There is a specific, primal joy in the sound of a fork cutting through a thick, golden butter waffles crust. It is a sound that signals the start of a perfect morning—a delicate shatter that gives way to a cloud-like, airy interior. This isn’t just another breakfast recipe; it is a culinary exercise in texture and temperature contrast.
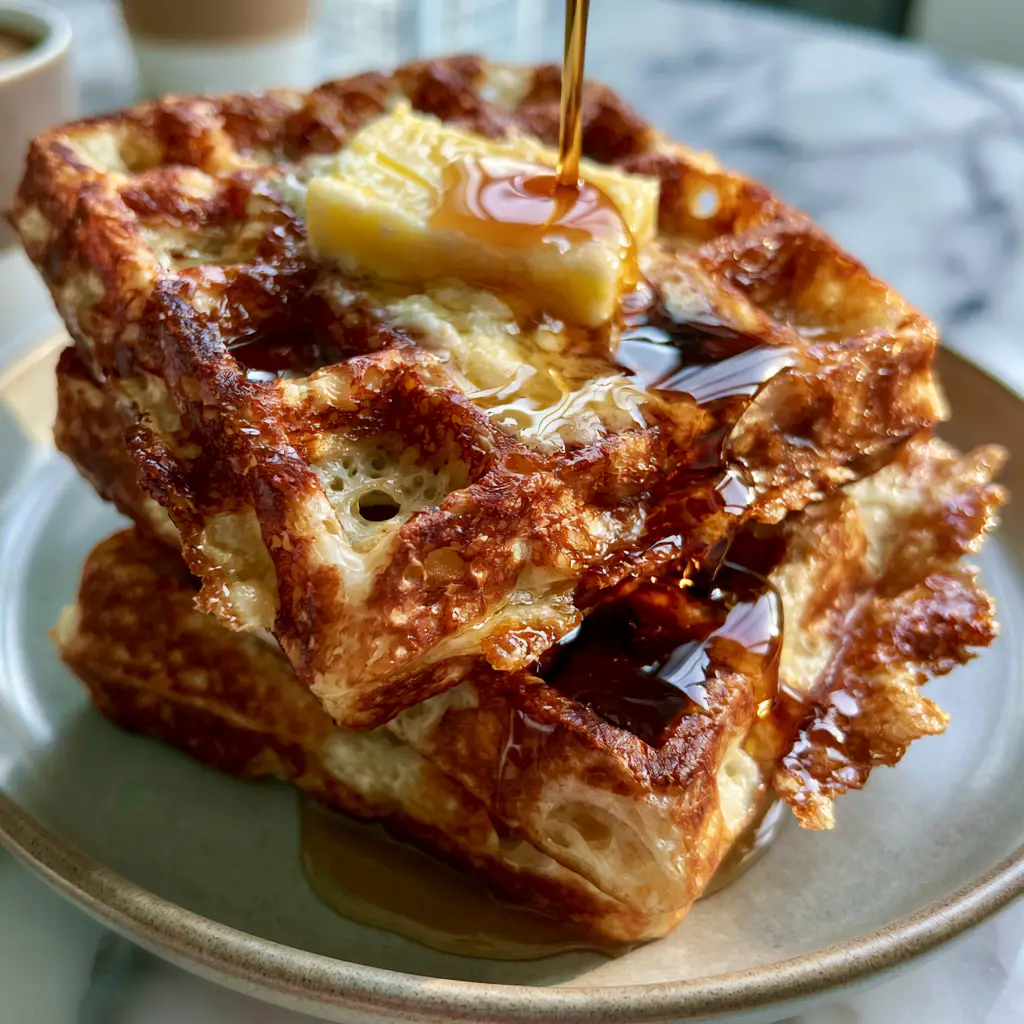
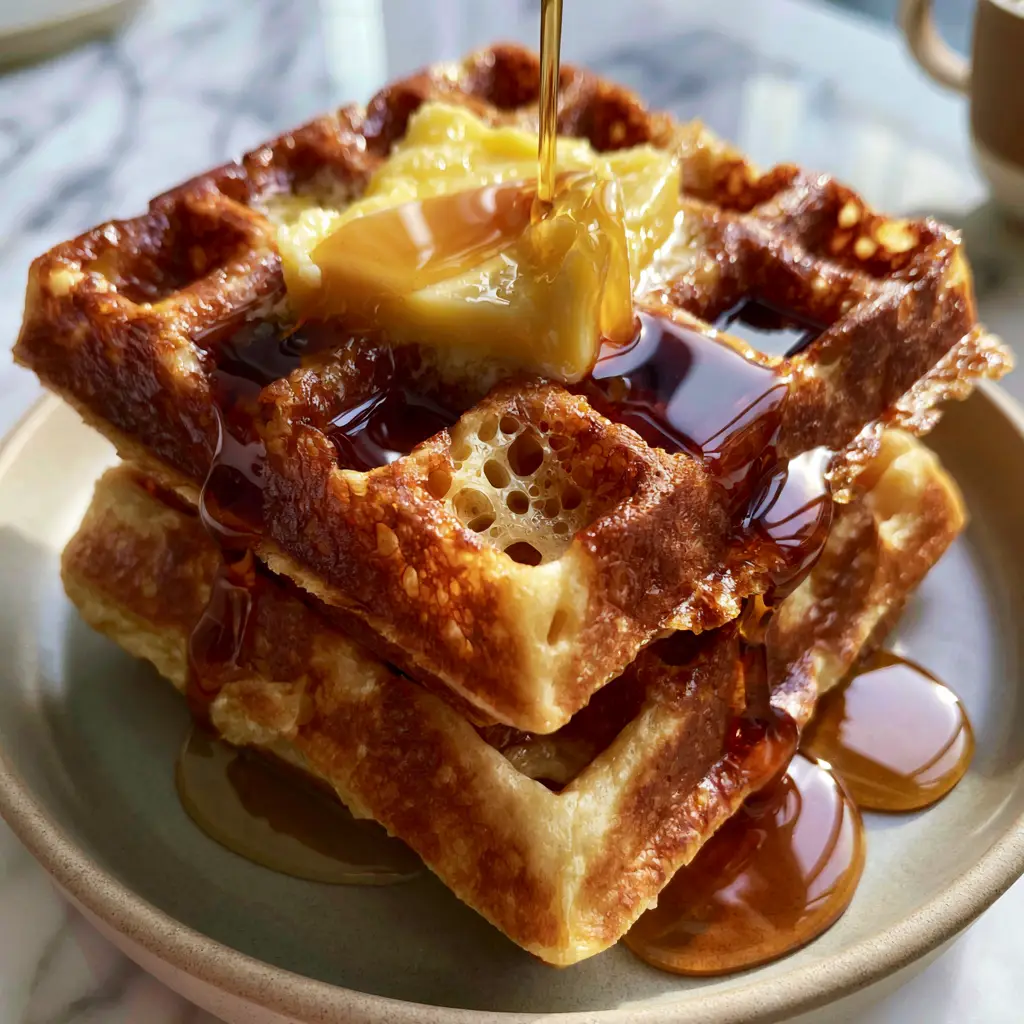
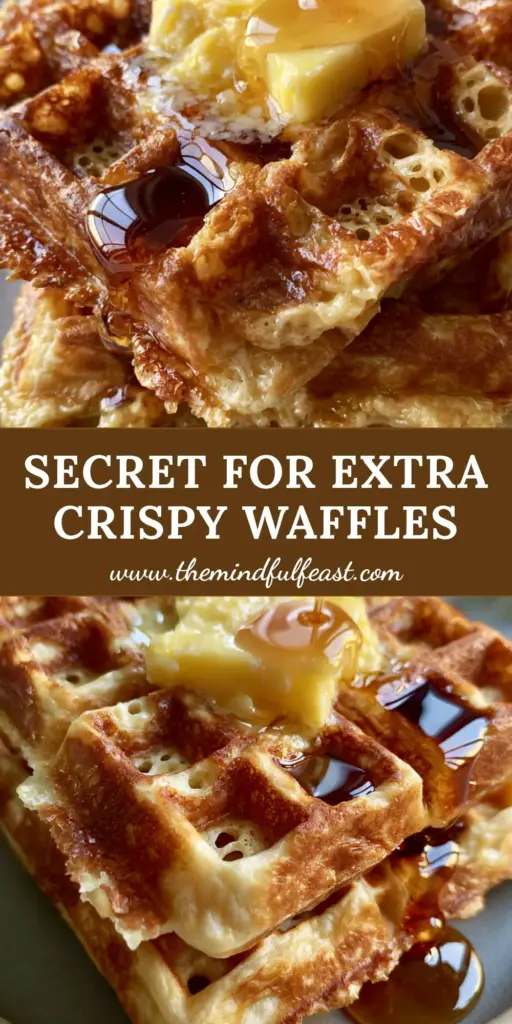
Imagine a stack of two thick Belgian waffles resting on a cool, matte ceramic plate. The ridges are an intense deep golden-brown, kissed by the heat of a heavy iron until they achieve a glass-like crispness. In the center, a generous slab of salted yellow butter begins its slow, glistening descent, pooling into the deep wells as thick, dark amber maple syrup cascades over the edges with a high-gloss reflection.
To achieve this highly specific visual and sensory result, we must move beyond basic batters. We are looking for the “shatter-crisp” texture mentioned in our design blueprint. By leveraging professional techniques like cornstarch integration and whipped egg whites, we create a waffle that holds its structural integrity even under a heavy pour of syrup.
The Anatomy of the Perfect Golden Butter Waffles
- Shatter-Crisp Exterior: A combination of high-heat caramelization and a specific starch-to-protein ratio ensures the ridges stay crunchy for minutes, not seconds.
- Deep Well Architecture: We utilize a Belgian-style grid to create reservoirs specifically designed to catch the pooling salted butter and amber syrup.
- Aerated Interior: By folding in stiff-peaked egg whites, we create an internal structure filled with delicate steam-pockets that contrast the crunchy shell.
- Golden-Brown Hue: The Maillard reaction is boosted by the perfect balance of granulated sugar and buttermilk acidity.
Essential Elements for a Superior Waffle Batter
Every ingredient in this recipe serves a forensic purpose to match our visual blueprint. We don’t just use flour; we use a blend designed for structural lightness. If you enjoy the science behind a fluffy pancake recipe, you will appreciate the technical precision required here.
All-Purpose Flour (300g / 2.5 cups): This provides the protein structure needed to hold those deep Belgian wells. It acts as the canvas for the golden-brown crispness.
Cornstarch (60g / 0.5 cup): This is the secret to the “shatter-crisp” texture. Cornstarch interferes with gluten development, ensuring the exterior is brittle and light rather than chewy.
Unsalted Butter, Melted (115g / 0.5 cup): While we top the dish with salted butter, the batter uses unsalted to control the seasoning. The fat content is vital for that “intense golden” color.
Buttermilk (480ml / 2 cups): The acid in buttermilk reacts with the leavening agents to create those “delicate aerated holes” seen in the cross-section of the waffle ridges.
Granulated Sugar (30g / 2 tbsp): Beyond sweetness, sugar is a humectant and a browning agent. It facilitates the deep amber hue as the batter hits the hot iron.
Large Eggs (2 units): Separated. The yolks provide richness and color, while the whites are whipped to provide the mechanical leavening for the airy interior.
Baking Powder (10g / 2 tsp) & Baking Soda (3g / 0.5 tsp): This dual-action leavening ensures a rapid rise the moment the iron lid is closed, pushing the batter into every corner of the grid.
Fine Sea Salt (3g / 0.5 tsp): To sharpen the flavors and contrast the sweetness of the dark amber maple syrup.
The Tool Kit for Professional Results
To replicate the “handheld smartphone photo” aesthetic of a high-end brunch, you need the right hardware. A standard thin waffle iron won’t work here; we need the depth of a Belgian iron.
A heavy-duty Belgian Waffle Maker with deep grids is non-negotiable for the pooling butter effect. You will also need a stainless steel balloon whisk or a hand mixer to achieve stiff peaks with your egg whites.
For the final presentation, a matte ceramic plate provides the perfect textural contrast to the glossy syrup. A small milk carafe for the “mid-pour” syrup shot will help you recreate that professional food photography style at home.
Step-by-Step Evolution of a Golden Waffle
The Foundation: Mixing the Dry and Wet Phases
In a large mixing bowl, sift together your flour, cornstarch, sugar, baking powder, baking soda, and salt. Sifting is crucial here to ensure no clumps interfere with the aerated crumb.
In a separate vessel, whisk the buttermilk, melted butter, egg yolks, and vanilla extract. Ensure your buttermilk is at room temperature so it doesn’t prematurely solidify the melted butter.
The Aeration Secret: Whipping the Whites
Place your egg whites in a clean, grease-free glass bowl. Whip them until they form stiff peaks—when you lift the whisk, the foam should stand straight up without drooping.
Gently fold the whipped whites into your main batter using a silicone spatula. Do not overmix; streaks of white are okay. This is what creates those “visible aerated holes” mentioned in the visual prompt.
The Heat Cycle: Achieving the Deep Golden Crust
Preheat your waffle iron to its highest setting. A hot iron is the only way to get the “shatter-crisp” texture without overcooking the inside.
Pour the batter into the center, allowing it to spread slightly before closing the lid. Cook for 4-6 minutes, or until the steam stops escaping the sides of the iron. This is the sensory cue that the moisture has evaporated, leaving behind a crispy shell.
Expert Tips for Success
- The Steam Cue: Never open your waffle iron while steam is still vigorously pouring out. Steam is the enemy of crispiness; wait until it subsides to ensure the ridges have set.
- The Cooling Rack Trap: Never stack hot waffles directly on a plate before serving. Place them on a wire cooling rack for 30 seconds to allow air to circulate, preventing the bottom from becoming soggy.
- Butter Quality Matters: Since the “large slab of salted yellow butter” is a focal point, use a high-quality cultured butter. Much like in garlic butter pasta, the milk solids in quality butter provide a better flavor profile.
- Syrup Temperature: Warm your dark amber maple syrup slightly before the pour. This ensures it cascades smoothly over the ridges with that “high-gloss reflection.”
Elevating the Breakfast Table
While these golden butter waffles are a star on their own, they fit perfectly into a larger brunch spread. If you are looking for a more savory “breakfast for dinner” vibe, consider pairing them with a honey garlic beef rice bowl for a sweet-and-salty fusion.
For those who prefer a varied waffle experience, you might also enjoy the nuttier profile of chocolate almond oat waffles. And if you find yourself making these as part of a late-night feast, they are the undisputed king of high-end stoner snacks.
Storage, Reheating, and Freezing
If you have leftover waffles, let them cool completely on a wire rack. Store them in an airtight freezer bag with parchment paper between each layer to prevent sticking.
To reheat and maintain that “shatter-crisp” texture, skip the microwave. Place the frozen waffles directly into a wide-slot toaster or a 350°F (175°C) oven for 5 minutes. This revives the exterior crunch while keeping the interior moist.
Frequently Asked Questions
You can, but the waffles will be less airy. Buttermilk’s acidity reacts with baking soda to create the delicate internal holes and helps achieve that deep golden-brown color.
The secret is replacing a portion of the flour with cornstarch and ensuring your waffle iron is preheated to its highest setting. Also, cooling them on a wire rack for 30 seconds prevents steam from softening the crust.
We use melted unsalted butter inside the batter to precisely control the sodium, but we always top the finished stack with a cold slab of high-quality salted butter for that classic flavor contrast.
Avoid the microwave! Use a toaster or an oven at 350°F (175°C) for a few minutes. This recrisps the ‘shatter-crisp’ ridges while keeping the inside light.
Chewy waffles usually result from overmixing the batter, which develops too much gluten, or using an iron that isn’t hot enough to immediately sear the exterior.
The Definitive Golden Butter Waffles Recipe
Golden Butter Waffles: The Ultimate Shatter-Crisp Belgian Recipe
Ingredients
Equipment
Method
- Sift together flour, cornstarch, sugar, baking powder, baking soda, and salt in a large bowl to ensure a light, aerated texture.
- In a separate bowl, whisk together buttermilk, melted unsalted butter, egg yolks, and vanilla until smooth.
- Whip egg whites in a clean bowl until stiff peaks form. Gently fold these into the batter, leaving some visible streaks to ensure an airy interior.
- Preheat your waffle iron to the highest setting. Pour batter into the center and close the lid immediately to trap steam.
- Cook for 4-6 minutes until the exterior is an intense deep golden-brown and the ridges are shatter-crisp.
- Place two thick waffles on a matte ceramic plate. Top with a large slab of salted yellow butter and a mid-pour cascade of dark amber maple syrup.
Notes
Always wait for the steam to stop before opening the iron lid.
Closing & Call to Action
Achieving the perfect balance of a deep golden-brown crust and a feather-light interior is a rewarding culinary feat. These waffles aren’t just food; they are a sensory experience of crunch, salt, and sweetness. We would love to see your “mid-pour” syrup shots! Tag us or share your results on Pinterest.
If you enjoyed this deep dive into waffle science, sign up for our newsletter to get more professional-grade recipes delivered straight to your inbox. Happy cooking!