Fruit Cocoa Punch is a sophisticated, non-alcoholic beverage that challenges everything you thought you knew about chocolate drinks. While most people associate cocoa with steaming mugs of milk on a winter day, this recipe reimagines dark chocolate as a vibrant, chilled, and incredibly refreshing summer staple.
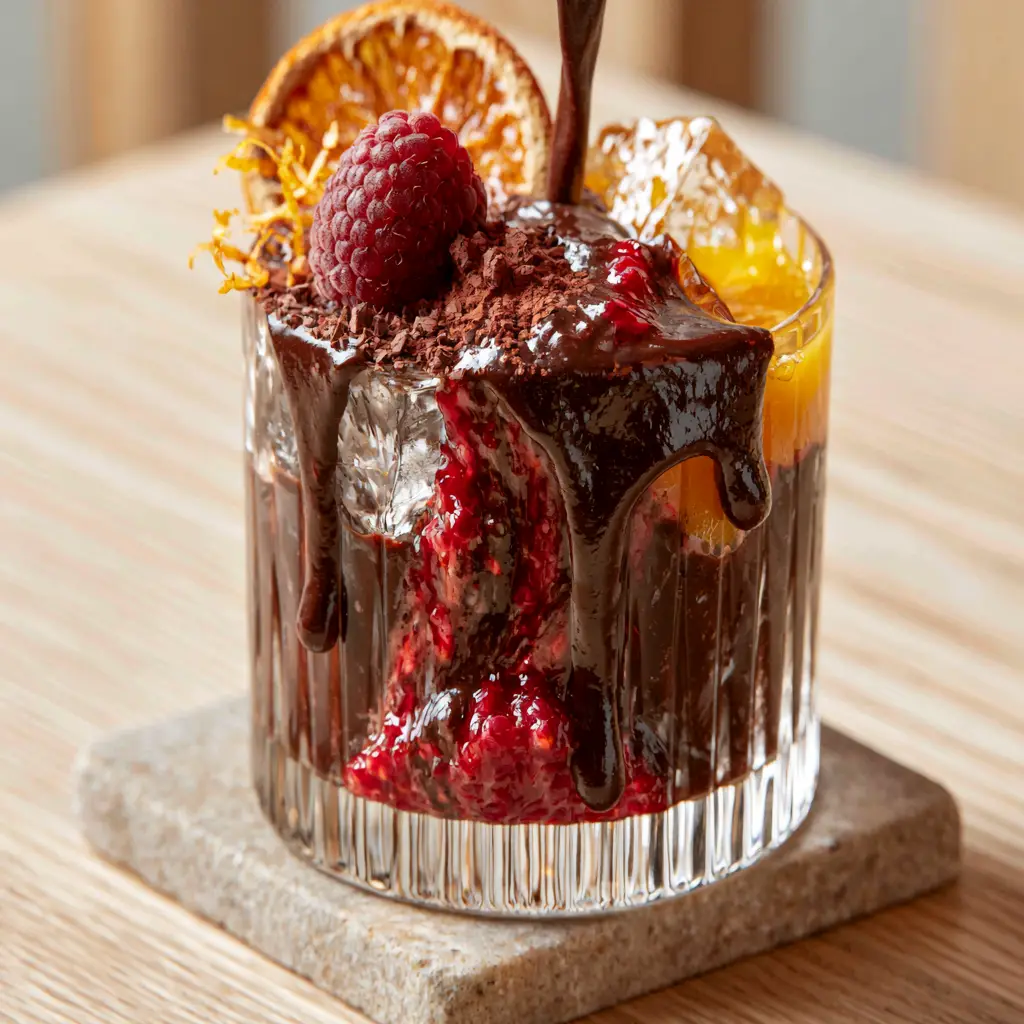
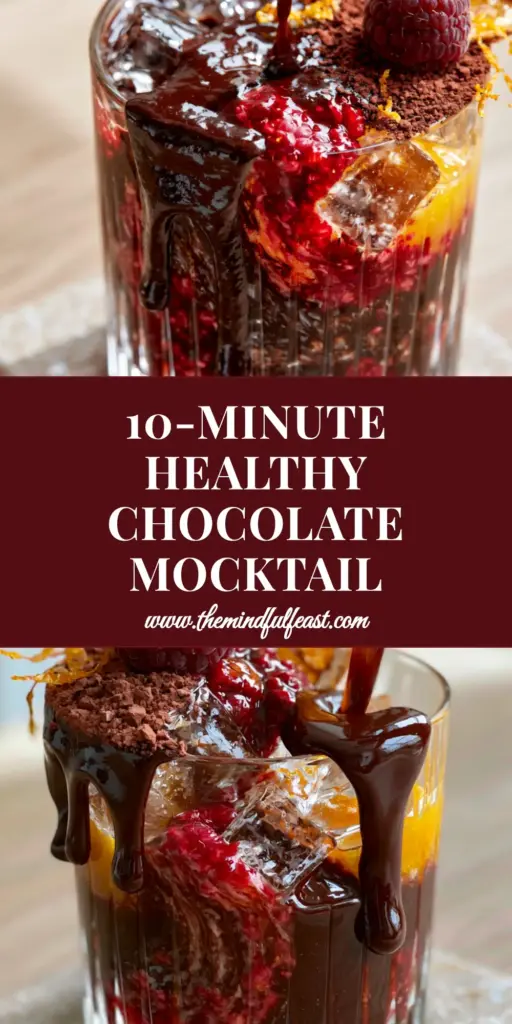
The visual impact of this drink is immediate and arresting. Imagine a sleek, ribbed crystal glass filled to the brim with crystal-clear square ice cubes, providing a structural foundation for a dynamic pour of glossy, dark cocoa liquid.
As the liquid hits the ice, it swirls with a vibrant red raspberry puree and bright, sun-kissed orange juice. The contrast of the deep mahogany cocoa against the citrus and berry tones creates a professional aesthetic that rivals high-end mixology bars.
This Fruit Cocoa Punch isn’t just a drink; it’s a sensory experience designed for those who appreciate the complex interplay between bitter, sweet, and tart. Whether you are hosting a summer brunch or looking for a refined evening refresher, this recipe delivers on every front.
Why This Fruit Cocoa Punch is a Visual and Culinary Masterpiece
- Glossy Dark Cocoa Foundation: We use a high-fat cocoa powder bloomed in hot water to create a silky, translucent dark liquid that remains fluid even when chilled.
- Vibrant Fruit Interplay: The acidity of the fresh-squeezed orange juice cuts through the richness of the cacao, while muddled raspberries provide a textured, tart finish.
- Professional Garnish Suite: From the dehydrated orange wheel to the fine orange zest, every element is designed to enhance both the aroma and the “handheld smartphone photo” aesthetic.
- Textural Contrast: The crunch of raw cacao powder sprinkled on top meets the velvety chocolate drizzle clinging to the ribbed glass walls.
The Structural Components of Your Fruit Cocoa Punch
To achieve the specific visual result described in our blueprint, we must select ingredients that offer both high-pigment payoff and structural integrity when layered over ice.
Dark Cocoa Powder (Unsweetened): 1/2 cup (45g). This provides the “glossy dark chocolate liquid base.” Using a Dutch-processed variety ensures a deeper color and smoother mouthfeel without excessive bitterness.
Fresh Orange Juice: 1 cup (240ml). Essential for the “bright orange juice” swirls; store-bought juice lacks the vibrant color and suspended pulp necessary for the visual contrast.
Fresh Red Raspberries: 1/2 cup (60g). These will be muddled to create the “vibrant red raspberry puree” that streaks through the dark cocoa liquid.
Hot Water (for blooming): 1 cup (240ml). Blooming the cocoa in hot water releases the aromatic oils and prevents the chocolate from clumping when it hits the cold juice.
Simple Syrup or Agave: 2 tbsp (30ml). A foundational invisible ingredient to balance the tannins in the cocoa and the acidity of the raspberries.
Dark Chocolate Sauce/Drizzle: 2 tbsp (30ml). This is specifically for the glass walls to achieve the “thick dark chocolate sauce” look described in the prompt.
Clear Square Ice Cubes: 4-6 large cubes. Clear ice is vital for the “sleek ribbed crystal glass” aesthetic, as cloudy ice would obscure the beautiful swirling textures.
Garnish Elements: One whole raspberry, one dehydrated orange wheel, 1 tsp (2g) raw cacao powder, and 1 tsp (2g) fine orange zest.
Essential Equipment for a Professional Pour
Creating a Fruit Cocoa Punch that looks like an unedited handheld smartphone photo requires more than just a spoon. You need the right tools to handle the textures and temperatures of the ingredients.
First, you will need a sleek ribbed crystal glass. The ribs catch the light and create shadows within the dark chocolate drizzle, adding depth to your photos. A muddler is also essential for breaking down the raspberries into a coarse puree rather than a smooth juice, which maintains those “vibrant red swirls.”
A fine-mesh strainer is helpful if you prefer a smoother drink, though the blueprint calls for muddled textures. Finally, a microplane is required for the fine orange zest to ensure it looks like “delicate” flecks rather than chunky peels.
Step-by-Step Architecture for a Stunning Layered Pour
Phase 1: Preparing the Glossy Cocoa Base
In a heat-proof pitcher, whisk together the dark cocoa powder and hot water. This process, known as blooming, is the culinary secret to a deep flavor profile. Whisk vigorously until the mixture is glossy and no dry clumps remain.
Once smooth, stir in your simple syrup or agave. Allow this mixture to cool to room temperature, then refrigerate for at least 30 minutes. The base must be chilled before assembly to prevent the clear ice cubes from melting instantly.
Phase 2: Muddling the Berry Component
Place the fresh raspberries in a small bowl. Use your muddler to press down firmly, rotating as you go. You are looking for a thick, textured puree rather than a liquid. This consistency ensures the red color “swirls” rather than simply mixing into the brown cocoa.
Phase 3: The Artistic Glass Drizzle
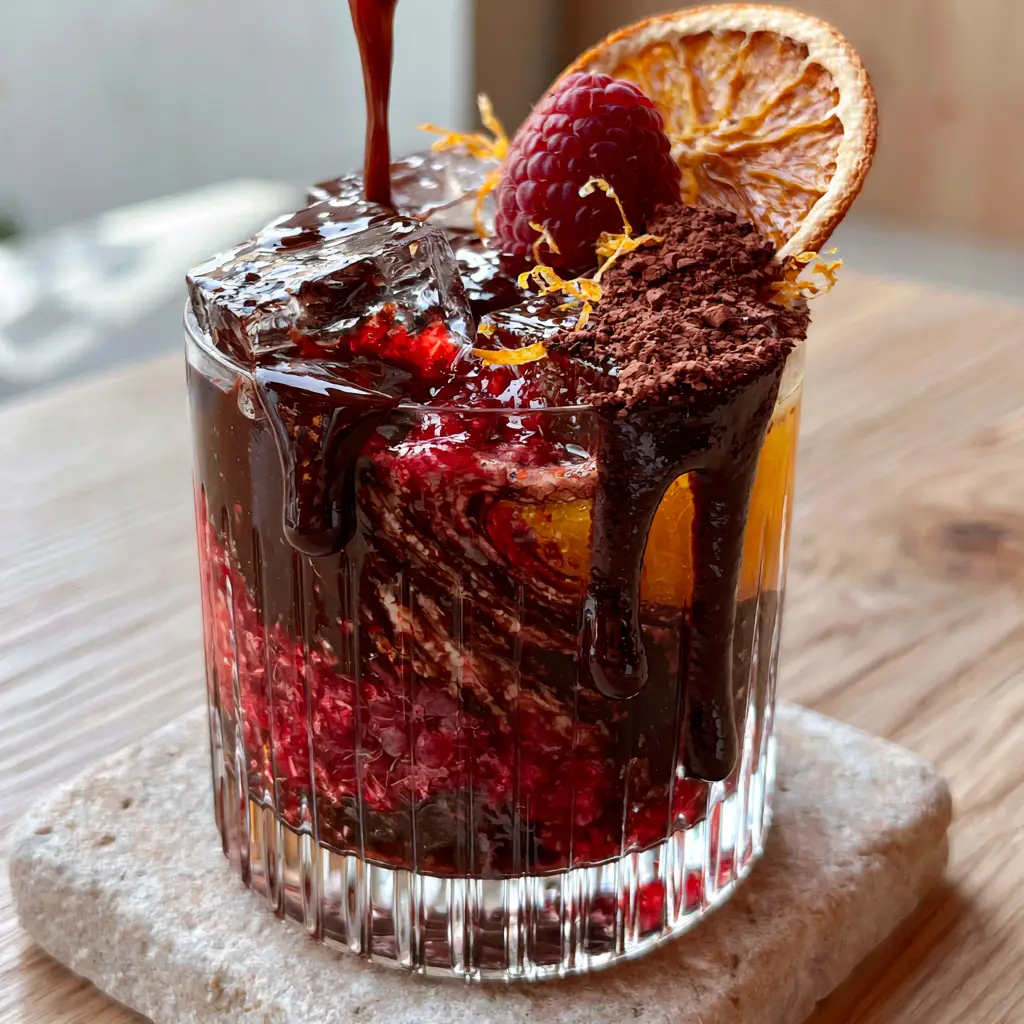
Take your room-temperature ribbed crystal glass. Hold it at a 45-degree angle and slowly rotate it while drizzling the dark chocolate sauce along the interior walls. The sauce should be thick enough to slowly slide down the glass, creating “glossy streaks” that will remain visible once the liquid is added.
Phase 4: Final Assembly and Sensory Cues
Carefully drop your clear square ice cubes into the glass. Pour the muddled raspberry puree over the ice, followed by the fresh orange juice. You will see the bright orange and red colors settling at the bottom and around the ice.
Slowly pour the chilled cocoa liquid over the back of a spoon into the glass. This “dynamic pour” technique creates the swirling effect. Watch as the dark mahogany liquid weaves through the citrus and berry layers. The sensory cue to look for is a marbled, high-contrast appearance that looks like liquid silk.
Expert Tips for Fruit Cocoa Punch Success
- Clear Ice Secret: To get those “clear square ice cubes,” use boiled water that has been cooled twice before freezing, or use a directional freezing tray. This removes air bubbles that cause cloudiness.
- Zest Precision: Only zest the orange part of the skin. The white pith underneath is extremely bitter and will ruin the delicate balance of the raw cacao powder garnish.
- Dehydration Hack: If you don’t have a dehydrator for the orange wheel, place thin slices in an oven at 200°F (95°C) for 2-3 hours until they are brittle and translucent.
- Viscosity Control: If your chocolate drizzle is too thin, refrigerate the bottle for 10 minutes before applying it to the glass walls. This helps it “grip” the crystal ribs.
Practical Storage and Make-Ahead Advice
While the Fruit Cocoa Punch is best served immediately for visual impact, you can prep the components in advance. The cocoa base can be kept in an airtight container in the refrigerator for up to 5 days. Shake well before using as the cocoa solids may settle.
Fresh orange juice should be used within 24 hours for the best color and flavor. The muddled raspberries should be prepared fresh, as they tend to oxidize and lose their “vibrant red” hue if left sitting for more than a few hours.
Do not attempt to freeze the fully assembled punch. The chocolate drizzle will harden and lose its glossy sheen, and the ice cubes will dilute the complex flavors as they melt and refreeze.
Perfect Culinary Pairings for Your Cocoa Mocktail
Because this Fruit Cocoa Punch leans into both the dessert and refreshment categories, it pairs beautifully with a wide variety of dishes. For a decadent weekend brunch, serve this alongside a fluffy pancake recipe topped with extra orange zest.
If you are looking for a savory contrast, the acidity in this drink works surprisingly well with a Korean steak sandwich, where the cocoa notes complement the grilled meat. It is also an excellent choice for a mid-afternoon treat with stoner snacks like salty pretzels or popcorn.
For those who want to lean into the chocolate theme, try pairing it with oatmeal cream pies. The spiced molasses in the pies brings out the hidden cinnamon notes often found in high-quality dark cocoa powder.
Frequently Asked Questions
While you can, milk will make the drink opaque and creamy, which will hide the vibrant red raspberry swirls and bright orange juice layers described in this recipe.
Ensure your glass is room temperature or slightly chilled, and use a high-quality, thick dark chocolate sauce. If the sauce is too thin, it will puddle at the bottom rather than creating streaks.
This is a strictly chilled beverage. The cocoa is bloomed in hot water to dissolve properly but is then refrigerated and served over clear ice for maximum refreshment.
Cocoa powder is processed at higher temperatures, whereas raw cacao powder is cold-pressed, offering a more intense, bitter chocolate flavor and a slightly coarser texture for the garnish.
The Complete Fruit Cocoa Punch Recipe
Fruit Cocoa Punch: The Ultimate Refreshing Gourmet Chocolate Mocktail
Ingredients
Equipment
Method
- Whisk 1/2 cup (45g) cocoa powder into 1 cup (240ml) hot water until glossy and smooth.
- Add simple syrup, then refrigerate the mixture until cold.
- Apply 2 tbsp (30ml) dark chocolate sauce to the inner walls of a ribbed glass.
- Muddle raspberries into a textured puree and place at the bottom of the glass.
- Add clear ice, pour orange juice, and finish with a dynamic pour of the chilled cocoa base.
- Top with a whole raspberry, orange wheel, cacao powder, and zest.
Notes
Use clear ice to maintain the visual clarity of the fruit swirls.
Closing Thoughts on This Vibrant Creation
The Fruit Cocoa Punch is more than just a beverage; it is a testament to how simple ingredients like orange, raspberry, and cocoa can be elevated through technique and presentation. By focusing on the visual cues—the glossy drizzle, the clear ice, and the vibrant swirls—you create a drink that is as beautiful as it is delicious.
We invite you to try this recipe and share your results. Did your cocoa swirl perfectly? Did the orange zest provide that essential aromatic lift? Let us know in the comments below! Don’t forget to follow us on Pinterest for more visually stunning recipe blueprints.