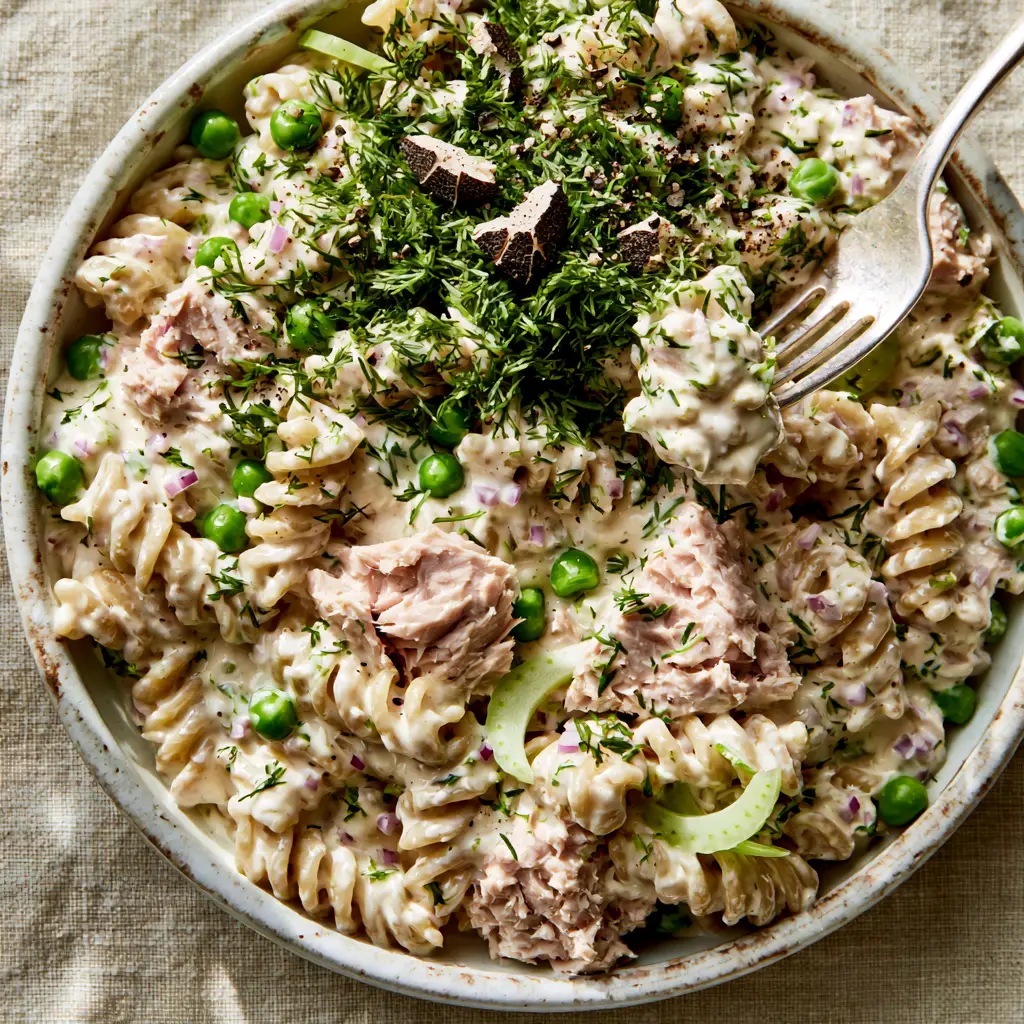
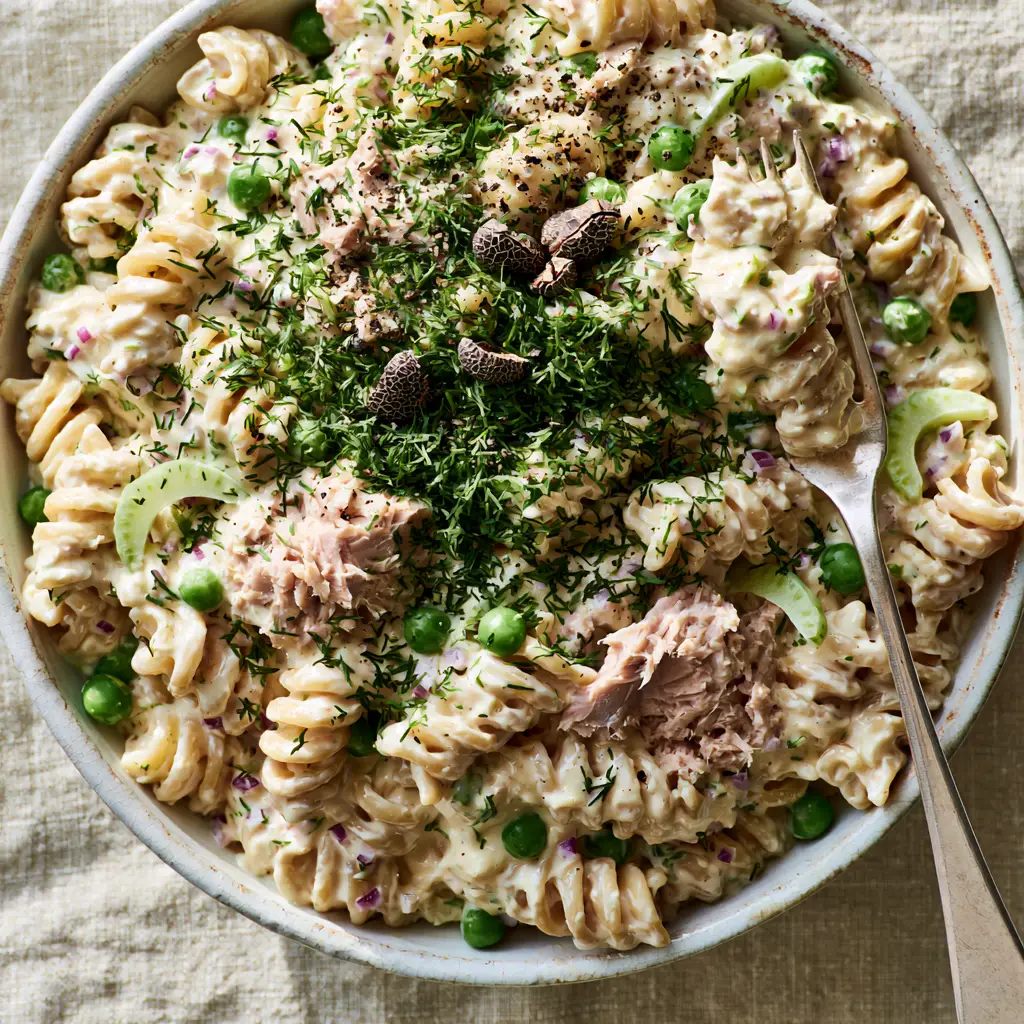
There is nothing quite like a massive, rustic white ceramic bowl overflowing with a perfectly executed Tuna pasta salad. When the midday sun hits that ivory-colored dressing, highlighting the glossy, velvety texture of the sauce, you know you are in for a treat. This isn’t just a side dish; it is a meticulously crafted meal that balances chunky protein, popping greens, and a thick, non-runny consistency that clings to every rotini spiral.
Achieving the ultimate creamy texture requires a delicate balance of moisture and fat. We have moved away from the oily, heavy salads of the past to embrace a refreshing blend of mayonnaise and Greek yogurt. This combination creates that signature ivory hue and rich mouthfeel while the lemon zest cuts through the richness with a bright, citrusy finish.
Every bite of this Tuna pasta salad offers a symphony of textures. From the crisp snap of thin celery crescents to the tiny, sharp flecks of purple red onion, each ingredient is chosen for its visual and structural contribution. The crowning glory is a heavy garnish of fresh chopped dill and large, rustic grains of cracked black pepper that provide an earthy depth to the sweet garden peas.
Why This Velvety Tuna Pasta Salad Works Every Single Time
- Structural Integrity: Using rotini pasta creates deep grooves that act as “sauce traps,” ensuring you get a thick, creamy coating in every forkful.
- Visual Vibrancy: The contrast between the bright green garden peas, the pale pink tuna chunks, and the purple red onion flecks creates a photo-ready dish.
- Thick, Glossy Emulsion: The hybrid dressing of mayo and Greek yogurt stays stable and thick, never becoming runny or oily even after hours in the fridge.
- Fragrant Herbaceousness: Fresh dill sprigs are not just a garnish; they provide a cooling, grassy flavor that elevates the canned tuna to a gourmet level.
The Anatomy of a Perfect Creamy Pasta Salad
Cooked Rotini Pasta: 16 oz (454g). The spiral shape is essential for capturing the ivory dressing and keeping the ingredients suspended evenly throughout the bowl.
Flaked Light Tuna: 2 cans (5 oz / 142g each). Opt for tuna in water, drained well, to ensure the salad stays thick and doesn’t become waterlogged or overly fishy.
Creamy Mayonnaise: 1/2 cup (120ml). This provides the foundational fat and glossy sheen that makes the dressing look rich and decadent.
Plain Greek Yogurt: 1/2 cup (120ml). This is the secret to the ivory color and adds a tangy brightness that lightens the overall profile of the Tuna pasta salad.
Bright Green Sweet Peas: 1 cup (150g). Whether fresh or frozen (and thawed), these add a “pop” of sweetness and a vibrant green visual element.
Finely Diced Red Onion: 1/4 cup (40g). Mincing the onion into tiny purple flecks ensures you get the sharp flavor without a harsh, biting texture.
Sliced Celery: 2 stalks (approx. 80g). Slicing these into thin crescents provides a necessary crunch that mimics the curve of the pasta spirals.
Fresh Dill Sprigs: 1/4 cup (10g), chopped. Dill is the essential aromatic that bridges the gap between the savory tuna and the creamy dressing.
Lemon Zest and Juice: 1 tbsp (15g) zest and 1 tbsp (15ml) juice. The zest provides essential oils for aroma, while the juice stabilizes the dairy in the dressing.
Cracked Black Pepper: 1 tsp (5g). Use a coarse grind to achieve those large, visible grains that provide a sharp, earthy contrast to the cream sauce.
Invisible Essentials: Don’t forget 1 tbsp (15g) of kosher salt for the pasta water and a pinch of salt for the dressing to enhance all the other flavors.
Essential Tools for Gourmet Pasta Salad Prep
To achieve the “macro-shot” quality of this dish, you need a large pot for boiling the rotini to a perfect al dente state. A fine-mesh sieve is crucial for draining the sweet peas and the tuna, as any excess moisture will ruin the thick consistency of your ivory sauce.
A microplane is the best tool for harvesting the lemon zest without the bitter white pith. For the final presentation, a rustic white ceramic bowl and a silver fork help highlight the textures of the creamy bite. If you enjoy this toolset, you might also find them useful for making our Canned Tuna Bowl for a quicker lunch option.
The Culinary Science of the Ultimate Tuna Pasta Salad
Mastering the Al Dente Rotini
Bring a large pot of water to a rolling boil and season it heavily with salt—it should taste like the sea. Add 16 oz (454g) of rotini and cook for exactly 1 minute less than the package instructions. You are looking for a firm, toothsome bite that will not turn mushy once the dressing is applied.
Immediately drain the pasta and rinse it under cold water for 30 seconds. This stops the cooking process and removes excess starch, which prevents the pasta from clumping together and absorbing too much of the sauce later.
Building the Ivory Velvet Dressing
In a small mixing bowl, whisk together 1/2 cup (120ml) of mayonnaise, 1/2 cup (120ml) of Greek yogurt, 1 tbsp (15ml) of lemon juice, and the lemon zest. Whisk vigorously until the mixture is thick, glossy, and completely smooth. If you enjoy creamy pasta bases, you will likely love our Creamy Jambalaya Pasta as well.
Taste the dressing at this stage. It should be tangy and rich. This dressing acts as the glue for the entire Tuna pasta salad, providing that moist, rich appearance described in the visual prompt.
Prepping the Texture Elements
Drain your canned tuna thoroughly and use a fork to break it into large, chunky flakes. You want pale pink pieces that are large enough to be “nestled” between the pasta spirals rather than a fine mush. Thinly slice the celery into crescents and mince the red onion into tiny purple flecks.
If using frozen peas, ensure they are fully thawed and patted dry. Moisture is the enemy of a thick, non-runny sauce. Chop the fresh dill finely, saving a few whole sprigs for the final garnish to achieve that professional food-stylist look.
Assembly and the Final Garnish
In a large rustic bowl, combine the cooled rotini, the chunky tuna, peas, onion, and celery. Pour the ivory dressing over the top and use a large spatula to fold the ingredients together gently. You want to coat every spiral without breaking the tuna flakes into smaller bits.
Once combined, the salad should look moist and rich, with the sauce creating gentle highlights on the pasta. Top the dish with a heavy garnish of fresh dill and a generous sprinkle of large-grain cracked black pepper. The pepper grains should be clearly visible against the light cream sauce.
Expert Strategies for Pasta Salad Perfection
- The Chill Factor: Let the salad sit in the refrigerator for at least 30 minutes before serving. This allows the flavors of the dill and lemon to penetrate the pasta.
- Tuna Selection: Use “Solid White Albacore” for the biggest, heartiest chunks, or “Chunk Light” for a softer, more traditional texture.
- Preventing Dryness: If the pasta absorbs too much sauce while chilling, stir in a single tablespoon of Greek yogurt right before serving to restore the glossy sheen.
- Herb Variations: While dill is king here, you can add a touch of parsley if you are also serving a Dill Cucumber Salad to vary the flavor profile.
Storage, Freshness, and Meal Prep
This Tuna pasta salad is an excellent candidate for meal prep because the flavors actually improve over the first 24 hours. Store it in an airtight container in the refrigerator for up to 3 to 4 days.
We do not recommend freezing this recipe. The mayonnaise and Greek yogurt emulsion will break upon thawing, resulting in a grainy, watery texture that loses its signature velvety ivory appearance. For a warm meal that stores better in the freezer, consider our Tuna Pasta Bake Recipe.
What to Serve with Your Creamy Tuna Pasta Salad
Because this salad is rich and creamy, it pairs beautifully with light, acidic side dishes. A crisp Cucumber Onion Salad provides a refreshing contrast to the thick dressing of the pasta.
If you are serving this at a large gathering, it fits perfectly alongside other protein-heavy options like a Classic Chicken Salad or even a grain-based Mediterranean Quinoa Salad for variety. The neutral beige linen background of the serving area will make the vibrant greens and purples of the salad pop.
Frequently Asked Questions
Yes! Frozen sweet peas are perfect for this recipe. Just make sure to thaw them completely and pat them dry with a paper towel to prevent extra moisture from thinning out the creamy ivory sauce.
Pasta naturally absorbs liquid. To prevent dryness, rinse your cooked pasta in cold water to remove excess starch and ensure your dressing is thick. If it dries out in the fridge, stir in a tablespoon of Greek yogurt or a splash of milk before serving.
When stored in an airtight container, this salad remains fresh and delicious for 3-4 days. The flavors actually meld and improve after the first few hours of chilling.
For this specific creamy dressing, tuna in water is best. It allows the flavors of the lemon zest and fresh dill to shine without the heavy, competing taste of canning oil.
Greek yogurt provides a tangier profile and helps achieve that beautiful ivory color. It also creates a more stable, velvety texture that stays thick on the pasta compared to 100% mayo-based dressings.
The Ultimate Creamy Tuna Pasta Salad Recipe
Tuna Pasta Salad with Creamy Dill and Lemon Zest
Ingredients
Equipment
Method
- Boil rotini in salted water until al dente. Drain and rinse with cold water to stop cooking and remove excess starch.
- In a bowl, combine mayo, Greek yogurt, lemon juice, and zest. Whisk until a thick, glossy, ivory-colored dressing forms.
- Fold together the cold pasta, flaked tuna, peas, celery, and red onion with the dressing until heavily coated.
- Top with fresh dill and large grains of cracked black pepper. Serve in a rustic bowl with a silver fork.
Notes
If the salad seems dry after chilling, stir in a teaspoon of milk or extra yogurt.
Closing Thoughts on This Potluck Classic
This Tuna pasta salad is a testament to how simple ingredients, when treated with culinary respect, can create a stunning and satisfying meal. The thick, glossy ivory dressing and the pop of sweet garden peas make it a visual and flavorful masterpiece. Whether you are hosting a summer BBQ or prepping lunches for the week, this recipe delivers on every promise.
If you enjoyed this recipe, please leave a comment below and let us know how yours turned out! Don’t forget to share your creations and follow us for more kitchen inspiration on Pinterest.