When you search for the term Pancake Clipart, you are looking for more than just a simple drawing. You are looking for the Platonic ideal of a breakfast staple: a towering, majestic stack that defies gravity and logic with its fluffiness. This recipe is designed to bridge the gap between digital perfection and culinary reality.
Creating a stack that looks like a high-resolution render requires a deep understanding of leavening chemistry and heat management. We aren’t just making breakfast; we are engineering a sensory experience that features golden lacy edges and a moist, aerated crumb. Every element in this guide is tailored to help you reproduce the exact visual found in our Midjourney-inspired blueprint.
By the time you flip your final flapjack, you will have a plate that looks like it was plucked straight from a professional food photography set. Let’s dive into the science of the ultimate buttermilk pancake.
The Anatomy of the Perfect Pancake Clipart Aesthetic
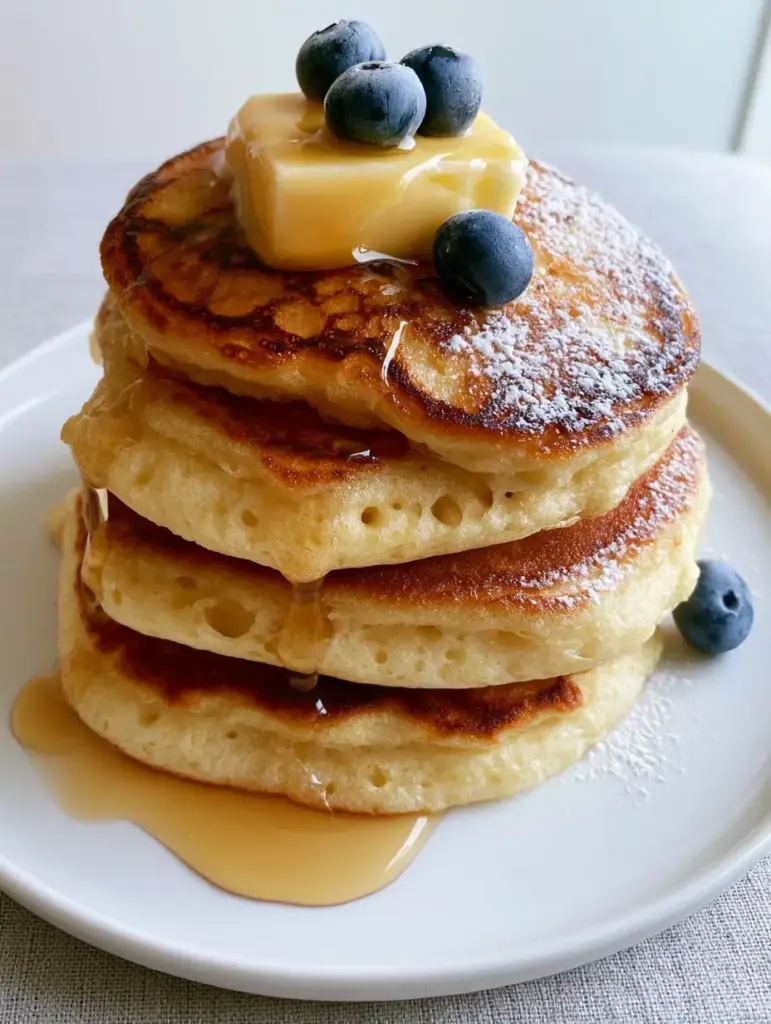
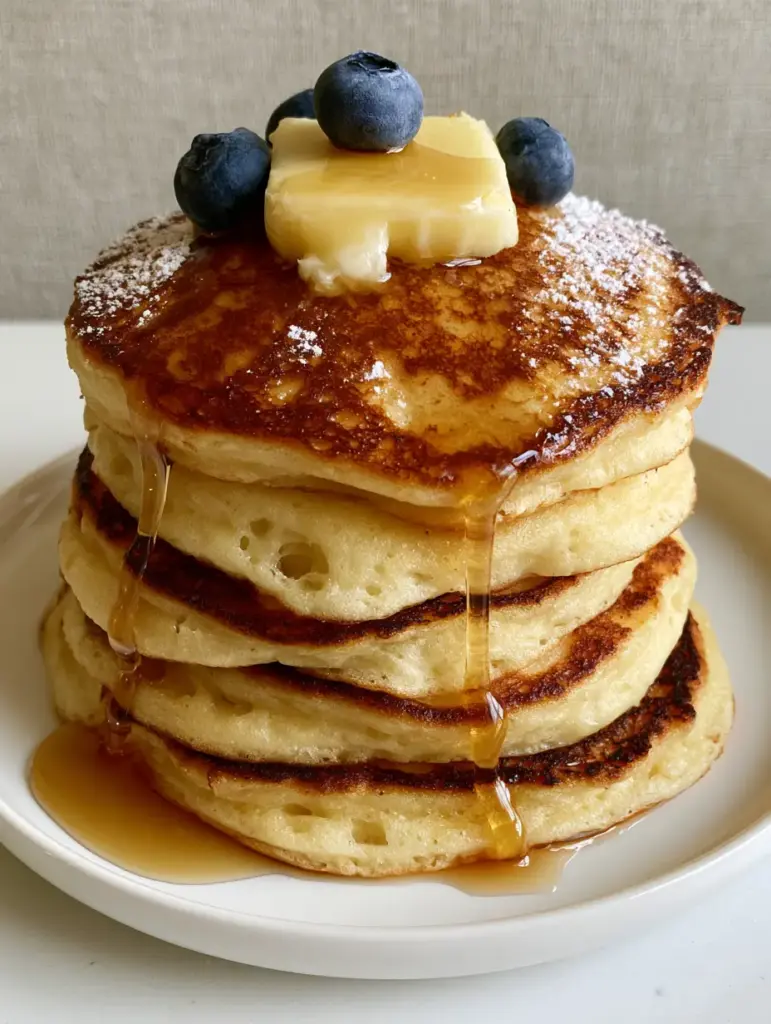
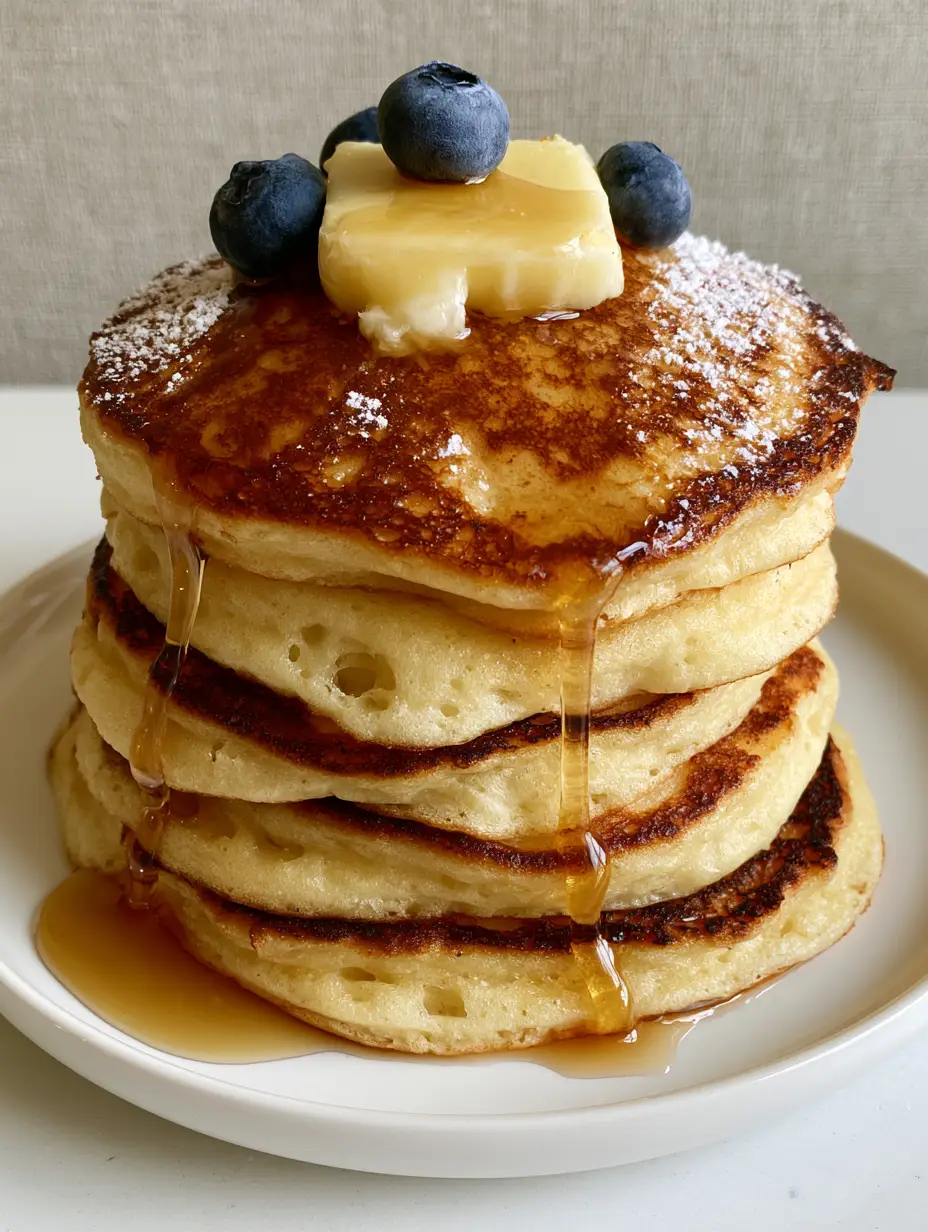
To achieve the visual cues required for a true “clipart-style” pancake, we must focus on four distinct pillars of texture and color. These are not merely suggestions; they are the structural requirements for a majestic four-pancake stack.
- The Aerated Foundation: Each pancake must be a thick, lofty disk. This is achieved through a specific ratio of baking powder to buttermilk, creating internal air pockets that are visible when you cut into the stack.
- The Lacy Maillard Edge: We utilize a high-fat searing technique to create charred, golden-brown edges that contrast beautifully with the soft, pale-yellow centers.
- The Viscous Cascade: The maple syrup must be thick enough to cling to the sides of the stack, creating that iconic glistening “drip” that characterizes high-quality food art.
- The Melting Glisten: A thick pat of salted butter provides the crown, partially liquefied to add a specular highlight that catches the light perfectly.
The Essential Pantry Foundations for Superior Aeration
Achieving the Pancake Clipart look starts with high-quality ingredients. Do not substitute these if you want the specific structural integrity required for a tall stack.
All-Purpose Flour (312g / 2.5 cups): This provides the necessary gluten structure to hold the air bubbles without making the pancakes tough. It acts as the “canvas” for our golden edges.
Buttermilk (480ml / 2 cups): The acidity in buttermilk reacts instantly with our leavening agents to produce a massive rise. It also ensures the “pale-yellow center” remains tender and moist.
Granulated Sugar (25g / 2 tbsp): Beyond sweetness, sugar aids in the Maillard reaction, allowing those lacy edges to caramelize quickly before the center overcooks.
Baking Powder (12g / 2.5 tsp) and Baking Soda (3g / 0.5 tsp): This double-leavening approach ensures the “majestic height” of the stack. The soda neutralizes the acid, while the powder provides the lift.
Salted Butter (56g / 4 tbsp, melted for batter + extra for topping): Fat is the conductor of flavor and the secret to that lacy texture. Salted butter adds a necessary sharp contrast to the amber maple syrup.
Large Eggs (2 units): The proteins in the eggs provide the “skeletal” support for the aerated disks, preventing the stack from collapsing under the weight of the syrup.
Vanilla Extract (5ml / 1 tsp): An invisible but essential aromatic that elevates the scent profile, matching the visual “warmth” of the dish.
Professional Culinary Tools for Precision Stacking
To recreate the Pancake Clipart visual accurately, your equipment must be as precise as your ingredients. Consistency is the key to a uniform stack.
Heavy-Bottomed Cast Iron Griddle: This tool provides even heat distribution, which is critical for achieving the “golden-brown, lacy charred edges” without burning the centers.
Standardized 1/2 Cup Measure: Using a consistent scoop ensures all four pancakes in your stack are the exact same diameter, creating that majestic, symmetrical look.
Thin Offset Spatula: This allows you to flip the pancakes gently, preserving the delicate air bubbles inside the batter and maintaining the “ultra-fluffy” profile.
Fine Mesh Sieve: Essential for the “fine powdered sugar dusting” that acts as the final garnish, ensuring an even, snow-like distribution.
The Master Blueprint for Fluffy Buttermilk Success
Step 1: The Dry Ingredient Sift
In a large mixing bowl, whisk together your flour, sugar, baking powder, baking soda, and a pinch of salt. Sifting is not optional here; we need the dry mix to be as light as air to avoid clumps that could weigh down the “aerated disks.”
Step 2: The Emulsion of Wet Ingredients
In a separate vessel, whisk your buttermilk, eggs, vanilla, and melted butter. Ensure the buttermilk is at room temperature to prevent the melted butter from seizing, which would ruin the “moist crumb” texture.
Step 3: The Gentle Fold Technique
Make a well in the center of the dry ingredients and pour in the wet mixture. Use a spatula to fold the batter just until combined—lumps are your friends here! Over-mixing will destroy the air bubbles, turning your Pancake Clipart dream into a flat reality.
Step 4: The Searing and Bubbling Cue
Heat your griddle to medium-high and grease it generously with butter. Pour 1/2 cup of batter onto the surface. Look for the “Visual Cue”: when large air bubbles form on the surface and the edges look set and lacy, it is time to flip. You should see a beautiful golden-brown crust.
Step 5: The Final Rise
Flip the pancake and cook for another 1-2 minutes. The center should puff up significantly, creating that “thick disk” appearance. Repeat until you have four perfect specimens.
Expert Tips for the Ultimate Pancake Clipart Visuals
- The Temperature Sweet Spot: If your edges aren’t “lacy,” your pan isn’t hot enough. If your centers aren’t “pale-yellow” but are instead dark brown, your pan is too hot.
- Rest the Batter: Let the batter sit for 10 minutes before cooking. This allows the flour to hydrate fully, resulting in a more “majestic” rise and a softer crumb.
- The Syrup Heat: Slightly warm your “viscous amber maple syrup” before pouring. This helps it flow naturally down the sides, just like the Midjourney prompt suggests.
- Blueberry Placement: For the most aesthetic result, place exactly three plump, dusty-blue fresh blueberries on the top or at the base. Symmetry is the enemy of artistry!
Flavor Pairings and Serving Suggestions
A majestic stack of pancakes is a hearty start to the day, but it benefits from complementary textures and flavors. If you are hosting a brunch, consider serving these alongside some savory options.
To balance the sweetness of the amber maple syrup, a plate of savory steak bites provides a rich, high-protein contrast. If you prefer something lighter, a light chicken salad can act as a refreshing follow-up for a late-morning meal.
For those who love garden-fresh ingredients, these pancakes pair surprisingly well with a side of sauteed zucchini sides. The earthy notes of the vegetables ground the sugary profile of the stack. If you have leftover blueberries, you might even consider them as a topping for breakfast wall art inspired toast.
Practical Storage and Reheating Advice
While these pancakes are best served fresh to maintain their “glistening butter” and “powdered sugar dusting,” you can store them for later. Wrap individual pancakes in parchment paper and store in an airtight container in the fridge for up to 3 days.
To reheat and maintain the “golden lacy edges,” avoid the microwave. Instead, use a toaster oven or a dry skillet over medium heat. This will crisp up the exterior while keeping the “aerated center” soft and moist. Do not apply the syrup or sugar until you are ready to serve.
Frequently Asked Questions
Pure Grade A amber maple syrup has the best viscosity. If your syrup is too thin, you can slightly reduce it in a saucepan to thicken it for that iconic drip.
The key is a hot, well-buttered cast iron griddle. The high fat content and consistent heat create a Maillard reaction that crisps the edges while the buttermilk keeps the center pale and soft.
Yes. The acid in buttermilk reacts with the baking soda to create carbon dioxide gas, which is trapped by the egg proteins to form those visible air bubbles in the crumb.
Flat pancakes are usually caused by over-mixing the batter, which develops gluten and pops air bubbles. Stir until just combined, and ensure your baking powder is fresh.
Salted butter provides a crucial flavor contrast to the sweet syrup and powdered sugar, and it liquefies with a distinct glistening sheen that enhances the visual appeal.
The Definitive Pancake Clipart: Fluffy Buttermilk Recipe
Pancake Clipart: How to Create the World’s Most Picture-Perfect Buttermilk Stack
Ingredients
Equipment
Method
- Whisk flour, sugar, baking powder, and soda in a large bowl to ensure aeration.
- Combine buttermilk, eggs, and melted butter in a separate jug until smooth.
- Gently fold wet into dry ingredients, leaving lumps to preserve air bubbles.
- Sear on a hot greased griddle until lacy charred edges form and bubbles appear on top.
- Stack four pancakes high, top with butter, syrup, blueberries, and a dusting of sugar.
Notes
Use room temperature buttermilk to prevent butter from clumping.
Closing & Call to Action
Mastering the Pancake Clipart aesthetic is a journey of culinary precision and artistic flair. By following this blueprint, you’ve created a stack that is as visually stunning as it is delicious. The combination of the charred lacy edges and the viscous amber maple syrup is a testament to your skills as a home cook.
If you enjoyed this recipe, please leave a comment below and let us know how your stack turned out! Don’t forget to share your photos and tag us. For more visually-driven recipe inspiration, follow us on Pinterest and subscribe to our newsletter for weekly culinary deep-dives.