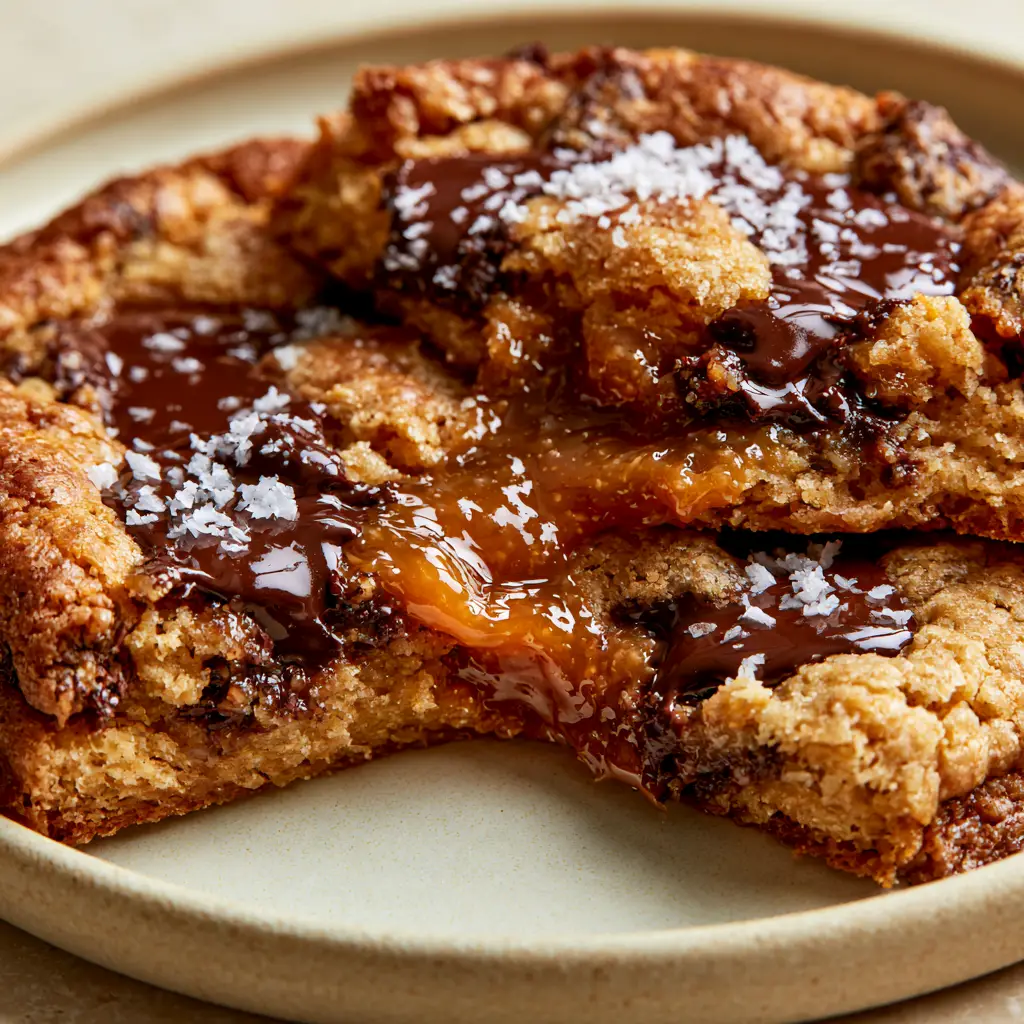
When you imagine the perfect dessert, it likely involves a thick, golden-brown crumb that gives way to a molten, liquid center. These deep dish chocolate chip caramel-filled cookies are the culinary embodiment of that dream, featuring a massive, bakery-style structure that houses a hidden reservoir of warm, stretching caramel.
Designed for the true dessert enthusiast, this recipe focuses on achieving that iconic handheld smartphone photo look—glistening pools of dark chocolate, a rustic textured crumb, and the unmistakable amber pull of high-quality caramel. Whether you are baking for a special occasion or just craving a professional-grade treat, these cookies deliver on every sensory promise.
By using a specific chilling technique and high-quality dark chocolate bars instead of standard chips, we ensure that every bite is a masterclass in texture and flavor contrast. Let’s dive into the science of the perfect stuffed cookie.
Why You Will Love These Stuffed Deep Dish Cookies
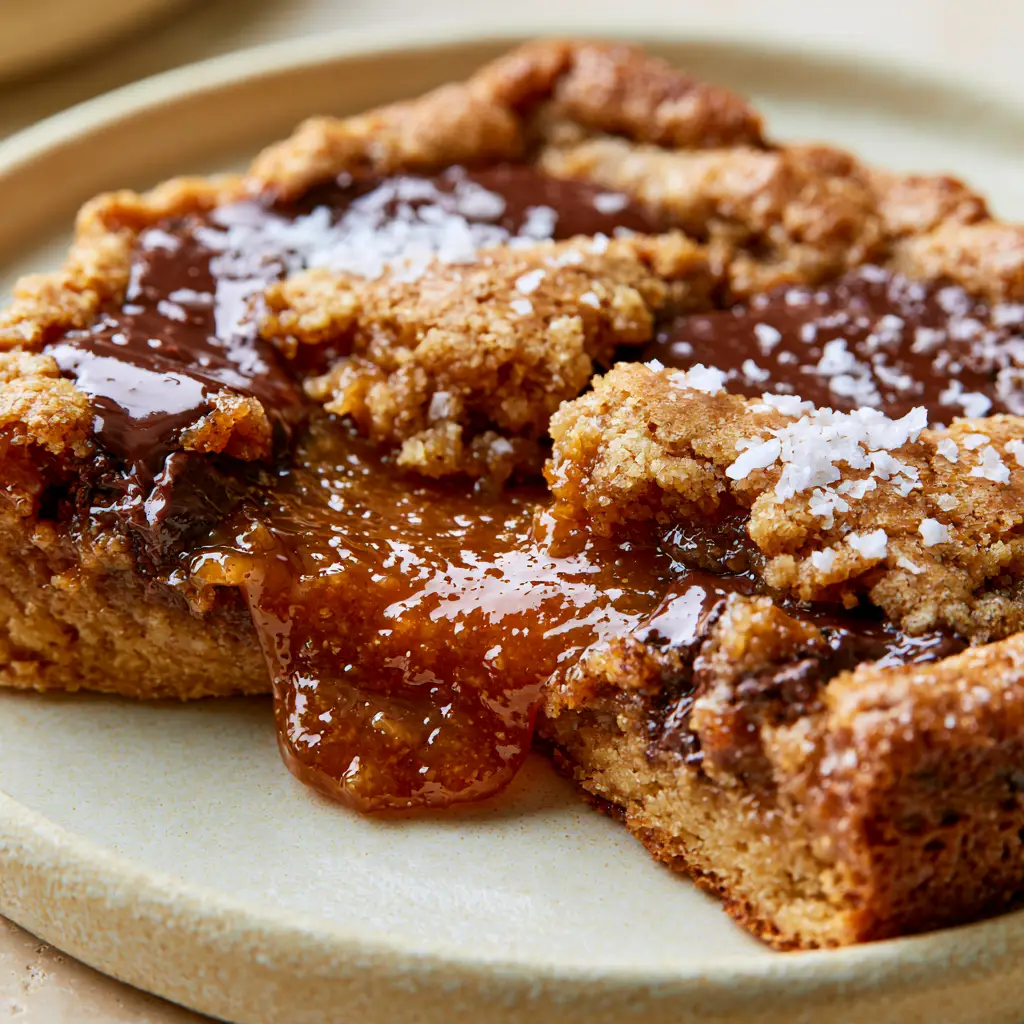
- The Perfect Caramel Pull: We use a specific stuffing method to ensure a thick, gooey, warm amber caramel pull that stretches inches when the cookie is pulled apart.
- Decadent Chocolate Pools: By using chopped dark chocolate, we create wide, glistening melted pools of chocolate on the surface rather than small, dry nibs.
- Professional Texture: The dough is engineered to be thick and golden-brown, providing a sturdy exterior that contains the molten center.
- Salty-Sweet Balance: A final garnish of flaky white sea salt cuts through the richness of the caramel and dark chocolate.
Essential Ingredients for Gourmet Caramel-Filled Cookies
All-Purpose Flour: 3 cups (375g). This provides the structural foundation needed to hold the heavy caramel center without collapsing during the bake.
Unsalted Butter: 1 cup (225g), cold and cubed. Using cold butter instead of room temperature helps prevent the cookies from spreading too thin, ensuring that “deep dish” height.
Brown Sugar: 1 cup (200g), packed. The molasses content in brown sugar is what creates that chewy, moist texture and deep golden-brown color.
Granulated Sugar: ½ cup (100g). This helps the edges crisp up, providing a necessary textural contrast to the soft, gooey center.
Large Eggs: 2, cold. Eggs act as the binder and provide lift, contributing to the thick, textured crumb seen in the visual blueprint.
Dark Chocolate Bar: 8 oz (225g), roughly chopped. Chopping a bar creates those iconic “melted dark chocolate pools” that chips simply cannot replicate.
Soft Caramels: 12-15 individual pieces. Look for high-quality, soft-chew caramels that will melt into a liquid amber state at oven temperatures.
Cornstarch: 1 tsp (3g). This is the secret “invisible” ingredient that keeps the cookie crumb tender and soft while maintaining a thick profile.
Flaky Sea Salt: 1 tbsp (15g). A generous sprinkle of flaky white sea salt provides the finishing touch, highlighting the amber caramel tones.
Foundational Leaveners: 1 tsp (5g) baking soda and ½ tsp (3g) fine salt. These ensure the dough rises and the flavors are properly seasoned from within.
Must-Have Kitchen Tools for Success
To achieve the visual results of a professional bakery, you will need a large baking sheet lined with parchment paper to prevent sticking. A digital kitchen scale is highly recommended for measuring flour and sugar accurately, as volume measurements can lead to dry cookies.
A heavy-duty stand mixer or hand mixer is essential for creaming the cold butter and sugars together. Finally, a large cookie scoop (approx. 3 tablespoons) helps ensure each deep dish chocolate chip caramel-filled cookie is uniform in size for even baking.
How to Make Deep Dish Chocolate Chip Caramel-Filled Cookies
Step 1: The Creaming Process
In a large bowl or stand mixer, combine your cold, cubed butter with the brown sugar and granulated sugar. Beat on medium-high speed for about 3-4 minutes until the mixture is light, fluffy, and no large chunks of butter remain.
This process aerates the dough, which is vital for that thick, textured crumb. Scrape down the sides of the bowl to ensure every bit of sugar is incorporated into the fats.
Step 2: Incorporating the Binding Ingredients
Add the cold eggs one at a time, beating well after each addition. Pour in a splash of vanilla extract if desired for extra depth of flavor.
In a separate bowl, whisk together the flour, cornstarch, baking soda, and fine salt. Slowly add the dry ingredients to the wet mixture on low speed, mixing just until a few streaks of flour remain.
Step 3: Creating the Chocolate Pools
Fold in the roughly chopped dark chocolate pieces by hand. Ensure you include the small “chocolate dust” from the chopping board, as this seasons the entire dough with cocoa.
Unlike standard m&m cookies, these rely on large chunks to create the glistening surface pools described in the visual prompt. Set aside a handful of chocolate chunks to press onto the tops before baking.
Step 4: The Caramel Stuffing Technique
Scoop a large portion of dough (about 3-4 tablespoons) and flatten it in your palm. Place one or two soft caramels in the center, then wrap the dough around the caramel, ensuring it is completely sealed.
Roll the dough into a tall ball rather than a flat disc. This height is the secret to a “deep dish” result that doesn’t spread too much into a flat pan-style bake.
Step 5: Chilling for Structure
Place the dough balls on a tray and chill in the refrigerator for at least 30 minutes. This prevents the caramel from leaking out too early and ensures the cookie stays thick and golden-brown.
Step 6: The Golden-Brown Bake
Preheat your oven to 375°F (190°C). Arrange the chilled dough balls on a parchment-lined sheet, leaving at least 3 inches of space between them.
Bake for 12-15 minutes. Watch for the visual cue: the edges should be a deep golden-brown, while the center still looks slightly soft and underbaked. This ensures the caramel remains liquid and “gooey.”
Step 7: The Finishing Touch
Immediately upon removing from the oven, press your reserved chocolate chunks into the soft tops and sprinkle generously with flaky white sea salt. The residual heat will melt the chocolate into glistening pools.
Expert Tips for the Ultimate Caramel Pull
- Don’t Overbake: If the cookies are in the oven too long, the caramel will overcook and become hard or chewy instead of stretching into that warm amber pull.
- Seal the Bottoms: Make sure there are no cracks in the dough at the bottom of the ball, or the caramel will leak out and burn on the pan.
- Quality Matters: Use a dark chocolate bar with at least 60% cocoa for the best visual “melt” and flavor contrast against the sweet caramel.
- Let Them Rest: Allow the cookies to sit on the hot pan for 5-10 minutes. This sets the base while keeping the center molten for the perfect handheld photo pull.
Storage, Reheating, and Make-Ahead Advice
These cookies are best enjoyed warm, right after the resting period. However, you can store leftovers in an airtight container at room temperature for up to 3 days. To regain that iconic caramel pull, microwave a single cookie for 10-15 seconds before serving.
You can also freeze the unbaked, stuffed dough balls for up to 3 months. When the craving hits, simply bake them directly from the freezer, adding 2-3 minutes to the total baking time. This is a great alternative to a heavy savory meal when you need a quick, high-quality dessert.
What to Serve with Deep Dish Cookies
While these cookies are a meal in themselves, they pair beautifully with a cold glass of milk or a bitter espresso to balance the sweetness. If you are hosting a dinner party, serve these after a light main course like a fresh Greek salad or a crispy cucumber salad to cleanse the palate before the indulgence.
For those who love the contrast of sweet and salty, these cookies also follow well after savory appetizers like spicy pickle poppers or garlic butter steak bites.
Frequently Asked Questions
You can, but chips contain stabilizers that prevent them from melting into the ‘glistening pools’ seen in professional photos. Chopping a dark chocolate bar provides those luxurious melted textures.
Yes! Chilling for at least 30 minutes solidifies the butter, which ensures the cookies stay ‘deep dish’ and thick rather than spreading flat on the pan.
The secret to a long amber caramel pull is using soft-chew caramels and slightly underbaking the cookies. If the caramel gets too hot for too long, it will harden as it cools.
To restore the gooey center, microwave a single cookie for 10-15 seconds. This softens the caramel and melts the dark chocolate chunks perfectly.
Leaking usually happens if the dough isn’t sealed tightly around the caramel or if there are cracks in the bottom. Make sure to roll the dough into a smooth, tall ball with no visible seams.
Deep Dish Chocolate Chip Caramel-Filled Cookies Recipe Card
Deep Dish Chocolate Chip Caramel-Filled Cookies: The Ultimate Gooey Recipe
Ingredients
Equipment
Method
- Cream cold cubed butter and both sugars on medium-high for 4 minutes until light and fluffy.
- Add cold eggs one at a time, beating well after each addition to create a smooth emulsion.
- Whisk flour, cornstarch, soda, and salt; mix into wet ingredients on low speed until just combined.
- Fold in dark chocolate chunks. Flatten a portion of dough, place caramel in center, and seal tightly into a tall ball.
- Chill dough for 30 minutes. Bake at 375°F (190°C) for 12-15 minutes until edges are deep golden-brown.
- Press remaining chocolate into tops and sprinkle with flaky sea salt while hot.
Notes
Ensure the dough is completely sealed around the caramel to prevent leaking.
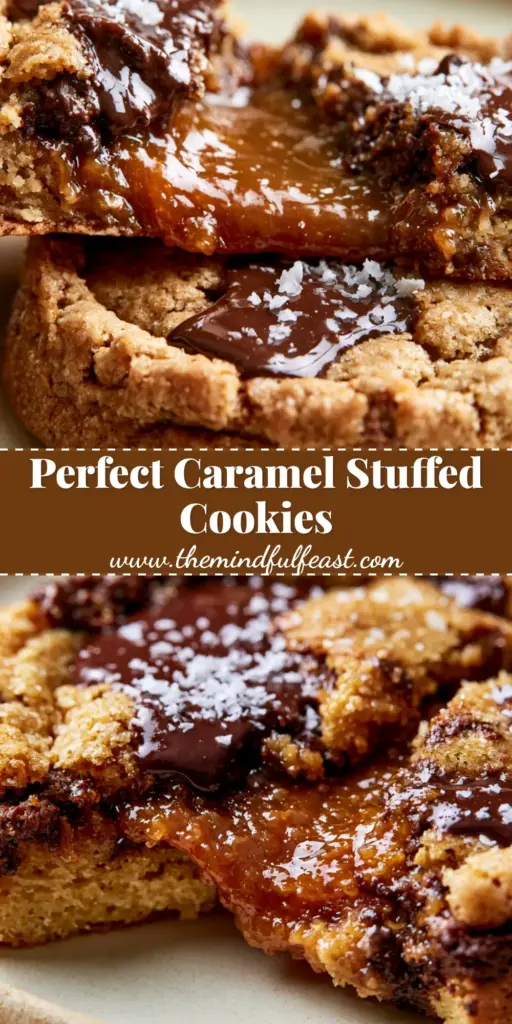
Indulge in the Ultimate Gooey Cookie Experience
There is nothing quite like the experience of breaking open a warm, thick cookie to reveal a river of amber caramel. These deep dish chocolate chip caramel-filled cookies are designed to impress, offering a restaurant-quality dessert right in your own kitchen. The combination of dark chocolate, rich caramel, and flaky salt creates a flavor profile that is truly unforgettable.
If you enjoyed this recipe, please leave a comment below and let us know how your caramel pull turned out! Don’t forget to share your photos and follow us on Pinterest for more decadent dessert inspiration.