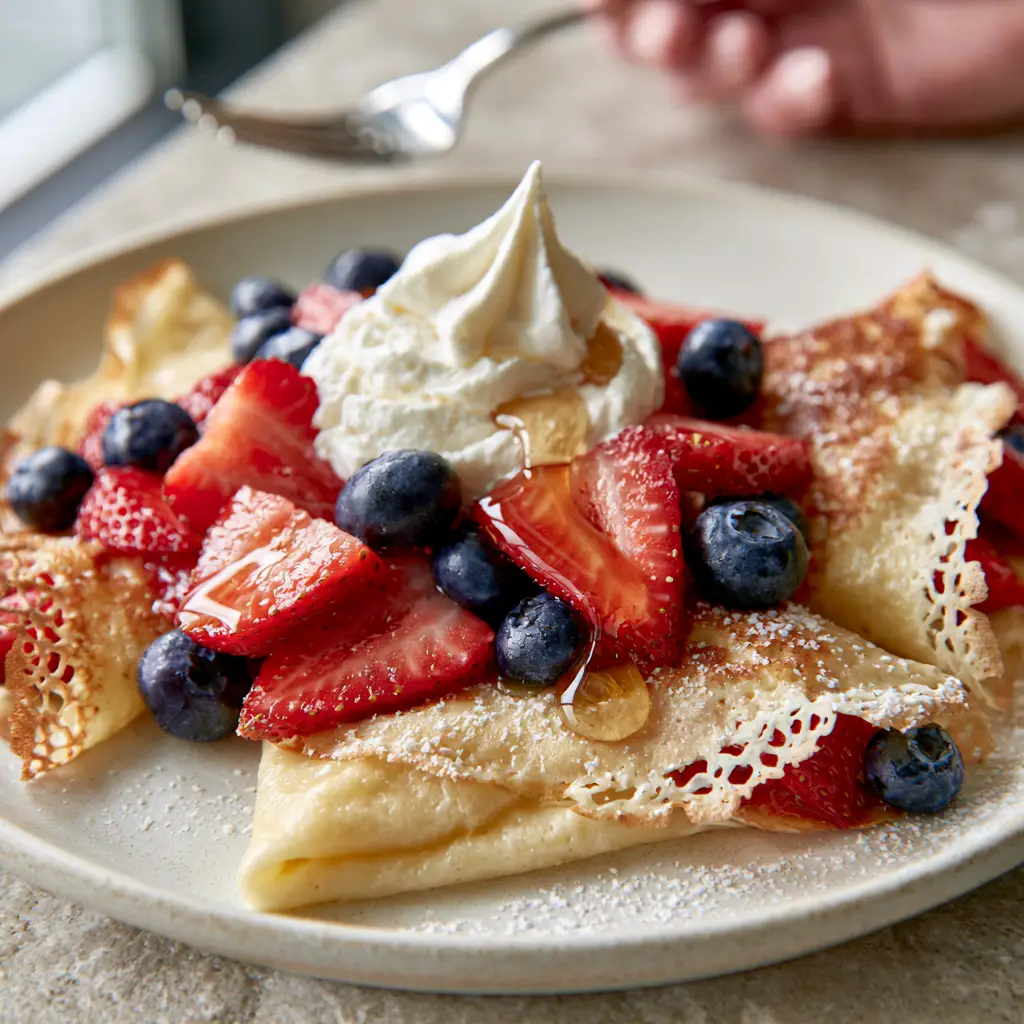
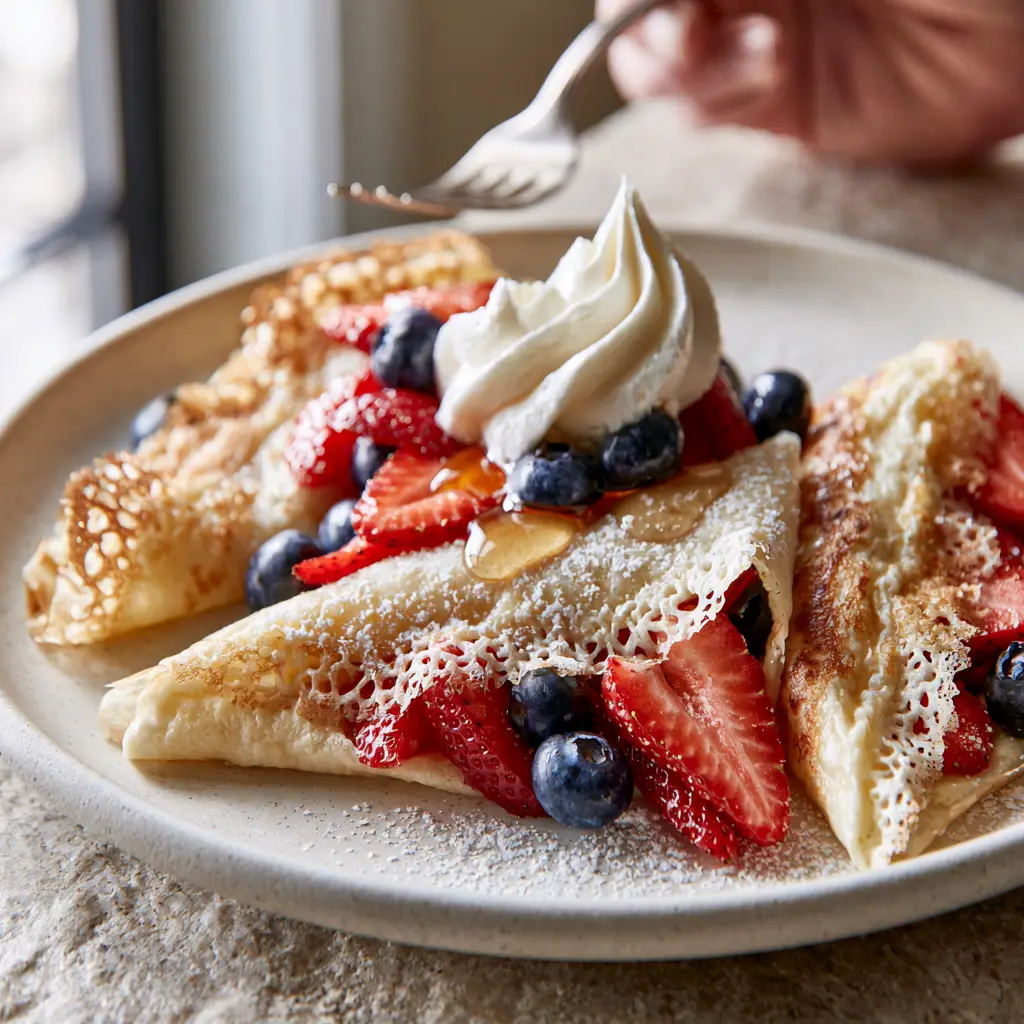
There is a specific, almost poetic beauty in a perfectly executed French crepe. When you hold a plate of fruit crepes, the first thing you notice shouldn’t just be the vibrant colors, but the delicate, paper-thin texture of the pastry itself. These are not thick, cakey pancakes; they are elegant, buttery veils designed to cradle the season’s best produce. Imagine three paper-thin French crepes, folded into neat triangles, resting on a matte off-white ceramic plate. The edges are lacy and crisp, catching the natural morning light, while the centers remain soft and supple.
The visual appeal of these fruit crepes is defined by the contrast of textures. You have the soft, buttery crepe contrasting with the snap of fresh blueberries and the juicy give of sliced red strawberries. A generous dollop of thick, peaked whipped cream sits atop the stack, acting as a cloud-like anchor for a glistening drizzle of amber maple syrup. A final, fine dusting of powdered sugar creates a snow-like finish that makes the entire dish look like it was lifted straight from a high-end Parisian bistro. Whether you are using a silver fork to take that first perfect bite or capturing the moment for your feed, this recipe delivers on every sensory promise.
This isn’t just a recipe; it’s a masterclass in achieving that specific “handheld smartphone photo” authenticity. We are moving away from overly processed textures and toward the real, rustic charm of home cooking. By following this guide, you will learn the culinary science behind the lacy edge and the secret to a batter that never tears. If you’ve been looking for classic pancake alternatives, these crepes offer a sophisticated upgrade that is surprisingly simple to master in your own kitchen.
The Anatomy of a Perfect Fruit Crepe: Why This Recipe Works
- Paper-Thin Structural Integrity: We use a specific ratio of liquid to flour to ensure the crepes are thin enough to be translucent but strong enough to hold heavy fruit fillings.
- The Lacy Edge Effect: By using clarified butter and a high-initial-heat technique, we achieve those coveted golden-brown, “crispy-around-the-perimeter” edges seen in professional patisseries.
- Vibrant Fruit Synergy: The combination of sliced red strawberries and whole, plump blueberries provides both acidity and sweetness, cutting through the richness of the cream.
- Professional Plating Cues: We focus on the “peaked” whipped cream and the “amber drizzle” to ensure your final dish matches the aesthetic of high-end food photography.
Foundational Ingredients for French Fruit Crepes
To achieve the visual and textural results described in our blueprint, every ingredient must serve a specific scientific purpose. We don’t just add salt for flavor; we add it to tighten the gluten structure. We don’t just use milk; we use a specific fat content to ensure the crepes remain buttery rather than rubbery.
All-Purpose Flour: 1 cup (125g). This provides the necessary structure without making the crepes too heavy or bready.
Large Eggs: 2 eggs (approx. 100g). Eggs act as the primary binder and provide the rich, golden hue seen in the lacy edges.
Whole Milk: 1.5 cups (350ml). The fat in whole milk is crucial for a tender crumb and a soft, buttery mouthfeel.
Melted Unsalted Butter: 2 tbsp (30g), plus more for the pan. This “invisible” ingredient is the secret to the lacy texture; as the water in the butter evaporates, it creates tiny steam pockets that form the characteristic holes.
Granulated Sugar: 1 tbsp (12g). A small amount of sugar aids in the Maillard reaction, helping those edges turn that beautiful amber-gold.
Kosher Salt: 1/4 tsp (1.5g). Salt balances the sweetness of the fruit and maple syrup, deepening the overall flavor profile.
Fresh Strawberries: 1 cup (150g), hulled and sliced. Choose deep red berries for that “vibrant” visual pop against the off-white plate.
Fresh Blueberries: 1/2 cup (75g), whole. Look for plump, “dusty” blue berries to provide a color contrast to the strawberries.
Heavy Whipping Cream: 1/2 cup (120ml), chilled. This must be whipped to “stiff peaks” to maintain its shape as a dollop on top of the warm crepes.
Amber Maple Syrup: 2-3 tbsp (30-45ml). Use Grade A Amber for that glistening, translucent drizzle that catches the light.
Powdered Sugar: 1 tbsp (8g). A fine-mesh sieve is required to achieve the “fine dusting” effect across the fruit and pastry.
Essential Equipment for Artisan Crepe Making
To recreate the handheld photo aesthetic, you need the right tools. A heavy-bottomed 10-inch (25cm) non-stick skillet or a traditional carbon steel crepe pan is non-negotiable for heat distribution. You will also need a fine-mesh sieve for the powdered sugar and a whisk or blender to ensure a lump-free batter. To achieve the “peaked” whipped cream, a chilled metal bowl and a hand mixer are your best friends. Finally, a matte off-white ceramic plate provides the neutral background necessary to make the colors of the fruit crepes truly stand out.
The Secret to the Paper-Thin French Crepe Batter
Step 1: Emulsifying the Base
In a large mixing bowl or blender, combine the eggs, milk, melted butter, sugar, and salt. If using a whisk, beat the eggs first before slowly incorporating the milk to ensure a smooth emulsion. This prevents the “rubbery” texture that often plagues homemade crepes. You want the fat from the butter to be fully suspended in the liquid before adding the flour.
Step 2: Incorporating the Flour and Resting
Gently whisk in the flour until just combined. Do not overmix, as this develops too much gluten, which will make your fruit crepes tough instead of tender. The most critical step is the rest: let the batter sit in the refrigerator for at least 30 minutes. This allows the flour to fully hydrate and the air bubbles to escape, ensuring that paper-thin, hole-free surface.
Mastering the Art of the Lacy Golden Edge
Step 3: The Sizzle and Swirl
Heat your skillet over medium-high heat and lightly brush with butter. You should hear a faint sizzle when the batter hits the pan. Pour about 1/4 cup (60ml) of batter into the center and immediately tilt and swirl the pan in a circular motion. The batter should reach the very edges of the pan, forming a delicate, translucent layer. If it’s too thick, your crepes won’t have that “lacy” quality.
Step 4: Monitoring Sensory Cues
Watch for the “Visual & Sensory Cues.” The edges will begin to lift and turn a deep golden-brown, becoming slightly brittle. This usually takes 60-90 seconds. Flip the crepe carefully using a thin spatula. The second side only needs 20-30 seconds—just enough to set the batter while maintaining that soft, buttery texture in the center. The lacy edges should be clearly visible against the softer, pale-gold middle.
Assembly: Achieving the “Overflowing Fruit” Look
Step 5: Folding and Filling
Lay a crepe flat and place a handful of sliced strawberries and whole blueberries in one quadrant. Fold the crepe in half, and then in half again to create a triangle. Repeat this with three crepes, overlapping them slightly on your matte ceramic plate. Ensure the fruit is “overflowing” from the folds, just like in our visual blueprint. This creates a sense of abundance and freshness.
Step 6: The Finishing Touches
Using a spoon, place a thick dollop of peaked whipped cream on the top fold. Slowly drizzle the amber maple syrup over the berries, allowing a few drops to glisten on the surface of the fruit. Finally, take your fine-mesh sieve and apply a light dusting of powdered sugar. The sugar should look like a delicate frost, not a heavy blanket. Serve immediately while the crepes are warm and the cream is cold.
Expert Tips for Culinary Success
- Temperature Control: If your crepes are sticking, your pan isn’t hot enough. If they are browning too fast without setting, turn the heat down slightly. The “lacy edge” requires a precise medium-high sweet spot.
- The First Crepe Rule: The first crepe is almost always a “test” crepe. Use it to gauge the heat of your pan and the consistency of your batter. Don’t be discouraged!
- Berry Prep: Pat your strawberries and blueberries dry after washing. Excess moisture will bleed into the crepe and the whipped cream, ruining the “glistening” syrup effect.
- Whipped Cream Stability: For the most stable peaks, ensure your cream, bowl, and beaters are ice-cold. This creates the structural “thick peaked” look that lasts through a photo session.
Storage, Reheating, and Freezing Advice
Crepes are best enjoyed fresh, but you can store the unfilled “skins” for later. Stack them with pieces of parchment paper in between to prevent sticking. They will stay fresh in an airtight container in the refrigerator for up to 3 days. To reheat, place them in a dry skillet over low heat for 30 seconds per side until pliable again.
For freezing, wrap the parchment-separated stack tightly in plastic wrap and place it in a freezer bag. They can be frozen for up to 2 months. Thaw in the refrigerator overnight before reheating. Never freeze the crepes once they have been filled with fruit and cream, as the textures will degrade significantly.
What to Serve with Fruit Crepes
While these fruit crepes are a star on their own, they pair beautifully with other breakfast staples. For a balanced brunch, consider serving them alongside some savory steak bites to contrast the sweetness. If you’re looking for more morning inspiration, our morning aesthetics guide offers great tips on setting the mood. For those who prefer a more savory start, a protein-packed chicken salad can be a great follow-up for a late-morning meal.
Frequently Asked Questions
Yes! In fact, the batter is better after resting. You can make it up to 24 hours in advance and store it in the refrigerator. Just give it a gentle stir before using.
The lacy edge is achieved by using a hot, buttered pan and ensures the batter is swirled thin enough. The Maillard reaction between the sugar and butter at high heat creates that golden-brown perimeter.
A dedicated carbon steel crepe pan is best for heat distribution, but a high-quality 10-inch non-stick skillet works perfectly as long as it has low sloped sides for easy flipping.
Rubbery crepes are usually the result of overmixing the batter or skipping the resting period. Resting allows the gluten to relax and the flour to fully hydrate, ensuring a soft, paper-thin texture.
The first crepe is usually a sacrifice to the ‘pan seasoning’ gods. It helps you regulate the pan’s temperature and ensures the butter is evenly distributed. Don’t worry—the second one will be perfect!
The Ultimate Fruit Crepes Recipe Card
Fruit Crepes with Fresh Berries and Lacy Golden-Brown Edges
Ingredients
Equipment
Method
- Whisk eggs, milk, melted butter, sugar, and salt until fully emulsified.
- Gently whisk in flour until no lumps remain. Do not overmix.
- Refrigerate batter for at least 30 minutes to hydrate the flour.
- Pour 1/4 cup batter into a hot, buttered pan. Swirl to edges. Cook until edges are lacy and golden-brown, then flip.
- Beat heavy cream until stiff, thick peaks form.
- Fold crepes into triangles with fruit inside. Top with a dollop of cream, maple syrup drizzle, and powdered sugar.
Notes
Use high initial heat to get the lacy edges.

Join the Authentic Flavor Community
Creating beautiful, restaurant-quality meals at home is about more than just following steps—it’s about understanding the textures, colors, and science that make food enticing. If you enjoyed making these fruit crepes, we would love to see your results! Tag us in your photos and share your lacy-edged masterpieces with our community. For more visually stunning recipes and daily culinary inspiration, be sure to follow us on Pinterest and sign up for our newsletter.