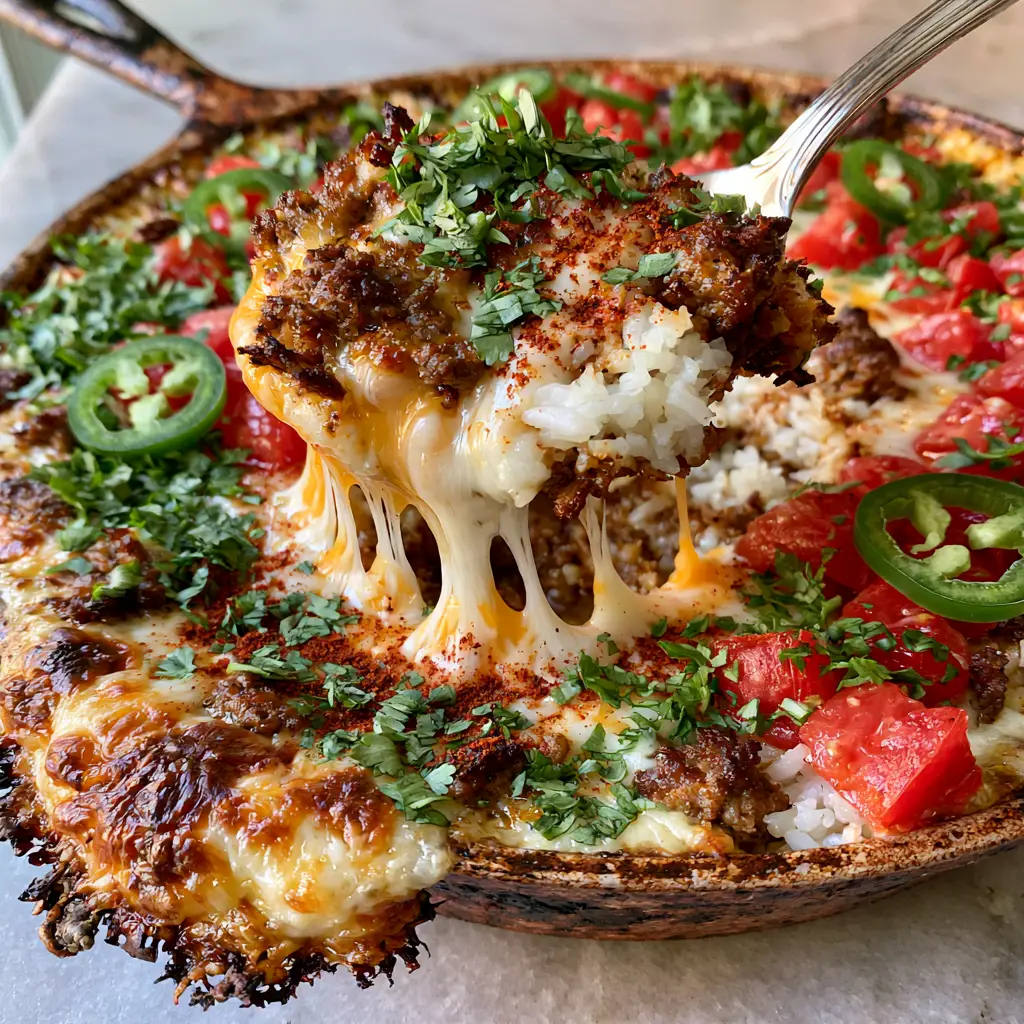
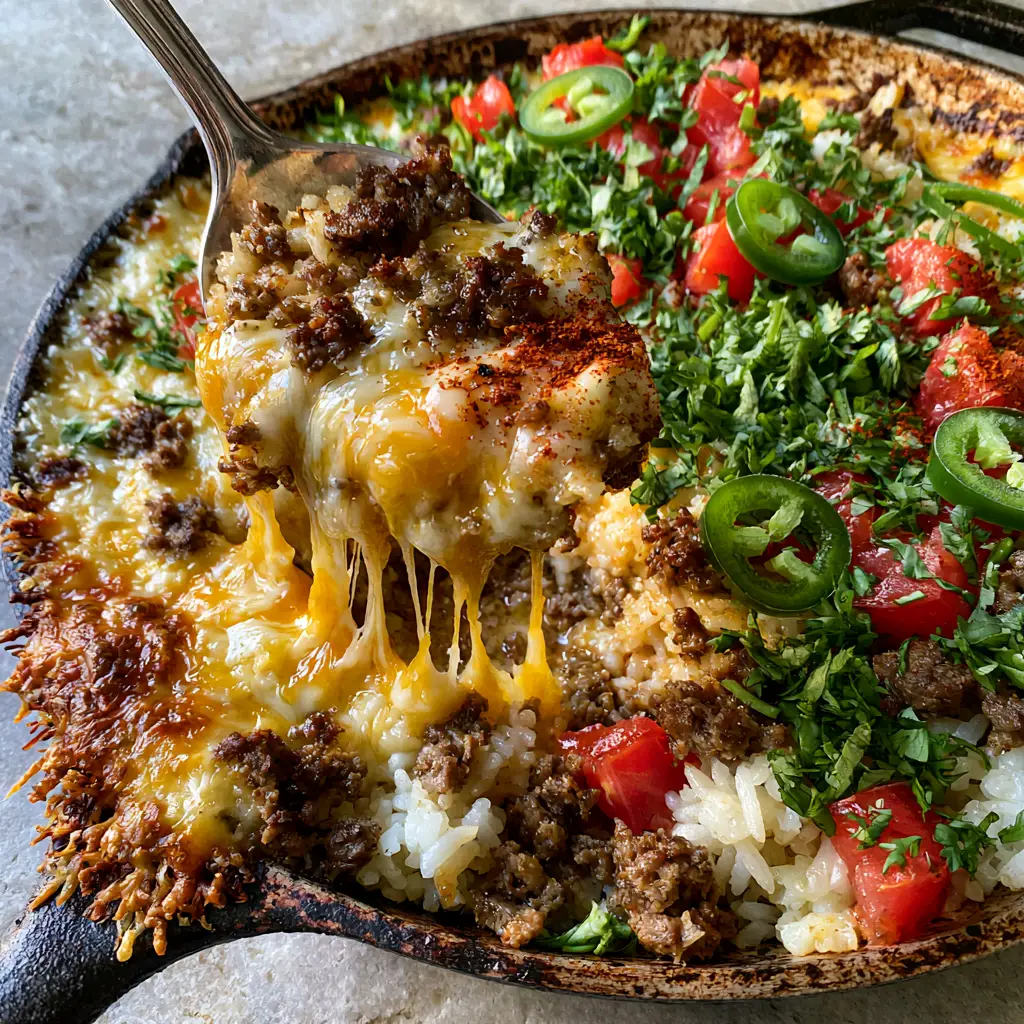
This taco rice casserole is the ultimate comfort food solution for busy weeknights when you crave bold, Southwestern flavors without the cleanup. Imagine a rustic, seasoned cast iron skillet bubbling with savory ground beef and fluffy long-grain rice, all held together by an epic, multi-strand cheese pull of melted sharp cheddar and Monterey Jack.
Every bite of this taco rice casserole delivers a perfect contrast between the tender, seasoned meat and the bright, fresh pop of diced Roma tomatoes. The afternoon light catching the steam vapors rising from the pan makes it impossible to resist diving in with a spoon to grab those slightly crisped, golden-brown toasted cheese edges.
Whether you are looking for a reliable family dinner or a crowd-pleasing potluck dish, this recipe bridges the gap between a classic skillet meal and a festive taco night. Just like a perfectly layered zesty Mexican rice casserole, this version prioritizes texture and depth of flavor through specific searing techniques.
Why This Cheesy Skillet Casserole Works
- The Ultimate Texture Contrast: You get fluffy steamed rice paired with browned beef crumbles and a gooey, stretchy cheese topping that features toasted, crispy edges.
- One-Pan Simplicity: By using a seasoned cast iron skillet, you develop a better crust on the beef and achieve a superior melt on the dual-cheese blend.
- Visual Appeal: Bright red Roma tomatoes, vibrant green jalapeños, and fresh cilantro provide a professional finish that looks as good as it tastes.
- Highly Customizable: While we use beef here, the technique is similar to building a hearty beef and hashbrown casserole, allowing for easy protein swaps.
Essential Ingredients for the Perfect Taco Rice Casserole
Ground Beef: Use a lean (85/15 or 90/10) ground beef to ensure the dish is flavorful without being overly greasy. The beef provides the savory foundation and a rich, browned texture.
Long-Grain White Rice: 1.5 cups (285g) of long-grain rice ensures the grains stay individual and fluffy rather than turning into mush. It absorbs the seasoned broth perfectly during the simmering process.
Sharp Cheddar & Monterey Jack: A dual-cheese blend is critical. The 1.5 cups (168g) of Cheddar provides a punchy tang, while the 1.5 cups (168g) of Monterey Jack delivers that signature, stretchy cheese pull seen in the visuals.
Roma Tomatoes: 3 medium tomatoes, diced fresh, provide a necessary acidic lift to cut through the richness of the melted cheese and seasoned meat.
Fresh Garnishes: A generous handful of chopped cilantro and thin rounds of bright green jalapeños add heat and herbaceous notes. A final light dusting of chili powder enhances the rustic look.
Foundational Liquid: 2.5 cups (600ml) of low-sodium beef broth is used to steam the rice, infusing every grain with deep, savory flavor rather than using plain water.
Must-Have Kitchen Tools
12-Inch Cast Iron Skillet: The heavy bottom and heat retention of cast iron are essential for creating those toasted cheese edges along the sides of the pan.
Sharp Chef’s Knife: Essential for dicing the Roma tomatoes cleanly and slicing the jalapeños into uniform, paper-thin rounds.
Long-Handled Silver Spoon: Not just for serving, but for achieving that perfect, vertical cheese pull when the dish is piping hot.
Step-by-Step Instructions for Culinary Success
Searing the Seasoned Beef Foundation
Heat 1 tbsp (15ml) of avocado oil in your cast iron skillet over medium-high heat. Add 1 lb (454g) of ground beef, breaking it into small crumbles with a wooden spoon.
Season with 1 tbsp (8g) chili powder, 1 tsp (2g) cumin, and 1 tsp (6g) salt. Cook until the beef is deeply browned and crispy at the edges; this Maillard reaction is key for the “seasoned beef” visual in the prompt.
Simmering the Fluffy Long-Grain Rice
Stir in 1.5 cups (285g) of rinsed white rice, toasting the grains in the beef fat for 2 minutes until they smell nutty. Pour in 2.5 cups (600ml) of beef broth and bring to a rapid boil.
Reduce the heat to low, cover the skillet tightly, and simmer for 18 minutes. Look for the visual cue of small “steam holes” appearing on the surface, indicating the rice is perfectly fluffy and the liquid is absorbed.
Creating the Gooey Multi-Strand Cheese Pull
Once the rice is tender, fluff it gently with a fork. Turn off the heat and scatter a thick, even layer of the shredded Cheddar and Monterey Jack over the entire surface.
Place the skillet under a broiler for 2-3 minutes. Watch closely for the cheese to start bubbling and the edges against the iron pan to turn a dark, toasted golden brown.
Fresh Garnishing and Final Presentation
Immediately after removing from the heat, scatter your diced Roma tomatoes and sliced jalapeños across the top. The residual heat will slightly soften them without losing their vibrant color.
Finish with a heavy scatter of fresh cilantro and a light dusting of extra chili powder for that professional, rustic aesthetic. Serve immediately while the steam vapors are still visible.
Expert Tips for a Flawless Taco Rice Casserole
- Rinse Your Rice: Always rinse your rice under cold water until it runs clear to remove excess starch; this prevents the casserole from becoming gummy.
- Grate Your Own Cheese: Pre-shredded cheese is coated in potato starch to prevent clumping, which ruins the “stretchy, gooey” cheese pull. Buy blocks and grate them yourself.
- Control the Heat: If your jalapeños are particularly spicy, remove the white ribs and seeds before slicing to keep the heat manageable for all guests.
- The Broiler Trick: For those specific “toasted cheese edges,” ensure the cheese touches the side of the cast iron skillet before broiling.
Storage and Reheating Advice
Store any leftover taco rice casserole in an airtight container in the refrigerator for up to 4 days. The flavors actually deepen overnight, making it a fantastic lunch option.
To reheat, add a splash of beef broth or water to the container before microwaving to keep the rice from drying out. For the best results, reheat in a skillet over medium heat to maintain the texture of the beef.
What to Serve With Your Skillet Dinner
This hearty meal stands well on its own, but it pairs beautifully with a fresh, crisp vibrant vegetable salad to balance the richness of the cheese. If you are hosting a larger gathering, consider serving these alongside crispy beef flautas for a full Mexican-inspired feast.
For a lighter side, a simple plate of sliced avocado or a dollop of cool sour cream works wonders to temper the heat from the sliced jalapeños.
Frequently Asked Questions
Yes, you can freeze the cooked beef and rice mixture for up to 3 months. Thaw overnight and add the fresh cheese and garnishes just before broiling.
Yes, but you will need to increase the beef broth to 3 cups (720ml) and the simmering time to approximately 40-45 minutes until the rice is tender.
Use a blend of Monterey Jack and Sharp Cheddar, and ensure you grate the cheese from a block rather than using pre-shredded bags which contain anti-clumping starches.
The base dish is mild, but the sliced jalapeño garnishes add a fresh kick. For a milder version, remove the seeds from the jalapeños or omit them entirely.
The Ultimate Cheesy Taco Rice Casserole Recipe
Taco Rice Casserole with Gooey Melted Cheese and Seasoned Beef
Ingredients
Equipment
Method
- Brown the ground beef in a cast iron skillet over medium-high heat with chili powder and cumin until crispy edges form.
- Stir in the rice and beef broth. Cover and simmer on low for 18 minutes until fluffy and liquid is absorbed.
- Layer with cheddar and Monterey Jack. Broil for 2-3 minutes until bubbling with toasted edges.
- Top with diced Roma tomatoes, sliced jalapeños, fresh cilantro, and a dusting of chili powder.
Notes
Use freshly grated cheese for the best multi-strand cheese pull.

Final Thoughts on This Skillet Masterpiece
Mastering the taco rice casserole is all about balancing the rich, gooey textures of the melted cheese with the fresh, sharp notes of the garnishes. This dish is a visual and culinary triumph that brings the warmth of a rustic home-cooked meal to your table in under 45 minutes.
If you enjoyed this recipe, please leave a comment below and let us know how your cheese pull turned out! Don’t forget to follow us on Pinterest and share your skillet photos with the community.


