Bringing the magic of the “Happiest Place on Earth” into your own kitchen starts with the iconic scent of toasted dough and melted butter. There is perhaps no snack more legendary than the Mickey-shaped soft pretzel, a treat that has become a rite of passage for every theme park visitor. Our Disney inspired food journey today focuses on recreating that exact sensory experience: the golden-brown, bubbly crust, the fluffy interior, and that unmistakable silhouette.
This isn’t just a basic bread recipe; it is a culinary recreation designed to mimic the professional results found at the parks. We are aiming for a handheld masterpiece that looks like it was captured in the soft, natural afternoon sun of a California patio. From the glistening melted butter to the translucent flakes of Maldon salt, every detail counts.
Whether you are planning a themed party or simply craving a nostalgic snack, this recipe delivers on every front. We have meticulously tested the dough hydration and the alkaline bath timing to ensure your pretzels have that professional “snap” and deep mahogany color. Let’s dive into the science and soul of this beloved park classic.
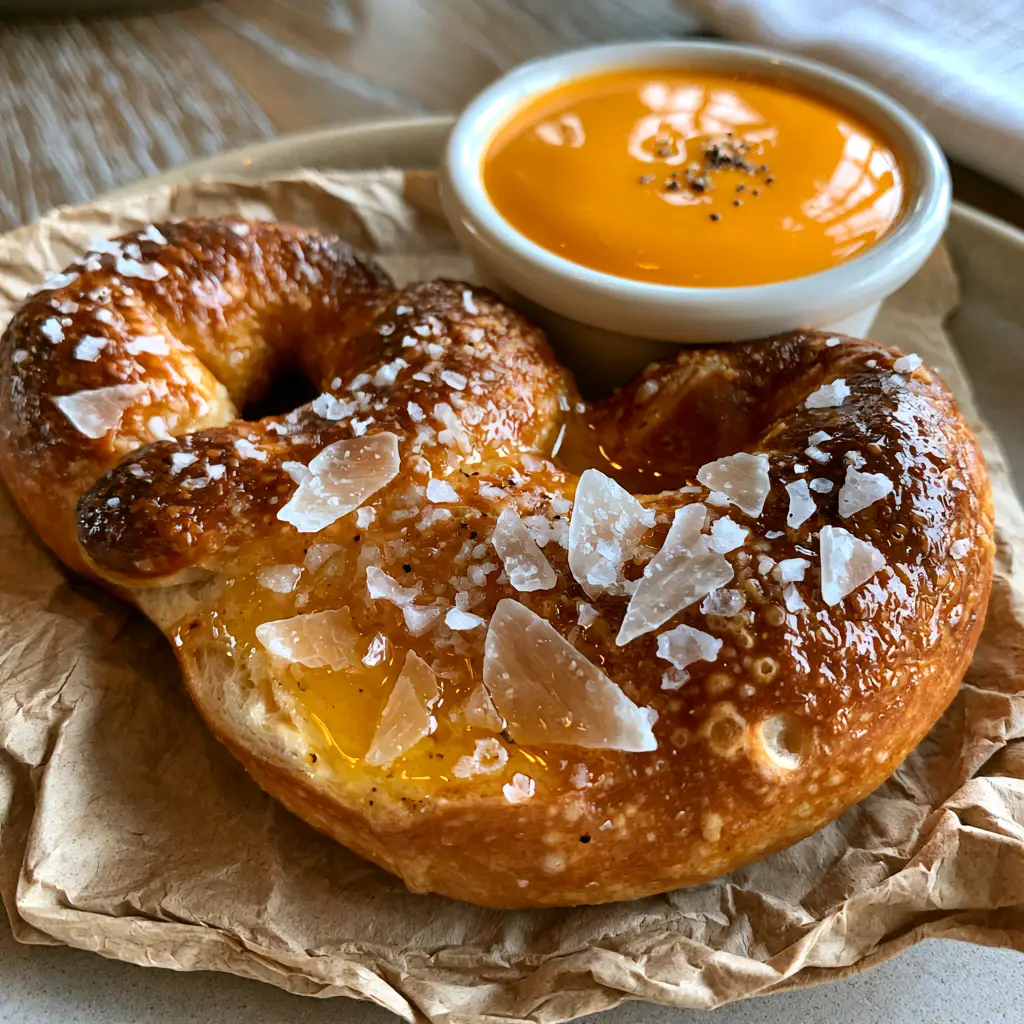
Why You Will Love This Magical Theme Park Recreation
- Authentic Texture: Achieve a perfect toasted crust with slight bubbles from the baking process, contrasted by a soft, pillowy center.
- Visual Precision: Our shaping guide ensures you get that iconic Mickey silhouette every single time without the dough losing its form.
- Gourmet Finishing: We swap standard table salt for coarse Maldon sea salt flakes to provide a sophisticated crunch and clean saline finish.
- The Perfect Dip: A glossy, vibrant orange warm cheddar cheese sauce with a hint of cracked black pepper that rivals any park offering.
- Nostalgic Aroma: Your kitchen will fill with the smell of warm yeast and browning butter, creating an immediate emotional connection to the magic.
Essential Pantry Staples for Park-Style Pretzels
To achieve the specific Disney inspired food aesthetic, we need a mix of foundational dough ingredients and high-quality finishing touches. Each component plays a vital role in the structural integrity and flavor profile of the pretzel.
High-Protein Bread Flour: 4 cups (500g). Bread flour contains more protein than all-purpose flour, which is essential for creating the chewy, elastic texture that defines a classic soft pretzel.
Warm Water: 1.5 cups (360ml). The water must be between 110°F and 115°F (43°C-46°C) to properly hydrate and activate the yeast without killing the living cultures.
Active Dry Yeast: 2.25 tsp (7g). This is the engine of our recipe, providing the necessary rise and that characteristic fermented aroma that makes the dough smell like a professional bakery.
Granulated Sugar: 1 tbsp (12g). Sugar acts as “food” for the yeast, speeding up the fermentation process and helping the crust brown through caramelization during the bake.
Unsalted Butter (Melted): 2 tbsp (28g) for the dough. Adding fat directly into the dough ensures the crumb remains tender and doesn’t become overly tough or bread-like.
Fine Sea Salt: 1 tsp (6g). This seasons the interior of the dough, enhancing the natural flavors of the wheat and the yeast.
Baking Soda: 1/2 cup (120g). This is used for the alkaline water bath, which is the “secret” step that creates the dark, shiny crust and the unique “pretzel” flavor through the Maillard reaction.
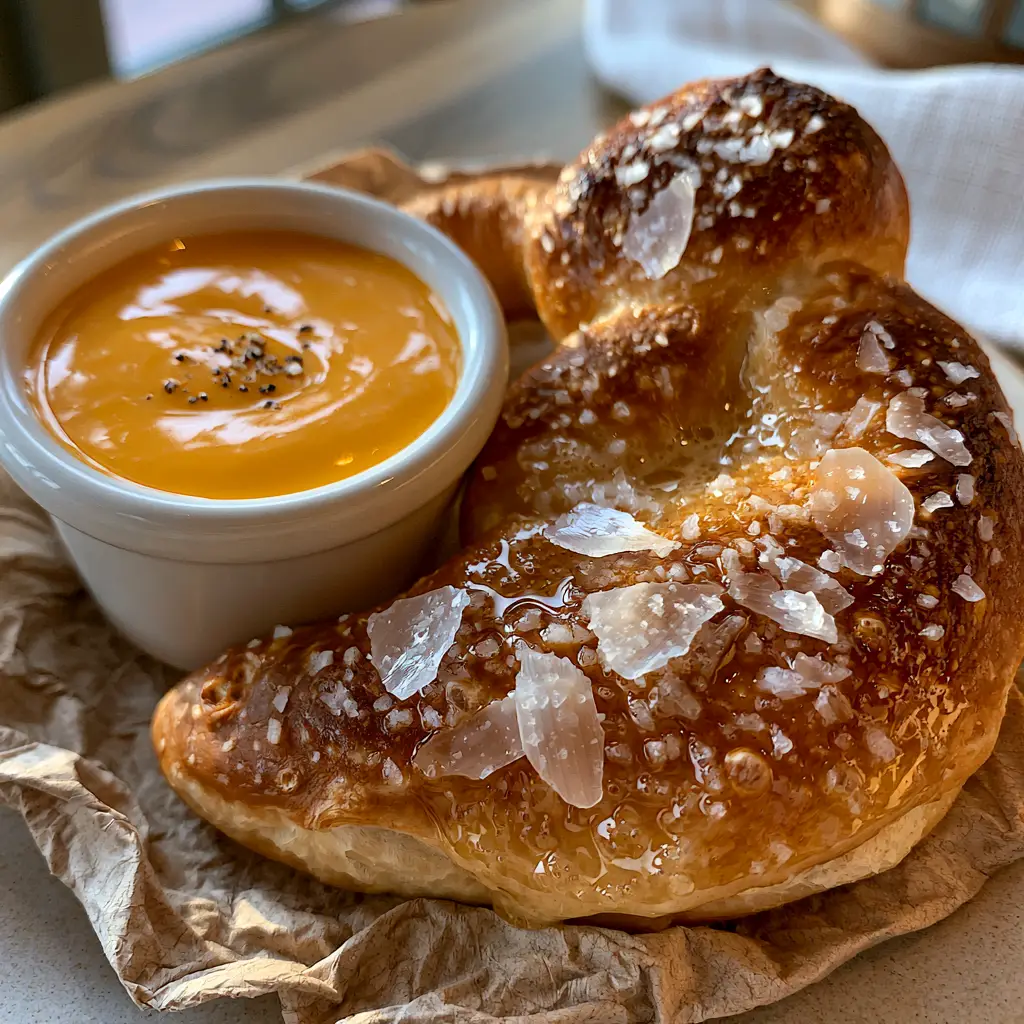
Salted Butter (For Finishing): 4 tbsp (56g). We use melted salted butter to brush the pretzels immediately after baking, giving them a glistening, handheld smartphone photo-ready sheen.
Maldon Sea Salt Flakes: 2 tbsp (15g). These large, translucent flakes provide a visual and textural pop that standard salt simply cannot replicate.
Sharp Cheddar Cheese: 2 cups (225g), shredded. For the sauce, use a high-quality sharp cheddar to ensure a vibrant orange color and a robust, tangy flavor profile.
Whole Milk: 1 cup (240ml). Milk provides the liquid base for our glossy sauce, ensuring it stays smooth and pourable at room temperature.
Cracked Black Pepper: 1/2 tsp (1g). A few tiny specks of black pepper on top of the sauce provide a subtle heat and a professional culinary finish.
Must-Have Kitchen Tools for Success
Creating the perfect Disney inspired food silhouette requires a few specific tools to manage the dough and the finishing process. Using a wooden serving board for the final presentation adds to the rustic, park-like charm.
A stand mixer fitted with a dough hook is highly recommended for kneading, as this dough is quite stiff. You will also need a large, wide stockpot for the baking soda bath to ensure you can fit the Mickey-shaped heads without crowding. A slotted spatula or a “spider” strainer is essential for lifting the delicate dough shapes out of the boiling water.
For the baking process, high-quality baking sheets lined with rustic crumpled parchment paper will prevent sticking and contribute to that “handheld smartphone photo” aesthetic. Finally, a small ceramic ramekin is the perfect vessel for serving your warm, glossy cheese sauce.
The Step-by-Step Path to Golden-Brown Magic
Phase 1: Cultivating the Perfect Dough
Start by whisking your warm water (110°F/43°C) and sugar in the bowl of your stand mixer. Sprinkle the yeast over the top and let it sit for about 5-8 minutes. You are looking for a foamy, frothy “bloom” on the surface, which indicates the yeast is active and ready to work.
Add the melted unsalted butter and fine sea salt. Gradually incorporate the bread flour, one cup at a time, using the dough hook on low speed. Once the dough pulls away from the sides of the bowl, increase the speed to medium and knead for 5 minutes. The dough should be smooth, slightly tacky but not sticky, and should bounce back when poked.
Place the dough in a lightly greased bowl, cover with a warm linen napkin, and let it rise in a draft-free spot for 1 hour. It should roughly double in size. This slow rise is where the flavor develops, so don’t rush this step.
Phase 2: Sculpting the Mickey Silhouette
Punch down the risen dough to release excess air. Turn it onto a lightly floured surface and divide it into 8 equal portions. To create the Disney inspired food shape, divide each portion into three pieces: one large piece for the head and two smaller pieces for the ears.
Roll the large piece into a long rope (about 12 inches) and form it into a circle, twisting the ends together at the bottom. Roll the two smaller pieces into 5-inch ropes and form small circles, attaching them to the top of the large circle. Use a tiny bit of water to “glue” the ears to the head, pressing firmly to ensure they stay attached during the boil.
Place the shaped pretzels on your parchment-lined sheets and let them rest for another 15 minutes. This allows the gluten to relax, which prevents the ears from shrinking or deforming during the next stage.
Phase 3: The Alkaline Bath and the Bake
Preheat your oven to 450°F (230°C). Bring a large pot of water to a boil and slowly add the baking soda (it will bubble up!). This alkaline solution is what gives the pretzel its toasted crust and slight bubbles. Boil each Mickey head for 30 seconds per side.
Use your slotted spatula to return the pretzels to the parchment paper. Immediately brush them with a small amount of egg wash (optional for extra shine) or simply leave them as is for a more rustic look. Bake for 12-15 minutes until they reach a deep, golden-brown hue.
As soon as they come out of the oven, brush them generously with the melted salted butter. The heat from the pretzel will pull the butter into the crust, creating a glistening surface. Sprinkle immediately with the Maldon sea salt flakes so they adhere to the buttery exterior.
Phase 4: Crafting the Glossy Cheddar Sauce
While the pretzels bake, prepare the sauce. In a small saucepan, melt 1 tbsp (15g) of butter and whisk in 1 tbsp (8g) of flour to create a light roux. Slowly pour in the milk (240ml), whisking constantly until the mixture thickens slightly.
Remove from heat and stir in the shredded sharp cheddar cheese until completely melted and glossy. The sauce should be a vibrant, thick orange. Pour into a white ceramic ramekin and top with a few tiny specks of cracked black pepper for visual contrast.
Expert Tips for Success
- Temperature Check: Always use a thermometer for your water. If it is too cold, the yeast won’t wake up; if it’s too hot, you’ll kill the yeast and the dough will never rise.
- The “Ear” Connection: Make sure you pinch the dough aggressively when attaching the ears. As the dough expands in the boiling water, weak joints will fail, leaving you with earless pretzels!
- Baking Soda Caution: Add the baking soda very slowly to the boiling water. If you dump it in all at once, it can create a “volcano” effect and boil over your stovetop.
- Salt Timing: Only salt the pretzels *after* they have been brushed with butter. If you salt them before baking, the salt can sometimes dissolve into the dough rather than sitting beautifully on top.
Storage, Reheating & Freezing
Soft pretzels are best enjoyed within an hour of baking to experience that perfect “handheld smartphone photo” freshness. If you have leftovers, store them in an airtight container at room temperature for up to 2 days. To reheat, place them in a 350°F (175°C) oven for 5 minutes to restore the crust’s texture; avoid the microwave, as it can make the dough rubbery.
For long-term storage, these pretzels freeze beautifully. Once cooled, wrap them individually in plastic wrap and store in a freezer bag for up to 3 months. To serve, bake from frozen at 350°F (175°C) for 10-12 minutes until warmed through.
What to Serve With This Iconic Snack
If you’re looking for more snack-heavy adult lunchable ideas, these pretzels are a perfect center-piece base for a savory board. Pair them with some sliced meats and cheeses for a full meal.
While the dough rises, you might want to prep some quick dinner recipes for later in the week to keep your kitchen magic going. Balance the rich, buttery pretzel with a crisp cucumber salad to cleanse the palate between bites.
For a full “park day at home” experience, finish your meal with a sweet treat like decadent zucchini brownies, which offer a moist, chocolatey finish that complements the salty pretzel perfectly.
Frequently Asked Questions
Yes, but the texture will be less chewy. Bread flour has a higher protein content (gluten), which is what provides the characteristic ‘snap’ and elastic crumb of a traditional soft pretzel.
The secret is using a tiny drop of water as ‘glue’ and pinching the dough firmly at the joints. Resting the shaped dough for 15 minutes before boiling also helps the gluten bond together.
Maldon salt is flaky and translucent, providing a clean saltiness and a satisfying crunch without being overwhelming. It also stays white and visible on the buttery crust, unlike table salt which can dissolve.
The baking soda bath is an alkaline solution that breaks down the proteins on the surface of the dough. This triggers the Maillard reaction, which gives pretzels their deep brown color, shiny finish, and distinct flavor.
Grainy cheese sauce usually happens when the cheese is added to milk that is too hot, causing the proteins to clump. Always remove the milk from the heat before stirring in your shredded cheddar.
The Ultimate Disney-Inspired Mickey Soft Pretzel
Disney Inspired Food: The Ultimate Mickey-Shaped Soft Pretzel Recipe
Ingredients
Equipment
Method
- Mix warm water and sugar in mixer bowl. Sprinkle yeast and wait 5-8 minutes until foamy.
- Add butter, sea salt, and flour. Knead with dough hook for 5 minutes until smooth and bouncy.
- Cover and let rise in a warm spot for 1 hour until doubled in size.
- Divide dough into 8 sets of head and ears. Roll into ropes and form circles, attaching ears firmly.
- Boil pretzels in water and baking soda for 30 seconds per side. Place on parchment paper.
- Bake at 450°F (230°C) for 12-15 minutes until dark golden-brown with visible crust bubbles.
- Brush hot pretzels with melted salted butter and sprinkle with Maldon sea salt flakes.
- Whisk roux, add milk, then melt in cheddar cheese. Top with cracked black pepper.
Notes
Don't skip the baking soda bath; it's what creates the iconic pretzel crust.

Closing & Call to Action
Recreating Disney inspired food at home is more than just a cooking project; it’s about capturing a feeling of joy and shared experience. These Mickey-shaped pretzels, with their glistening butter and Maldon salt, are guaranteed to bring a smile to any enthusiast’s face. The combination of the chewy, toasted crust and the vibrant orange cheddar sauce creates a sensory journey that truly feels like magic.
If you enjoyed this recipe, please leave a comment below and tell us about your favorite park snack! Don’t forget to share your creations on Pinterest and tag us. For more magical recipes and kitchen tips, sign up for our newsletter today!


