Imagine the delicate, translucent snap of a Vietnamese spring roll meeting the bold, aromatic punch of a North Indian tandoor. These Indian rice paper rolls represent the ultimate culinary bridge, offering a vibrant, fresh, and gluten-free way to enjoy your favorite tikka flavors. Every bite delivers a satisfying crunch of purple cabbage and cucumber, followed by the warm, smoky richness of golden-seared paneer cubes.
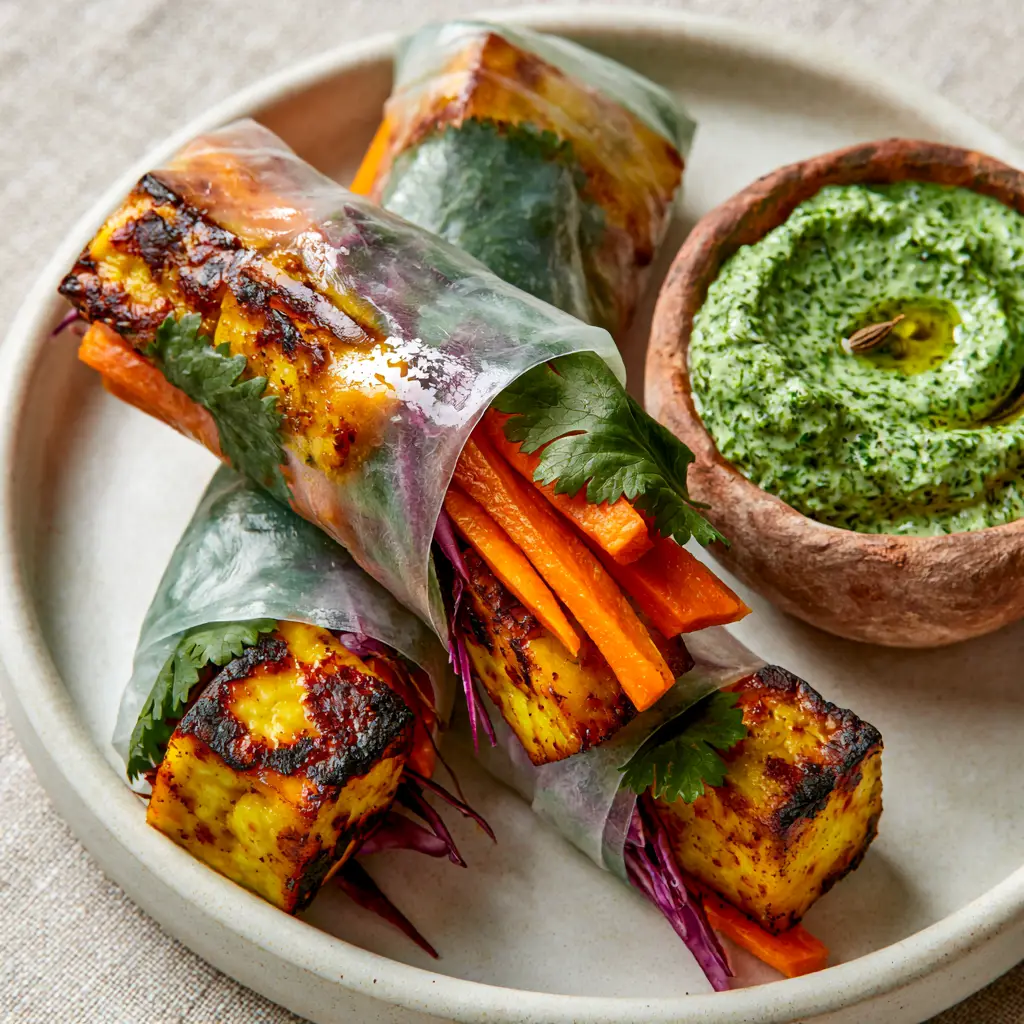
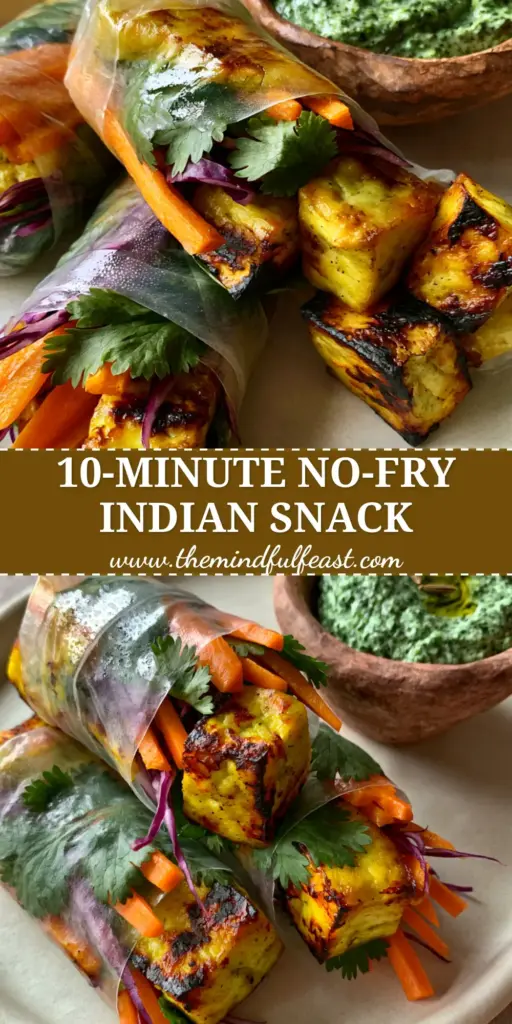
Visually, these rolls are a masterpiece of color and texture. The thin rice paper acts as a window, showcasing bright orange julienned carrots, deep emerald cilantro sprigs, and the charred edges of spiced paneer. Whether you are looking for a light lunch or a show-stopping appetizer, this fusion dish is designed to impress both the palate and the eyes.
The secret to this recipe lies in the contrast between the cold, crisp raw vegetables and the warm, pan-seared protein. Accompanied by a thick, neon-green mint chutney served in a rustic clay bowl, these rolls are as fun to make as they are to eat. Let’s dive into how you can recreate this restaurant-quality dish in your own kitchen.
Why You Will Crave These Indian-Inspired Summer Rolls
- Texture Symphony: Experience the transition from the soft, chewy rice paper to the crisp matchstick vegetables and the firm, juicy paneer.
- Aromatic Spice Profile: The paneer is infused with a custom tikka blend, providing a smoky heat that is perfectly balanced by the cooling mint dip.
- Visual Brilliance: The rainbow of colors—purple, orange, green, and gold—makes these a perfect fit for a high-end adult lunchable idea or dinner party.
- Nutrient Dense: Packed with raw fiber and high-quality vegetarian protein, this is a meal that leaves you feeling energized rather than weighed down.
Essential Components for Your Fusion Masterpiece
To achieve the specific visual and flavor profile of these Indian rice paper rolls, each ingredient must be prepared with precision. We aren’t just wrapping food; we are building a structural work of art.
The Protein Foundation
Paneer Cubes: 8 oz (225g) of firm paneer. Use a high-quality brand that won’t crumble, as you need clean edges for that specific visual “cube” look mentioned in our blueprint.
Tikka Spice Blend: A mixture of 1 tsp (5g) Kashmiri chili powder, 1/2 tsp (2.5g) turmeric, and 1 tsp (5g) garam masala. This creates the signature golden hue and charred edges when seared.
Ghee or Neutral Oil: 1 tbsp (15ml) for searing. A high smoke point is necessary to get those charred, golden edges without burning the spices.
The Garden Fresh Fillings
Rice Paper Wrappers: 8-10 large (22cm) circular sheets. These become translucent once dipped in water, revealing the vibrant interior colors.
Purple Cabbage: 1 cup (70g) finely shredded. The deep violet color provides a stunning visual contrast against the orange carrots.
Carrots & Cucumber: 1 cup (125g) each, julienned into matchsticks. For the best result, use a mandoline or a sharp knife to ensure they are thin enough to roll tightly.
Fresh Cilantro: 1/2 cup (15g) whole leaves. Keeping the leaves whole ensures they show up as “emerald sprigs” through the translucent wrapper.
The Signature Dipping Sauce
Mint Chutney: 1 cup (60g) fresh mint leaves, 1/2 cup (30g) cilantro, 1 green chili, and a squeeze of lemon. We want a “thick, textured neon-green” consistency, so avoid adding too much water during blending.
Chaat Masala: A generous pinch for garnish. This adds the final “tangy” note that defines Indian street food flavors.
Must-Have Tools for the Perfect Roll
Having the right equipment ensures your vegetables are uniform and your paneer is seared to perfection. Consistency is key for both aesthetics and mouthfeel.
- Cast Iron Skillet: The best tool for achieving those specific “charred edges” on the paneer cubes.
- Julienne Peeler or Mandoline: Essential for creating identical cucumber and carrot matchsticks that won’t puncture the delicate rice paper.
- Large Shallow Dish: A pie plate or wide bowl is needed to submerge the rice paper sheets briefly in room temperature water.
- Damp Kitchen Towel: Placing your soaked rice paper on a damp towel prevents it from sticking to the counter while you work.
Mastering the Art of Indian Rice Paper Rolls
Follow these steps carefully to ensure your rolls look exactly like the professional photography. The order of layering is crucial for the visual reveal through the rice paper.
Step 1: The Tikka Paneer Sear
Cut your paneer into uniform 1/2-inch (1.25cm) cubes. Toss them in a small bowl with the tikka spices, a pinch of salt, and a teaspoon of oil until evenly coated. Heat your skillet over medium-high heat with the remaining ghee.
Place the paneer cubes in the hot pan, ensuring they aren’t touching. Sear for 2 minutes per side until you see a deep golden-brown crust and visible charred edges. Remove from heat and let them cool slightly so they don’t tear the rice paper with residual heat.
Step 2: Prepping the Rainbow Filling
While the paneer cools, prepare your vegetables. Shred the purple cabbage as thinly as possible. Julienne your carrots and cucumber into 3-inch (7.5cm) long matchsticks. If you have extra cucumber, consider using it later for a side refreshing cucumber salad.
Step 3: Softening the Rice Paper
Fill your shallow dish with room temperature water. Take one rice paper sheet and submerge it for exactly 5-10 seconds. It should still feel slightly firm; it will continue to soften as you add the fillings. Lay it flat on your damp work surface.
Step 4: The Strategic Layering
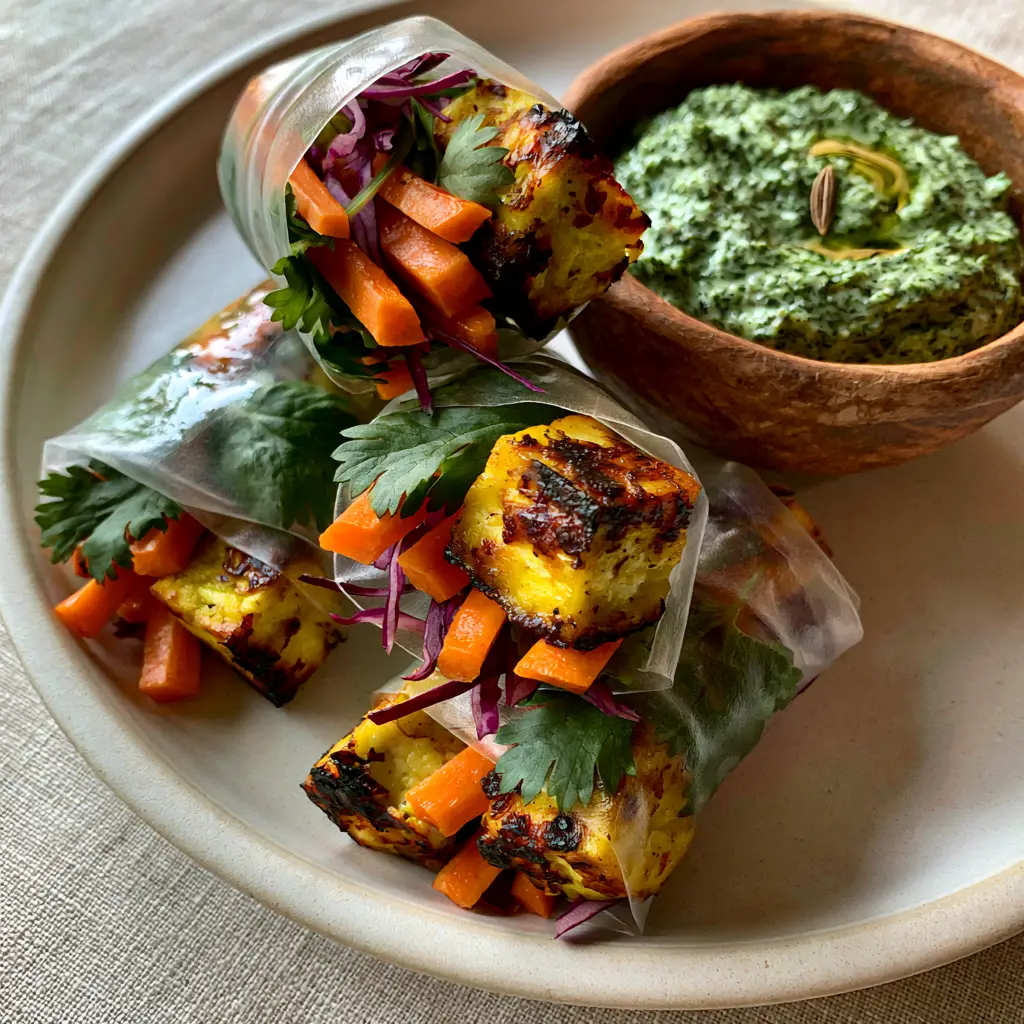
To ensure the “translucent revealing” effect, placement matters. Start by placing 2-3 whole cilantro sprigs in the center of the lower third of the paper. Layer 3-4 cubes of paneer on top of the cilantro. Follow with a small handful of purple cabbage, carrots, and cucumber matchsticks.
Step 5: The Rolling Technique
Fold the bottom of the rice paper up over the fillings, tucking it tightly. Fold in the left and right sides toward the center. Continue rolling upward tightly until a plump, sealed cylinder is formed. The rice paper will naturally stick to itself.
Step 6: Crafting the Mint Chutney
Blend the mint, cilantro, green chili, and lemon juice until a thick paste forms. Transfer to a handcrafted clay bowl. Top with a single cumin seed and a tiny swirl of oil to match the visual prompt exactly. Sprinkle the rolls with a pinch of chaat masala before serving.
Expert Tips for Success
- Don’t Over-Soak: If the rice paper is too soft when you take it out of the water, it will become gummy and tear easily. It should feel like flexible plastic when you start rolling.
- Dry Your Veggies: Pat the cucumber matchsticks dry with a paper towel. Excess moisture can cause the rolls to become soggy and lose their plump shape.
- Tightness is Key: A loose roll will fall apart when dipped. Keep tension on the paper as you roll, similar to rolling a burrito.
- Work in Batches: Only dip one rice paper sheet at a time. If you dip them all at once, they will stick together and become unusable.
How to Store and Refresh
These Indian rice paper rolls are best enjoyed immediately to appreciate the contrast in temperatures. However, if you must store them, wrap each roll individually in plastic wrap to prevent them from sticking together or drying out. They will stay fresh in the refrigerator for up to 24 hours.
To refresh a day-old roll, lightly mist it with water to rehydrate the rice paper. If you prefer a different texture, you could even try a variation of this technique with air fryer rice paper rolls for a crispy exterior.
What to Serve With This Fusion Dish
While these rolls are a complete meal on their own, they pair beautifully with other textured dishes. For a larger feast, serve them alongside a fragrant aromatic rice pilaf or a protein-packed shrimp rice bowl. The cooling nature of the mint chutney also makes these an excellent starter for spicier main courses like a tikka masala or curry.
Frequently Asked Questions
Yes, traditional rice paper is made from rice flour and water, making it naturally gluten-free. Just ensure your tikka spice blend does not contain any wheat-based anti-caking agents.
While best served fresh, you can make them 2-4 hours in advance. Wrap each roll individually in plastic wrap and cover with a damp paper towel to prevent the rice paper from hardening.
Avoid over-soaking the paper in water; it should only be submerged for about 5-10 seconds. Also, ensure your vegetable matchsticks are not too sharp or long, as they can puncture the skin.
Use a heavy-bottomed cast iron skillet and ensure the pan is hot before adding the paneer. Do not crowd the pan, which allows the cubes to sear rather than steam.
The Ultimate Indian Rice Paper Rolls Recipe
Indian Rice Paper Rolls with Tikka Spiced Paneer and Fresh Mint Chutney
Ingredients
Equipment
Method
- Toss paneer cubes with spices and sear in a hot cast iron skillet with ghee until edges are golden and charred.
- Dip one rice paper sheet in room temperature water for 5-10 seconds until flexible.
- Layer cilantro, paneer, and vegetables. Fold sides in and roll tightly from the bottom up.
Notes
Keep the paneer cubes uniform for even searing and easier rolling.
Bring the Fusion Flavors Home
Creating these Indian rice paper rolls is an exercise in both culinary skill and artistic expression. The combination of the smoky paneer and the fresh, raw vegetables provides a balanced meal that is as healthy as it is beautiful. We hope this recipe inspires you to experiment with fusion flavors in your own kitchen.
If you enjoyed this recipe, please leave a comment below and let us know how your rolls turned out! Don’t forget to share your creations on Pinterest and tag us so we can see your beautiful work. Happy cooking!