Mochi is more than just a sweet treat; it is a tactile experience that defines the essence of Japanese confectionery. When you pull a piece of ultra-soft, snow-white mochi, you should witness an incredible, elastic stretch and a translucent ‘Q-bounce’ texture that feels as good as it looks. The secret to capturing that perfect social-media-worthy pull lies in the precise gelatinization of glutinous rice starch.
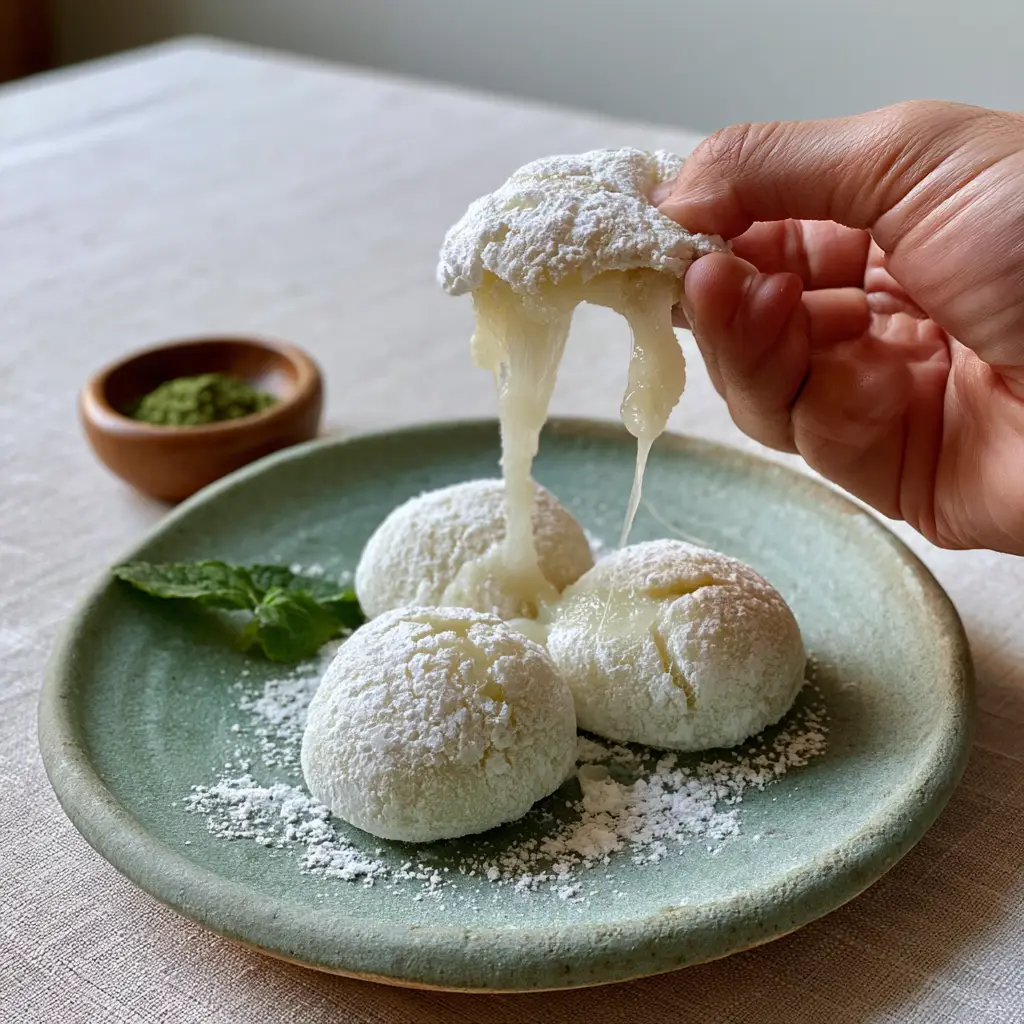
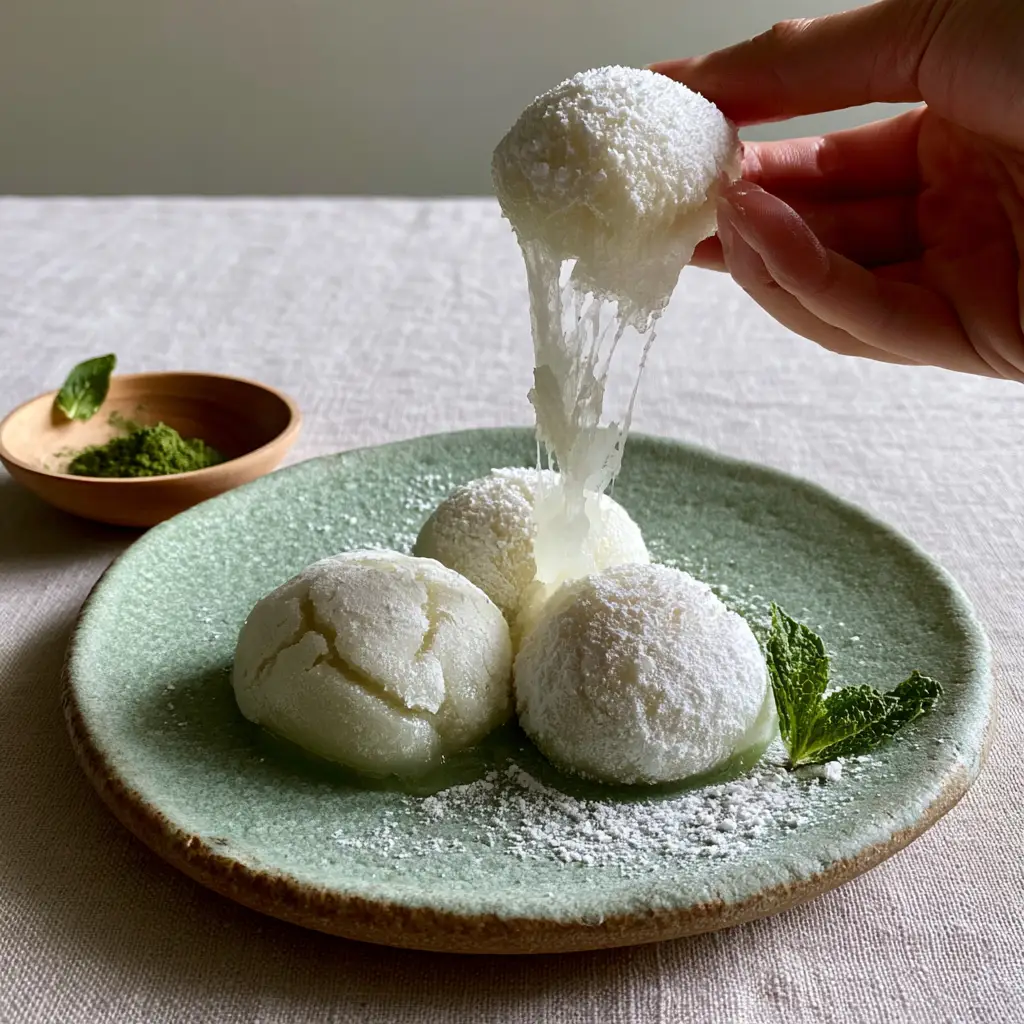
In this guide, we are recreating the exact aesthetic of a handcrafted dessert experience. Imagine three perfectly round, pillowy mounds resting on a matte-textured sage green ceramic plate, catching the soft natural side-lighting of a quiet afternoon. The fine, velvet-like coating of white cornstarch not only prevents sticking but adds a sophisticated matte finish to the glossy, sticky dough underneath.
Whether you are a seasoned pastry chef or a home cook looking to explore Disney-inspired food favorites like these rice cakes, mastering the dough is your first step. We will walk through the culinary science of amylopectin and the physical techniques required to achieve that legendary elasticity.
Why This Ultra-Soft Mochi Recipe Stands Out
- Perfect Elasticity: We focus on the “Q-bounce” (a culinary term for the ideal chewy-yet-firm resistance) using specific hydration ratios.
- Visual Precision: This recipe results in a snow-white, translucent dough that mirrors high-end artisanal confectionery.
- Tactile Texture: The combination of a matte cornstarch exterior and a sticky, glossy interior provides a dual-sensory experience.
- Scientific Ratios: We balance sugar and water to ensure the dough remains soft and pliable for days rather than hours.
The Essential Ingredients for Translucent Rice Dough
To achieve the look of the matte sage green ceramic plate presentation, every ingredient must be of the highest quality. We aren’t just making a snack; we are engineering a texture that responds to the touch.
Glutinous Rice Flour (Mochiko or Shiratamako): 1.5 cups (200g). This is the foundation of the stretch; the high amylopectin content provides the “Q-bounce” that regular rice flour lacks.
Granulated Sugar: 1/3 cup (65g). Beyond sweetness, sugar acts as a humectant, keeping the water molecules trapped in the starch network so the mochi stays soft.
Filtered Water: 1 cup (240ml). Water is the catalyst for gelatinization; using filtered water ensures a clean, snow-white appearance without mineral discoloration.
Fine White Cornstarch: 1/2 cup (60g) for dusting. This provides the velvet-like coating that catches the light and creates that beautiful contrast against the sticky dough.
Matcha Powder & Mint Leaf: 1 tsp (2g) matcha and one fresh leaf for garnish. These provide the pop of color in the tiny wooden bowl next to your sage green plate.
Professional Tools for Sticky Dough Success
Achieving a handheld, smartphone-photo-ready result requires the right equipment to handle the high-viscosity dough. You don’t need a traditional wooden mallet, but you do need precision.
A heat-proof glass bowl is essential for even heat distribution during the cooking process. You will also need a silicone spatula, which is naturally non-stick, allowing you to fold the dough until it reaches its maximum elastic state. A fine-mesh sieve is required to apply the cornstarch dusting evenly, preventing clumps and ensuring that “velvet” look.
If you are planning to serve this as part of a larger spread, perhaps alongside adult lunchable ideas, having a clean, neutral-toned linen tablecloth will provide the perfect backdrop for the soft natural daylight to highlight the mochi’s translucency.
Mastering the Microwave Mochi Technique
1. Hydrating the Glutinous Rice Starch
In your heat-proof glass bowl, whisk together the 1.5 cups (200g) of glutinous rice flour and 1/3 cup (65g) of granulated sugar. Slowly stream in the 1 cup (240ml) of water while whisking constantly to ensure no lumps remain.
The mixture should look like a thin, white liquid at this stage. This hydration phase is critical; if the starch isn’t fully saturated, the final mochi will have a grainy texture rather than a smooth, snow-white finish.
2. The Controlled Gelatinization Process
Cover the bowl loosely with plastic wrap and microwave on high for 2 minutes. Remove the bowl and use your silicone spatula to stir the dough vigorously. You will notice the edges becoming translucent while the center remains opaque.
Continue to microwave in 30-second intervals, stirring between each, until the entire mass is translucent and incredibly sticky. The dough should show an elastic stretch when you lift the spatula—this is the “Q-bounce” beginning to form.
3. Achieving the Velvet-Like Coating
Generously dust a clean work surface with the fine white cornstarch. Turn the hot dough onto the starch. Use a sieve to dust the top of the dough as well, ensuring every inch of the glossy, sticky surface is covered in the matte white powder.
While the dough is still warm (but safe to touch), pinch off three equal portions. Roll them between your palms to create perfectly round, pillowy mounds. As you work, you may see small, delicate cracks in the starch coating—this is a sign of a perfectly tensioned dough ball.
Expert Tips for Success
- Temperature Control: Shape the dough while it is warm. Once the mochi cools completely, the starch molecules begin to retrogress, making it harder to achieve that smooth, round shape.
- Sifting is Non-Negotiable: Always sift your cornstarch. Clumpy starch will ruin the “social media snap” aesthetic by creating jagged shadows on the surface of the dough.
- Avoid Humidity: Mochi is sensitive to moisture. Work in a dry environment to ensure the cornstarch remains a fine powder rather than turning into a paste on the dough’s surface.
- Flavor Infusions: While this recipe focuses on the snow-white visual, you can add a drop of extract to the water if you want a subtle flavor profile.
Storage, Reheating, and Texture Preservation
Mochi is best enjoyed immediately when the stretch is at its peak. However, if you have leftovers, wrap each individual mound tightly in plastic wrap to prevent the air from drying out the dough. Store at room temperature for up to 2 days.
Do not refrigerate the mochi, as the cold temperature causes the starch to crystallize and turn hard. If you must store it longer, freezing is a better option. When ready to eat, let it thaw at room temperature to regain its pillowy softness.
What to Serve with Your Pillowy Rice Cakes
The delicate, neutral flavor of white mochi makes it a versatile companion to many dishes. For a traditional pairing, serve it with a tiny wooden bowl of matcha powder and a single mint leaf, as seen in our visual blueprint. This creates a beautiful contrast against the sage green plate.
If you are hosting a lunch and looking for quick dinner recipes to precede your dessert, consider a light vegetable dish. Mochi’s chewy texture pairs surprisingly well after a crisp cucumber salad recipe. The contrast between the crunchy cucumbers and the elastic rice dough is a culinary delight. For those who enjoy a variety of textures, including mochi in a spread with banana quark balls offers a fascinating study in different types of dough and batters.
Frequently Asked Questions
No, regular rice flour will produce a crumbly, non-elastic cake. You must use glutinous rice flour (Mochiko or Shiratamako) to achieve the signature stretch.
Use a generous amount of sifted cornstarch or potato starch. Dust your hands and the work surface thoroughly to manage the sticky dough.
The ‘Q-bounce’ comes from the high amylopectin content in glutinous rice flour. When heated with water, these starches gelatinize into a highly elastic and chewy network.
Mochi hardens as it loses moisture or when refrigerated. Keep it airtight at room temperature, or freeze it and thaw when ready to eat to maintain softness.
If the dough is still opaque, the starch hasn’t fully cooked. Continue microwaving in 30-second intervals until it becomes semi-transparent and very sticky.
The Ultimate Homemade Mochi Recipe Card

Mochi: The Ultimate Guide to Achieving that Perfect Elastic Stretch and Q-Bounce Texture
Ingredients
Equipment
Method
- In a heat-proof glass bowl, whisk the glutinous rice flour, sugar, and water until a smooth, lump-free liquid forms.
- Cover loosely with plastic wrap and microwave on high for 2 minutes. Stir vigorously with a silicone spatula.
- Microwave in 30-second intervals until the dough is translucent, glossy, and shows a strong elastic stretch.
- Turn the hot dough onto a surface generously dusted with sifted cornstarch. Dust the top of the dough.
- Pinch off three portions and roll into round, pillowy mounds. Place on a matte sage green ceramic plate.
Notes
Always sift the cornstarch to ensure a velvet-like texture on the surface.
Conclusion: Capture the Stretch
Mastering the art of mochi is about understanding the balance between moisture and starch. By following this guide, you have created a dessert that is not only edible but a work of art worthy of a handheld smartphone photo. The matte sage green ceramic plate and neutral linen provide the stage for your ultra-soft, snow-white creation.
We invite you to share your results and tag us in your “stretch” photos! If you enjoyed this tactile culinary journey, be sure to follow us on Pinterest for more visually stunning recipes. Leave a comment below and let us know—how did your “Q-bounce” turn out?


