Mastering the perfect Air Fryer Tilapia is a culinary game-changer for anyone seeking a high-protein dinner that delivers on both texture and flavor. This recipe transforms humble white fish into a gourmet experience, featuring craggy, golden-brown crispy edges and a succulent, flaky interior that melts in your mouth.
Forget the heavy breading of traditional fried fish; we are focusing on a sophisticated, spice-rubbed technique that highlights the natural sweetness of the tilapia. By utilizing the rapid convection heat of the air fryer, we achieve a glistening buttery sheen and charred edges that look as incredible as they taste.
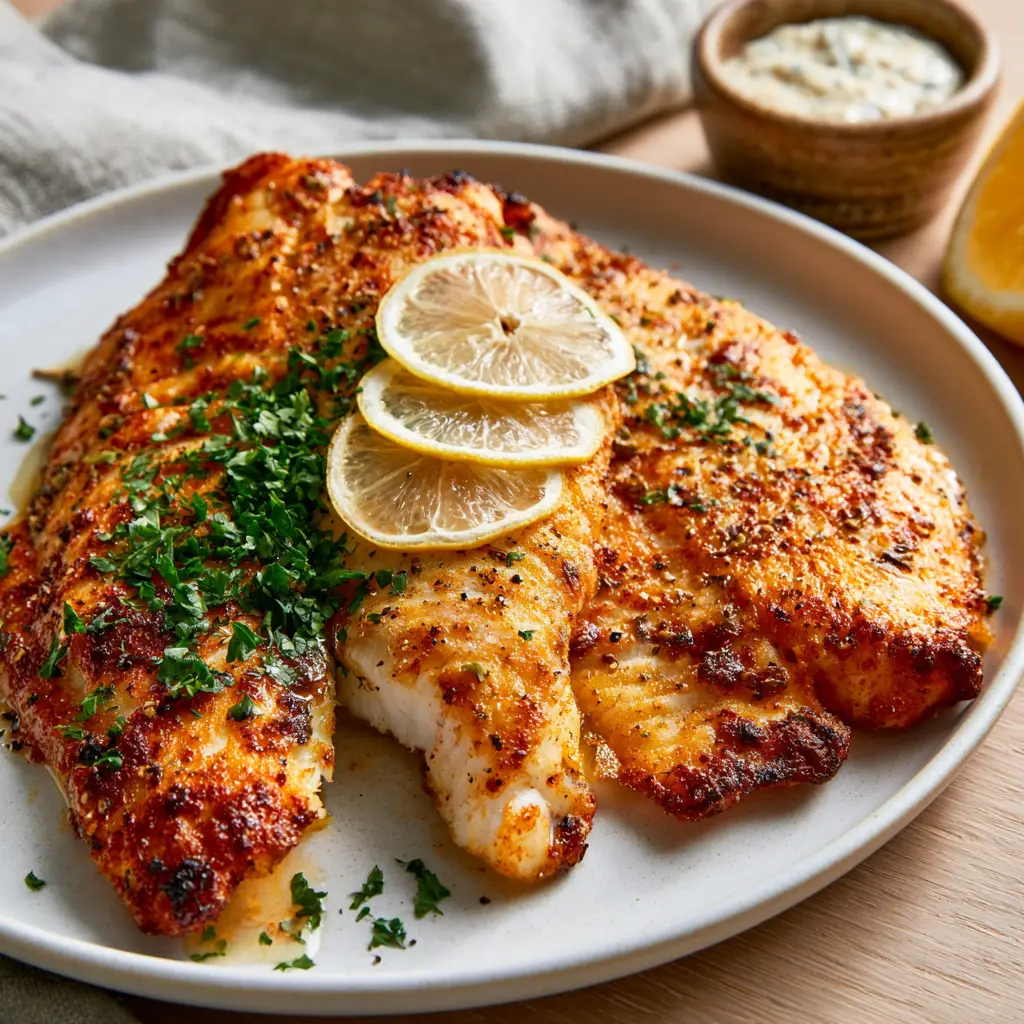
Whether you are a seasoned home cook or just beginning your air frying journey, this Air Fryer Tilapia will become your new weeknight staple. The combination of smoked paprika, cracked black pepper, and dried oregano creates a vibrant crust that perfectly complements the juicy, translucent lemon slices layered on top.
Why This Crispy Air Fryer Tilapia Recipe Works
- Zero Breading, Maximum Crunch: We rely on the Maillard reaction and a precise oil-to-spice ratio to create a crispy exterior without the need for flour or breadcrumbs.
- Perfectly Flaky Texture: The air fryer’s intense circulation locks in moisture, ensuring the white fish interior remains juicy rather than drying out.
- Visually Stunning Presentation: With vibrant smoked paprika dusting and bright green finely chopped fresh parsley, this dish looks like it came from a high-end bistro.
- Under 15 Minutes: This is the definition of a fast, healthy meal that doesn’t sacrifice the “wow” factor for speed.
The Anatomy of Flavor: Essential Ingredients
To achieve the specific visual and flavor profile of this Air Fryer Tilapia, each ingredient plays a critical role in the culinary science of the dish. We balance heat, fat, and acidity to create a well-rounded palate.
Tilapia Fillets: You will need 2 large tilapia fillets (about 6oz (170g) each). Choose fillets that are uniform in thickness to ensure even cooking and that signature flaky white fish interior.
Avocado Oil: Use 1 tbsp (15ml) of avocado oil as your foundational invisible ingredient. Its high smoke point allows the air fryer to “sear” the fish at high temperatures without smoking, creating those charred edges.
Melted Unsalted Butter: 2 tbsp (30g) of melted butter is used as a finishing glaze. This provides the glistening sheen seen in the recipe photos and adds a rich, velvety mouthfeel to the lean fish.
Smoked Paprika: 1 tsp (2g) of smoked paprika offers a deep red hue and a subtle earthiness. It is essential for achieving the “golden-brown” visual appeal without overcooking the fish.
Cracked Black Pepper & Kosher Salt: Use 1/2 tsp (1g) of freshly cracked black pepper for a sharp bite and 1/2 tsp (3g) of salt. The salt is crucial for drawing out surface moisture, which facilitates the crisping process.
Dried Oregano: 1/2 tsp (0.5g) of dried oregano adds an aromatic, Mediterranean-inspired woodiness that cuts through the richness of the butter glaze.
Fresh Garnishes: You will need one lemon sliced into three paper-thin translucent slices, plus one fresh lemon wedge for serving. A generous 1 tbsp (4g) of finely chopped fresh parsley provides the final pop of color.
Creamy Tartar Sauce: Serve with 1/4 cup (60ml) of high-quality tartar sauce in a small rustic ramekin to balance the spice with cool, tangy creaminess.
Must-Have Tools for the Perfect Sear
Achieving a professional-grade Air Fryer Tilapia requires more than just the ingredients; you need the right environment for convection cooking. A standard basket-style or toaster-oven-style air fryer works perfectly for this recipe.
A sharp mandoline or a very steady hand with a chef’s knife is required to get those paper-thin, translucent lemon slices. You will also want a flexible fish spatula to flip the fillets gently without breaking the delicate, flaky structure of the cooked fish.
Finally, using a small pastry brush is the best way to apply the melted butter glaze. This ensures an even coating that creates a glistening sheen across the craggy exterior of the fish.
Step-By-Step Instructions for Air Fryer Success
Preparing the Fish for Maximum Crisp
Start by patting your tilapia fillets extremely dry with paper towels. Removing surface moisture is the most important step; if the fish is damp, it will steam rather than sear, and you will miss out on those golden-brown crispy edges.
In a small bowl, whisk together the avocado oil, smoked paprika, cracked black pepper, dried oregano, and salt. Rub this mixture onto both sides of the fillets, ensuring the seasoning is deeply embedded into the natural crevices of the fish meat.
The High-Heat Air Frying Process
Preheat your air fryer to 400°F (200°C). Once hot, place the fillets in the basket in a single layer, ensuring they do not touch. This allows the hot air to circulate around the entire surface, creating a “craggy” exterior on all sides.
Air fry for 8-10 minutes. At the 6-minute mark, carefully flip the fillets using your fish spatula. You are looking for a visual cue of deep golden-brown coloring and edges that look slightly charred and crispy.
The Finishing Butter Glaze and Garnish
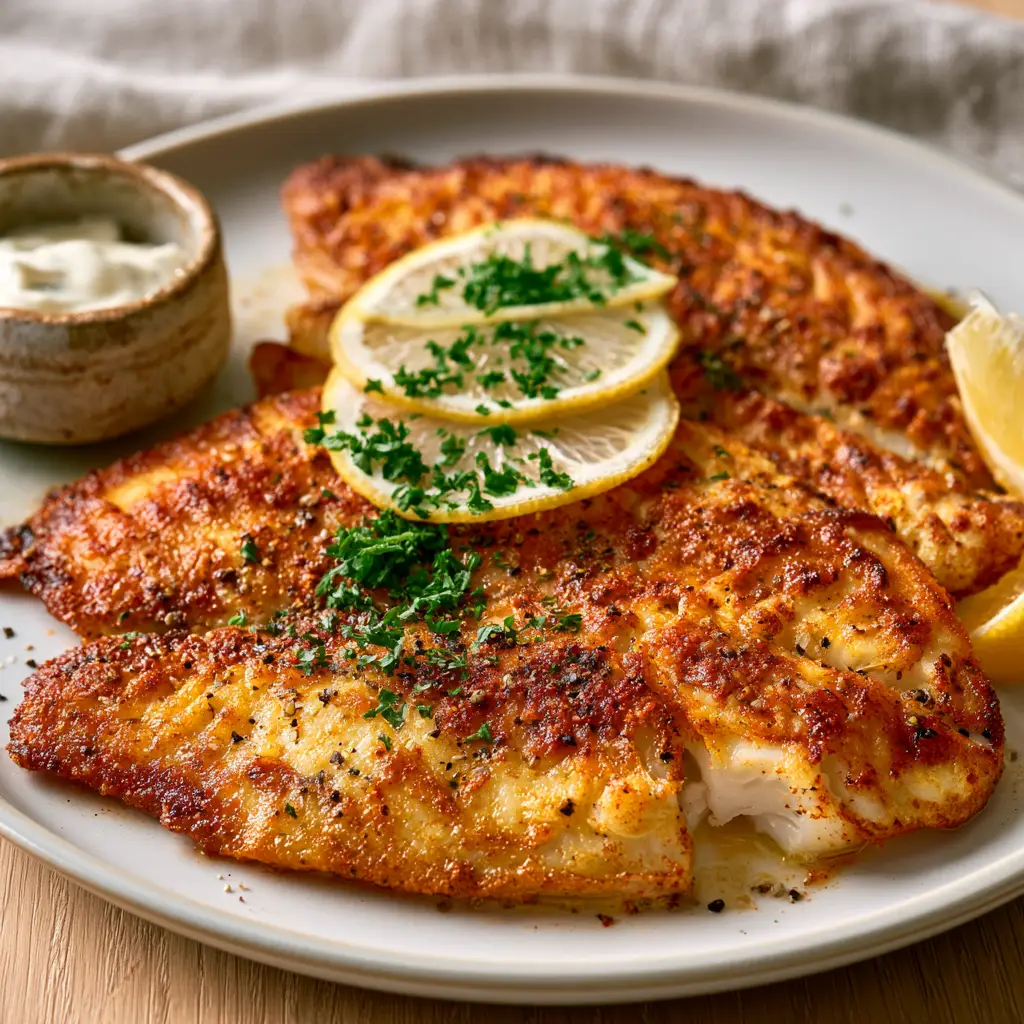
Immediately after removing the fish from the air fryer, brush the tops of the hot fillets with the melted butter glaze. The residual heat will cause the butter to meld with the spices, creating a glistening, professional aesthetic.
Layer the three paper-thin translucent lemon slices on top of the fillets. The warmth of the fish will slightly soften the lemons, releasing their oils. Finish with a generous dusting of the finely chopped fresh parsley across the entire plate.
Expert Tips for a Flawless Result
- Don’t Overcrowd: If you are cooking for a crowd, work in batches. Overcrowding the basket drops the temperature and prevents the edges from becoming crispy.
- Check the Internal Temp: Tilapia is perfectly cooked at 145°F (63°C). Use a meat thermometer to ensure the interior is juicy and flaky rather than rubbery.
- The “Flake” Test: Gently press a fork into the thickest part of the fillet; if it separates easily along the natural lines of the muscle, it is ready to serve.
- Freshness Matters: If using frozen tilapia, ensure it is completely thawed and dried before seasoning to avoid a “fishy” flavor and soggy texture.
Smart Storage and Reheating Guide
Air Fryer Tilapia is best enjoyed immediately to appreciate the contrast between the crispy edges and soft interior. However, you can store leftovers in an airtight container in the refrigerator for up to 2 days.
To reheat, avoid the microwave, as it will make the fish rubbery and soft. Instead, place the fillets back into the air fryer at 350°F (175°C) for 3-4 minutes until warmed through and the exterior recrisps.
We do not recommend freezing the cooked tilapia, as the delicate texture of the white fish will degrade significantly upon thawing and reheating.
What to Serve With Air Fryer Tilapia
To turn this into a complete feast, pair your fish with vibrant, texture-rich sides. If you’re looking for a low-carb option, these Cheesy Zucchini Tots provide a delightful crunch that mimics the fish’s exterior.
For a more substantial dinner, serve the tilapia alongside a refreshing Canned Tuna Bowl-inspired salad or some zesty Sheet Pan Chicken Fajitas if you’re hosting a multi-protein surf-and-turf night.
If you enjoy global flavors, the smoky notes of this fish pair beautifully with the spices found in Peruvian Chicken green sauce. This Air Fryer Tilapia is versatile enough to fit into almost any meal plan.
Frequently Asked Questions
Yes, but for the best crispy edges, it is better to thaw the fillets first and pat them completely dry. If cooking from frozen, add 3-5 minutes to the cook time and check for an internal temperature of 145°F.
Preheating the air fryer and ensuring the fillets are well-coated in oil (like avocado oil) prevents sticking. You can also lightly grease the basket or use a piece of perforated parchment paper.
Yes! Tilapia is a lean source of protein. By using an air fryer and a small amount of oil/butter instead of deep frying with heavy breading, you significantly reduce the calorie and fat content.
400°F (200°C) is the ideal temperature. This high heat quickly browns the exterior and creates charred edges before the delicate white interior has a chance to overcook and dry out.
The most common reason is excess moisture. If the fish isn’t patted dry with paper towels, it will steam. Also, ensure you aren’t overcrowding the basket; air needs to circulate to create that ‘fryer’ effect.
The Ultimate Crispy Air Fryer Tilapia Recipe
Air Fryer Tilapia: The Ultimate Crispy Golden-Brown Fillets
Ingredients
Equipment
Method
- Pat tilapia fillets extremely dry with paper towels. Whisk avocado oil, paprika, pepper, oregano, and salt together, then rub evenly onto both sides of the fish.
- Preheat air fryer to 400°F (200°C). Place fillets in the basket in a single layer. Cook for 8-10 minutes, flipping halfway through, until edges are golden-brown and charred.
- Brush the hot fillets with melted butter for a glistening sheen. Top with translucent lemon slices and fresh parsley. Serve with tartar sauce and a lemon wedge.
Notes
Don't skip patting the fish dry; it's the secret to the crispy exterior without breading.
Join the Community and Share Your Creations!
This Air Fryer Tilapia is proof that healthy eating can be incredibly indulgent and visually stunning. We can’t wait to see your golden-brown fillets and glistening butter glazes at home!
If you loved this recipe, please leave a comment below and let us know how yours turned out. Don’t forget to follow us on Pinterest for more daily recipe inspiration and kitchen tips!
Looking for more quick meals? Check out our other favorites like these Cuban Picadillo recipes for a flavorful weeknight win.