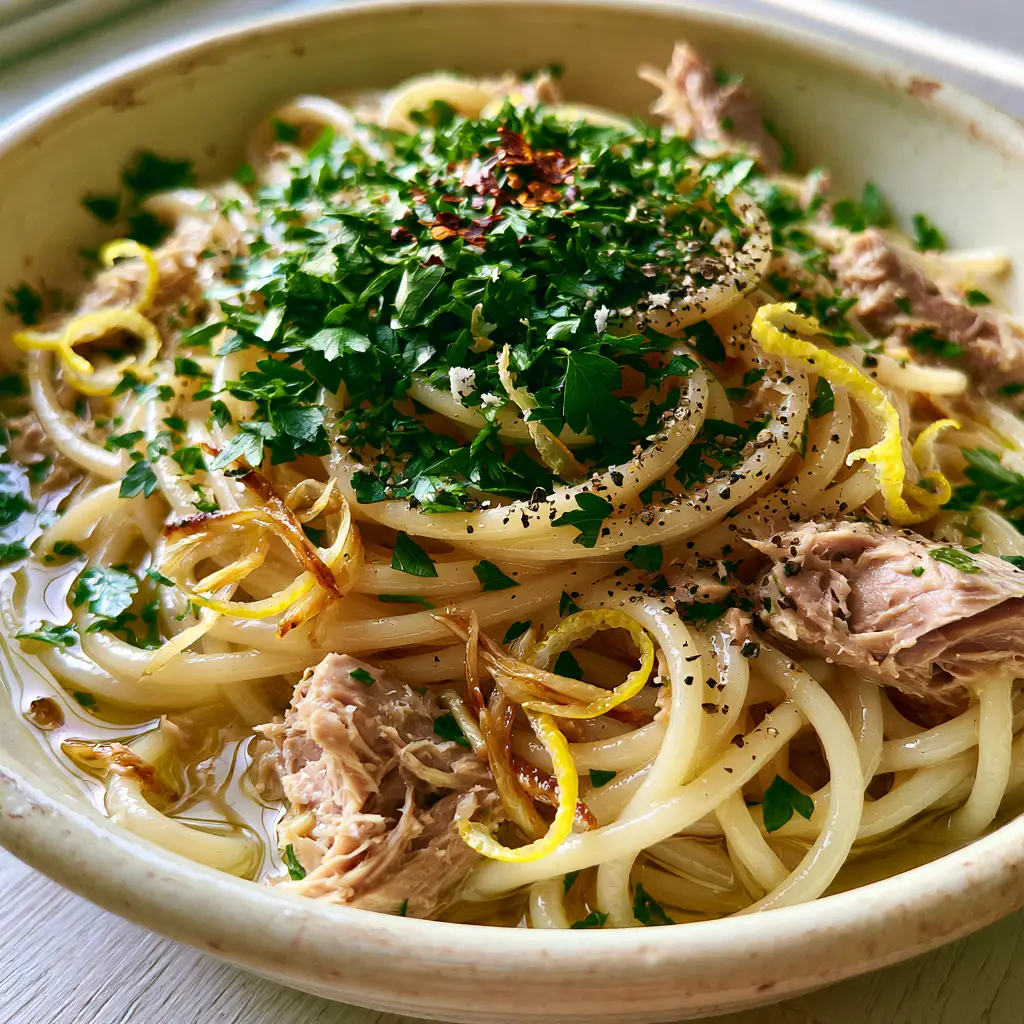
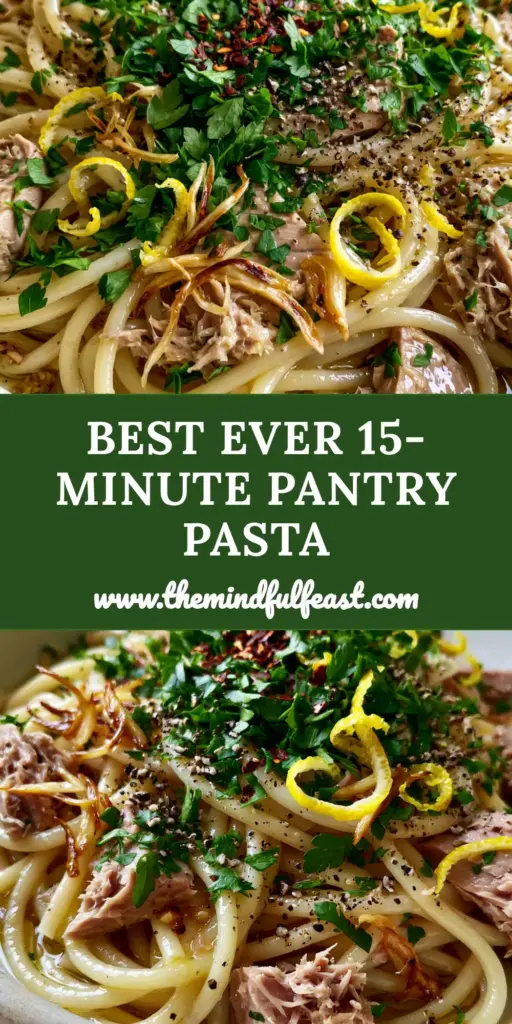
This canned tuna pasta is the ultimate intersection of pantry-staple convenience and high-end Mediterranean flavor. Forget the heavy, mayo-laden salads of the past; this dish is defined by its glossy, translucent olive oil sauce and vibrant aromatics.
Every bite delivers a perfect balance of textures, from the firm snap of al dente spaghetti to the moist, meaty flakes of premium tuna. We aren’t just opening a tin; we are building a sophisticated flavor profile using golden-sautéed garlic slivers and bright citrus notes.
By following this guide, you will master the art of emulsification, ensuring your sauce clings to every strand of pasta rather than pooling at the bottom of the bowl. This is a restaurant-quality meal that you can realistically whip up in under 20 minutes.
Why This Elegant Canned Tuna Pasta Works
- The Perfect Texture Contrast: We use high-quality canned tuna to ensure large, moist chunks that contrast beautifully against the silky, oil-slicked spaghetti.
- Aromatic Depth: Instead of minced garlic, we use thin slivers that turn a perfect golden-brown, providing a nutty sweetness without the harsh bite.
- Bright Visual Appeal: The dish is finished with vibrant yellow lemon zest curls and a heavy scatter of fresh flat-leaf parsley for a pop of color and freshness.
- Balanced Heat: A precise pinch of red chili flakes adds a gentle, warming glow that cuts through the richness of the extra virgin olive oil.
The Secret to Moist Flakes and Glossy Noodles
1 lb (450g) Spaghetti: The foundation of the dish. Look for a bronze-cut pasta that has a rougher surface, which helps the olive oil and lemon sauce adhere better.
2 cans (approx. 320g) Tuna in Olive Oil: For the best results, use tuna packed in oil rather than water. This keeps the fish moist and flaky, providing a much richer mouthfeel in the final canned tuna pasta.
1/2 cup (120ml) Extra Virgin Olive Oil: This isn’t just for sautéing; it is the base of your sauce. Use a high-quality oil with a peppery finish to complement the seafood.
4 cloves Garlic: Peeled and cut into thin, translucent slivers. These will be sautéed until golden-brown to provide the signature visual and flavor profile of the dish.
1 tbsp (6g) Lemon Zest Curls: Use a zester or a small knife to create bright yellow curls. The oils in the zest provide a more intense citrus aroma than the juice alone.
1/4 tsp (0.5g) Red Chili Flakes: Just enough to provide a background hum of heat without overwhelming the delicate flavors of the lemon and garlic.
1/2 cup (15g) Fresh Flat-Leaf Parsley: Finely chopped. Parsley acts as a structural element here, adding a grassy freshness that balances the savory tuna.
1 tsp (2g) Coarse Cracked Black Pepper: Freshly cracked pepper provides a larger grain size, which adds visual texture and sharp bursts of flavor.
Kosher Salt: Essential for the pasta water. The water should be “salty like the sea” to season the spaghetti from the inside out.
Essential Tools for the Perfect Al Dente Finish
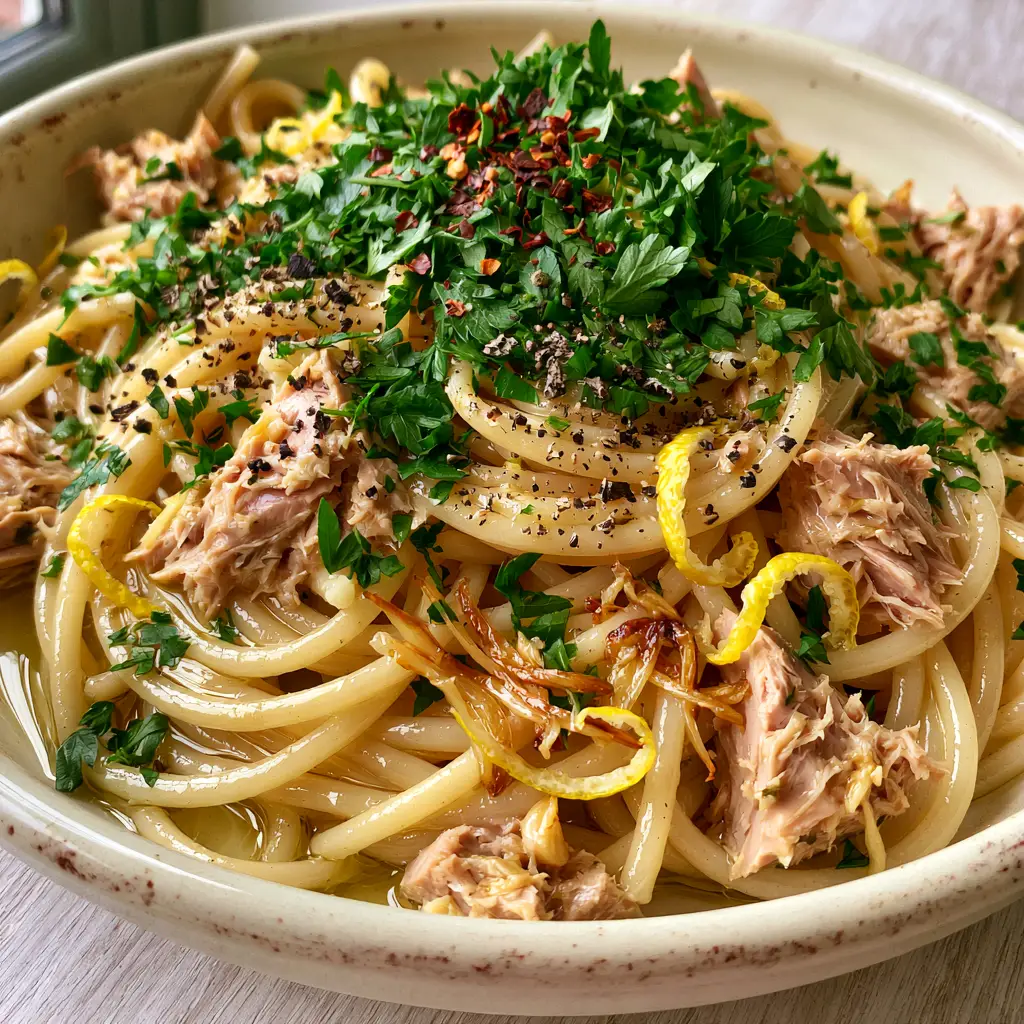
To achieve the visual result seen in professional food photography, you need a large pasta pot to allow the spaghetti to move freely. A wide, shallow skillet or sauté pan is also necessary to properly emulsify the sauce and toss the noodles.
A microplane or zester is crucial for those bright yellow lemon curls. Finally, use a set of stainless steel tongs to swirl the pasta into the bowl, creating that “chef-style” nest appearance.
How to Make Restaurant-Quality Tuna Spaghetti at Home
1. Achieving the Perfect Al Dente Foundation
Bring a large pot of water to a rolling boil and add at least 2 tablespoons (30g) of kosher salt. Submerge the 1 lb (450g) of spaghetti and cook for 1-2 minutes less than the package directions suggest.
Visual Cue: The pasta should be flexible but still have a firm, white core when bitten into. Reserve 1 cup (240ml) of the starchy pasta water before draining; this is the liquid gold that creates your glossy sauce.
2. Infusing the Olive Oil
While the pasta cooks, heat the 1/2 cup (120ml) of extra virgin olive oil in your large skillet over medium-low heat. Add the thin slivers of garlic and the red chili flakes.
Sensory Cue: Sauté the garlic until the slivers turn a light, golden-brown color. They should smell nutty and toasted, not burnt or acrid. If they brown too quickly, remove the pan from the heat immediately.
3. Emulsifying the Sauce
Add 1/2 cup (120ml) of the reserved pasta water to the oil and garlic mixture, whisking or shaking the pan vigorously. This creates a glossy, translucent emulsion that will coat the canned tuna pasta perfectly.
Add the cooked spaghetti to the pan and toss constantly over medium heat. You will see the liquid transform into a thin, shimmering sauce that clings to every strand of pasta.
4. Incorporating the Tuna and Aromatics
Gently fold in the drained tuna, keeping the flakes as large as possible. If you stir too vigorously, the tuna will disintegrate into a paste—we want moist, distinct chunks.
Add the finely chopped flat-leaf parsley and the bright yellow lemon zest curls. Give it one final, gentle toss to distribute the ingredients without breaking up the fish.
Expert Culinary Cues for the Best Pantry Dinner
- Quality Matters: Since this is a pantry meal, the quality of your tuna defines the dish. Opt for “Tonno” style tuna in jars or tins for the best texture.
- The Starch Secret: Never skip the pasta water. The starch acts as a binder between the oil and the noodles, preventing a greasy finish.
- Zest vs. Juice: We use zest curls for the primary flavor. If you want more acidity, add a squeeze of fresh lemon juice only at the very end to keep the flavors bright.
- Cold Tuna vs. Warm Pasta: You don’t need to “cook” the tuna. Just let the residual heat of the pasta warm it through to maintain that moist, flaky integrity.
Storing and Reviving Leftover Pasta
This canned tuna pasta is best served immediately while the sauce is glossy. However, leftovers can be stored in an airtight container in the refrigerator for up to 2 days.
To reheat, add the pasta to a pan with a splash of water or a drizzle of olive oil. Heat gently over low heat while tossing to re-emulsify the sauce. Avoid the microwave if possible, as it can make the tuna rubbery.
What to Serve Alongside Your Seafood Pasta
This dish is quite complete on its own, but a light, crisp side dish can elevate the entire meal. A simple arugula salad with a balsamic glaze provides a peppery bite that pairs perfectly with the lemon and garlic.
If you are looking for more seafood inspiration, you might enjoy our seared tuna steaks or our pantry-friendly canned salmon recipes. For those who prefer a bit more heat, this dish serves as a great milder alternative to our spicy rattlesnake pasta.
If you love the citrus notes here, you should also try a more classic lemon garlic pasta base which uses similar aromatics but a different protein profile.
Frequently Asked Questions about Canned Tuna Pasta
Traditional Italian seafood recipes usually avoid cheese, but a sprinkle of Pecorino Romano can work if you enjoy the saltiness. However, the lemon and garlic provide plenty of flavor on their own.
While you can, tuna in olive oil is preferred for its superior moisture and flavor. If using water-packed tuna, ensure you drain it thoroughly and perhaps add an extra tablespoon of olive oil to the sauce.
Add the tuna at the very end of the cooking process. Instead of vigorous stirring, use tongs to gently fold the tuna flakes into the pasta to keep the chunks large and moist.
Yes, it is high in protein and healthy fats from the olive oil. By using fresh parsley and lemon, you add antioxidants and vitamins to a low-cost, high-protein meal.
Long, thin noodles like spaghetti, linguine, or bucatini are best. They provide a large surface area for the glossy oil-based sauce to adhere to.
The Best Canned Tuna Pasta Recipe Card
Canned Tuna Pasta with Golden Garlic, Lemon, and Chili
Ingredients
Equipment
Method
- Cook the spaghetti in salted water until just under al dente. Reserve 1 cup (240ml) of pasta water before draining.
- Heat olive oil in a skillet and sauté garlic slivers and chili flakes until the garlic is golden-brown and fragrant.
- Add reserved pasta water to the oil and whisk to create a glossy, translucent sauce base.
- Add pasta to the skillet, tossing to coat. Fold in tuna chunks, parsley, lemon zest, and black pepper gently.
Notes
Don't over-stir the tuna to keep the flakes large and distinct.
Closing & Call to Action
Mastering this canned tuna pasta means you are always only 15 minutes away from a sophisticated, healthy dinner. With its glossy finish and bright citrus notes, it is a testament to the power of high-quality ingredients and proper technique.
If you enjoyed this recipe, please leave a comment below and let us know how your garlic slivers turned out! Don’t forget to follow us on Pinterest for more culinary inspiration and share your creations with the community.