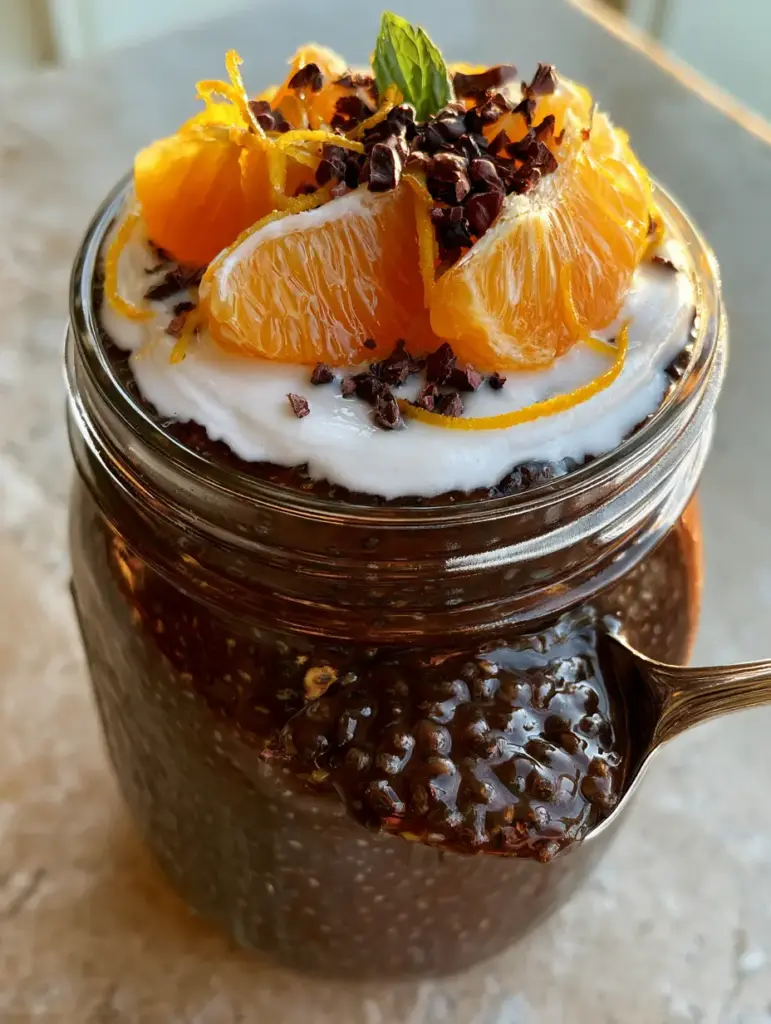
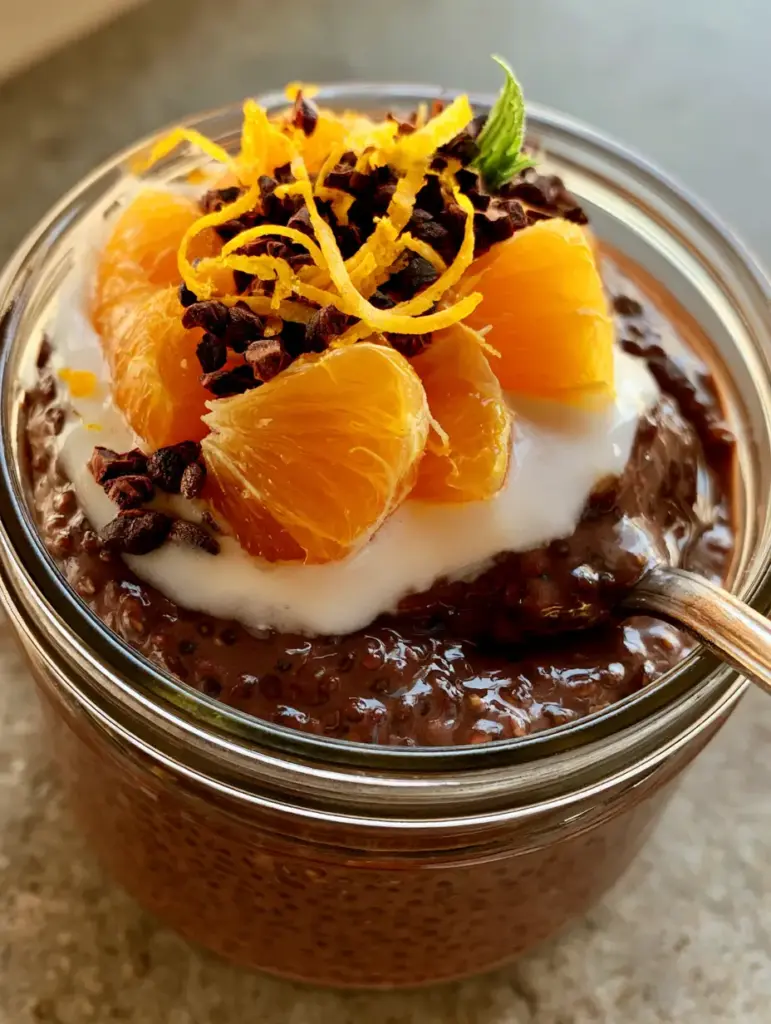
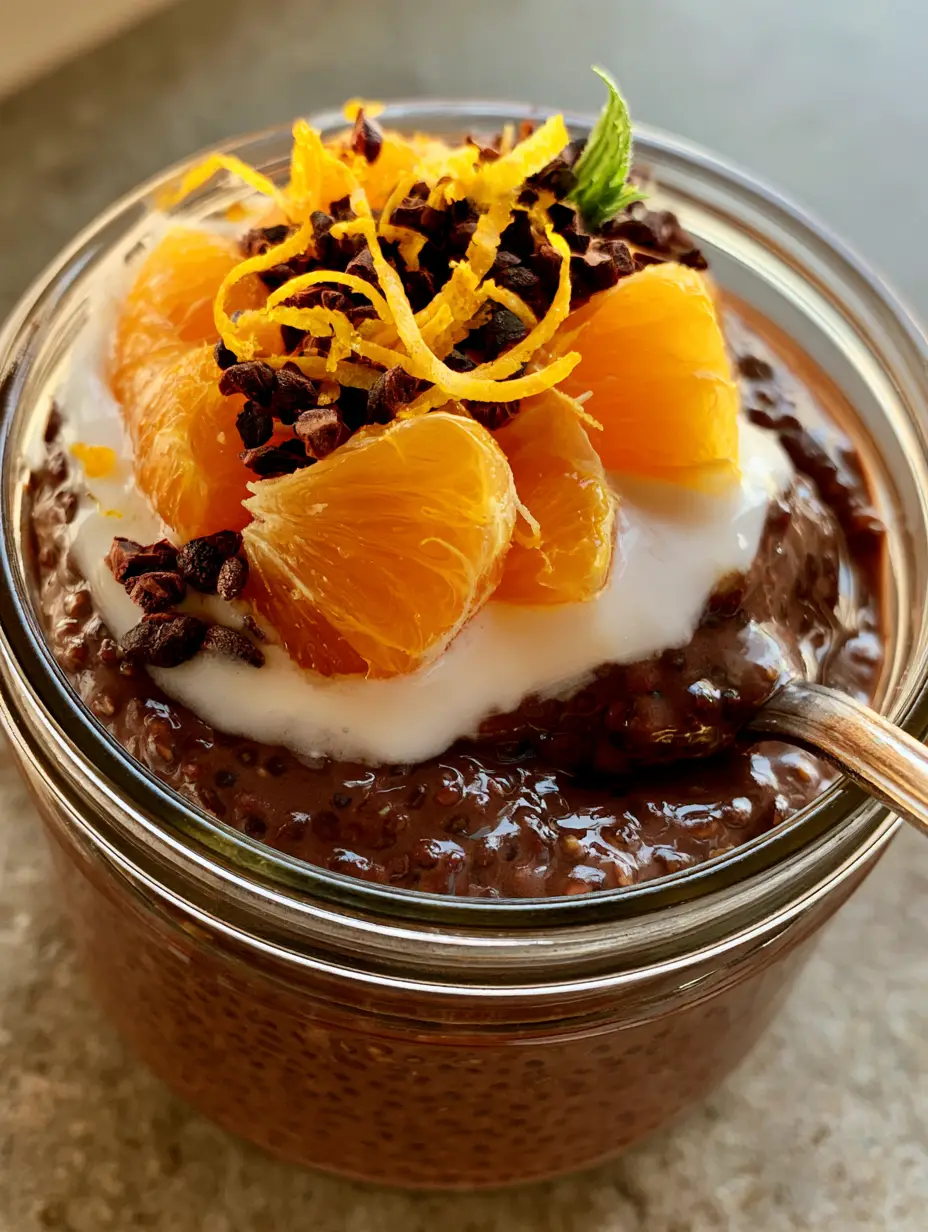
There is something undeniably magical about the combination of deep, earthy cocoa and the bright, citrusy zing of a fresh orange. This Chocolate Orange Chia Pudding isn’t just a healthy breakfast; it is a gourmet experience disguised as a meal-prep staple. Imagine plunging a silver spoon into a thick, glossy dark chocolate base, only to find a velvety swirl of coconut milk and succulent orange segments waiting for you.
Inspired by the classic flavor profile of artisanal truffles, this recipe transforms humble seeds into a luxurious treat. The visual contrast between the dark, plump chia seeds and the vibrant orange juice sacs makes this dish as beautiful as it is delicious. Whether you are looking for a fuel-packed morning start or a guilt-free dessert, this jar delivers on every sensory front.
In the world of functional foods, the Chocolate Orange Chia Pudding stands as a masterclass in texture. By following the precise ratios in this guide, you will achieve a pudding that is rich and velvety, avoiding the common pitfall of a “watery” set. Let’s dive into the culinary science of making this masterpiece in your own kitchen.
The Secrets Behind the Perfect Velvety Texture and Bright Citrus Finish
- The “Glossy Base” Secret: By using a high-quality dark cocoa powder and a touch of maple syrup, we create a light-reflecting sheen on the pudding that mimics a high-end chocolate ganache.
- Visible Freshness: We focus on “supreming” the orange to reveal those glistening juice sacs, ensuring every bite bursts with natural moisture.
- Structural Integrity: Using full-fat coconut milk for the swirl provides a heavy, creamy contrast that sits perfectly atop the dense chocolate chia base without sinking.
- Textural Contrast: The addition of raw cacao nibs provides a necessary “snap” that breaks through the softness of the hydrated seeds.
A Symphony of Flavors: What You Need for the Perfect Jar
To achieve the result seen in professional food photography, the quality of your ingredients is paramount. Each element plays a specific role in the structural and flavor profile of the Chocolate Orange Chia Pudding.
Chia Seeds: 1/4 cup (40g) of black chia seeds. These act as the thickening agent; black seeds are preferred here to maintain the “dark chocolate” visual aesthetic without the speckled look of white seeds.
Dark Cocoa Powder: 2 tbsp (15g) of Dutch-processed or dark cocoa powder. This provides the intense “midnight” hue and a smooth, non-acidic chocolate flavor that pairs perfectly with citrus.
Unsweetened Almond or Cashew Milk: 1 cup (240ml). A neutral-flavored plant milk allows the chocolate and orange to remain the stars of the show while providing the liquid necessary for hydration.
Maple Syrup: 1-2 tbsp (15-30ml). This liquid sweetener blends seamlessly into cold liquids, ensuring no gritty sugar crystals remain in your smooth pudding base.
Vanilla Extract and Sea Salt: 1/2 tsp (2.5ml) vanilla and a tiny pinch of salt. These “invisible” ingredients are culinary essentials that enhance the perception of sweetness and depth in the cocoa.
Fresh Navel Oranges: 1 large orange. We will use both the juice sacs (segments) and the zest curls for a multi-layered citrus experience that cuts through the richness.
Coconut Milk (Canned): 2 tbsp (30ml) of the thick cream from the top of a chilled can. This creates that striking white swirl that mimics the look of a professional barista’s pour.
Garnish Essentials: A few dark cacao nibs for crunch and a tiny sprig of fresh mint to provide a cooling aromatic finish and a pop of green color.
Essential Tools for This Gourmet Preparation
You don’t need a high-tech kitchen to make this Chocolate Orange Chia Pudding, but a few specific tools will help you achieve that “hyper-appetizing” look. A glass mason jar is essential for showing off the layers and the coconut swirl.
A fine-mesh zester or channel knife is required to create those elegant orange zest curls. For the segments, a sharp paring knife is non-negotiable for “supreming” the fruit. If you enjoy this level of citrus precision, you might also love the bright flavors in our crispy orange salmon bowls.
Step-by-Step Guide to Achieving a Perfectly Set Chocolate Base
Whisking the Foundation
In a medium mixing bowl, combine your chia seeds, cocoa powder, maple syrup, vanilla, and salt. Slowly pour in the plant milk while whisking vigorously. The goal here is to ensure no dry clumps of cocoa powder remain; the mixture should look like a dark, uniform chocolate milk.
The “Double Stir” Technique
Let the mixture sit at room temperature for about 10 minutes. You will notice the seeds starting to settle. Give it another thorough whisk to break up any “clumps” of seeds that have formed. This ensures that every seed has space to expand, resulting in that “plump chia seed” look described in our visual blueprint.
The Cold Set
Transfer the mixture into your glass mason jar, leaving about an inch of space at the top. Seal and refrigerate for at least 4 hours, though overnight is ideal. You will know it is ready when the pudding is thick enough to hold a spoon upright, yet still maintains a glossy, velvety sheen.
Preparing the Citrus Crown
While the pudding sets, prepare your orange. Slice off the top and bottom of the orange, then cut away the peel and white pith following the curve of the fruit. Carefully slice between the membranes to release the segments. This technique reveals the juice sacs, making the fruit look succulent and fresh.
The Final Artistic Layering
Once set, take a spoon and create a small well in the center of the pudding. Gently pour in the thick coconut milk, allowing it to swirl naturally against the dark sides of the jar. Top with your prepared orange segments, a sprinkle of cacao nibs, and those delicate zest curls. Finish with a single mint sprig for a professional touch.
Expert Tips for Success
- Avoid the “Gritty” Trap: If your cocoa powder is particularly lumpy, sift it through a fine-mesh strainer before adding the liquid to ensure a perfectly smooth finish.
- The Temperature Factor: For the most “glossy” appearance, serve the pudding slightly chilled but not ice-cold, which allows the chocolate flavors to be more prominent on the palate.
- Coconut Swirl Consistency: If your canned coconut milk is too hard, whisk it with a teaspoon of the coconut water from the bottom of the can until it reaches a “pourable cream” consistency.
- Zest Like a Pro: Only zest the orange part of the skin; the white pith underneath is bitter and will distract from the delicate sweetness of the pudding.
Shelf Life and Meal Prep Advice
This Chocolate Orange Chia Pudding is a meal-prepper’s dream. It will stay fresh and delicious in an airtight glass jar for up to 5 days in the refrigerator. However, for the best visual appeal, add the fresh orange segments and the mint sprig just before serving to prevent the fruit from releasing too much juice into the base.
While you can freeze chia pudding, the texture of the orange segments will change significantly upon thawing, becoming mushy. If you must freeze, freeze only the chocolate base and add your fresh toppings later. If you are in the mood for more chocolatey meal prep, check out our oatmeal chocolate chip cookies for a portable snack.
What to Pair With Your Decadent Pudding
This pudding is quite filling on its own, but it also pairs beautifully with other breakfast favorites. For a full brunch spread, serve it alongside some yogurt custard toast for a protein boost. If you are serving this as a dessert, it follows beautifully after a light lunch like our chicken salad sandwiches.
For those who love the “pudding” texture in other forms, you might find our banana pudding cupcakes to be the perfect weekend baking project. The creamy elements in both recipes provide a satisfying, mouth-coating richness that fans of the Chocolate Orange Chia Pudding will adore.
Answers to Your Common Pudding Questions
You can replace some of the milk with orange juice, but be aware that the acidity in the juice can make the chocolate flavor taste slightly sharp. For the best creamy results, use plant milk and get your citrus flavor from fresh zest and segments.
Yes, the nutritional value is the same. However, the visual result will be different; white seeds will appear as light specks in the chocolate, whereas black seeds blend into the dark cocoa for a more uniform, velvety look.
Use chilled, full-fat canned coconut milk. The cream separates to the top when cold; use only that thick cream. If it’s too thick to pour, whisk it slightly until it reaches a heavy cream consistency.
It is highly recommended for this recipe. Dutch-processed cocoa is less acidic and darker in color, which provides that specific ‘midnight’ chocolate look and a smoother, more mellow flavor that complements the orange.
This usually happens if the ratio of liquid to seeds is too high or if you didn’t perform the ‘second stir.’ Chia seeds need to be agitated 10 minutes after initial mixing to prevent clumping and ensure they absorb the liquid properly.
The Ultimate Chocolate Orange Chia Pudding Recipe
Chocolate Orange Chia Pudding: The Ultimate Decadent Breakfast Jar
Ingredients
Equipment
Method
- In a bowl, whisk together chia seeds, cocoa powder, maple syrup, vanilla, salt, and almond milk until the cocoa is fully incorporated.
- Let rest for 10 minutes, then whisk again vigorously to break up any seed clumps. This ensures a velvety texture.
- Pour into mason jars and refrigerate for at least 4 hours or overnight until a thick, glossy pudding forms.
- Swirl in the coconut milk. Top with fresh orange segments, zest curls, cacao nibs, and a mint sprig.
Notes
For a thicker swirl, use only the solidified cream from the top of the coconut milk can.

Closing & Call to Action
Mastering the Chocolate Orange Chia Pudding is a gateway to high-end, healthy eating that never feels like a sacrifice. This recipe proves that with the right culinary techniques—like the double-stir and proper fruit sup-reming—you can create a dish that looks like it belongs in a professional gallery. The combination of antioxidants from the cocoa and the fiber from the chia seeds makes this a powerhouse of nutrition.
If you enjoyed making this visually stunning breakfast, please let us know in the comments below! We love seeing your recreations. Don’t forget to follow us and share your beautiful jar photos to Pinterest to inspire others on their healthy food journey.