If you have been searching for a healthy Reese’s eggs recipe that actually delivers on that iconic, nostalgic texture without the high-fructose corn syrup and preservatives, you have arrived at the definitive guide. There is something uniquely satisfying about the combination of a salty, matte peanut butter core and a crisp, dark chocolate shell that snaps when you bite into it.
This version elevates the classic candy to a gourmet level, focusing on high-quality fats and natural sweeteners. We aren’t just making a “substitution”; we are crafting a superior confection that looks like a professional social media post and tastes like a luxury truffle.
In this deep-dive guide, we will explore the culinary science behind achieving that specific matte interior and glossy exterior. Whether you are preparing for a holiday or simply need a protein-packed treat in your freezer, this healthy Reese’s eggs recipe is designed to exceed every expectation.
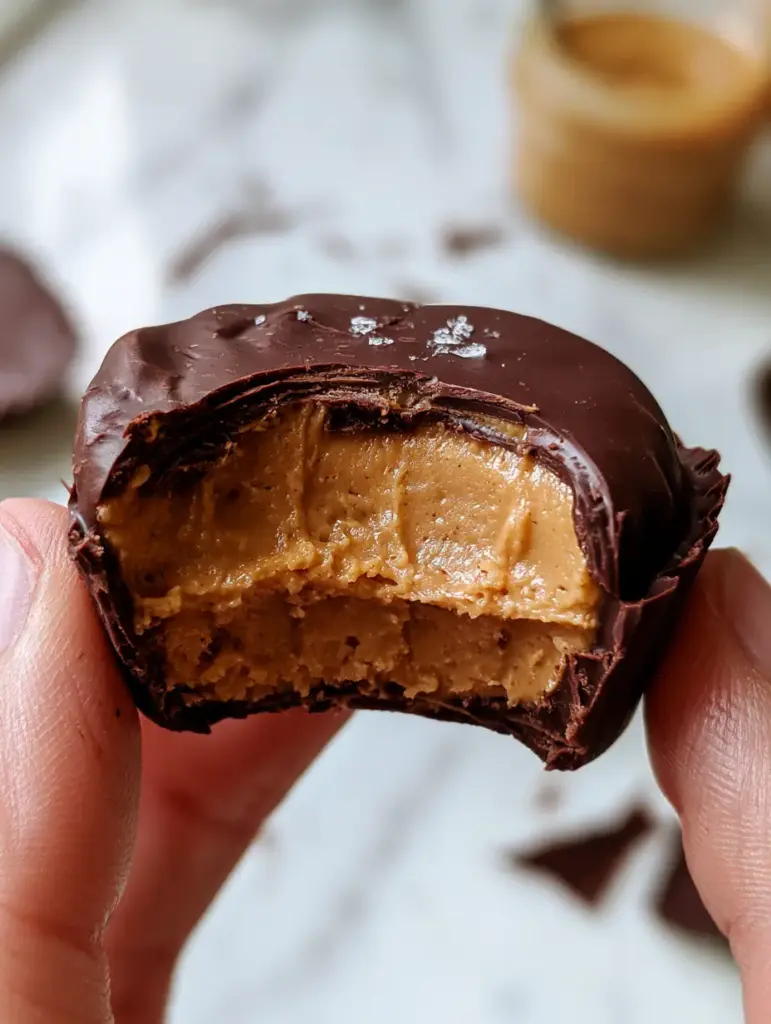
Why This Healthy Reese’s Eggs Recipe Dominates the Competition
- The Signature “Snap”: By using specific tempering techniques and a touch of coconut oil, we achieve a thin, glossy dark chocolate shell that provides a clean, professional break.
- Dense, Matte Interior: Unlike “runny” healthy treats, this recipe uses coconut flour to create a thick, creamy peanut butter center that mimics the exact texture of the original.
- No Refined Sugars: We utilize pure maple syrup or honey, allowing the natural roasted flavor of the peanuts to take center stage.
- Visual Perfection: From the scattered Maldon sea salt to the jagged bite mark that reveals a rich interior, these eggs are a feast for the eyes as much as the palate.
Essential Pantry Staples for Your Peanut Butter Confections
To achieve the results seen in our visual blueprint, every ingredient must serve a structural and flavor-focused purpose. We don’t use “fluff” ingredients; we use culinary building blocks.
Natural Creamy Peanut Butter: Use 1 cup (250g) of the drippy kind that contains only peanuts and salt. The natural oils are essential for a smooth mouthfeel, though we will be firming it up later.
Coconut Flour: 1/4 cup (30g) is our secret weapon for the matte finish. It absorbs moisture rapidly, turning a soft butter into a moldable dough that holds its shape at room temperature.
Pure Maple Syrup: 3 tbsp (45ml) provides a gentle sweetness. This liquid sweetener blends seamlessly into the peanut butter without the grittiness of granulated sugar.
Vanilla Bean Paste or Extract: 1 tsp (5ml) adds a floral depth that bridges the gap between the saltiness of the nuts and the bitterness of the chocolate.
Dark Chocolate Chips: 1.5 cups (255g) of at least 70% cocoa. This ensures a deep, complex flavor profile and a superior glossy finish compared to milk chocolate.
Refined Coconut Oil: 1 tbsp (15ml) is the “invisible” ingredient. It thins the chocolate just enough to create that professional-grade thin coating while helping it set firmly.
Maldon Flaky Sea Salt: A generous pinch for topping. Those large, flat crystals provide the essential visual highlight and a concentrated burst of flavor to cut through the richness.
Professional Equipment for the Home Chocolatier
You don’t need a commercial kitchen, but a few specific tools will help you achieve the “smartphone-taken POV” aesthetic of our hero image. Quality tools result in quality textures.
First, a parchment-lined baking sheet is non-negotiable for easy release. You will also want a silicone spatula to ensure you’re incorporating all the coconut flour into the peanut butter for that uniform, matte look.
For dipping, a chocolate dipping fork or a standard dinner fork with thin tines works best. This allows excess chocolate to drip off, preventing a “puddle” at the base of your eggs and ensuring that thin, crisp shell.
Step-by-Step Guide to Peanut Butter Perfection
Crafting the Matte Peanut Butter Core
In a medium mixing bowl, combine your creamy peanut butter, maple syrup, vanilla, and a pinch of fine sea salt. Use your spatula to fold the ingredients together until the mixture is glossy and homogenous.
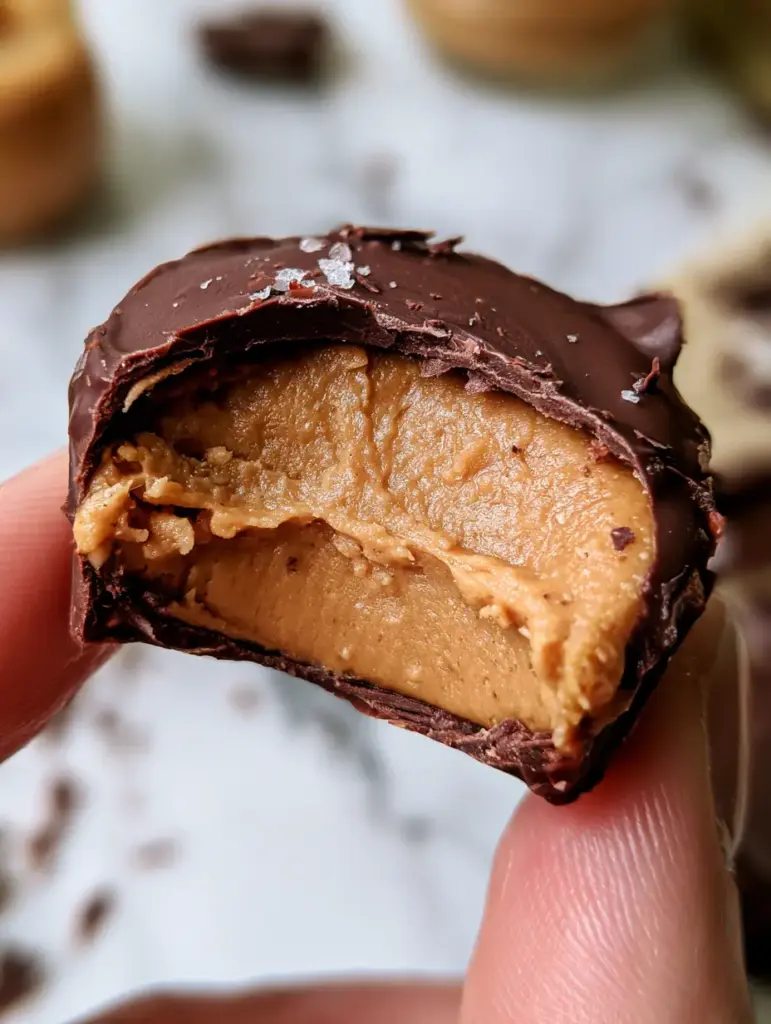
Slowly sift in the coconut flour. As you stir, you will notice the dough transition from a liquid state to a thick, dense, and matte consistency. It should feel like “edible playdough” that doesn’t stick to your fingers.
Taste the dough now. It should be intensely peanut-forward with a balanced salt-to-sweet ratio. This is the same satisfying base many love in a classic scotcheroos recipe, but with a cleaner nutritional profile.
Shaping and Chilling for Structural Integrity
Scoop about 2 tbsp (30g) of the peanut butter mixture and roll it into a ball between your palms. Gently flatten it into an oval, then pinch one end slightly to create the signature “egg” shape.
Place the shaped eggs onto your parchment-lined tray. It is critical to freeze these for at least 30-40 minutes. If the centers aren’t frozen solid, they will melt or lose their shape when dipped into the warm chocolate.
While the centers chill, you can prepare the chocolate. This waiting period is the perfect time to think about your next meal, perhaps a savory perfectly seared chicken breast to balance out the sweetness of the day.
Mastering the Glossy Dark Chocolate Dip
Using a double boiler or a microwave in 30-second bursts, melt the dark chocolate chips and coconut oil together. The oil is the key to that “clean snap” mentioned in our culinary blueprint.
Once the chocolate is smooth and glossy, remove one egg from the freezer at a time. Using your fork, submerge the egg completely. Lift it out, tapping the fork against the side of the bowl to let the excess chocolate flow back in.
Place the egg back on the parchment. Immediately sprinkle a few flakes of Maldon salt and some fine dark chocolate shavings over the top before the chocolate sets. This creates the professional “scattered” look from our Midjourney prompt.
Expert Tips for Success and Troubleshooting
- Control Your Temperature: If your chocolate starts to thicken too much while dipping, reheat it for 10 seconds. Thick chocolate leads to a “clunky” shell rather than the thin, crisp one we desire.
- The “Bite” Test: For the perfect jagged bite mark shown in the images, let the eggs sit at room temperature for 5 minutes after taking them out of the fridge before biting. This allows the center to soften slightly while the chocolate remains crisp.
- Avoid Condensation: Don’t cover the eggs immediately after putting them in the fridge to set. This can cause “sugar bloom” or water droplets on the glossy surface.
- Peanut Butter Choice: If your peanut butter is extremely dry (the bottom of the jar), add a teaspoon of melted coconut oil to the dough to maintain that “creamy matte” texture.
Shelf Life and Storage Strategy
These healthy Reese’s eggs are best stored in an airtight container in the refrigerator for up to two weeks. The cold environment keeps the dark chocolate shell crisp and prevents the peanut butter center from becoming too soft.
For long-term storage, these eggs freeze beautifully for up to three months. If you’re a fan of meal prepping treats, you might also enjoy making a batch of fudgy brownie texture bars to keep alongside them.
When serving from the freezer, let them thaw for 10 minutes on a marble surface (as seen in our visual guide) to achieve the optimal eating experience.
What to Pair With Your Homemade Treats
While these eggs are a standalone star, they fit perfectly into a lifestyle that values both health and flavor. If you’re hosting a brunch, serve these alongside a savory potato and egg breakfast skillet to provide a salty counterpoint.
For a cozy afternoon snack, a plate of these eggs paired with a hot cup of coffee or even a refreshing mango boba can turn a mundane break into a gourmet experience. The dark chocolate’s bitterness is remarkably versatile.
Frequently Asked Questions
Yes, as long as you use dairy-free chocolate chips and maple syrup, this recipe is naturally vegan and gluten-free.
Yes, you can substitute almond butter 1:1, but ensure it is the creamy, natural variety. You may need an extra tablespoon of coconut flour as almond butter is often runnier.
Not at all. In this small quantity, coconut flour acts as a structural agent to absorb moisture, creating that classic ‘matte’ peanut butter texture without affecting the flavor.
Since the peanut butter centers are frozen before dipping, the cold temperature will cause the thin chocolate layer to set almost instantly.
The gloss comes from adding a small amount of coconut oil and ensuring the chocolate isn’t overheated. Avoid getting any water in the melting chocolate, which causes it to seize and turn dull.
The Definitive Healthy Reese’s Eggs Recipe

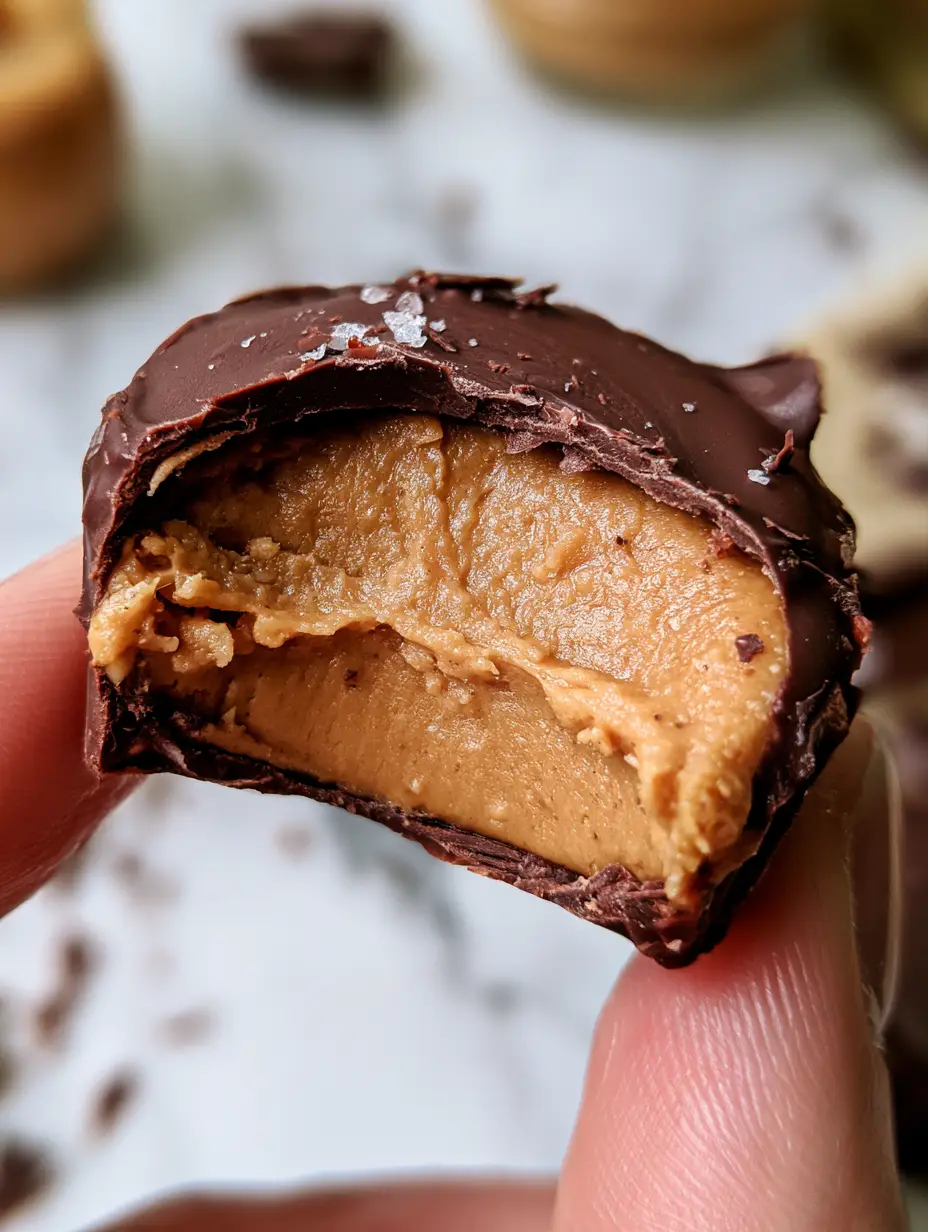
Healthy Reese's Eggs Recipe: The Ultimate Dark Chocolate Peanut Butter Copycat
Ingredients
Equipment
Method
- In a bowl, combine peanut butter, maple syrup, and vanilla until smooth.
- Stir in the coconut flour until a thick, matte, moldable dough forms. It should not be sticky.
- Roll 2 tbsp of dough into ovals and pinch one end to create an egg shape.
- Place eggs on parchment paper and freeze for 30-40 minutes until solid.
- Melt chocolate chips and coconut oil together until thin and glossy.
- Use a fork to dip frozen eggs into chocolate. Tap off excess, place back on parchment, and immediately sprinkle with Maldon salt and chocolate shavings.
Notes
Use refined coconut oil to avoid a strong coconut flavor in the chocolate shell.
Closing & Call to Action
Creating this healthy Reese’s eggs recipe at home is more than just a way to satisfy a sweet tooth; it’s an exercise in culinary mindfulness. You have controlled every ingredient, from the protein-rich peanut butter to the antioxidant-packed dark chocolate. The result is a treat that looks like it belongs on a professional food blog and tastes even better.
We would love to see your results! Did you get that perfect “clean snap” on the chocolate shell? Let us know in the comments below. If you enjoyed this recipe, please consider signing up for our newsletter for more “better-for-you” recreations of your favorite classics.
Don’t forget to share your beautiful creations and follow us on Pinterest for daily culinary inspiration and visual recipe guides.