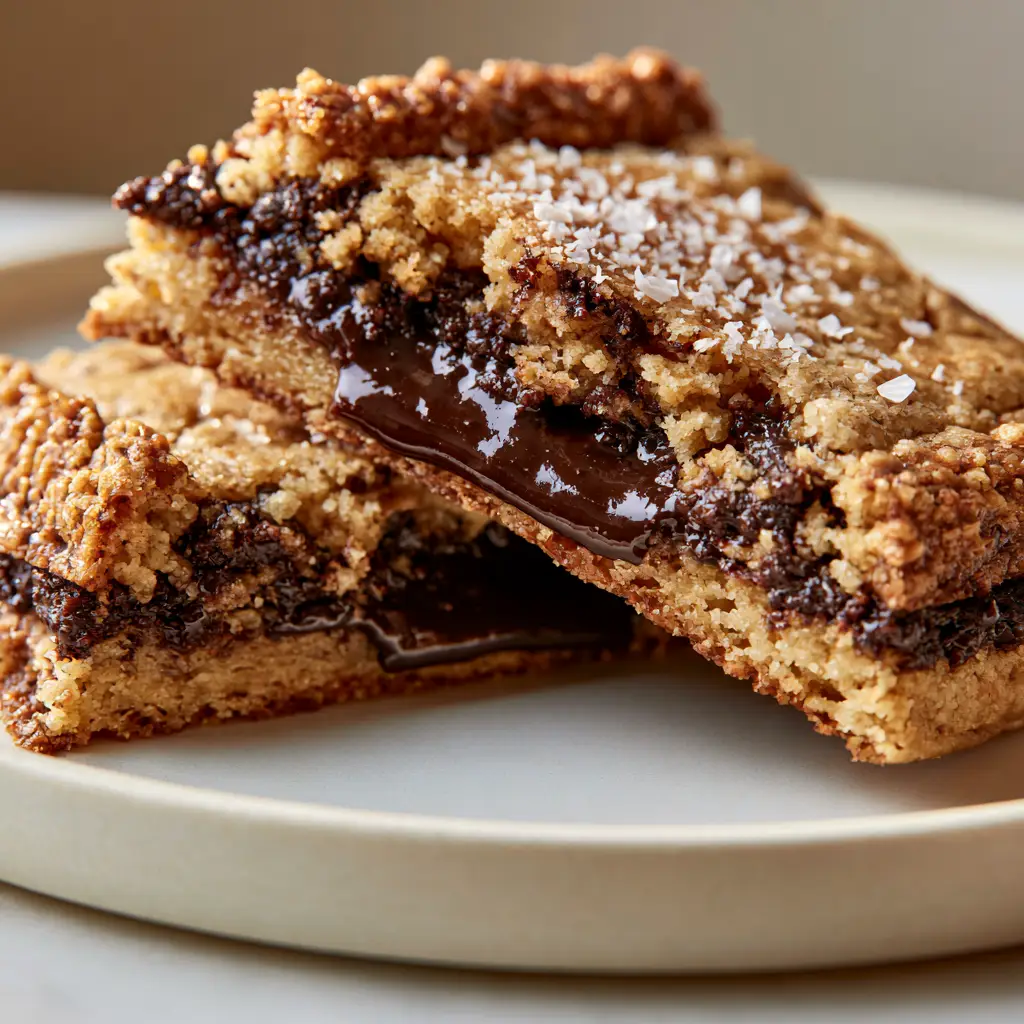
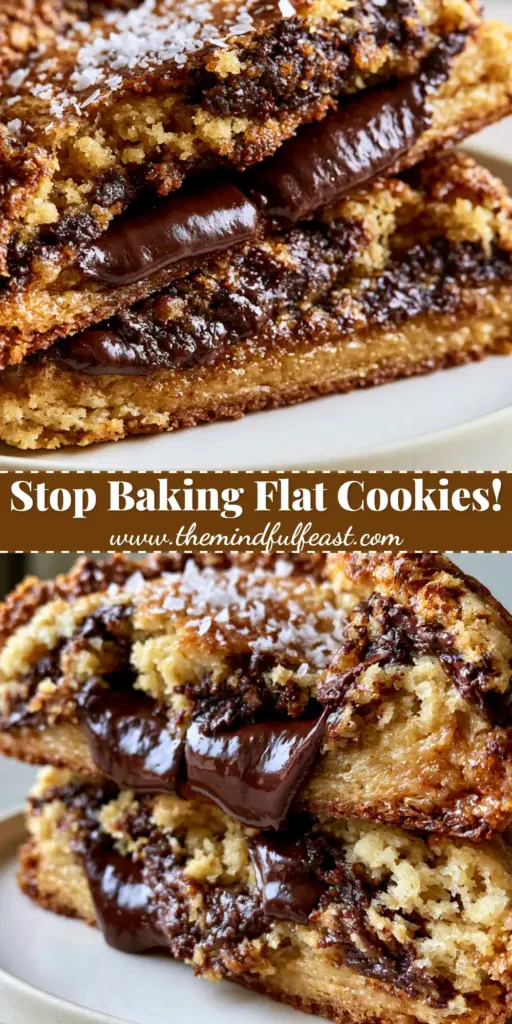
There is a specific, almost architectural beauty to the perfect Bakery style chocolate chip cookies. We aren’t just talking about a standard sweet treat; we are describing a monumental cookie experience characterized by deep golden-brown caramelized dough, crispy textured edges, and a warm, gooey, fudgy center that defies the laws of physics. When you split one of these giant cookies in half, large pools of melted dark chocolate chunks should stretch between the halves, shimmering under a light dusting of flaky Maldon sea salt.
Achieving this visual and textural masterpiece requires more than just mixing ingredients; it requires an understanding of culinary forensics. To replicate the giant, thick cookies found in high-end artisanal bakeries, we must master the Maillard reaction, the science of browned butter, and the structural integrity provided by specific flour ratios. This recipe is designed to bridge the gap between a home kitchen and a professional patisserie, ensuring every bite provides that signature crunch and molten chocolate interior.
Whether you are a seasoned baker or a curious novice, this guide will walk you through the sensory cues—the smell of nutty toasted butter, the sight of bubbling dark chocolate, and the feel of a perfectly weighted dough ball. If you enjoy mastering classic textures, you might also love exploring our chewy oatmeal chocolate chip cookies or diving into the hybrid decadence of rich chocolate brookies.
The Anatomy of a Perfect Bakery-Style Masterpiece
- Caramelized Brown-Butter Base: A deep, amber-hued dough that offers notes of toasted hazelnuts and butterscotch, providing the “golden-brown” visual confirmed in our blueprint.
- Textural Contrast: A dual-zone experience featuring outer edges that are shatteringly crisp and a center that remains soft, dense, and fudgy.
- Molten Chocolate Pools: By using hand-chopped dark chocolate chunks instead of standard chips, we create the dramatic “melted chocolate stretch” seen in professional food photography.
- The Saline Finish: A light garnish of flaky sea salt that cuts through the richness and enhances the complexity of the dark cacao.
Foundational Ingredients for Ultimate Cookie Structural Integrity
Unsalted Butter (1 cup / 226g): We will be browning this butter to remove water content and toast the milk solids, which is essential for that caramelized flavor profile and the signature golden-brown hue.
Dark Chocolate Chunks (10 oz / 280g): Choose a high-quality bar with at least 60% cacao; chopped chunks melt into irregular “pools” rather than holding their shape like stabilized chips.
Light Brown Sugar (1 cup / 200g) and Granulated Sugar (1/2 cup / 100g): The high ratio of brown sugar provides the moisture needed for a fudgy center, while the white sugar aids in creating those crispy, caramelized edges.
All-Purpose Flour (2 cups / 250g) and Bread Flour (1/2 cup / 65g): Adding a portion of bread flour increases the protein content, giving the cookie the “giant, thick” structure required to hold up all that chocolate without collapsing.
Large Eggs (2, at room temperature): Eggs provide emulsification and structure; using them at room temperature ensures they incorporate seamlessly into the fat for a smooth, uniform crumb.
Baking Soda (1 tsp / 5g) and Baking Powder (1/2 tsp / 2.5g): This combination ensures the cookies rise enough to stay thick while also reacting with the acidic brown sugar to promote browning.
Kosher Salt (1 tsp / 6g) and Flaky Maldon Sea Salt (for topping): The kosher salt seasons the dough, while the flaky salt provides the visual and sensory “pop” mentioned in the visual blueprint.
Vanilla Bean Paste or Extract (1 tbsp / 15ml): This provides the floral, aromatic backbone that complements the toasted notes of the browned butter.
Precision Tools for Professional Bakery Results
To achieve the “handheld smartphone photo” aesthetic of a giant cookie, you need the right gear. A heavy-duty rimmed baking sheet is essential for even heat distribution, preventing the bottoms from burning before the edges are crisp. A large cookie scoop (roughly 3.5 ounces or 100g capacity) is the secret to getting that “giant” size that stays thick in the middle.
Finally, using high-quality parchment paper or a silicone mat ensures the cookies can be removed without breaking the delicate, fudgy center. If you are looking for more fun kitchen projects to use your equipment for, check out our creative snack ideas or even these gourmet banana cream pie cookies.
Master Class: Crafting the Caramelized Dough
Step 1: The Art of Browning Butter
In a medium saucepan over medium heat, melt the 1 cup (226g) of butter. Continue cooking, swirling the pan constantly, as the butter begins to foam and pop. Watch closely for the visual cue: the milk solids will turn a deep golden-brown and the aroma will shift to a rich, nutty scent. Immediately remove from heat and pour into a large heat-proof bowl to stop the cooking process; ensure you scrape all the browned bits into the bowl.
Step 2: Emulsifying the Sugars and Aromatics
Add the 1 cup (200g) of brown sugar and 1/2 cup (100g) of granulated sugar to the warm browned butter. Whisk vigorously for about 2 minutes; the heat will partially dissolve the sugar, creating a shiny, toffee-like texture. Add the room-temperature eggs one at a time, followed by the vanilla, whisking until the mixture is pale and thick.
Step 3: Folding the Structural Components
Sift the 2 cups (250g) of all-purpose flour, 1/2 cup (65g) of bread flour, baking soda, baking powder, and kosher salt into the wet ingredients. Using a sturdy spatula, fold the ingredients together until just a few streaks of flour remain. Do not overmix, as this will develop too much gluten and make the cookies tough rather than fudgy.
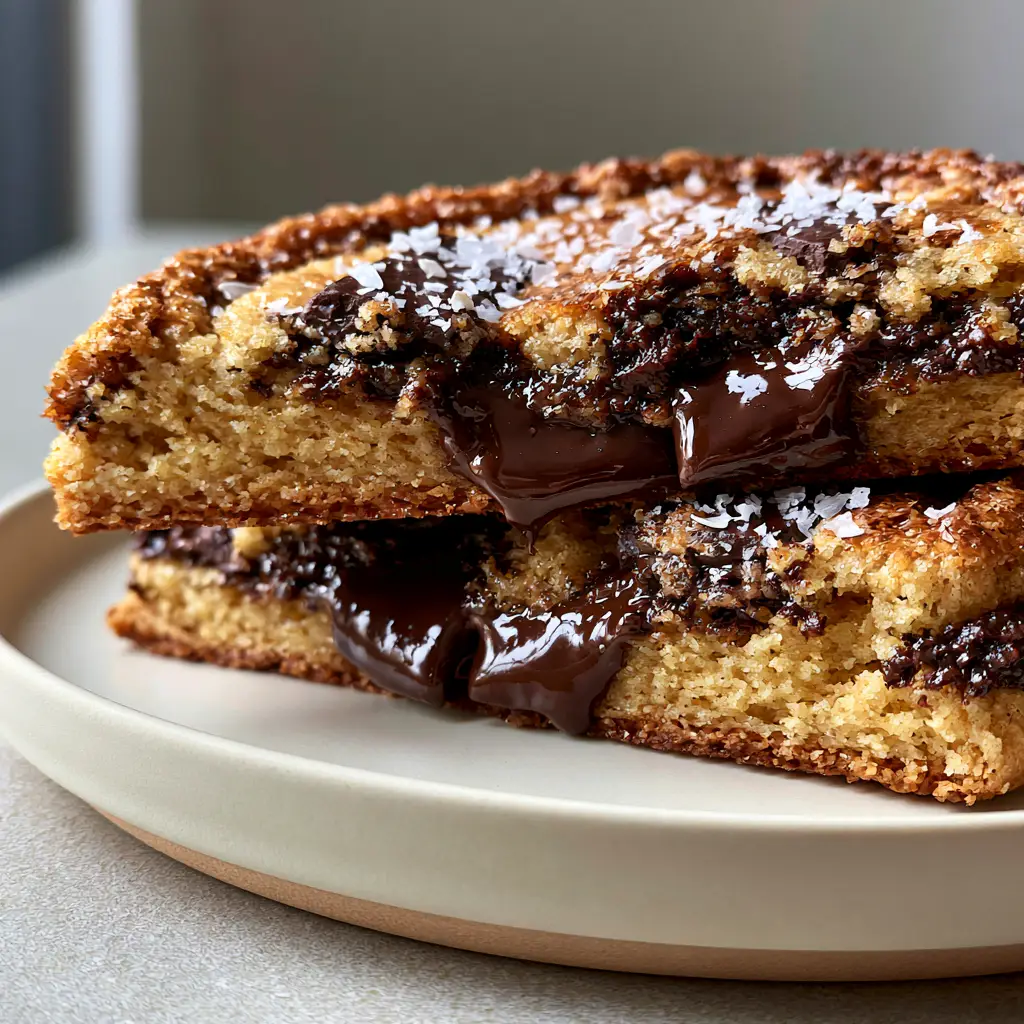
Step 4: Incorporating the Dark Chocolate Pools
Fold in the 10 oz (280g) of chopped dark chocolate chunks. Ensure the chunks are distributed evenly, but keep some of the larger pieces near the surface of the dough balls. This ensures that when the cookies bake, those large pieces create the “pools of melted dark chocolate” seen in the visual prompt.
Step 5: The Crucial Chill Phase
Scoop the dough into giant portions, approximately 3.5 oz (100g) each. Place them on a tray and refrigerate for at least 2 hours, though 24 hours is ideal. This chilling time allows the flour to fully hydrate and the fats to solidify, which prevents the cookies from spreading too thin and ensures they stay thick and giant.
Baking Secrets for Fudgy Centers and Crispy Edges
Preheat your oven to 375°F (190°C). This slightly higher temperature is a “bakery secret”—it shocks the outside of the dough, setting the crispy caramelized edges quickly while leaving the interior warm and underbaked. Place the chilled dough balls on the prepared baking sheet, leaving at least 3 inches of space between them.
Bake for 10-12 minutes. Look for the visual cue: the edges should be a deep amber and look firm, but the centers should still appear slightly soft and “puffy.” As they cool on the hot pan, the carry-over heat will finish cooking the center to a fudgy consistency without drying it out. Immediately upon removing them from the oven, sprinkle a light layer of flaky Maldon sea salt over the molten chocolate pools.
Expert Tips for Success
- The Pan Bang: Halfway through baking, gently lift the baking sheet and drop it against the oven rack. This ripples the edges, creating that professional “crispy textured” look.
- Chocolate Quality Matters: Avoid “tasting” chocolate chips, which contain stabilizers. Use a bar of high-quality dark chocolate for the best melt.
- Room Temperature Eggs: Cold eggs will seize the browned butter, resulting in a chunky, broken dough that won’t bake evenly.
- Weigh Your Ingredients: For the most consistent “bakery style” results, use a digital scale to measure your flour and dough balls.
Storage, Reheating, and Freezing
These cookies are best enjoyed warm when the dark chocolate is at its most molten state. However, they can be stored in an airtight container at room temperature for up to 3 days. To regain that “fresh-baked” texture, pop a cookie in the microwave for 10-15 seconds or in a 300°F (150°C) oven for 5 minutes.
You can also freeze the pre-scooped dough balls for up to 3 months. When the craving hits, bake them directly from the freezer, adding 2-3 minutes to the total baking time. This is the perfect way to always have a giant, bakery-style treat ready for guests.
What to Serve With These Giant Cookies
A giant, rich cookie deserves a thoughtful pairing. A cold glass of whole milk is the classic choice, but the deep dark chocolate also pairs beautifully with a hot espresso or a café au lait. If you’re hosting a dessert spread, consider serving these alongside something lighter like our savory pasta salad for a full meal, or follow up a dinner of savory Thai pork skewers with these cookies for a decadent finish.
Frequently Asked Questions
You can, but they will spread more and won’t have the same depth of flavor. Chilling allows the flour to hydrate and the sugars to concentrate, leading to a better texture and richer color.
While you can use only all-purpose flour, bread flour adds extra protein (gluten), which gives the cookies the strength to stay thick and chewy rather than just soft.
Use high-quality chocolate bars and chop them by hand into irregular chunks. Unlike chocolate chips, which contain stabilizers to hold their shape, chunks will melt into beautiful, stretching pools.
Cookies usually turn out flat if the butter was too warm or the dough wasn’t chilled long enough. Ensure you chill the dough for at least 2 hours to allow the fats to solidify, which prevents excessive spreading.
Browning the butter removes water and toasts the milk solids, creating a deep, caramelized flavor and a nutty aroma that elevates the cookie from standard to professional bakery quality.
Bakery Style Chocolate Chip Cookies Recipe Card
Bakery Style Chocolate Chip Cookies: The Ultimate Thick and Fudgy Recipe
Ingredients
Equipment
Method
- Melt butter in a saucepan over medium heat. Whisk until it foams, pops, and turns amber brown with a nutty aroma. Remove and cool slightly.
- Whisk browned butter with brown and white sugars for 2 minutes until toffee-like. Add eggs and vanilla, whisking until thick.
- Fold in dry ingredients followed by dark chocolate chunks. Scoop into 100g balls and chill for at least 2 hours.
- Preheat oven to 375°F (190°C). Bake for 10-12 minutes until edges are golden and center is soft. Top with flaky salt.
Notes
Don't skip the bread flour; it provides the gluten structure needed for a thick cookie.
Sharing the Cookie Love
Mastering the Bakery style chocolate chip cookies is a rite of passage for any home baker. The combination of browned butter, high-quality dark chocolate, and that perfect hit of sea salt creates a sensory experience that is truly unforgettable. We would love to see your giant, fudgy creations! Leave a comment below with your results, and don’t forget to follow us and share your cookie photos to our Pinterest page.
If you enjoyed this deep dive into cookie science, be sure to check out our other dessert tutorials or sign up for our newsletter to get the latest kitchen forensics delivered straight to your inbox.