Fudgy Cocoa Brownies are the holy grail of home baking, offering a deep, soul-satisfying chocolate experience that melted chocolate versions often struggle to match. If you have been searching for that elusive combination of a gooey, dense chocolate center and a delicate, paper-thin shiny crinkled top crust, your search ends here.
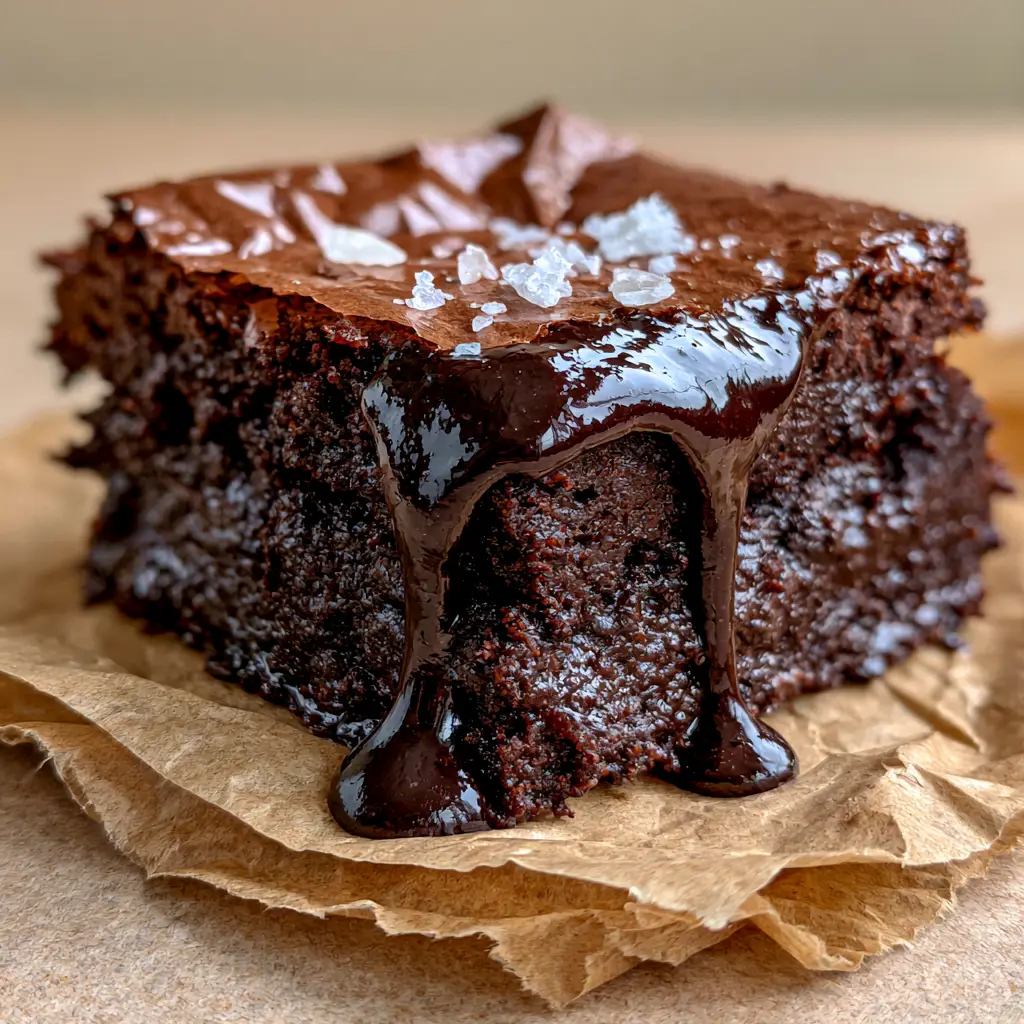
This recipe isn’t just about mixing ingredients; it is about the culinary science of aeration and fat-to-sugar ratios. We have engineered this formula to produce a thick-cut square that looks exactly like a professional food photograph, complete with a glistening dark chocolate sauce drizzle and a hit of flaky Maldon sea salt.
Whether you are serving these at a dinner party or enjoying a midnight snack on crumpled brown parchment paper, these brownies deliver a macro-worthy texture. Every bite offers a contrast between the shatteringly crisp top and the ultra-moist fudge interior that clings to the fork.
Why These Fudgy Cocoa Brownies Outperform the Rest
- The Signature Crinkle: We utilize a specific egg-and-sugar whipping technique that creates a meringue-like layer, resulting in that coveted paper-thin, shiny crust.
- Intense Cocoa Depth: By “blooming” the cocoa powder in hot melted butter, we extract the maximum flavor molecules for a darker, richer profile.
- Texture Contrast: The recipe balances a dense, gooey chocolate center with the sharp, clean crunch of flaky Maldon sea salt.
- Visual Sophistication: A finished drizzle of glossy dark chocolate sauce ensures these look as good as they taste on any minimalist plating.
The Anatomy of a Perfect Brownie: Ingredients and Substitutions
Unsalted Butter (225g / 1 cup): High-quality butter provides the fat necessary for a fudgy mouthfeel and carries the flavor of the cocoa. Ensure it is melted and hot when combined with the cocoa to properly bloom the powder.
Dutch-Processed Cocoa Powder (95g / 1 cup): This cocoa is treated with alkali to neutralize acidity, resulting in a darker color and smoother, more mellow chocolate flavor. It is essential for achieving that glistening dark chocolate appearance.
Granulated White Sugar (400g / 2 cups): Sugar does more than sweeten; it dissolves into the eggs to create the structural integrity of the crinkle top. Do not reduce the sugar, or you will lose the shiny, crackly surface.
Large Eggs (4 total): These provide the lift and moisture. Using room-temperature eggs ensures they emulsify perfectly with the fats, preventing a greasy finish.
Pure Vanilla Extract (1 tbsp / 15ml): Vanilla acts as a flavor enhancer for chocolate, rounding out the bitterness of the cocoa and adding aromatic depth. Use a high-quality extract rather than imitation for the best results.
All-Purpose Flour (125g / 1 cup): A relatively low amount of flour is used to keep the brownies dense and fudgy rather than cakey. Sift the flour to avoid any dry pockets in the gooey center.
Maldon Sea Salt (for finishing): These large, pyramid-shaped flakes provide a burst of salinity that cuts through the richness of the sugar. It transforms a simple dessert into a gourmet experience.
Dark Chocolate Chips (100g / ½ cup): These are melted down with a teaspoon of oil to create the glistening dark chocolate sauce drizzle seen in the visual blueprint.
Essential Tools for Professional Results
To achieve the specific macro-level detail of a freshly cut, thick-cut chocolate brownie square, you need the right equipment. A 8×8 inch (20×20 cm) square baking pan is non-negotiable for achieving that specific thickness.
You will also need high-quality parchment paper. Beyond preventing sticking, crumpled brown parchment paper serves as the perfect rustic backdrop for minimalist plating, as described in our visual guide.
A heavy-duty whisk or an electric hand mixer is required for the egg-sugar mixture. Without vigorous whisking, the sugar won’t fully dissolve, and you’ll miss out on the paper-thin shiny crinkled top crust.
Step-by-Step Instructions to Brownie Perfection
Blooming the Cocoa and Melting Fats
Preheat your oven to 350°F (175°C). Line your 8×8 inch pan with brown parchment paper, leaving an overhang on the sides for easy removal. In a large heat-proof bowl, combine your 1 cup (225g) of melted hot butter and 1 cup (95g) of Dutch-processed cocoa powder.
Whisk these together until smooth. This “blooming” process allows the cocoa to release its full aromatic potential. The mixture should look like a thick, glistening dark chocolate paste.
Creating the Meringue-Style Crinkle Top
In a separate large bowl, combine the 2 cups (400g) of sugar and 4 large eggs. Using an electric mixer or a very strong arm, whisk vigorously for 3-5 minutes. You are looking for a visual change: the mixture should become pale, thick, and fall in ribbons.
This aeration is the secret to the paper-thin crinkled top crust. Once achieved, fold in the vanilla extract and the cocoa-butter mixture until just combined. The batter should be glossy and dark.
Incorporating Dry Ingredients for a Gooey Center
Gently fold in the 1 cup (125g) of sifted all-purpose flour and a half-teaspoon of fine salt. Use a spatula and stop the moment you see no more white streaks. Over-mixing at this stage will develop gluten, turning your fudgy cocoa brownies into something bread-like.
Pour the batter into the prepared pan. Smooth the top with a spatula. You will notice the batter is thick and heavy, which is the first sign of a successful dense chocolate center.
The Bake and the Sensory Cues
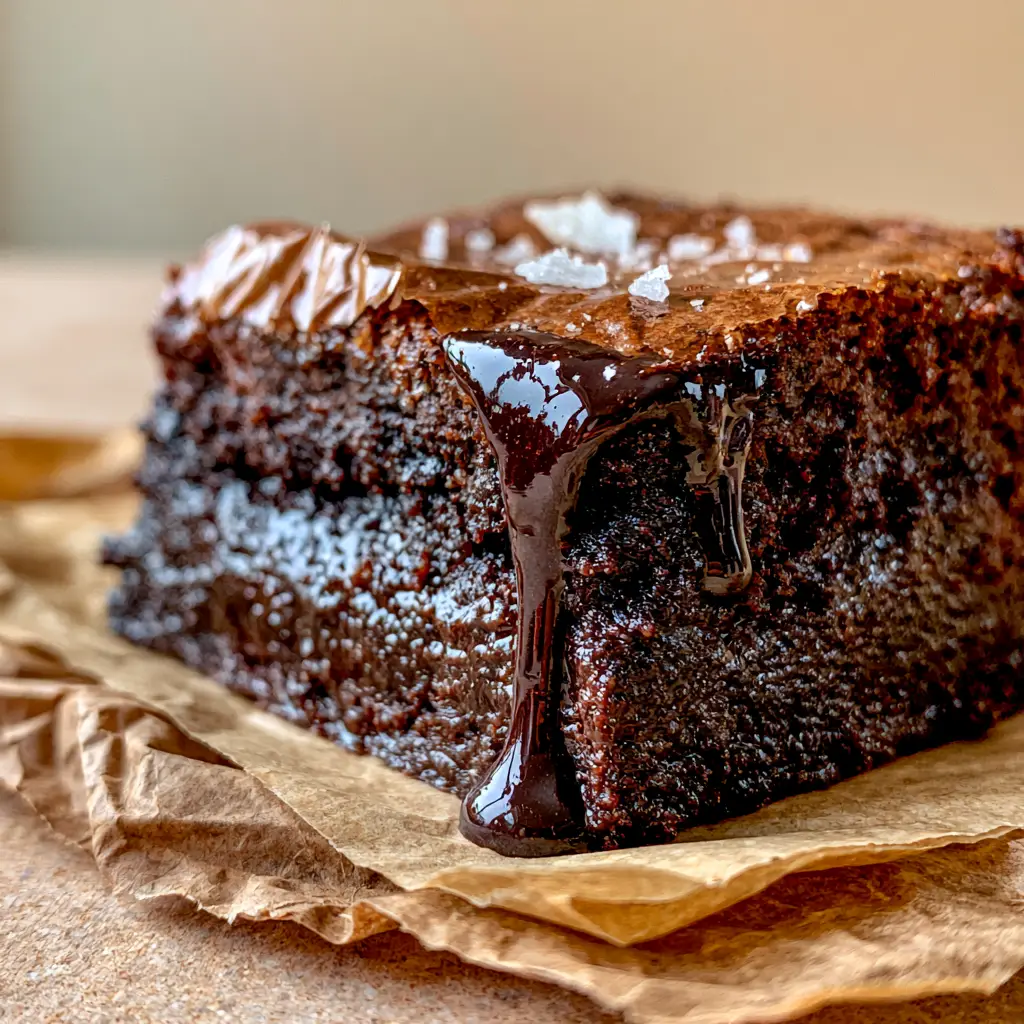
Bake for 30-35 minutes. At the 30-minute mark, check for sensory cues. The edges should be set and slightly pulling away from the parchment, but the center should still have a very slight jiggle when the pan is nudged.
The most important visual cue is the top: it should be transformed into a delicate, paper-thin shiny crinkled top crust. If you insert a toothpick, it should come out with a few moist crumbs attached—not clean, and certainly not wet batter.
Expert Tips for Visual and Culinary Success
- The Freezer Chill: For those perfectly clean, sharp edges seen in macro photography, let the brownies cool completely, then chill in the freezer for 30 minutes before slicing with a hot knife.
- The Sauce Consistency: When making the glistening dark chocolate sauce drizzle, ensure the chocolate is melted slowly. If it gets too hot, it will lose its gloss and become matte.
- Parchment Aesthetics: To get the “crumpled brown parchment paper” look, ball up the paper into a tight sphere, then flatten it back out before lining your pan or plating.
- Salt Timing: Add the flaky Maldon sea salt immediately after drizzling the chocolate sauce so the flakes “stick” to the glistening finish.
Elevating the Experience: Pairings and Service
While these Fudgy Cocoa Brownies are a powerhouse on their own, they thrive when paired with textures that contrast their density. Consider serving a square alongside a light Strawberry Dole Whip to provide a bright, acidic counterpoint to the heavy cocoa.
If you are hosting a dessert spread, these brownies anchor the table beautifully next to Banana Pudding Cupcakes or even a tray of Strawberries and Cream Cupcakes. The rich, dark tones of the brownie provide a stunning visual contrast to lighter, fruit-based desserts.
For a more savory-to-sweet transition, these brownies are a fantastic follow-up to a spicy meal like a Cajun Chicken Rice Bowl. The salt and chocolate help soothe the palate after the heat of the Cajun spices.
Storage and Preservation
To maintain the ultra-moist, gooey fudge center, store these brownies in an airtight container at room temperature for up to 3 days. If you prefer a firmer, chewier texture, they can be refrigerated for up to a week.
To freeze, wrap individual thick-cut squares in plastic wrap and then foil. They will stay fresh for up to 3 months. When ready to eat, let them thaw at room temperature for an hour, or microwave for 15 seconds to restore that “freshly cut” warmth.
Frequently Asked Questions
You can, but the brownies will be lighter in color and have a slightly more acidic, sharp flavor. Dutch-processed cocoa is recommended for that dark, glistening look and mellow chocolate taste.
To keep them fudgy, avoid over-measuring your flour and do not add any chemical leaveners like baking powder or baking soda. Also, be careful not to over-bake; the center should still be slightly moist when removed from the oven.
Chill the brownies in the refrigerator or freezer for 30 minutes after they have cooled to room temperature. Use a large chef’s knife dipped in hot water and wiped dry between every single cut.
The crinkle top is created by dissolving sugar into eggs to form a thin layer of meringue. If you don’t whisk the eggs and sugar vigorously for at least 3-5 minutes, the crust won’t form.
Mixing cocoa powder with a hot liquid (like melted butter) dissolves the cocoa particles and releases trapped flavor compounds, resulting in a much more intense chocolate flavor in the final bake.
The Ultimate Fudgy Cocoa Brownies Recipe
Fudgy Cocoa Brownies with the Ultimate Paper-Thin Crinkle Top
Ingredients
Equipment
Method
- Preheat your oven to 350°F (175°C). Line an 8x8 inch square baking pan with crumpled brown parchment paper, leaving an overhang on two sides.
- In a large bowl, whisk the hot melted butter and cocoa powder together until glossy and smooth. Set aside to cool slightly.
- In a separate bowl, whip the eggs and granulated sugar with an electric mixer on medium-high speed for 3-5 minutes until the mixture is pale and thick.
- Fold the cocoa-butter mixture and vanilla into the egg mixture until just combined.
- Gently fold in the flour and fine salt using a spatula. Stop as soon as no flour streaks remain to ensure a gooey center.
- Pour into the pan and bake for 30-35 minutes. The top should be crinkled and the center slightly jiggling.
- Once cooled, drizzle with melted dark chocolate and sprinkle with flaky Maldon sea salt before slicing.
Notes
Use Dutch-processed cocoa for the darkest, most fudgy results.
Join the Mindful Feast Community
We hope these Fudgy Cocoa Brownies become a staple in your kitchen. There is nothing quite like the satisfaction of cracking through that paper-thin crust to find the gooey treasure beneath. If you enjoyed this deep dive into chocolate science, please leave a comment below and share your results!
Don’t forget to pin this recipe to your favorite dessert boards on Pinterest so you can find it the next time a chocolate craving strikes. Happy baking!