There is a specific kind of culinary magic that happens when simple, farm-fresh ingredients meet the seasoned surface of a rustic cast iron skillet. The Italian Frittata is the personification of this magic—a vibrant, golden-yellow masterpiece that defies the gravity of ordinary egg dishes. Imagine a dish with a souffle-like height, where the edges are whisper-thin and browned to a perfect crisp, while the center remains light, porous, and incredibly aerated.
When you lift a triangular slice with your spatula, a wisp of steam escapes, carrying the aroma of sautéed baby spinach and salty, melted feta cheese. This isn’t just breakfast; it’s a sensory experience defined by the pop of blistered cherry tomatoes and the sharp fragrance of fresh emerald-green basil. Whether you are looking for quick Italian dinner ideas (coming soon) or a show-stopping weekend brunch, this recipe delivers professional results with home-cook simplicity.
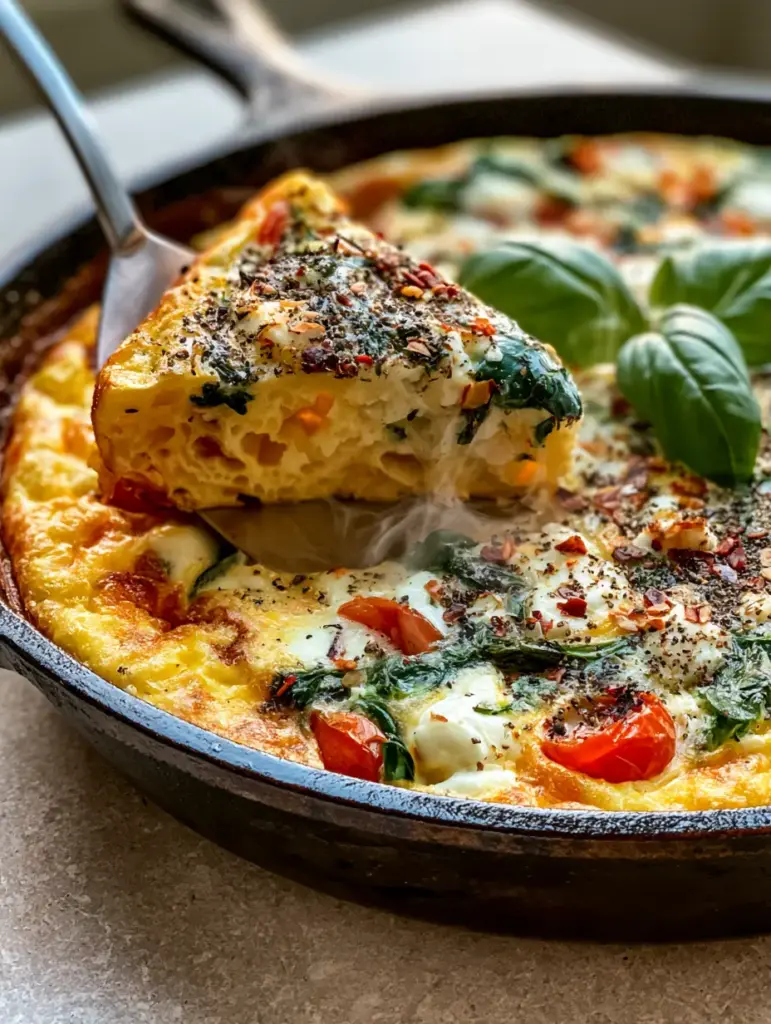
Why This Fluffy Italian Frittata Works Every Time
- Structural Integrity: Using a seasoned cast iron skillet ensures those coveted browned crispy edges that provide a textural contrast to the soft, pillowy interior.
- Visual Vibrancy: The combination of bright green baby spinach, vibrant golden eggs, and deep red blistered tomatoes creates a photogenic plate that looks as good as it tastes.
- Aerated Texture: Through specific whisking techniques and the addition of high-fat dairy, we achieve a light, porous internal structure that mimics a professional souffle.
- Balanced Flavor Profile: The saltiness of the feta chunks perfectly offsets the natural sweetness of the burst tomatoes and the earthy notes of fresh torn basil.
The Essential Components for a Sky-High Skillet Frittata
To achieve the visual and textural benchmarks of a true Italian Frittata, every ingredient serves a dual purpose: flavor and physics. Here is what you will need to gather for your countertop mise en place.
Large Farm-Fresh Eggs: You will need 8 to 10 large eggs to provide the volume necessary for that impressive vertical height seen in professional food styling. Use room-temperature eggs for better aeration during the whisking process.
Heavy Cream or Whole Milk: 1/2 cup (120ml) of high-fat dairy is the secret to the “light and porous” texture. The fat molecules coat the egg proteins, preventing them from bonding too tightly and becoming rubbery.
Feta Cheese: 1/2 cup (75g) of crumbled feta provides those distinct melted white chunks. Unlike shredded cheese that disappears, feta maintains its structural identity, creating pockets of creamy saltiness.
Baby Spinach: 2 cups (60g) of fresh baby spinach adds an earthy base and a vibrant green hue. Sautéing it briefly before adding the eggs ensures it is tender and evenly distributed.
Cherry Tomatoes: 1 cup (150g) of halved cherry tomatoes are essential for the “blistered” look. They provide a necessary acidity that cuts through the richness of the eggs and cheese.
Fresh Basil Leaves: 1/4 cup (10g) of fresh torn basil leaves added at the very end preserves their volatile oils. This gives the dish a punch of emerald-green color and a sweet, peppery finish.
Red Chili Flakes & Black Pepper: A heavy dusting of 1 tsp (2g) cracked black pepper and 1/2 tsp (1g) red chili flakes provides the “visual heat” and a gentle kick that lingers on the palate.
Unsalted Butter or Olive Oil: 2 tbsp (30ml) of fat is required for the skillet. This isn’t just for non-stick purposes; it’s what fries the edges of the eggs to create that signature browned crust.
Professional Tools for the Perfect Sear
To recreate the handheld smartphone photo aesthetic of this recipe, your choice of equipment is non-negotiable. The star of the show is a 10-inch (25cm) seasoned cast iron skillet. Cast iron holds heat more effectively than stainless steel or non-stick pans, which is the only way to achieve those deeply browned, crispy edges while the center remains fluffy.
You will also need a high-quality balloon whisk to incorporate maximum air into the egg mixture. A silver offset spatula is recommended for serving, as it allows you to lift the triangular slices cleanly, revealing the internal aeration and the wisps of rising steam that signal a fresh-from-the-oven meal.
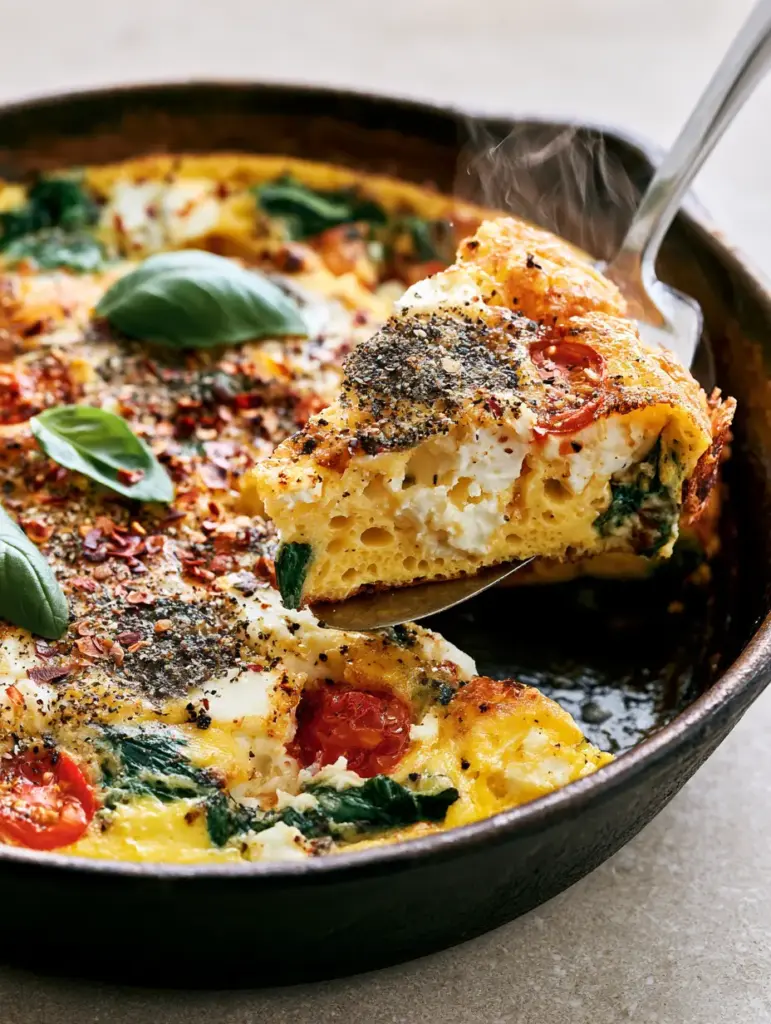
Step-by-Step Mastery: Achieving the Perfect Golden Crust
Phase 1: The Aeration Secret
In a large glass bowl, crack your eggs and add the 1/2 cup (120ml) of heavy cream. Using your balloon whisk, beat the mixture vigorously for at least 2 minutes. You are looking for a frothy surface with tiny bubbles; this air is what will expand in the oven to give your Italian Frittata its souffle-like height.
Season the egg mixture now with half of your cracked black pepper and a pinch of salt. Remember, the feta is salty, so season conservatively at this stage to maintain a balanced flavor profile.
Phase 2: Blistering and Wilting
Place your cast iron skillet over medium-high heat and add 1 tbsp (15ml) of olive oil. Once the oil is shimmering, toss in the halved cherry tomatoes cut-side down. Leave them undisturbed for 2-3 minutes until the skins begin to shrivel and brown—this is the “blistered” effect mentioned in our visual blueprint.
Lower the heat to medium and add the baby spinach. Toss the spinach with the tomatoes for only 60 seconds. You want the spinach to be bright green and just barely wilted. Remove the vegetables from the pan and set them aside briefly so they don’t overcook during the next step.
Phase 3: The Stovetop Sear
Wipe the skillet clean and add 1 tbsp (15g) of butter. As the butter foams and begins to turn slightly brown (beurre noisette), pour in your aerated egg mixture. Immediately drop the sautéed spinach, blistered tomatoes, and feta chunks evenly across the surface.
Let the frittata sit undisturbed on the stovetop for about 3-4 minutes. This is the critical moment where the “browned crispy edges” are formed. Use a spatula to gently lift the edge to check for a deep golden-yellow color before transitioning to the oven.
Phase 4: The Oven Rise
Transfer the skillet to a preheated oven at 375°F (190°C). Bake for 8-12 minutes. Watch for the “visual cues”: the center should have a slight jiggle, and the entire frittata should puffed up significantly. The residual heat of the cast iron will continue to cook the base, ensuring the bottom is as flavorful as the top.
Expert Tips for a Souffle-Like Egg Texture
- Don’t Overbeat the Veggies: Sauté your spinach just until it collapses. Overcooked spinach releases moisture, which can lead to a soggy frittata rather than a fluffy one.
- The Dairy Ratio: Never skip the cream. If you use skim milk, the Italian Frittata will likely collapse faster and lack the light, porous internal texture.
- Room Temperature Ingredients: Cold eggs and cold feta can shock the pan and drop the temperature, preventing that immediate sear on the edges.
- The Steam Factor: Serve the dish immediately! The “rising steam” in the visual prompt is a sign of a perfectly cooked interior. As the dish cools, the air pockets will begin to shrink.
Practical Storage and Reheating Advice
While this dish is best enjoyed fresh from the skillet, leftovers can be stored in an airtight container in the refrigerator for up to 3 days. To maintain the crispy edges, avoid the microwave. Instead, reheat a slice in a dry skillet over medium heat for 2-3 minutes per side.
If you are meal prepping, you can serve this cold alongside a zesty chickpea tuna salad for a high-protein lunch. However, note that once chilled, the frittata will lose its souffle height and become more dense and custard-like.
What to Serve With Your Italian Frittata
To turn this into a full Mediterranean spread, pair your frittata with a side of toasted sourdough or herb-crusted focaccia (coming soon). The bread is perfect for soaking up any juices from the blistered tomatoes.
If you’re serving this for a hearty dinner, consider a side of savory ground turkey pasta or a light arugula salad tossed in a lemon vinaigrette. For those who love a bit of heat, an extra drizzle of the oil used in an authentic Italian spaghetti sauce can add a wonderful depth of flavor to the final garnish.
Frequently Asked Questions
Yes, you can use any oven-safe non-stick pan, but you won’t achieve the same deeply browned, crispy edges that seasoned cast iron provides.
Yes, but you must thaw it completely and squeeze out all excess water. Too much moisture will prevent the eggs from setting properly and ruin the texture.
The secret is heavy whisking to incorporate air and adding a high-fat dairy like heavy cream, which prevents egg proteins from becoming too dense.
Feta provides creamy, visible chunks that don’t melt away, whereas parmesan adds a nutty, salty crust. For the visual ‘chunks’ in this recipe, feta is superior.
Like a souffle, a frittata relies on hot air trapped in the egg structure. As it cools, that air contracts, causing it to settle. Serve immediately for maximum height!
The Ultimate Fluffy Italian Frittata Recipe
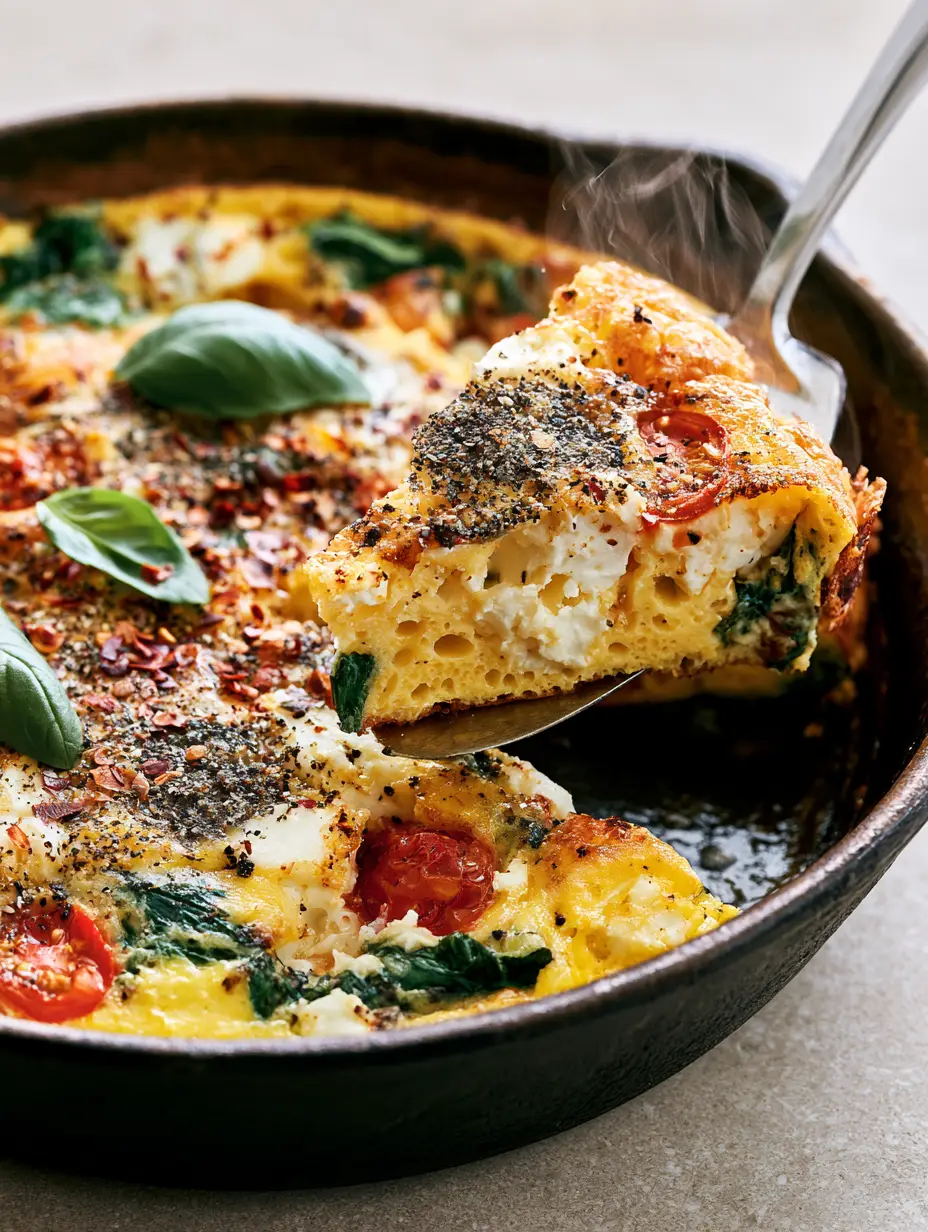
Italian Frittata: The Ultimate Fluffy Cast Iron Skillet Recipe
Ingredients
Equipment
Method
- Whisk eggs and cream in a large bowl for 2 minutes until very frothy and aerated.
- Sauté cherry tomatoes in the skillet until blistered, then wilt the spinach briefly and remove both from the pan.
- Melt butter in the skillet, pour in eggs, and add the vegetables and feta. Cook on the stovetop for 3-4 minutes to brown the edges.
- Transfer to a 375°F (190°C) oven and bake for 8-12 minutes until puffed and golden.
Notes
Always whisk your eggs right before pouring to keep the air bubbles intact.
Final Thoughts on the Skillet Frittata
Mastering the Italian Frittata is a rite of passage for any home cook looking to elevate their breakfast game. By focusing on the aeration of the eggs and the high-heat capabilities of a cast iron skillet, you create a dish that is as visually stunning as it is delicious. The contrast of the melted feta chunks against the blistered tomatoes ensures every bite is a new discovery of flavor.
Did you achieve that perfect golden rise? We would love to hear about your results! Leave a comment below or share your photos with us. Don’t forget to save this recipe to your breakfast boards on Pinterest so you can find it the next time you need a stunning, one-pan meal.