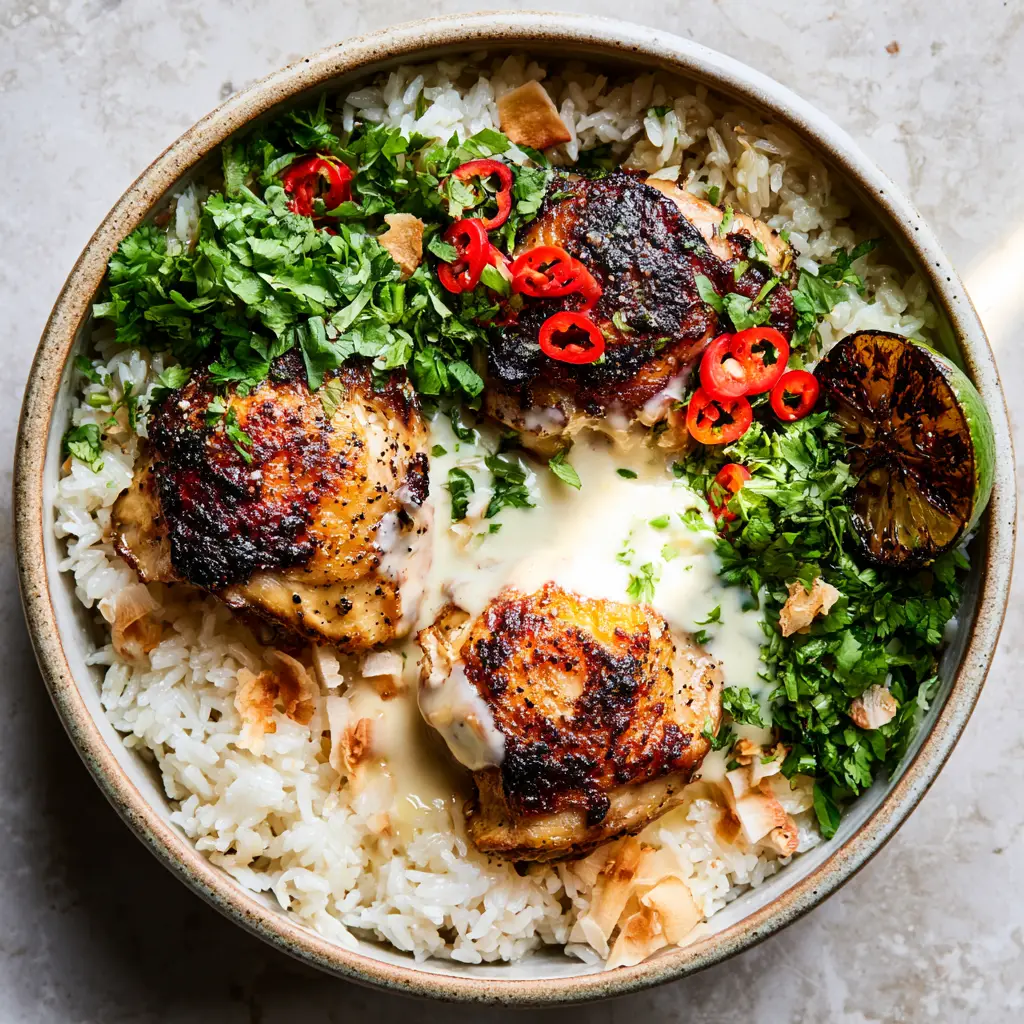
This Coconut Chicken is the ultimate one-pot masterpiece, designed for home cooks who crave restaurant-quality textures and bold, tropical flavors. Imagine sinking your fork into a bone-in, skin-on chicken thigh that has been seared to a deep, caramelized golden-brown perfection, resting atop a bed of fluffy, glistening jasmine rice infused with rich coconut milk. Every bite offers a symphony of sensations: the crunch of toasted coconut flakes, the gentle heat of sliced red Fresno chilies, and the bright, citrusy lift of charred lime.
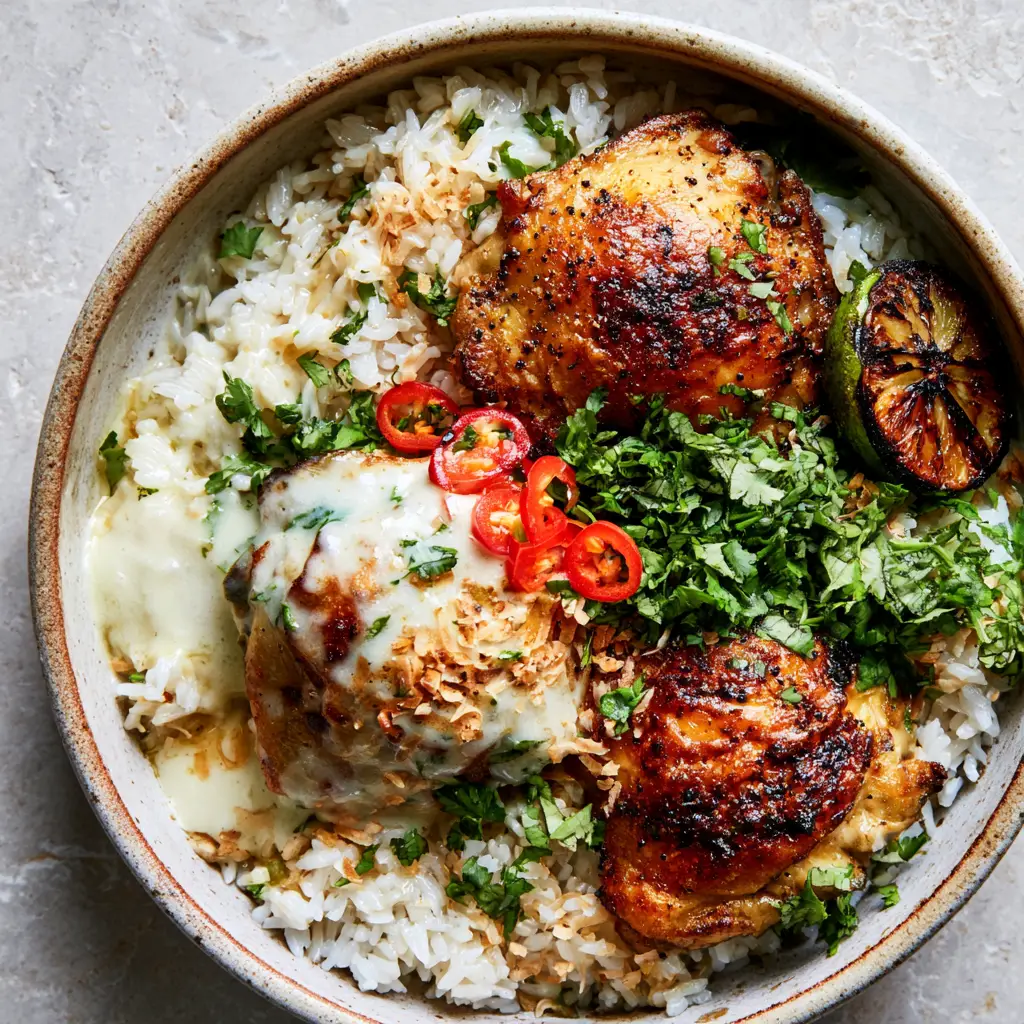
Crafting the perfect Coconut Chicken requires more than just tossing ingredients into a pan; it is about mastering the balance between the fat of the coconut milk and the acidity of the lime. The visual appeal of this dish—with its ivory-colored sauce pooling slightly into the rice and vibrant green cilantro garnishes—is matched only by its deep, savory profile. Whether you are looking for a comforting weeknight meal or a stunning centerpiece for a dinner party, this recipe delivers on every sensory promise.
Why This One-Pot Coconut Chicken Recipe Works Every Time
- The Ultimate Texture Contrast: By searing the chicken thighs separately before finishing them atop the rice, we ensure the skin remains deeply caramelized and crispy rather than soggy and boiled.
- Aromatic Depth: We build layers of flavor starting with a foundational base of fresh garlic and ginger, bloomed in the rendered chicken fat to maximize their reach throughout the dish.
- Perfectly Glistening Jasmine Rice: Using a precise ratio of full-fat coconut milk and chicken stock results in rice that is tender and fragrant without being mushy or overly heavy.
- Visual Forensics: From the visible black pepper flecks to the bright red Fresno chilies, every element is designed to provide a high-contrast, professional presentation straight from a rustic ceramic bowl.
The Secret Pantry for a Silkier Coconut Sauce
To achieve the specific ivory-colored coconut lime sauce seen in the visuals, you need high-quality ingredients that behave correctly under heat. Choosing the right components is the first step toward a successful Coconut Chicken.
Bone-in, Skin-on Chicken Thighs: You will need 4 to 6 large chicken thighs. The bone provides insulation, keeping the meat juicy, while the skin renders out the fat needed to toast the rice and aromatics. Compared to a lemon chicken recipe (coming soon), thighs offer a much richer mouthfeel here.
Jasmine Rice: Use 1.5 cups (270g) of long-grain jasmine rice. This specific variety is essential for its floral aroma and ability to absorb the coconut milk while maintaining individual grain definition.
Full-Fat Coconut Milk: 1 can (13.5 oz / 400ml) is required. Do not use “lite” coconut milk, as it lacks the necessary fat content to create that thick, drizzlable reduction sauce that pools beautifully around the chicken.
Chicken Bone Broth: 1 cup (240ml) of high-quality stock provides the savory backbone. This foundational liquid ensures the rice cooks through without the coconut milk becoming too cloying.
Fresh Aromatics: 3 cloves of garlic, minced, and 1 tablespoon (15g) of freshly grated ginger. These invisible ingredients are the engine of flavor, providing the “zing” that balances the creamy elements.
Red Fresno Chilies: 1 or 2 chilies, thinly sliced. These provide a mild-to-medium heat and a stunning pop of red color that contrasts against the green cilantro and ivory sauce.
Toasted Coconut Flakes: 1/4 cup (15g) of unsweetened flakes. These add a crucial textural element, providing a dry crunch that plays off the creamy rice.
Limes: 2 whole limes. One will be juiced into the sauce, and the other will be sliced and charred in the pan to serve as a smoky, acidic garnish.
Fresh Cilantro: 1/2 cup (15g) of roughly chopped leaves. The vibrant green color is essential for the visual “pop” described in our blueprint, adding a necessary herbaceous finish.
Foundational Seasonings: 2 tablespoons (30ml) of neutral oil (like avocado or grapeseed) for the initial sear, plus generous amounts of kosher salt and cracked black pepper to taste.
Essential Tools for Mastering the Golden-Brown Sear
Achieving the perfect Coconut Chicken requires a heavy-bottomed vessel. A 12-inch (30cm) cast-iron skillet or a wide Dutch oven is ideal. These tools retain heat efficiently, ensuring that when the chicken skin hits the pan, it sears immediately rather than steaming.
You will also need a fine-mesh sieve to rinse the jasmine rice. Rinsing removes excess surface starch, which is the secret to getting that glistening, individual grain texture rather than a gummy mass. A pair of stainless steel tongs is also vital for flipping the chicken without tearing the delicate, browning skin.
Mastering the Perfect Golden-Brown Sear: Step-by-Step
Phase 1: Preparing and Searing the Protein
Start by patting the chicken thighs completely dry with paper towels. Moisture is the enemy of a crispy sear. Season both sides aggressively with kosher salt and plenty of cracked black pepper, ensuring the black pepper flecks are visible on the skin side.
Heat 2 tablespoons (30ml) of oil in your skillet over medium-high heat. Once the oil shimmers, place the chicken thighs skin-side down. Do not crowd the pan. Sear for 6-8 minutes without moving them. You are looking for a deep, caramelized golden-brown crust. If the skin is sticking, it isn’t ready to flip. Once golden, flip and sear the bottom for 2 minutes, then remove the chicken to a plate (it will not be fully cooked yet).
Phase 2: Building the Aromatic Base and Toasting Rice
Reduce the heat to medium and pour off all but 1 tablespoon (15ml) of the rendered fat. Add your minced garlic and grated ginger. Sauté for 30-60 seconds until fragrant but not browned. Add the rinsed jasmine rice directly to the pan.
Stir the rice for 2 minutes to coat every grain in the chicken fat and aromatics. This “toasting” phase creates a barrier on the rice, helping it stay fluffy in the coconut milk. This technique is similar to how you would start a traditional chicken paella to ensure the grains don’t get mushy.
Phase 3: The Coconut Milk Simmer
Pour in 1 cup (240ml) of chicken stock and half of the coconut milk. Stir in the juice of half a lime and a pinch of salt. Bring the liquid to a gentle simmer. Place the chicken thighs back into the pan on top of the rice, making sure the crispy skin remains above the liquid line.
Cover the pan tightly and reduce the heat to low. Let the Coconut Chicken cook for 15-18 minutes, or until the rice has absorbed the liquid and the chicken reaches an internal temperature of 165°F (74°C).
Phase 4: Reducing the Sauce and Charring the Garnish
While the rice cooks, take a small saucepan and simmer the remaining coconut milk with a squeeze of lime until it thickens into a pourable, ivory-colored reduction. In a separate dry pan, place the lime wedges cut-side down over high heat until they are charred and blackened around the edges.
Toast the coconut flakes in a dry pan for 1-2 minutes until they turn a light golden brown and smell nutty. Watch them closely, as they can burn in seconds!
Expert Tips for Success
- Don’t Skip the Rinse: Rinsing the jasmine rice until the water runs clear is the difference between a professional result and a “clumpy” home cook mistake.
- Listen to the Sizzle: When searing the chicken, a loud, consistent sizzle means the fat is rendering. If the sound dies down, your pan is too cold, and the skin will become rubbery.
- The Liquid Line: Never submerge the crispy chicken skin in the cooking liquid. The skin must stay exposed to the steam to remain firm while the meat stays succulent.
- Rest Before Serving: Once the rice is done, remove from heat and let the pan sit, covered, for 5 minutes. This allows the steam to redistribute, making the rice easier to fluff.
How to Store and Reheat Your Leftovers
This Coconut Chicken keeps remarkably well. Store leftovers in an airtight container in the refrigerator for up to 3 days. The flavors of the ginger and garlic actually deepen over time, much like a hearty chicken casserole.
To reheat, the best method is the oven. Place the chicken and rice in an oven-safe dish, add a splash of water or coconut milk to the rice to prevent drying, and cover with foil. Heat at 350°F (175°C) for 15 minutes. To restore the crispy skin, pop the chicken under the broiler for the last 2 minutes.
What to Serve With One-Pot Coconut Chicken
While this is a complete meal on its own, you can expand the table with a few bright sides. A crisp cucumber salad with rice vinegar and sesame oil complements the creaminess of the coconut perfectly. If you are looking for more chicken inspiration, you might enjoy our Peruvian grilled chicken for a different take on bold poultry flavors.
For a lighter lunch the next day, this chicken can be shredded and tossed into a refreshing chicken pasta salad or served cold alongside a mango coconut chia pudding for a tropical-themed day of eating.
Frequently Asked Questions
It is not recommended. Lite coconut milk lacks the fat needed to create the thick ivory sauce and the rich mouthfeel of the jasmine rice.
You can, but breasts dry out faster. If using breasts, reduce the simmering time to avoid a rubbery texture and ensure they stay juicy.
The key is to sear the skin thoroughly first and then ensure the skin remains above the liquid line while the rice simmers.
Fresno chilies are similar to jalapeños but slightly fruitier and milder. Removing the seeds will further reduce the heat level.
Gummy rice usually results from not rinsing the starch off before cooking or using too much liquid. Always rinse until the water is clear.
The Ultimate One-Pot Coconut Chicken Recipe

Coconut Chicken with Crispy Thighs and Creamy Coconut Lime Sauce
Ingredients
Equipment
Method
- Pat chicken thighs dry and season with salt and cracked black pepper.
- Heat oil in a skillet and sear chicken skin-side down for 6-8 minutes until golden-brown and crispy.
- Sauté garlic and ginger in the rendered fat. Add rice and toast for 2 minutes.
- Add broth, half the coconut milk, and lime juice. Place chicken on top and simmer covered for 15-18 minutes.
Notes
Keep the chicken skin above the liquid line to maintain that crispy texture.
Bring the Tropics to Your Kitchen Today!
There is nothing quite like the aroma of Coconut Chicken wafting through the house. It is a dish that feels like a vacation in a bowl—sophisticated, comforting, and visually stunning. The contrast between the deeply caramelized chicken and the ivory sauce is something you have to see (and taste) to believe.
If you made this recipe, I would love to hear from you! Leave a comment below and let me know how your crispy skin turned out. Don’t forget to share your photos and tag us on Pinterest to inspire other home cooks!