There is a specific, quiet magic to a plate of authentic French crepes catching the soft morning window light. When you lift that first paper-thin layer with a silver fork, the crepe should be so flexible and translucent that it almost glows, revealing a delicate lattice of golden-brown leopard spotting. This isn’t just breakfast; it is a masterclass in culinary texture and temperature control.
Achieving that professional, matte finish on a cream ceramic plate requires more than just a good recipe. It requires an understanding of the relationship between resting gluten and high-heat searing. These French crepes are designed to be soft and buttery, with edges that never crack or dry out, finished with a microscopic dusting of powdered sugar and a shimmering glaze of melted salted butter.
Whether you are a seasoned home cook or a weekend enthusiast, mastering the French crepe is a rite of passage. The following guide breaks down the forensic details of the perfect crepe, from the micro-pores in the batter to the exact moment the butter begins to brown against the hot surface of the pan.
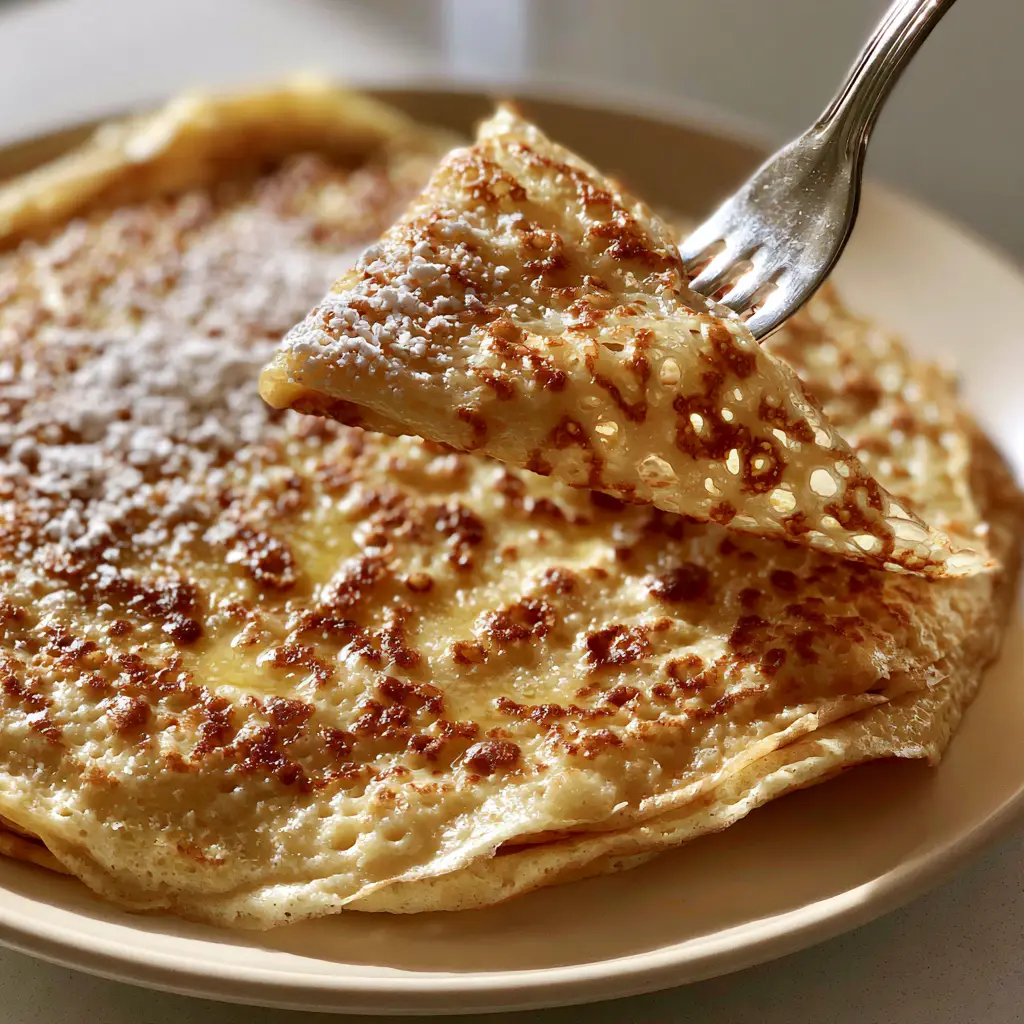
The Signature Characteristics of a Perfect French Crepe
- Translucent Flexibility: The batter must be thin enough to create a crepe you can almost see through, yet strong enough to be lifted by a fork without tearing.
- Lacy Leopard Spotting: These are the iconic golden-brown marks created by the Maillard reaction when the batter hits the hot, buttered surface of the pan.
- Soft, Non-Cracking Edges: By using a specific ratio of liquid to flour and resting the batter, we ensure the edges remain tender and buttery rather than crisp and brittle.
- The Salted Butter Sheen: A final glaze of melted salted butter adds a savory depth that balances the airy dusting of ultra-fine powdered sugar.
Essential Components for Translucent Crepe Success
To achieve the visual and textural results seen in professional French patisseries, every ingredient serves a structural purpose. We are building a delicate emulsion that must withstand high heat while remaining incredibly soft.
All-Purpose Flour: 1 ½ cups (185g)
The backbone of the recipe, providing just enough gluten to keep the crepe flexible. We avoid high-protein bread flour to ensure the “lacy” texture isn’t replaced by a rubbery chew.
Whole Milk: 1 ½ cups (360ml)
Fat is flavor, and the proteins in whole milk contribute to the beautiful leopard spotting. Using skim milk would result in a pale, less flavorful crepe that lacks the signature sheen.
Large Eggs: 3 units
Eggs act as the primary binder, giving the crepes their structural integrity so they can be paper-thin. They also provide the rich, golden hue that looks so inviting under morning light.
Melted Salted Butter: 3 tbsp (45g) for the batter + extra for glazing
Melted butter in the batter prevents sticking and creates those micro-pores. Using salted butter specifically enhances the flavor profile, providing a sharp contrast to the sweet powdered sugar.
Granulated Sugar: 1 tbsp (12g)
This small amount of sugar isn’t just for sweetness; it aids in the caramelization process, helping to achieve that specific leopard spotting we desire.
Vanilla Extract: 1 tsp (5ml)
A subtle aromatic that bridges the gap between the savory butter and the sweet sugar dusting.
Fine Sea Salt: ¼ tsp (1.5g)
Even with salted butter, a tiny pinch of fine sea salt ensures the flavors are vibrant and not masked by the flour.
The Tools You Need for Culinary Precision
Achieving a paper-thin result requires the right equipment. A 10-inch (25cm) non-stick skillet or a traditional carbon steel crepe pan is essential for even heat distribution. You will also need a high-speed blender or a fine-mesh whisk to ensure the batter is completely free of lumps.
A small offset spatula or a thin silicone turner is vital for lifting the edges without causing cracks. Finally, a fine-mesh sieve is required for that “microscopic dusting” of powdered sugar that creates the soft-focus visual appeal on the matte ceramic plate.
Mastering the Batter: The Secret is the Rest
Step 1: Emulsifying the Ingredients
In a blender, combine the milk, eggs, melted butter, sugar, salt, and vanilla. Pulse for 5 seconds until combined, then add the flour. Blend on high for 20-30 seconds until the mixture is completely smooth and resembles the consistency of heavy cream.
If you are mixing by hand, whisk the eggs and milk first, then slowly sift in the flour to avoid lumps. This step is critical for the “micro-pores” visible in high-detail photos of French crepes.
Step 2: The Mandatory Gluten Rest
Transfer the batter to a bowl, cover, and refrigerate for at least 30 minutes, or ideally 2 hours. During this time, the starch granules in the flour expand and the gluten relaxes. If you skip this, your crepes will be rubbery and prone to shrinking in the pan.
This resting period also allows air bubbles to subside, which is how you achieve that lacy, translucent texture rather than a thick, bubbly pancake-like surface. If you’ve ever tried traditional crepes from other regions, you’ll know that the texture of a rested French batter is uniquely delicate.
The Art of the Sear: Achieving Leopard Spots
Step 3: Temperature Control and the First Flip
Place your pan over medium-high heat. Brush the surface lightly with melted salted butter. You want the pan hot enough that a drop of water sizzles and evaporates instantly. This high heat is what triggers the leopard spotting.
Pour about ¼ cup (60ml) of batter into the center of the pan. Immediately tilt and swirl the pan in a circular motion so the batter coats the entire bottom in a paper-thin layer. Any excess should be poured back or spread quickly.
Step 4: Visual and Sensory Cues
Watch for the edges to lift slightly and look dry—this usually takes about 60-80 seconds. The surface will go from shiny to matte. Use your spatula to gently lift an edge; if you see those beautiful golden-brown spots, it’s time to flip.
Flip the crepe carefully. The second side only needs 20-30 seconds. You are looking for a subtle sheen and a flexible, soft texture. Do not overcook, or you will lose the translucence and the edges will become brittle.
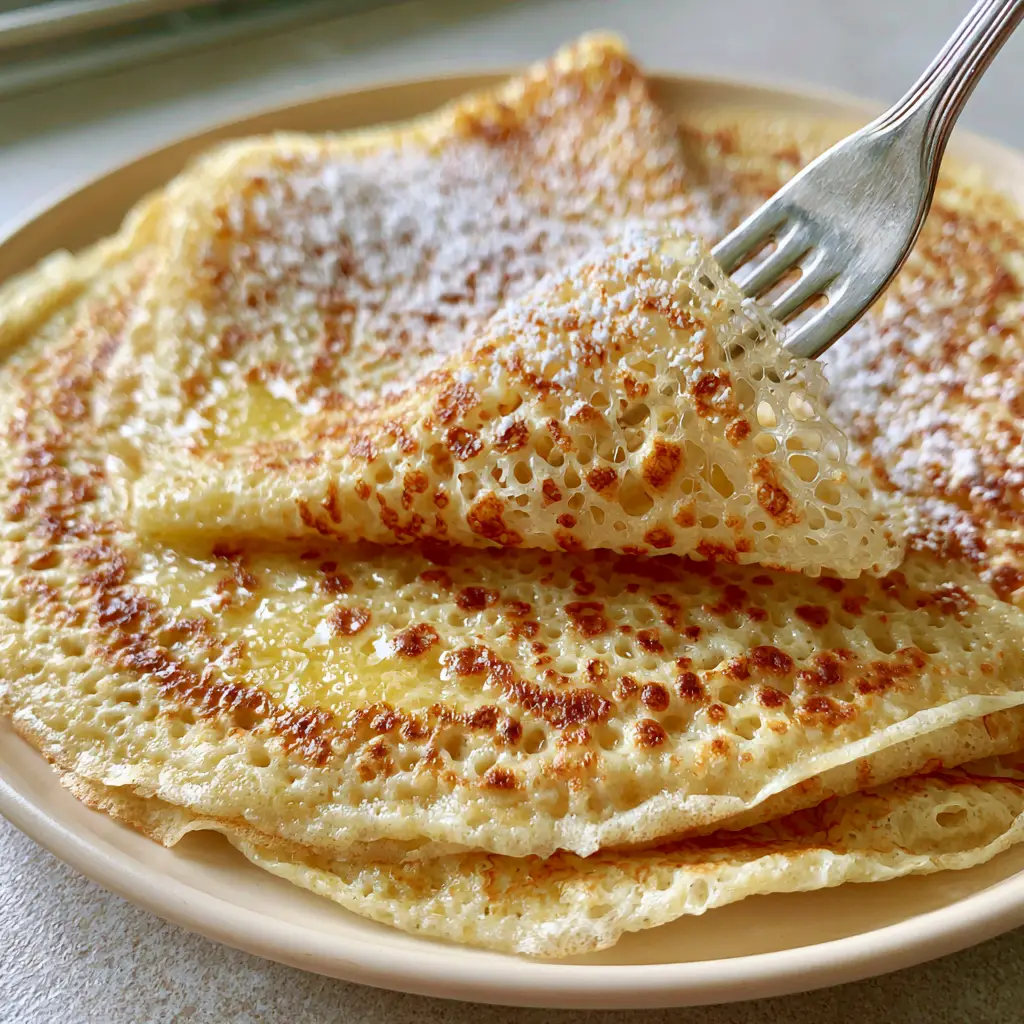
Finishing Touches: The Glaze and Dusting
As each crepe comes off the pan, stack them on a matte cream ceramic plate. While they are still steaming hot, lightly brush the top of the crepe with more melted salted butter. This creates that “subtle sheen” described in the visual blueprint.
Just before serving, hold a fine-mesh sieve high above the plate and add a teaspoon of ultra-fine powdered sugar. Tap the side of the sieve gently to create a light, airy dusting that looks like fallen snow across the leopard spots. This contrast between the golden brown, the buttery sheen, and the white sugar is what makes French crepes visually stunning.
Expert Tips for Success
- The “Discard” Crepe: Don’t be discouraged if the first crepe is ugly. The first one seasoned the pan and adjusts the temperature; the second is where the magic starts.
- Consistency Check: If your batter feels too thick after resting, whisk in 1 tablespoon (15ml) of milk at a time until it flows like thin cream.
- Butter, Not Oil: While oil works, it doesn’t provide the same Maillard reaction or flavor. Salted butter is the key to the professional sheen.
- Avoid Over-Mixing: Once the flour is in, blend just until smooth. Over-blending creates too much gluten, which leads to tough crepes.
Perfect Pairings and Serving Suggestions
These crepes are versatile enough to be served as a standalone breakfast or as part of a larger spread. For a classic European breakfast, pair them with traditional French sides like fresh berries or a light cafe au lait.
If you are looking for a more savory application, you can omit the sugar and vanilla and serve them alongside a crisp cucumber salad for a sophisticated brunch. They even work as a dessert when paired with something like banana-based treats for a fusion of textures.
For those who enjoy a variety of handheld snacks, these crepes fit perfectly into modern adult lunchable concepts, where they can be rolled with ham and gruyère cheese.
Frequently Asked Questions
Yes, you can refrigerate the batter for up to 24 hours. In fact, a longer rest often results in an even better texture and deeper flavor.
While unsalted butter works, salted butter provides a professional flavor contrast against the powdered sugar that is characteristic of high-end French patisseries.
Leopard spotting is achieved by using a high-heat pan and a small amount of butter. The Maillard reaction occurs where the batter hits the hot fat, creating those golden-brown marks.
Rubbery crepes are usually the result of over-mixing the batter or failing to let it rest. Resting allows the gluten to relax, ensuring a tender, lacy texture.
The first crepe typically acts as a ‘sacrificial’ piece that seasons the pan and helps you gauge if the heat is perfectly adjusted. Don’t worry, the second one is usually perfect.
The Ultimate French Crepes Recipe
French Crepes: How to Make Thin, Lacy, and Golden Leopard-Spotted Crepes
Ingredients
Equipment
Method
- Combine milk, eggs, melted butter, sugar, salt, and vanilla in a blender. Add flour and blend on high for 20-30 seconds until completely smooth.
- Chill the batter in the refrigerator for at least 30 minutes to allow the gluten to relax and air bubbles to dissipate.
- Heat a non-stick skillet over medium-high heat and brush with a small amount of melted salted butter.
- Pour 1/4 cup of batter into the pan, swirling immediately to cover the surface. Cook for 60-80 seconds until edges dry and golden spots appear.
- Gently flip and cook the other side for 20-30 seconds. The crepe should remain flexible and translucent.
- Stack crepes on a plate, brushing each with melted salted butter and finishing with a light dusting of powdered sugar.
Notes
Use medium-high heat to achieve the iconic golden leopard spotting.

Bring the Taste of France to Your Kitchen
Mastering French crepes is about more than just a recipe; it’s about embracing the delicate balance of heat, timing, and high-quality ingredients. By following these forensic steps, you can recreate that perfect, lacy, leopard-spotted texture every single time. The combination of the salted butter glaze and the powdered sugar dusting creates a sensory experience that is hard to beat.
If you enjoyed this deep dive into the art of the crepe, please leave a comment below and let us know how yours turned out! Don’t forget to share your beautiful creations and follow us on Pinterest for more culinary inspiration and visual guides.