There is a specific, audible “crunch” that defines the perfect Oven baked chicken tenders experience. It is not just a light crispness; it is a jagged, craggy, golden-brown architectural feat of breading that shatters upon impact. If you have been searching for a way to replicate the deep-fried texture of your favorite restaurant strips without the heavy oil and mess of a deep fryer, you have arrived at the definitive guide.
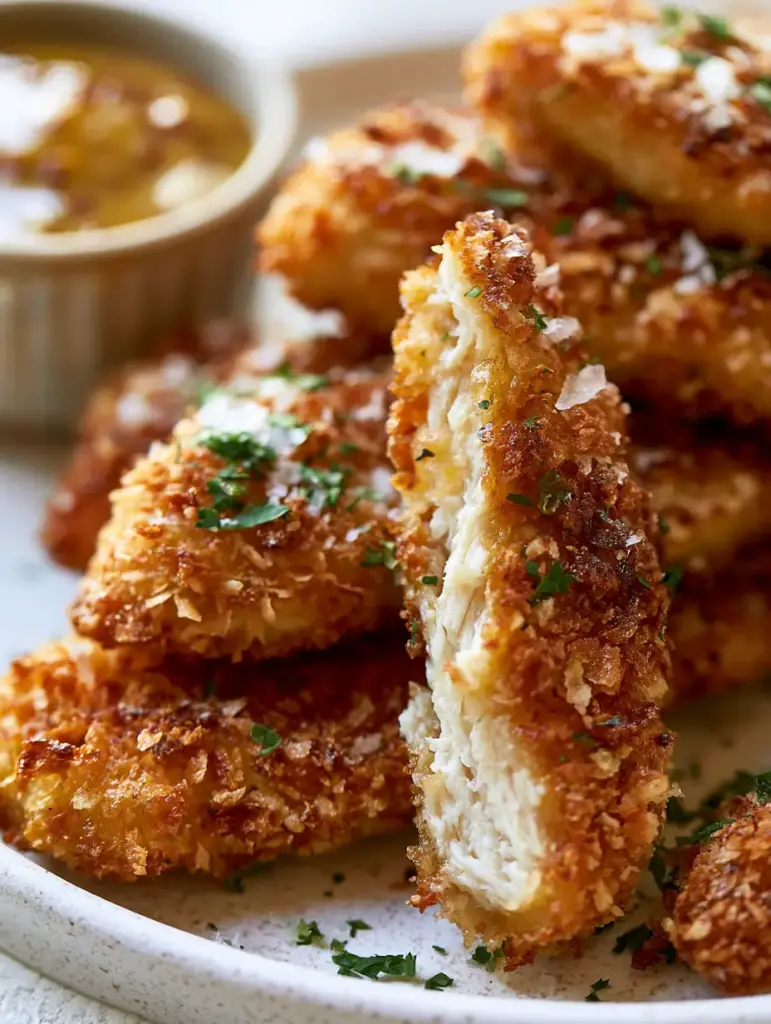
Imagine a stack of extra-crispy tenders resting on a matte white stoneware plate, their coating a deep, toasted amber. As you snap one in half, a plume of steam rises, revealing perfectly moist, fibrous white meat that contrasts against the heavy dusting of flaky sea salt and vibrant emerald-green parsley. This recipe is designed to bridge the gap between “healthy alternative” and “culinary masterpiece.”
By focusing on the science of moisture retention and the physics of panko, we are creating a dish that looks exactly like a high-end food photograph. Every element, from the glossy honey mustard sauce with visible stone-ground seeds to the specific way we toast our breadcrumbs, is calculated for maximum flavor and visual impact.
Why These Extra Crispy Chicken Strips Outperform Every Other Recipe
- The Pre-Toast Technique: We achieve that deep-fried golden-brown hue by pre-toasting the panko in a small amount of oil before it ever touches the chicken.
- Craggy Texture Science: Our triple-dredge method ensures a thick, jagged coating that holds onto every grain of flaky Maldon sea salt.
- Steaming Interior: By using high-heat convection principles, we seal in the juices, ensuring the white meat remains fibrous and tender, never rubbery.
- Visual Contrast: The addition of finely minced flat-leaf parsley provides a pop of color that elevates the dish from a simple snack to a gourmet dinner.
The Anatomy of the Perfect Golden-Brown Breading
To achieve the visual result described in our blueprint, every ingredient serves a dual purpose: structural integrity and flavor profile. We aren’t just using “crumbs”; we are building a shell.
1 lb (454g) Chicken Breast Tenderloins: We choose tenderloins or sliced breast strips for their consistent size and grain, which provides that specific “steaming fiber” look when broken open. If you’re looking for more ways to use this protein, you might enjoy our zesty lemon chicken recipe (coming soon) for a lighter weekday meal.
2 cups (120g) Panko Breadcrumbs: Unlike standard breadcrumbs, Panko is flaky and jagged, which is essential for creating the deep-fried texture in an oven environment. They act as little heat-conductors that crisp up individually.
1/2 cup (64g) All-Purpose Flour: This serves as the “primer.” It dries the surface of the chicken so the egg wash has something to cling to, preventing the breading from sliding off in one piece.
2 Large Eggs: The protein in the eggs acts as the “glue” for our craggy panko layer. It provides the moisture necessary for the breadcrumbs to hydrate slightly before they dehydrate and crisp in the oven.
2 tbsp (30ml) Extra Virgin Olive Oil: This is the “invisible” ingredient. We toss the panko in this oil before toasting to ensure every jagged edge turns golden-brown simultaneously.
1 tsp (5g) Flaky Sea Salt (Maldon style): Used as a finishing salt, these large crystals don’t just season; they catch the light and provide a distinct mineral crunch that enhances the Oven baked chicken tenders.
2 tbsp (8g) Fresh Flat-Leaf Parsley: Finely minced, this vibrant green herb provides the necessary visual and aromatic contrast to the rich, toasted notes of the breading.
Essential Kitchen Tools for Professional Results
To replicate the “high-end smartphone photo” look, you need the right gear. A standard baking sheet is good, but a wire cooling rack set inside that baking sheet is better. This allows hot air to circulate under the chicken, preventing a soggy bottom and ensuring the coating is uniform on all sides.
You will also need three shallow bowls for your dredging station. Using bowls that are too small will result in clumped breading and bare patches. For the honey mustard sauce, a small ceramic ramekin is ideal for that soft-focus background aesthetic.
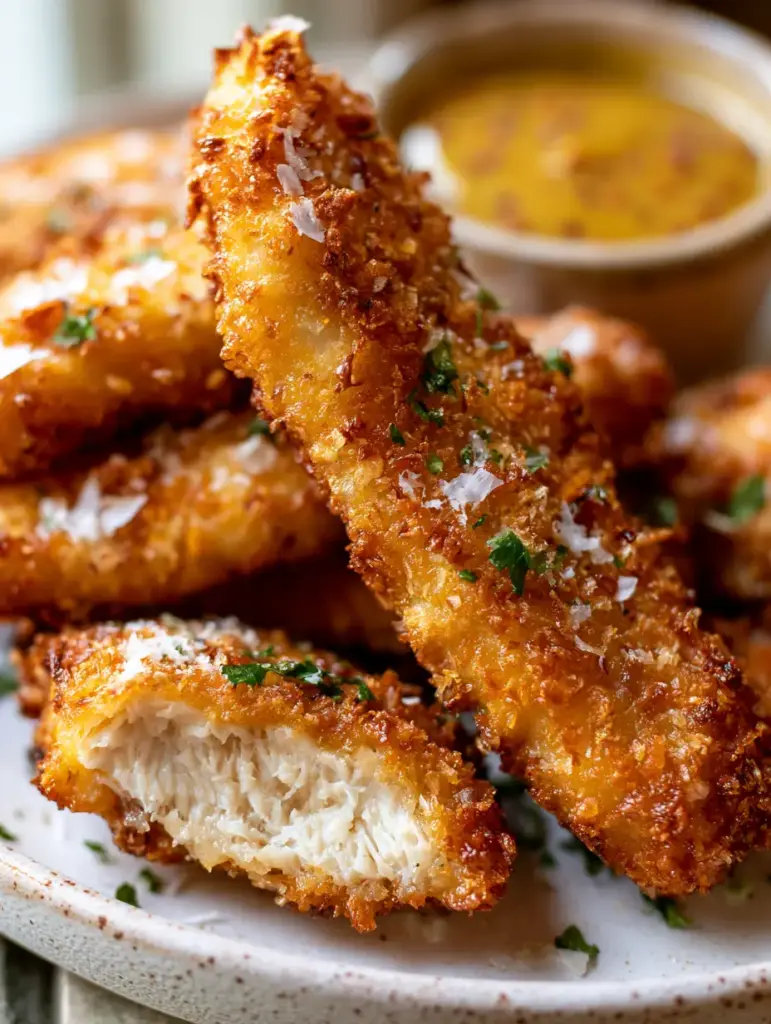
Building the Flavor: The Secret to the Triple-Dredge
Step 1: The Golden Panko Transformation
Preheat your oven to 400°F (204°C). In a large skillet over medium heat, add the panko breadcrumbs and olive oil. Stir constantly for 3–5 minutes until the crumbs are a uniform light golden-brown. This ensures your Oven baked chicken tenders look “deep fried” even before they finish baking. Transfer to a shallow dish and let cool slightly.
Step 2: The Priming Phase
Pat your chicken strips completely dry with paper towels. This is a non-negotiable step. If the chicken is wet, the flour will turn into a paste, and the breading will fall off. Season the flour with a pinch of salt and pepper in your first bowl. Dredge each piece of chicken in the flour, shaking off all excess until only a fine dust remains.
Step 3: The Binding and Coating
Dip the floured chicken into the beaten eggs (second bowl), ensuring full coverage. Finally, press the chicken firmly into the toasted panko (third bowl). Do not just toss them; press the crumbs into the meat to create that “thick, craggy layer of jagged golden-brown” crust. Place them onto the prepared wire rack.
Step 4: The High-Heat Roast
Slide the tray into the center of the oven. Bake for 12–15 minutes. You are looking for a visual cue: the panko should deepen in color and the edges should look remarkably crisp. The internal temperature should reach 165°F (74°C). For a different take on crispy poultry, you might consider our crispy bang bang chicken thighs.
Engineering the Glossy Honey Mustard Sauce
A great tender needs a great dip. To achieve the “glossy” look with “visible tiny mustard seeds,” we combine two types of mustard. Combine 1/4 cup (60g) mayonnaise, 1 tbsp (15g) Dijon mustard, 1 tbsp (15g) stone-ground mustard, 2 tbsp (30ml) honey, and a squeeze of lemon juice.
The stone-ground mustard provides the visual texture, while the honey creates that light-reflecting gloss. This sauce is much more sophisticated than the corn-syrup-based versions found in fast food, much like how our paleo-friendly sauces elevate simple proteins.
Expert Tips for Sensory Perfection
- The Snap Test: If you’ve cooked the tenders correctly, snapping one in half should produce a clean break in the crust while the meat inside pulls apart in moist, steaming fibers.
- Avoid Overcrowding: Leave at least 1 inch (2.5cm) of space between each tender on the rack. Overcrowding creates steam, which is the enemy of the “craggy layer.”
- Freshness Matters: Only chop the parsley seconds before serving. Pre-chopped parsley loses its “vibrant emerald-green” hue and turns a dull olive color.
- Salt Timing: Apply the flaky sea salt immediately after the tenders come out of the oven. The residual heat helps the crystals adhere to the crags of the panko.
Serving Suggestions and Internal Pairings
These Oven baked chicken tenders are a versatile protein powerhouse. While they are stunning on their own, they also pair beautifully with a variety of textures. Consider serving them alongside a creamy lemon ricotta pasta for a decadent dinner, or slice them up to top a fresh green salad.
If you have leftovers (though unlikely!), they make an incredible addition to crispy baked tacos for a fusion-style lunch the next day. The crunch of the panko adds an extra layer of dimension to the soft taco shells.
Common Questions About Baking Tenders
Yes, simply slice large chicken breasts into even 1-inch thick strips. Ensure they are uniform so they all finish cooking at the same time.
Look for steaming fibers when you snap one in half. Visually, the crust should be dark gold. Scientifically, an instant-read thermometer should register 165°F (74°C).
The key is using a wire cooling rack set inside your baking sheet. This allows hot air to circulate under the chicken, crisping the panko on all sides simultaneously.
Avoid the microwave! Reheat in an oven or air fryer at 350°F (175°C) for 5 minutes to reactivate the crunch of the panko coating.
Chicken tenders cook quickly (about 12-15 mins). In that short time, panko won’t reach a deep golden brown. Pre-toasting them in a pan with a little oil ensures a vibrant, fried-looking color and extra crunch.
The Ultimate Extra Crispy Oven Baked Chicken Tenders Recipe
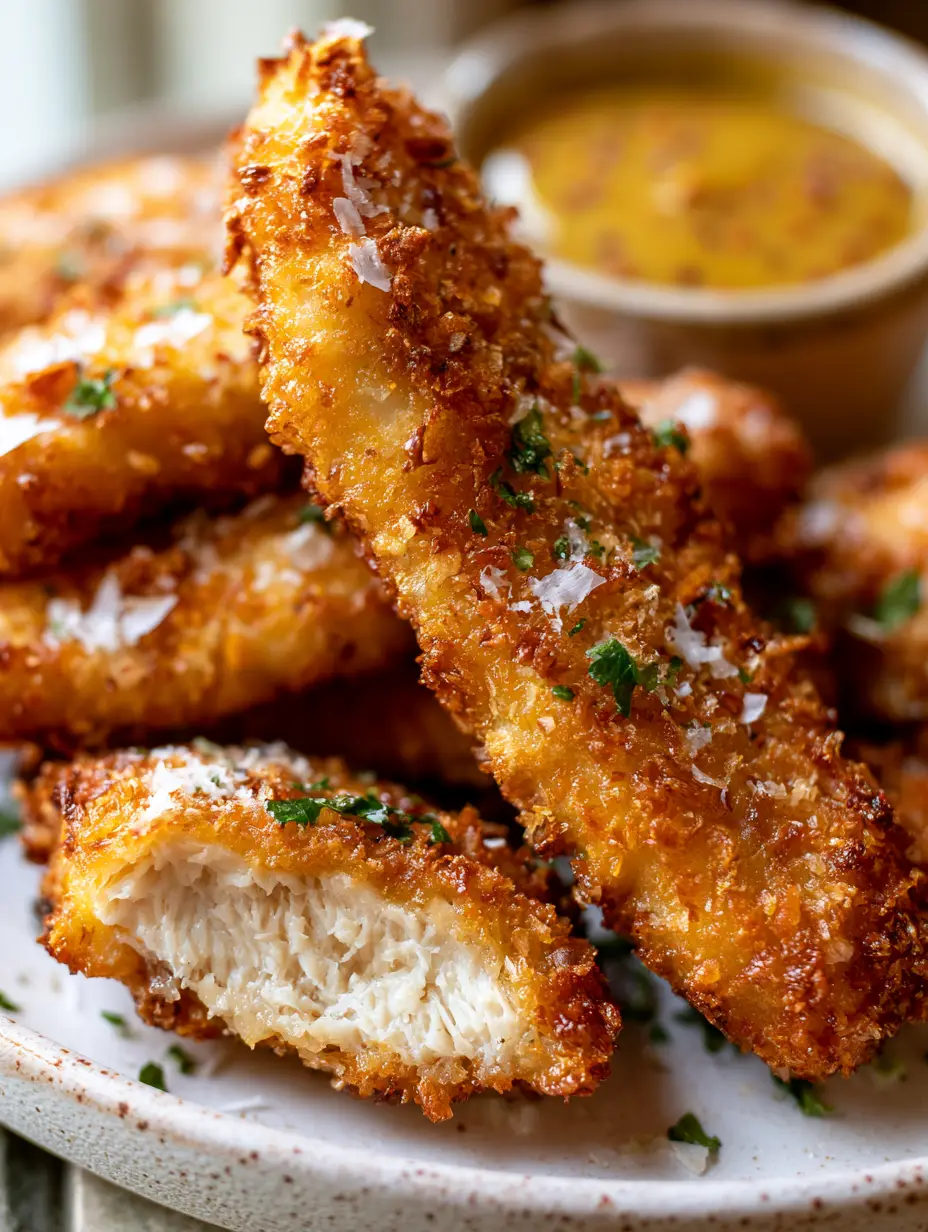
Oven Baked Chicken Tenders with the Ultimate Craggy Panko Crust
Ingredients
Equipment
Method
- In a skillet over medium heat, stir panko and olive oil until light golden brown (3-5 mins). Let cool.
- Set up three bowls: 1) Flour with salt/pepper, 2) Beaten eggs, 3) Toasted panko.
- Dry chicken, coat in flour, dip in egg, and press firmly into panko for a thick, craggy layer.
- Place on a wire rack over a baking sheet. Bake at 400°F (204°C) for 12-15 minutes until internal temp is 165°F (74°C).
- Dust with flaky sea salt and minced parsley while hot. Serve with glossy honey mustard sauce.
Notes
Pre-toasting the panko is the only way to get deep color without drying out the chicken.

Closing & Culinary Call to Action
Mastering the Oven baked chicken tenders is a rite of passage for any home cook looking to balance indulgence with technique. By following this visual blueprint—from the pre-toasted panko to the stone-ground honey mustard—you are ensuring a meal that is as beautiful as it is delicious. The contrast of the hot, juicy chicken against the cold, glossy sauce is a sensory experience you won’t soon forget.
Did your tenders achieve that perfect craggy crunch? We want to see your results! Leave a comment below and share your success. Don’t forget to follow us and save this recipe to your boards on Pinterest for your next family dinner night.