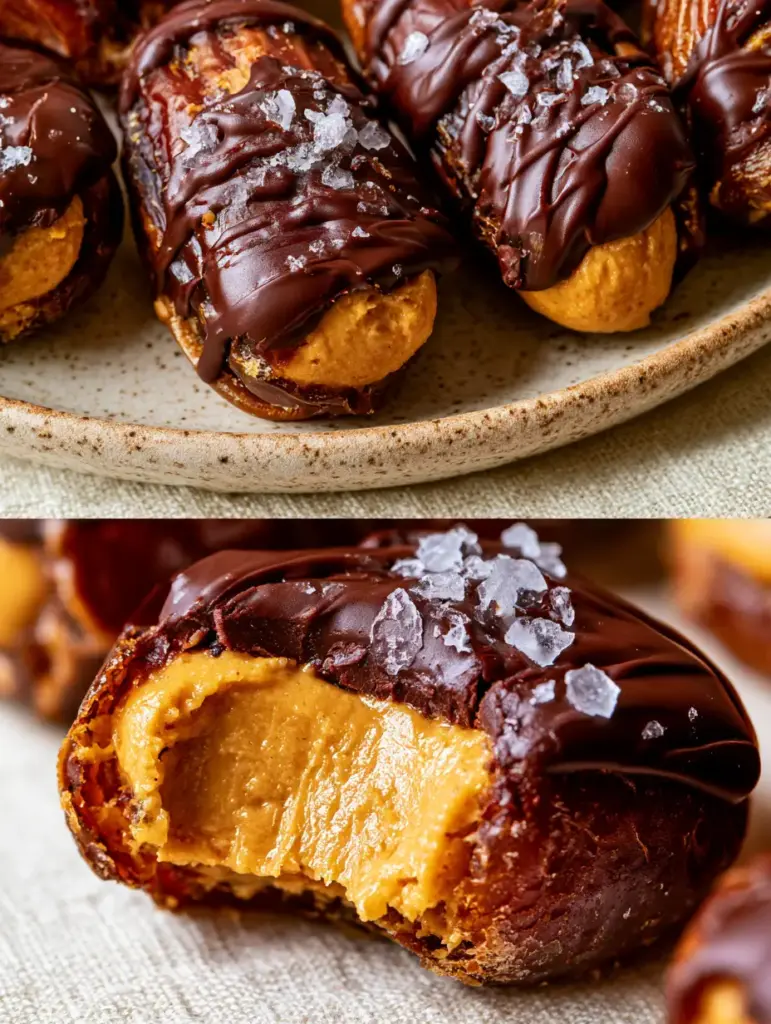
When you crave something sweet but want to keep your nutrition on track, finding the right 3-ingredient snacks can feel like a culinary revelation. These chocolate peanut butter stuffed dates aren’t just a quick fix; they are a sophisticated blend of textures and flavors that satisfy the deepest dessert cravings. Imagine a chewy, caramel-like date filled with a molten center of organic peanut butter, all draped in a glossy ribbon of 70 percent dark chocolate.
The visual appeal of these treats is undeniable, especially when you see that first bite reveal the creamy golden center. Topped with large, translucent flaky sea salt crystals, these snacks provide a sensory experience that rivals any high-end chocolatier. Whether you are looking for a mid-afternoon energy boost or a healthy post-dinner treat, this recipe delivers maximum flavor with minimal effort.
By using just three core ingredients—plus a pinch of essential seasoning—you can create a snack that is naturally gluten-free, vegan, and incredibly nutrient-dense. The soft morning light hitting the dark chocolate drizzle creates a beautiful contrast against the neutral linen textures of a modern kitchen, making these as much a feast for the eyes as they are for the palate.
Why These Healthy Stuffed Dates are the King of 3-Ingredient Snacks
- The Perfect Texture Trifecta: You get the chewiness of the Medjool date, the silky smoothness of organic peanut butter, and the definitive snap of tempered dark chocolate.
- Natural Caramel Sweetness: Medjool dates are nature’s candy, offering a deep molasses-like flavor that pairs perfectly with the bitterness of 70 percent cocoa.
- Visual Sophistication: The glossy chocolate ribbons and visible salt crystals make these look like a professional handheld smartphone photo from a high-end food blog.
- Quick and Clean: No baking required, which means you can have a batch of these snacks ready in under 20 minutes without heating up the kitchen.
The Essential Pantry for Your Stuffed Date Masterpiece
To achieve the results seen in the macro shots of these 3-ingredient snacks, the quality of your ingredients is paramount. Each component plays a vital role in both the structural integrity and the final flavor profile of the dish.
Large Medjool Dates (The Vessel)
Medjool dates are specifically required for their size and soft, jammy texture. You will need about 12-15 large dates; ensure they are at a room temperature state to make them easier to slice and stuff without tearing the delicate skin.
Creamy Organic Peanut Butter (The Molten Core)
Choose a peanut butter that is “drippy” and creamy. You’ll need approximately 1/2 cup (125g) of peanut butter. Organic varieties often have the best natural oil separation, which provides that professional “thick, creamy center” seen in the close-up shots.
70 Percent Dark Chocolate (The Glossy Finish)
High-quality dark chocolate is essential for the drizzle. We recommend 1/2 cup (85g) of chocolate chips or a chopped bar. The 70 percent cocoa content ensures the snack isn’t cloyingly sweet and provides that deep, dark contrast against the golden peanut butter.
Flaky Sea Salt (The Structural Finisher)
While technically a seasoning, large translucent flaky sea salt is the “fourth ingredient” that transforms these into a gourmet experience. It provides a necessary crunch and balances the sugars in the dates and the fats in the nuts.
Foundational Invisible Ingredients
To ensure your chocolate is glossy and easy to drizzle, a teaspoon (5ml) of coconut oil is a professional secret. It helps the chocolate melt smoothly and gives it that signature “glossy ribbon” look as it cascades over the dates.
Tools Required for Culinary Precision
To replicate the flat lay composition and the perfect bite, you need more than just your hands. A sharp paring knife is essential for creating a clean slit in the dates without crushing the fruit. Using a small espresso spoon or a piping bag will help you get the peanut butter inside neatly.
A microwave-safe glass bowl or a small double boiler is needed for melting the chocolate. Finally, a wire cooling rack placed over a sheet of parchment paper will allow the excess chocolate to drip off, ensuring your 3-ingredient snacks have clean, professional edges rather than sitting in a pool of chocolate.
How to Construct the Perfect Stuffed Date
Step 1: Preparing the Medjool Vessel
Start with your dates at a room temperature state. Using a sharp paring knife, make a longitudinal slit down one side of each date. Be careful not to cut all the way through; you want to create a pocket, not two separate halves.
Gently pull the sides of the date apart and remove the pit. If the date feels too firm, roll it between your palms for a few seconds to soften the fibers. You should see a hollow cavity ready to be filled, with the skin remaining intact and glossy.
Step 2: Filling the Creamy Center
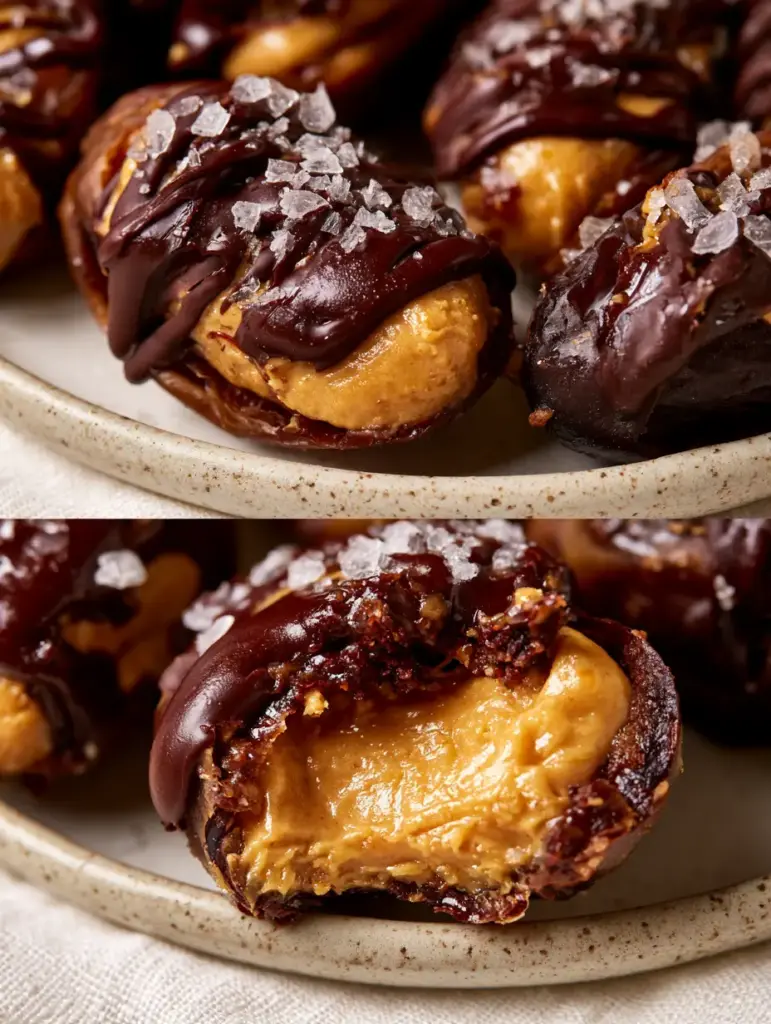
Stir your organic peanut butter well to incorporate any natural oils. Using a small spoon, fill each date with about 1-2 teaspoons (5-10g) of peanut butter. You want the filling to be flush with the top of the date but not overflowing.
For a cleaner look, you can transfer the peanut butter to a small plastic bag and snip off the corner. This “piping” method ensures the golden center stays inside the date and doesn’t smudge the outer skin, which is crucial for that extreme macro shot appearance.
Step 3: Creating the Glossy Chocolate Drizzle
Place your dark chocolate and a tiny amount of coconut oil in a microwave-safe bowl. Heat in 20-second intervals, stirring vigorously in between. This prevents the chocolate from seizing or burning, which would ruin the glossy finish.
Once the chocolate is completely smooth and falls off the spoon in a continuous “ribbon,” it is ready. Dip a fork into the chocolate and wave it back and forth over the stuffed dates. Aim for thin, elegant lines rather than a thick coating to maintain the visual balance of the 3-ingredient snacks.
Step 4: The Final Flourish of Salt
While the chocolate is still wet, immediately sprinkle a few crystals of flaky sea salt onto each date. If the chocolate sets, the salt won’t stick. The salt should look like large, translucent gems resting on the dark chocolate ribbons.
Allow the dates to sit at room temperature for 10 minutes, then transfer them to the refrigerator for another 10 minutes to “set” the chocolate. This ensures the chocolate has a snap when bitten into, as seen in the bitten-half macro photo.
Expert Tips for 3-Ingredient Snack Success
- Avoid Refrigerated Peanut Butter: Cold peanut butter is too stiff to drizzle or stuff cleanly. Always use it at room temperature for that “molten” look.
- Date Size Matters: Use “Jumbo” Medjool dates if available. They provide a better filling-to-fruit ratio and look more impressive on a speckled ceramic plate.
- Tempering Shortcut: Adding a touch of coconut oil to your chocolate not only adds gloss but prevents the chocolate from blooming (turning white) when stored in the fridge.
- The “Bite” Factor: For the perfect photo-ready bite, use a sharp knife to cut one date in half instead of actually biting it. This keeps the peanut butter center from squishing out too much.
Storage, Reheating, and Shelf-Life
These 3-ingredient snacks are incredibly shelf-stable. They can be stored in an airtight container at room temperature for up to 3 days, though the peanut butter may make the dates slightly softer over time. For the best “snap” in the chocolate, store them in the refrigerator for up to 2 weeks.
You can also freeze these for a cold, candy-bar-like experience. When frozen, they last for up to 3 months. There is no need to reheat them; in fact, they are best enjoyed slightly chilled or at room temperature to maintain the creamy texture of the center.
What to Serve with Your Stuffed Dates
These dates are quite rich, so they pair beautifully with a bitter beverage like black coffee or a strong espresso. If you’re hosting a brunch, these make a great sweet side alongside high protein breakfast ideas like egg white frittatas or Greek yogurt bowls.
For a full “healthy snack” spread, consider serving these alongside some savory options. They contrast perfectly with a crisp vinegar cucumber salad or even some oven baked cucumber chips for a crunchier texture profile. If you are preparing a larger meal, these dates are the perfect light finish after healthy dinner ideas such as grilled salmon or a Korean beef bowl.
Frequently Asked Questions About Healthy Snacks
Absolutely! Dates, organic peanut butter, and dark chocolate are naturally vegan and gluten-free. Just check your chocolate label for any dairy additives.
Yes, any nut or seed butter (like almond, cashew, or sunflower butter) works perfectly as long as it has a creamy, drippy consistency.
Ensure the dates are at room temperature and the peanut butter isn’t oily on the outside. A small amount of coconut oil in the chocolate helps it adhere and stay glossy.
When stored in an airtight container, these dates stay fresh and delicious for up to two weeks in the refrigerator.
Stuffed Medjool dates are excellent because they provide fiber and healthy fats, which keep you full longer compared to processed sugary snacks.
The Ultimate 3-Ingredient Peanut Butter Stuffed Dates Recipe
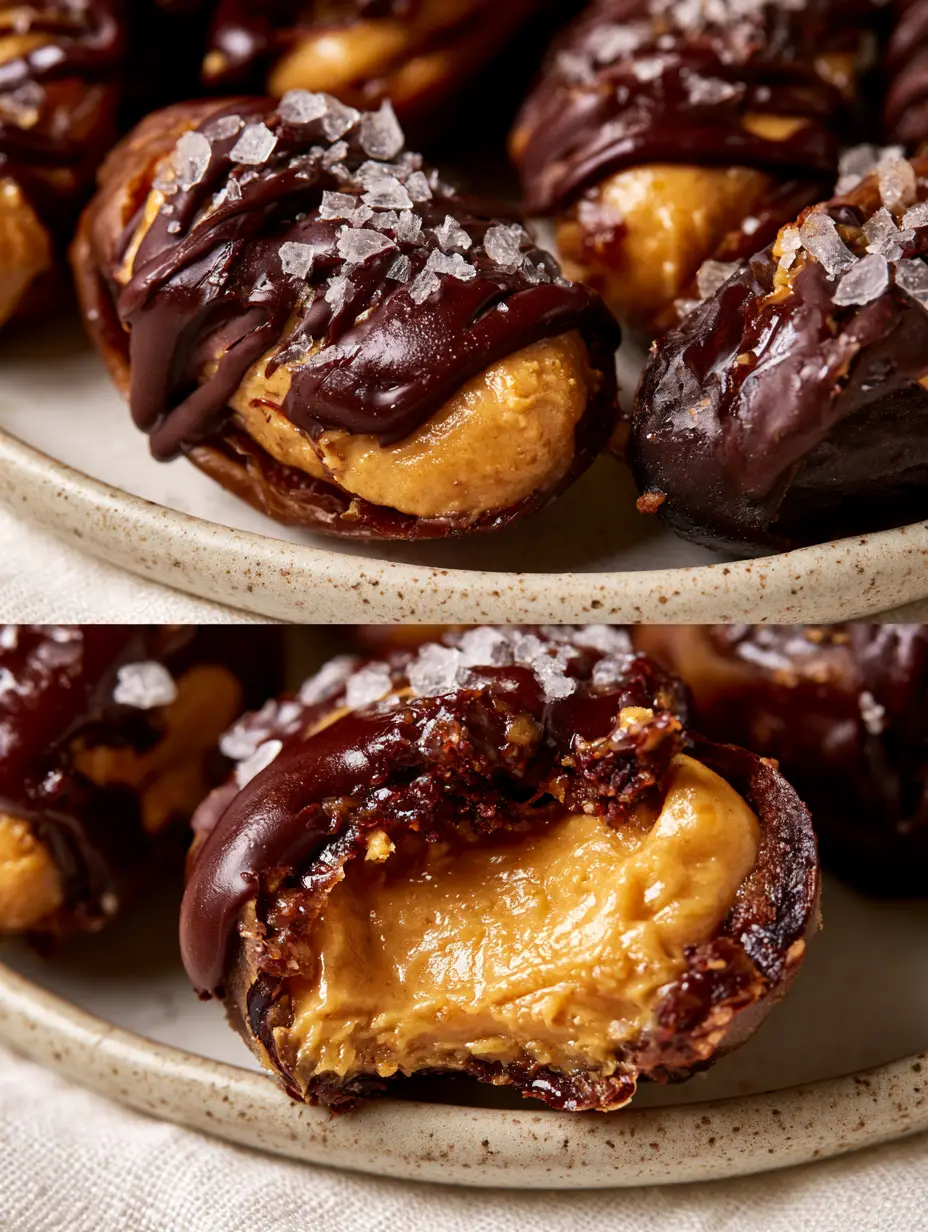
3-Ingredient Snacks: The Ultimate Chocolate Peanut Butter Stuffed Medjool Dates
Ingredients
Equipment
Method
- Using a paring knife, slice a longitudinal slit into each Medjool date and remove the pit while keeping the date intact.
- Spoon or pipe approximately 1-2 teaspoons of creamy peanut butter into the cavity of each date.
- Melt the dark chocolate and coconut oil in 20-second bursts in the microwave until glossy and smooth.
- Drizzle the melted chocolate over the dates in a ribbon pattern and immediately sprinkle with flaky sea salt.
Notes
Store in the fridge for a snappier chocolate texture.

Closing Thoughts on Handcrafted Treats
Mastering 3-ingredient snacks like these stuffed dates proves that you don’t need a long list of items to create something truly spectacular. The combination of high-quality dark chocolate, creamy peanut butter, and chewy Medjool dates creates a flavor profile that is both nostalgic and sophisticated. We hope you enjoy making these as much as you enjoy eating them!
If you loved this recipe, please leave a comment below and tell us how yours turned out! Don’t forget to sign up for our newsletter for more culinary inspiration and follow us on Pinterest for daily recipe pins. You might even want to frame your kitchen with a beautiful chocolate chip cookies kitchen art print to celebrate your love for all things sweet!


