There is a specific, undeniable aroma that fills the air when you walk into a pizza shop, a scent dominated by yeasty dough, sizzling butter, and pungent garlic. The Little Caesars experience is defined by that iconic orange bag, but what if you could recreate those pillowy, glistening breadsticks in your own kitchen? This recipe isn’t just a copycat; it is a forensic reconstruction of the perfect breadstick, designed to hit every sensory note from the toasted bubbles to the snowy parmesan finish.
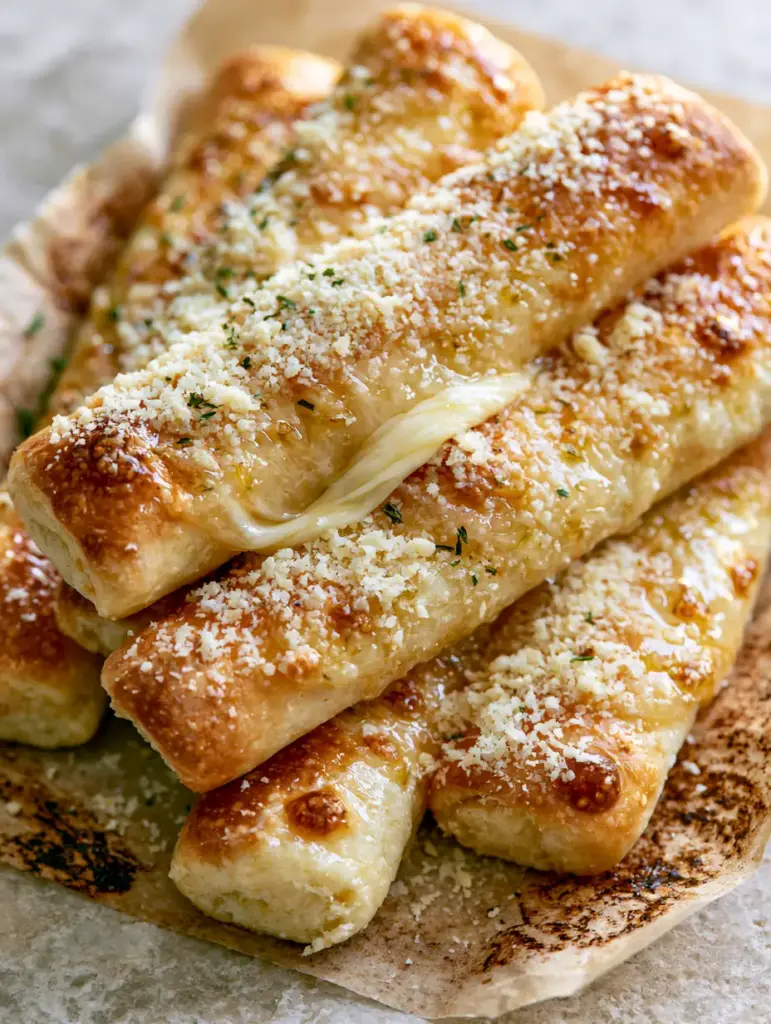
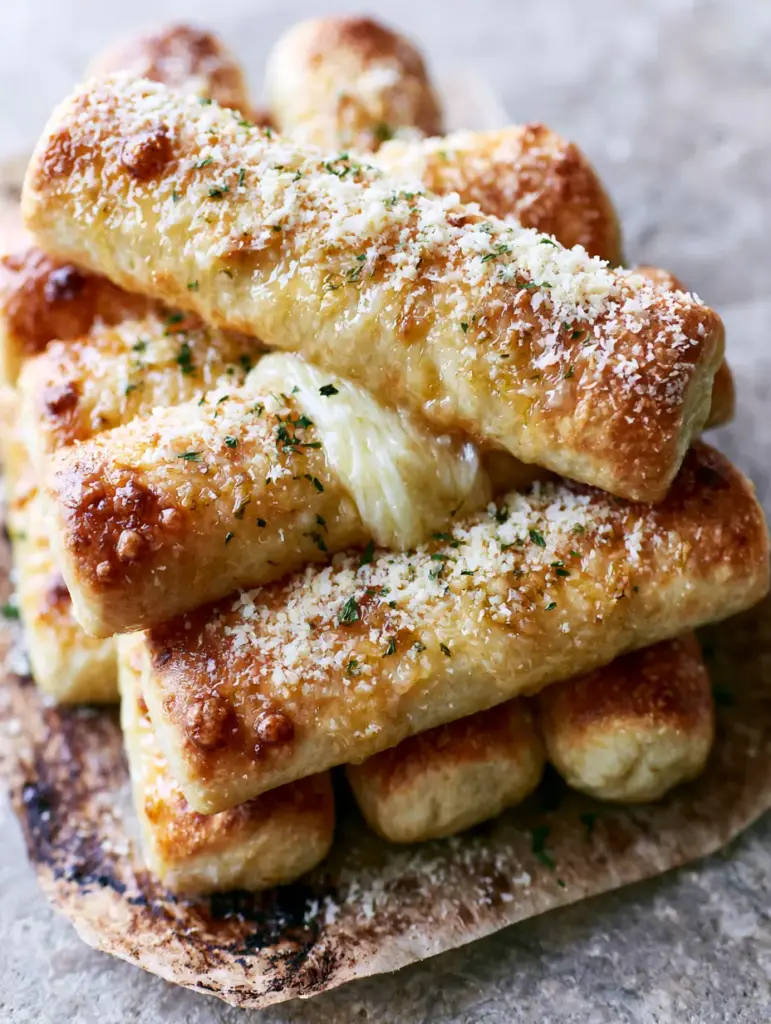
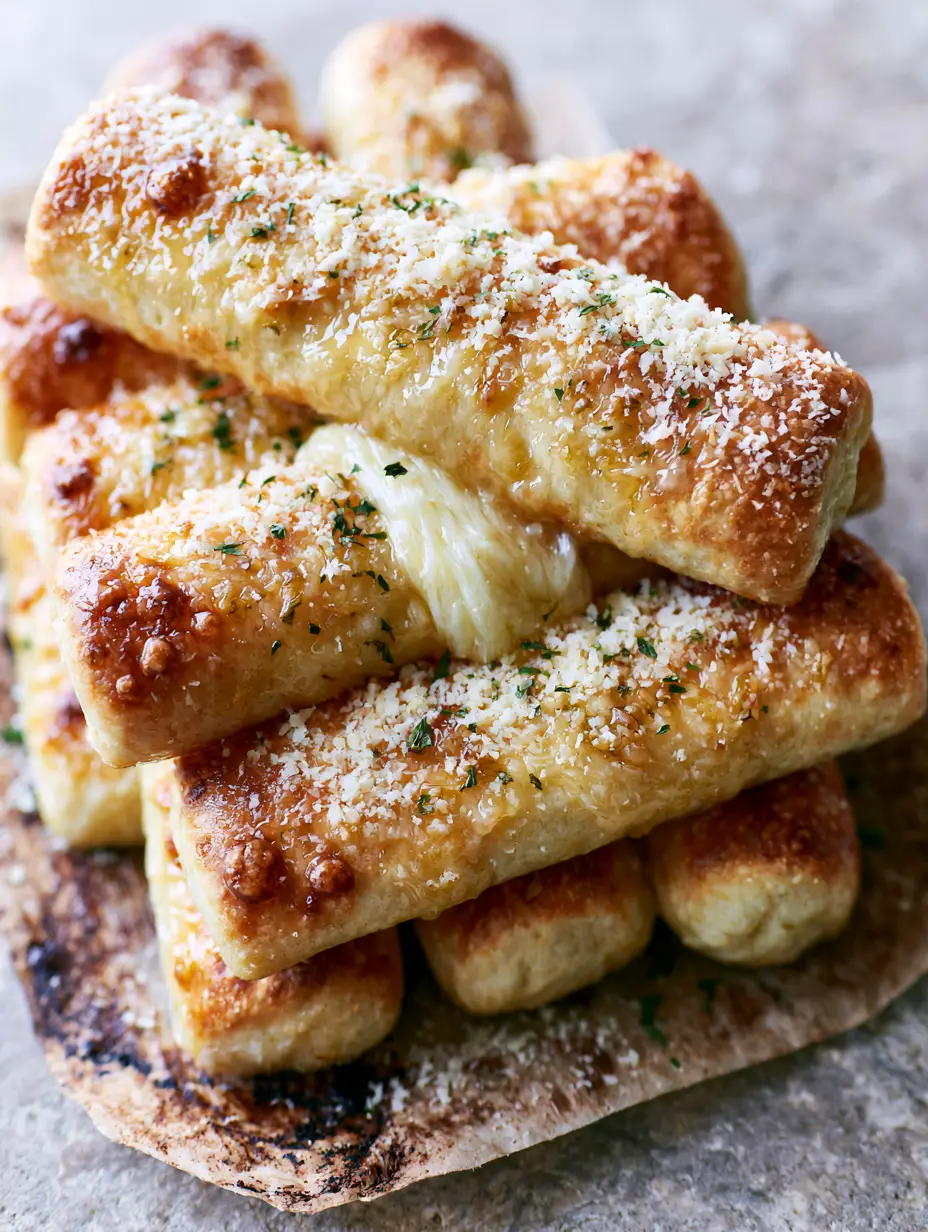
Imagine pulling apart two warm, golden-brown breadsticks to reveal a thick, stretchy mozzarella cheese pull that defies gravity. The surface is heavily glistening with a thick, translucent coating of melted garlic butter, speckled with fine minced garlic bits and tiny flecks of dried green parsley. It is a visual and culinary masterpiece that brings the pizzeria vibe directly to your stone countertop.
Whether you are hosting a game day gathering or looking for the perfect side for your ground beef dinner recipes, these breadsticks are the answer. We have meticulously balanced the hydration of the dough and the salinity of the garlic glaze to ensure every bite is a perfect echo of the original, only fresher and more decadent.
The Visual Anatomy of a Pizzeria-Style Breadstick
To achieve the authentic Little Caesars look, we must pay attention to the surface texture of the dough. Those slight toasted bubbles aren’t accidental; they are the result of high-heat fermentation and a hot oven environment that causes rapid steam expansion. The crust should be a deep golden-brown, providing a structural contrast to the soft, airy interior.
The “snowy” effect comes from using a very fine-grated parmesan cheese, applied immediately after the butter glaze. This allows the cheese to adhere to the bread without melting completely, maintaining that distinct white-on-gold visual contrast. Finally, the dried parsley flakes add a micro-pop of color that signals freshness and herbal balance.
- Perfectly Pillowy: A high-hydration dough ensures the interior stays soft while the exterior crisps up.
- Glistening Glaze: We use salted butter to create a translucent, shimmering coating that carries the garlic flavor into every crevice.
- The Epic Pull: Low-moisture mozzarella is hidden inside to provide that signature stretchy cheese core seen in professional food photography.
- Toasted Highlights: Strategic oven placement creates the “toasted bubbles” that characterize high-quality baked pizza dough.
The Essential Pantry Checklist for Homemade Little Caesars Magic
Creating these breadsticks requires a blend of basic leavening science and high-quality fats. Each ingredient serves a specific purpose in building the layers of flavor and texture that make this snack so addictive. We start with a strong foundation of bread flour to ensure the gluten network is sturdy enough to hold the melted mozzarella center.
Bread Flour (All-Purpose also works): 3.5 cups (435g). Flour provides the structure; bread flour specifically offers a higher protein content for a chewier, more authentic “pizza shop” texture.
Warm Water: 1.25 cups (300ml). The water must be between 105°F and 115°F (40°C-46°C) to properly activate the yeast without killing it.
Active Dry Yeast: 2.25 tsp (7g). This is the engine of the recipe, responsible for the airy, pillowy lift and the slight fermented tang in the dough.
Salted Butter: 0.5 cup (115g). Melted salted butter is the base of our glaze, providing the fat that creates the “glistening” appearance and a rich mouthfeel.
Fresh Garlic: 4 cloves, finely minced. While garlic powder is okay in a pinch, fresh minced garlic bits provide the visual texture and sharp aromatic punch described in our blueprint.
Mozzarella Cheese: 1 cup (115g) of low-moisture sticks or thick shreds. This is the secret to the stretchy cheese pull; avoid fresh mozzarella as it releases too much water.
Fine Grated Parmesan: 0.25 cup (25g). This creates the “snowy” dusting that finishes the breadsticks with a salty, nutty kick.
Dried Parsley: 1 tsp. Tiny flecks of green parsley provide the final visual flourish and a very subtle earthy undertone.
Honey or Sugar: 1 tbsp (20g). This feeds the yeast and aids in the Maillard reaction, helping us achieve those golden-brown toasted bubbles.
Necessary Tools for Professional Results
To replicate the Little Caesars style, you don’t need a commercial pizza oven, but a few specific tools will help. A heavy-duty baking sheet is essential for even heat distribution, preventing the bottoms from burning before the tops are golden.
A pastry brush is non-negotiable for applying the thick, translucent garlic butter coating. You want to be able to “paint” the butter on generously so it pools slightly around the toasted bubbles. Additionally, using rustic parchment paper not only prevents sticking but adds to the artisanal, “fresh from the oven” presentation.
A bench scraper is also highly recommended for portioning the dough into perfectly even sticks. Uniformity is key for consistent baking times, ensuring every breadstick in the stack reaches the same level of pillowy perfection simultaneously.
The Step-by-Step Path to Pillowy Breadstick Perfection
Phase 1: Hydrating the Yeast and Mixing the Dough
In a large bowl, combine your warm water (300ml) with the honey or sugar. Sprinkle the active dry yeast over the top and let it sit for about 5-10 minutes. You are looking for a foamy, frothy “bloom” on the surface, which indicates the yeast is alive and ready to work.
Gradually add the flour and a pinch of salt. Mix until a shaggy dough forms, then turn it onto a lightly floured stone countertop. Knead the dough for 8-10 minutes until it is smooth, elastic, and bounces back when poked. This gluten development is what creates the “pillowy” texture later on.
Phase 2: The First Rise and Shaping
Place the dough in a lightly oiled bowl, cover with a damp cloth, and let it rise in a warm spot for about 60 minutes. The dough should double in size. Once risen, punch the dough down to release excess air—this prevents large, uneven gaps in your breadsticks.
Divide the dough into 12 equal portions. Roll each portion into a small rectangle. Place a thin strip of mozzarella cheese in the center, then fold the dough over and pinch the seams tightly to seal. Roll it gently to form a uniform stick about 6 inches (15cm) long.
Phase 3: Achieving the Toasted Golden-Brown Finish
Preheat your oven to 425°F (220°C). Arrange the sticks on your parchment-lined baking sheet, leaving space for them to expand. Let them rest for another 20 minutes for a second “proof”—this is how you get that airy, light interior.
Bake for 12-15 minutes. Watch for the visual cues: the tops should transition from pale white to a vibrant golden-brown with slight toasted bubbles forming on the surface. The smell of baking bread should fill your kitchen, a signal that the starches are caramelizing perfectly.
Crafting the Signature Garlic Butter Glistening Glaze
While the breadsticks are in the oven, melt your salted butter (115g) in a small saucepan over low heat. Add the finely minced garlic bits and cook for just 1-2 minutes. You want the garlic to soften and release its oils into the butter without turning brown or bitter.
The goal is a thick, translucent coating. If the butter is too hot, it will simply soak into the bread; if it is just right, it will sit on the surface, creating that glistening effect. Keep the glaze warm until the moment the breadsticks emerge from the oven.
As soon as you pull the tray out, use your pastry brush to liberally coat each breadstick. The butter should sizzle slightly against the hot crust. Follow this immediately with a generous “snowy” dusting of the fine-grated parmesan and a sprinkle of parsley flakes. The heat of the bread will help the cheese and herbs adhere to the buttery surface.
Pro-Level Secrets for That Signature Pizza Shop Finish
- The Steam Secret: Place a small pan of water on the bottom rack of the oven. The resulting steam helps the dough expand fully before the crust sets, leading to a lighter, airier breadstick.
- Garlic Infusion: For a deeper flavor, grate one clove of garlic directly into the butter and mince the others. The grated garlic melts into the fat, while the minced bits provide visual texture.
- Double Glazing: For the ultimate Little Caesars intensity, brush the sticks once when they come out, wait two minutes, and brush them again before adding the parmesan.
- Temperature Control: Ensure your mozzarella is cold when you wrap it in the dough. This delays the melting process just enough so it doesn’t leak out of the seams during the bake.
Creative Pairings and Serving Suggestions
No Little Caesars style feast is complete without a warm red marinara dipping sauce. The acidity of the tomatoes cuts through the richness of the salted butter and mozzarella perfectly. For a complete meal, consider serving these alongside some saucy chicken enchiladas for a fusion feast or keep it classic with a fresh traditional greek salad.
If you’re looking for more appetizers to round out your spread, these breadsticks pair beautifully with crispy pickle poppers. The crunch of the poppers and the pillowy softness of the breadsticks offer a fantastic textural contrast that will keep your guests coming back for more. You could even serve them as a side to a light zesty chicken salad to balance the hearty garlic flavor.
Storage, Reheating, and Make-Ahead Tips
These breadsticks are best served immediately while the mozzarella pull is at its peak. However, if you have leftovers, store them in an airtight container at room temperature for up to 2 days or in the refrigerator for up to 5 days.
To reheat, avoid the microwave, as it can make the dough chewy and tough. Instead, place them in a 350°F (175°C) oven or toaster oven for 5-7 minutes. This will revive the toasted bubbles and melt the cheese inside once again. You may want to add a fresh brush of melted butter after reheating to restore that glistening sheen.
For make-ahead convenience, you can freeze the shaped, unbaked breadsticks. When ready to eat, let them thaw and rise at room temperature for 2 hours before baking as directed. This ensures you can have fresh, hot Little Caesars style treats whenever the craving strikes.
Frequently Asked Questions
Yes, you can use pre-made dough, but ensure you let it come to room temperature and give it a short second rise after shaping to achieve that signature pillowy texture.
For the most authentic visual and flavor profile, use fresh minced garlic bits. Powdered garlic works for flavor but won’t provide the distinct ‘bits’ seen on real Crazy Bread.
The key is using a microplane or a very fine-grated parmesan cheese. Apply it immediately after the butter glaze while the breadsticks are hot so it sticks without completely melting.
A high oven temperature (425°F/220°C) and placing the baking sheet on the upper third of the oven helps create those beautiful toasted highlights and bubbles.
Make sure you are using low-moisture mozzarella. Fresh mozzarella contains too much water and will make the dough soggy rather than creating a long, elastic stretch.
The Ultimate Little Caesars Style Breadstick Recipe Card
Little Caesars Style Crazy Bread Recipe: The Ultimate Cheesy Garlic Breadsticks
Ingredients
Equipment
Method
- Combine warm water, honey, and yeast. Let sit for 10 minutes until foamy.
- Mix in flour and salt. Knead for 8-10 minutes on a stone countertop until smooth and elastic.
- Cover and let rise in a warm spot for 60 minutes until doubled in size.
- Divide dough into 12 pieces. Wrap mozzarella inside each piece and roll into 6-inch sticks. Seal seams tightly.
- Place on parchment paper. Bake at 425°F (220°C) for 12-15 minutes until golden-brown with toasted bubbles.
- Brush generously with melted garlic butter. Shower with fine-grated parmesan and dried parsley flakes.
Notes
Ensure the butter glaze is translucent and applied while the sticks are hot for maximum glistening.
Join the Flavor Journey!
We hope this recipe brings a slice of pizzeria joy to your home! Recreating the Little Caesars magic is all about the balance of that garlic-heavy glaze and the soft, pillowy dough. Once you master the mozzarella pull, you’ll never go back to the store-bought version again. We invite you to share your results and tag us in your photos!
Did you achieve the perfect toasted bubbles? Let us know in the comments below! Don’t forget to sign up for our newsletter for more forensic recipe reconstructions and kitchen tips. If you loved this, please share it on Pinterest so others can enjoy the ultimate cheesy garlic breadstick experience too!