There is a specific, almost magical sensory experience that comes with the perfect chocolate mochi. Imagine a soft, translucent cocoa-brown dough that yields effortlessly to the touch, stretching into long, elastic ribbons that define the coveted “QQ” texture. This isn’t just a dessert; it is a masterclass in textural contrast, featuring a matte, velvet-like dusting of dark cocoa powder that hides a secret, molten heart of glossy dark chocolate ganache.
When you gently pull a piece apart, the resistance of the glutinous rice dough provides a satisfying tug before revealing the dense, slightly liquid center. The aroma of deep, unsweetened cocoa hits first, followed by the rich, buttery scent of the ganache. It is a handheld indulgence that looks as sophisticated on a matte ceramic plate as it tastes on the palate.
This recipe focuses on achieving that professional, eye-level macro shot quality. We are moving beyond basic rice cakes to create a gourmet confection that balances the earthy bitterness of dark cocoa with the creamy sweetness of a high-quality truffle filling. Whether you are a fan of simple sweet treats or complex patisserie, this mochi will redefine your expectations of Japanese-inspired desserts.
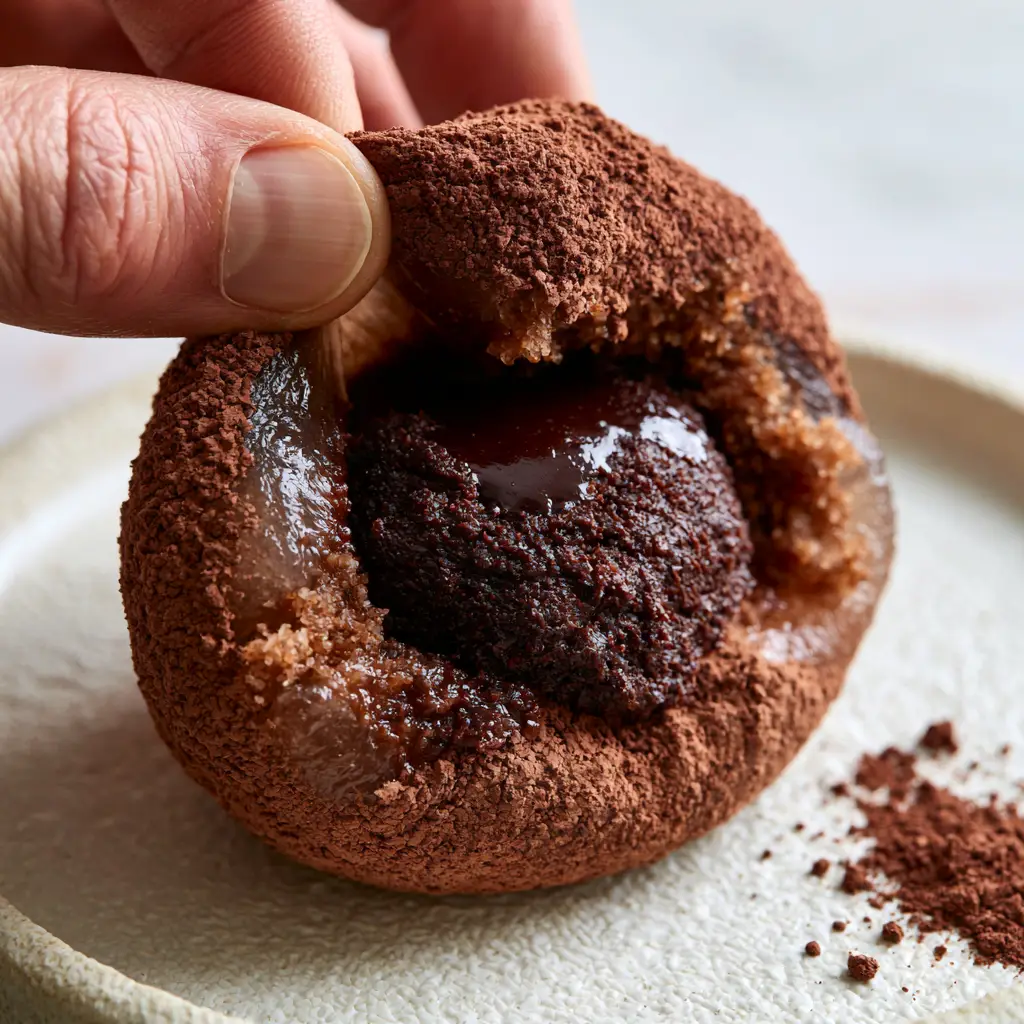
The Anatomy of the Perfect Chocolate Mochi Pull
- Elastic “QQ” Texture: A specialized ratio of glutinous rice flour to liquid ensures a dough that is incredibly stretchy without being overly sticky.
- Molten Ganache Core: Unlike solid fillings, our ganache is formulated to remain slightly fluid at room temperature for that signature “melted” look.
- Matte Visual Appeal: A thick coating of premium unsweetened cocoa powder provides a professional finish and prevents the dough from sticking to the plate or your hands.
- Scientific Precision: We use specific steaming or microwaving intervals to gelatinize the rice starches perfectly, creating a translucent, chocolate-infused foundation.
Essential Components for the Flawless Mochi Dough
Glutinous Rice Flour (Mochiko or Shiratamako): 1 cup (160g). This is the structural backbone of the mochi; ensure you use “glutinous” or “sweet” rice flour, as regular rice flour will not provide the necessary elasticity.
Unsweetened Dark Cocoa Powder: 1/4 cup (25g) for the dough + extra for dusting. Cocoa powder provides the deep mahogany hue and offsets the sweetness of the rice dough with a sophisticated bitterness.
Granulated Sugar: 1/2 cup (100g). Sugar does more than sweeten; it acts as a tenderizer, interfering with the rice starch molecules to keep the mochi soft for several days.
Filtered Water: 3/4 cup (180ml). The hydration level is critical for the “translucent” look described in the visual blueprint; too much water makes it soup, too little makes it opaque and tough.
Fine Sea Salt: 1/4 tsp (1.5g). Salt is the “invisible” ingredient that sharpens the chocolate profile and balances the sugar levels in the dough.
Neutral Oil (Grapeseed or Vegetable): 1 tsp (5ml). A tiny amount of fat added to the dough provides that glossy sheen visible in the interior when the mochi is pulled apart.
Dark Chocolate (60% Cacao or higher): 4 oz (115g). High-quality chocolate is non-negotiable for the ganache center to achieve a dense, glossy finish.
Heavy Cream: 1/3 cup (80ml). This creates the “molten” effect, allowing the center to remain soft even when the mochi has cooled.
Professional Tools for Texture Control
To achieve the macro-level perfection of our chocolate mochi, you will need a heat-proof glass bowl for even heat distribution. A silicone spatula is essential for folding the sticky dough, as the starches will cling to wooden or metal spoons.
You will also need a fine-mesh sieve for the cocoa dusting. This ensures the “velvety” appearance rather than clumpy patches. If you are a fan of technical baking, you might enjoy applying these same precision skills to a decadent layered cake later.
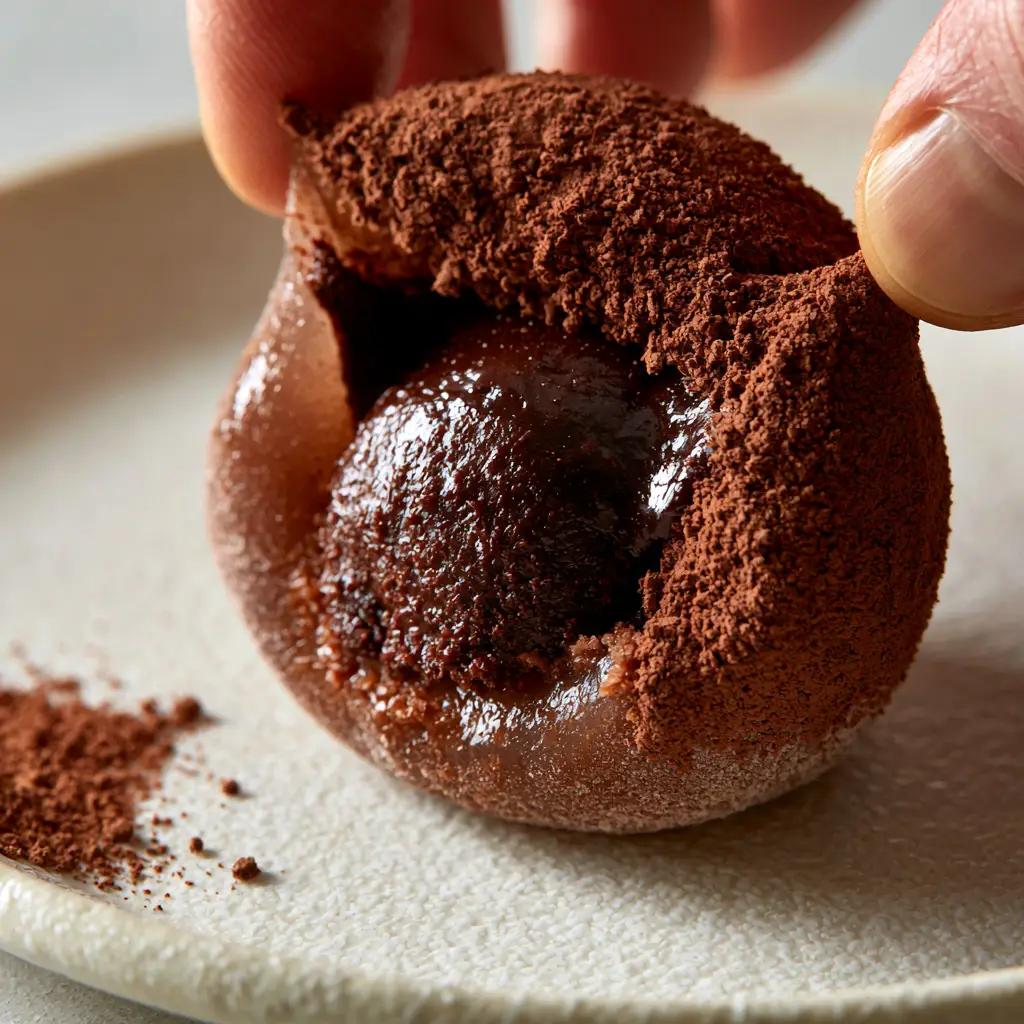
Mastering the Molten Dark Chocolate Ganache Center
Step 1: Emulsifying the Ganache
Finely chop 4 oz (115g) of dark chocolate and place it in a small bowl. Heat 1/3 cup (80ml) of heavy cream until it just begins to simmer—do not let it reach a rolling boil, as this can break the chocolate emulsion.
Pour the hot cream over the chocolate and let it sit for 2 minutes. Gently stir from the center outward until a glossy, dense liquid forms. Place this in the refrigerator for about 45-60 minutes until it reaches a scoopable, truffle-like consistency.
Step 2: Portioning the Filling
Once set, use a small spoon to scoop half-tablespoon portions of ganache onto a parchment-lined tray. Return these to the fridge while you prepare the rice dough. They need to be firm enough to handle but will soften into a molten core once encased in the warm dough.
Creating the Elastic Chocolate-Infused Dough
Step 1: Mixing for Translucency
In your heat-proof bowl, whisk together 1 cup (160g) glutinous rice flour, 1/4 cup (25g) cocoa powder, 1/2 cup (100g) sugar, and 1/4 tsp (1.5g) salt. Slowly pour in 3/4 cup (180ml) of water and 1 tsp (5ml) of oil.
Whisk until the batter is completely smooth and no lumps of cocoa remain. The mixture should look like a thin chocolate syrup at this stage.
Step 2: The Gelatinization Process
Cover the bowl with plastic wrap, leaving a small vent. Microwave on high for 1 minute. Remove and stir vigorously with a wet silicone spatula—the dough will be partially cooked and patchy.
Cover and microwave for another 45 seconds. The dough should now look darker, more translucent, and incredibly sticky. Give it one final, forceful stir; it should hold together in one elastic mass that pulls away from the sides of the bowl.
The Assembly: Dusting and Shaping
Step 1: Preparing the Workspace
Generously dust a clean work surface with unsweetened cocoa powder. Turn the hot mochi dough onto the cocoa. The powder is your best friend here; it prevents the “QQ” dough from sticking to everything it touches.
Step 2: Encasing the Molten Core
Divide the dough into 8-10 equal pieces. Flatten a piece into a disk, keeping the edges thinner than the center. Place one chilled ganache ball in the middle.
Pinch the edges of the dough over the ganache, sealing it tightly. Roll the ball gently between your palms to smooth it out, then give it a final roll in the cocoa powder for that matte finish.
Expert Tips for Success
- Temperature Control: Never try to wrap a warm ganache ball. The heat from the dough will melt it prematurely, making the mochi impossible to seal.
- Sieve the Cocoa: Always sift your cocoa powder over the finished mochi. Grains of cocoa powder scattered nearby, as seen in the visual prompt, add to the rustic, “unedited” aesthetic.
- The “Wet Hand” Technique: If the dough is sticking to your fingers despite the cocoa, lightly dampen your fingertips with water to handle the seal.
- Avoid Overcooking: If the mochi becomes tough or rubbery, it has been microwaved too long. It should be “elastic,” not “bouncy.”
Storage and the Quest for Freshness
Chocolate mochi is best enjoyed the day it is made to capture the maximum stretch and molten center. However, you can store them in an airtight container at room temperature for up to 2 days.
Do not refrigerate the finished mochi, as the cold will cause the rice starch to undergo retrogradation, turning the dough hard and opaque. If you must store them longer, wrap each piece in plastic wrap and freeze; thaw at room temperature for 30 minutes before serving.
What to Serve With This Decadent Dessert
The richness of the dark chocolate pairs beautifully with a sharp, acidic palate cleanser. Consider serving these alongside an Asian cucumber salad for a refreshing contrast after a heavy meal like a Korean beef bowl.
For a complete dessert spread, these mochi complement other chocolate-heavy treats. If you have leftover cocoa powder, you might consider making Oreo-stuffed chocolate chip cookies to offer a variety of textures to your guests.
Frequently Asked Questions
Yes, you can steam the dough. Place the bowl in a steamer over boiling water for 15-20 minutes, stirring halfway through, until the dough is translucent and glossy.
Use a generous amount of unsweetened cocoa powder or cornstarch on your work surface and hands. The powder acts as a dry barrier between the sticky starches and your skin.
Despite the name ‘glutinous’ rice flour, it is naturally gluten-free. It refers to the glue-like consistency of the cooked rice, not the presence of wheat gluten.
If you refrigerate the mochi, the fats in the chocolate and cream will solidify. Keep mochi at room temperature for a molten center, or gently microwave for 5-10 seconds to soften.
The most common reason is using regular rice flour instead of glutinous rice flour (Mochiko). Glutinous rice flour contains the specific amylopectin starch required for that elastic ‘QQ’ pull.
The Master Recipe for Molten Chocolate Mochi
Chocolate Mochi: The Ultimate Stretchy and Molten Ganache Recipe
Ingredients
Equipment
Method
- Combine hot cream and chopped chocolate; stir until glossy and emulsified.
- Refrigerate until scoopable, then portion into 10 small balls and freeze briefly.
- Whisk rice flour, cocoa, sugar, water, and oil in a bowl until smooth.
- Heat in 1-minute intervals, stirring in between, until the dough is dark, translucent, and elastic.
- Turn dough onto a cocoa-dusted surface and divide into 10 pieces.
- Flatten dough pieces, place ganache in the center, and pinch to seal.
Notes
Ensure the ganache is fully chilled before attempting to wrap it in the warm dough.

Closing & Call to Action
Mastering the chocolate mochi is a rite of passage for any home cook who values texture as much as flavor. The combination of the velvety matte exterior and the glossy, molten interior creates a dessert that is as visually stunning as it is delicious. By following these professional cues—watching for the translucency of the dough and ensuring the ganache is perfectly emulsified—you can recreate this “unedited” masterpiece in your own kitchen.
Did you achieve the perfect elastic pull? We want to see your results! Leave a comment below with your experience, and don’t forget to share your photos and save this recipe to your dessert boards on Pinterest.