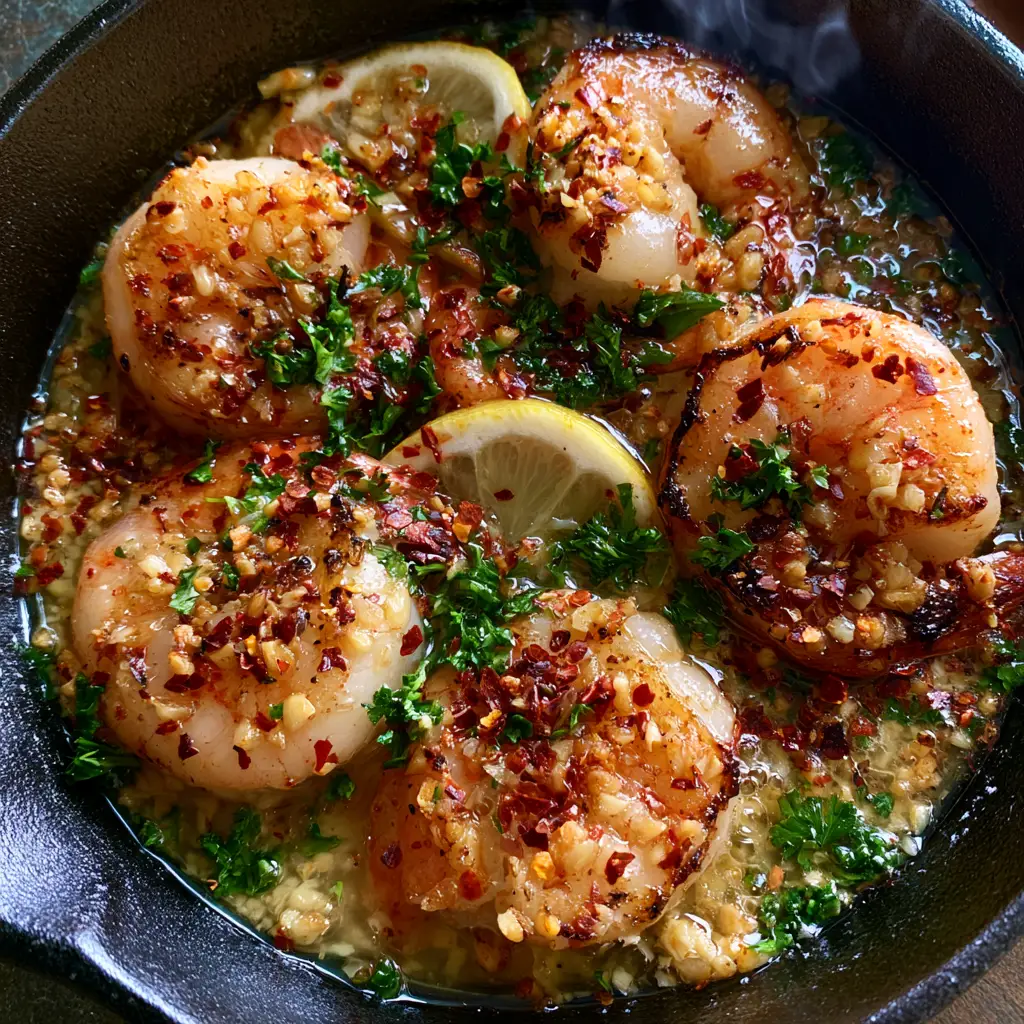
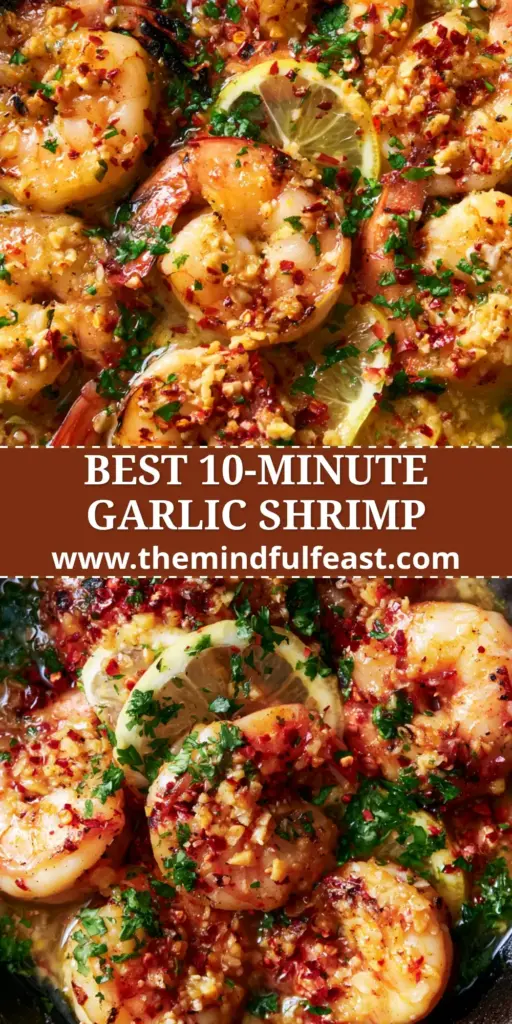
There is nothing quite like the sound of jumbo succulent shrimp hitting a screaming hot cast iron skillet. When you are looking for easy seafood recipes that deliver restaurant-quality results in under 15 minutes, this garlic butter shrimp is the undisputed champion. The combination of charred, golden-pink crusts and a silky, translucent pool of emulsified butter creates a sensory experience that is as visually stunning as it is delicious.
This recipe focuses on the bridge between high-heat searing and delicate sauce-making. We aren’t just tossing shrimp in a pan; we are building layers of flavor using toasted garlic, vibrant chili flakes, and the bright acidity of fresh lemon. The result is a dish that looks exactly like a professional food photograph—glistening, vibrant, and incredibly inviting.
Whether you are a seasoned home cook or just starting your culinary journey, mastering this technique will change the way you approach weeknight dinners. By understanding the science of the Maillard reaction and the mechanics of a butter emulsion, you will turn humble ingredients into a centerpiece that demands attention.
Why This Cast Iron Skillet Shrimp Defines Culinary Excellence
- Perfect Visual Contrast: The rustic, matte black cast iron surface provides a high-contrast backdrop for the vibrant pink shrimp and bright green parsley.
- Textural Harmony: You get the snap of the shrimp, the crunch of toasted garlic bits, and the velvet smoothness of the garlic butter sauce.
- Rapid Execution: This is the pinnacle of easy seafood recipes, requiring less than 5 minutes of actual cooking time once the prep is complete.
- Emulsified Sauce: Unlike broken, greasy sauces, this method creates a glossy coating that clings to every crevice of the seafood.
The Anatomy of a Perfect Garlic Butter Sauce
To achieve the “glossy, translucent pool” described in our visual blueprint, we must look beyond just melting butter. We use a combination of high-smoke point oil for the initial sear and cold butter for the finishing glaze. This prevents the milk solids from burning while ensuring the sauce has body and sheen.
Jumbo Tail-On Shrimp: 1.5 lbs (680g) of 16/20 count shrimp provide the best surface area for searing while remaining succulent inside. Leaving the tails on adds structural integrity and an elegant aesthetic to the final plate.
Grapeseed or Avocado Oil: 1 tbsp (15ml) is essential for the initial high-heat sear. These oils have high smoke points, allowing the shrimp to develop charred edges without the oil breaking down or smoking excessively.
Unsalted Butter: 4 tbsp (56g) of high-quality butter, kept cold until the moment of use. Adding cold butter to a warm pan helps create a stable emulsion, resulting in that professional glossy finish.
Fresh Garlic: 6 cloves, finely minced. We split the garlic usage: half is toasted to a golden brown for crunch, and half is infused into the butter for a deep, aromatic base.
Dried Red Chili Flakes: 1/2 tsp (1g) provides a gentle heat and vibrant red flecks that pop against the golden shrimp. You can increase this if you prefer a bolder spice profile.
Flat-Leaf Parsley: 1/4 cup (10g), freshly chopped. This herb adds a necessary earthy brightness and a scatter of green that completes the visual requirements of the dish.
Fresh Lemons: 1 large lemon, half juiced and half cut into thin semi-circles. The slices are tucked between the shrimp to provide a juicy visual cue and a fresh hit of acid.
Invisible Essentials: 1/2 tsp (3g) Kosher salt and 1/4 tsp (1g) cracked black pepper are chemically necessary to draw out moisture for the sear and season the proteins deeply.
Essential Equipment for High-Heat Searing
The vessel is just as important as the ingredients when executing easy seafood recipes. A 12-inch (30cm) cast iron skillet is the gold standard here. Its massive heat retention ensures the pan temperature doesn’t drop when the cold shrimp are added, which is the secret to those charred edges.
You will also need a pair of stainless steel locking tongs. These allow for precise flipping of each jumbo shrimp, ensuring both sides reach that perfect golden-pink hue. A sharp chef’s knife is non-negotiable for achieving the finely minced garlic and thin lemon semi-circles required for the garnish.
Achieving the Golden-Pink Char: Technique Deep Dive
Preparing the Shrimp for the Pan
The biggest enemy of a good sear is moisture. Pat the shrimp extremely dry with paper towels until no surface dampness remains. Season them with salt and pepper only seconds before they hit the pan to prevent the salt from drawing out internal juices.
The High-Heat Searing Phase
Heat your cast iron skillet over medium-high heat until the oil just begins to shimmer and a faint wisp of smoke appears. Lay the shrimp in a single layer, ensuring they are not crowded. Crowding causes the temperature to drop, leading to steaming rather than searing.
Visual and Sensory Cues
Listen for a vigorous sizzle. Do not move the shrimp for at least 90 seconds. Look for the edges to turn opaque and the bottom surface to develop visible charred edges and a deep golden crust. Once you see the pink color creeping up the sides, it is time to flip.
Step-by-Step Instructions for Easy Seafood Recipes Success
Infusing the Aromatics
Once the shrimp are flipped, immediately clear a small space in the center of the skillet. Add a small knob of butter and the minced garlic and chili flakes. Watch for the garlic to turn a pale straw color—this happens quickly and provides the “toasted garlic bits” look.
Building the Emulsified Sauce
Reduce the heat to medium and add the remaining cold butter. Stir the shrimp constantly as the butter melts. The movement, combined with the residual heat and the protein juices, will create a glossy, translucent pool of sauce that coats every shrimp.
The Final Garnish and Presentation
Turn off the heat. Squeeze the lemon juice over the pan and toss in the fresh chopped parsley. Arrange the thin lemon semi-circles between the shrimp. The steam rising from the pan at this moment, captured in natural daylight, is exactly what makes this dish so visually appetizing.
Expert Tips for Success
- Don’t Overcook: Shrimp are done the moment they form a “C” shape. If they tightly curl into an “O”, they will be rubbery.
- Butter Temperature: Use cold butter at the end. Warm or room temperature butter is more likely to “split,” leaving you with a greasy puddle instead of a glossy sauce.
- Garlic Timing: Never add garlic at the very start with the shrimp. The high heat needed for the sear will burn the garlic, making it bitter and black rather than toasted and sweet.
- Pan Material: If you don’t have cast iron, use stainless steel. Avoid non-stick pans, as they cannot safely reach the temperatures required for a true char.
Storage, Reheating, and Meal Prep
While easy seafood recipes are best enjoyed fresh from the skillet, leftovers can be stored in an airtight container in the refrigerator for up to 2 days. To reheat, do not use a microwave, as this will turn the shrimp into rubber.
Instead, place a small skillet over low heat with a splash of water or broth. Add the shrimp and cover for 1-2 minutes until just warmed through. This preserves the emulsion of the garlic butter sauce and the succulent texture of the seafood.
What to Serve With Garlic Butter Shrimp
This dish is incredibly versatile. For a light lunch, serve it alongside a crisp chicken salad sandwich or a bowl of ramen chinese chicken salad for a fusion experience. The buttery sauce is also the perfect companion for quick pasta recipes, where the noodles can soak up every drop of garlic infusion.
If you are hosting a dinner party, start with some spring rolls and offer a variety of easy mixed drinks to balance the richness of the butter. For those who love a variety of ocean flavors, this shrimp pairs beautifully with tuna recipes or even a side of smoked candied salmon.
Frequently Asked Questions
Yes, but they must be completely thawed and patted extremely dry. Any excess moisture will prevent the shrimp from developing the charred golden edges required for this dish.
While a cast iron skillet is recommended for its superior heat retention and ability to create a deep sear, a heavy stainless steel skillet will also work. Avoid non-stick pans for this high-heat method.
Look for a change in color from translucent gray to opaque pink. They should form a loose ‘C’ shape; if they curl into a tight ‘O’, they are overcooked.
Jumbo shrimp, specifically 16/20 count (meaning 16-20 shrimp per pound), are ideal. They are large enough to get a great sear without overcooking in the center too quickly.
This happens when the butter gets too hot and the milk solids separate from the fat. To prevent this, use cold butter and add it at the very end off the high heat, stirring constantly to emulsify.
The Perfect Easy Seafood Recipe: Garlic Butter Shrimp
Easy Seafood Recipes: The Ultimate Garlic Butter Seared Shrimp
Ingredients
Equipment
Method
- Pat the jumbo shrimp thoroughly dry with paper towels to ensure a crisp sear.
- Heat oil in the cast iron skillet over medium-high heat. Add shrimp in a single layer and sear for 90 seconds without moving until charred edges appear.
- Flip the shrimp. Add a knob of butter, minced garlic, and chili flakes to the center. Toast for 30 seconds until fragrant.
- Reduce heat to medium. Add remaining cold butter cubes. Stir constantly until the butter melts into a glossy, translucent sauce.
- Remove from heat. Stir in lemon juice and parsley. Garnish with lemon semi-circles and serve immediately.
Notes
Do not overcrowd the pan or the shrimp will steam instead of sear.
Closing & Call to Action
Mastering easy seafood recipes like this garlic butter shrimp is all about confidence in the kitchen and respect for the ingredients. The combination of the heavy cast iron skillet and the delicate emulsified sauce creates a dish that is truly greater than the sum of its parts. If you enjoyed this recipe, please leave a comment below and let us know how your sear turned out!
Don’t forget to follow us on Pinterest and save this recipe to your “Easy Dinners” board. For more culinary inspiration, sign up for our newsletter to get the latest kitchen secrets delivered straight to your inbox.