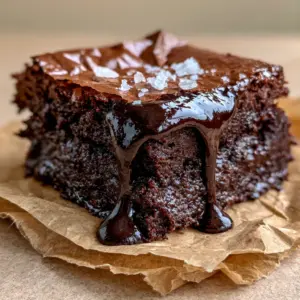
There is nothing quite like a chewy brownie recipe that delivers a deep, mahogany sheen and a crust so delicate it shatters like glass when you bite into it. If you have been searching for that elusive combination of a dense, fudgy interior and a shiny, crinkled meringue top, you have arrived at your final destination.
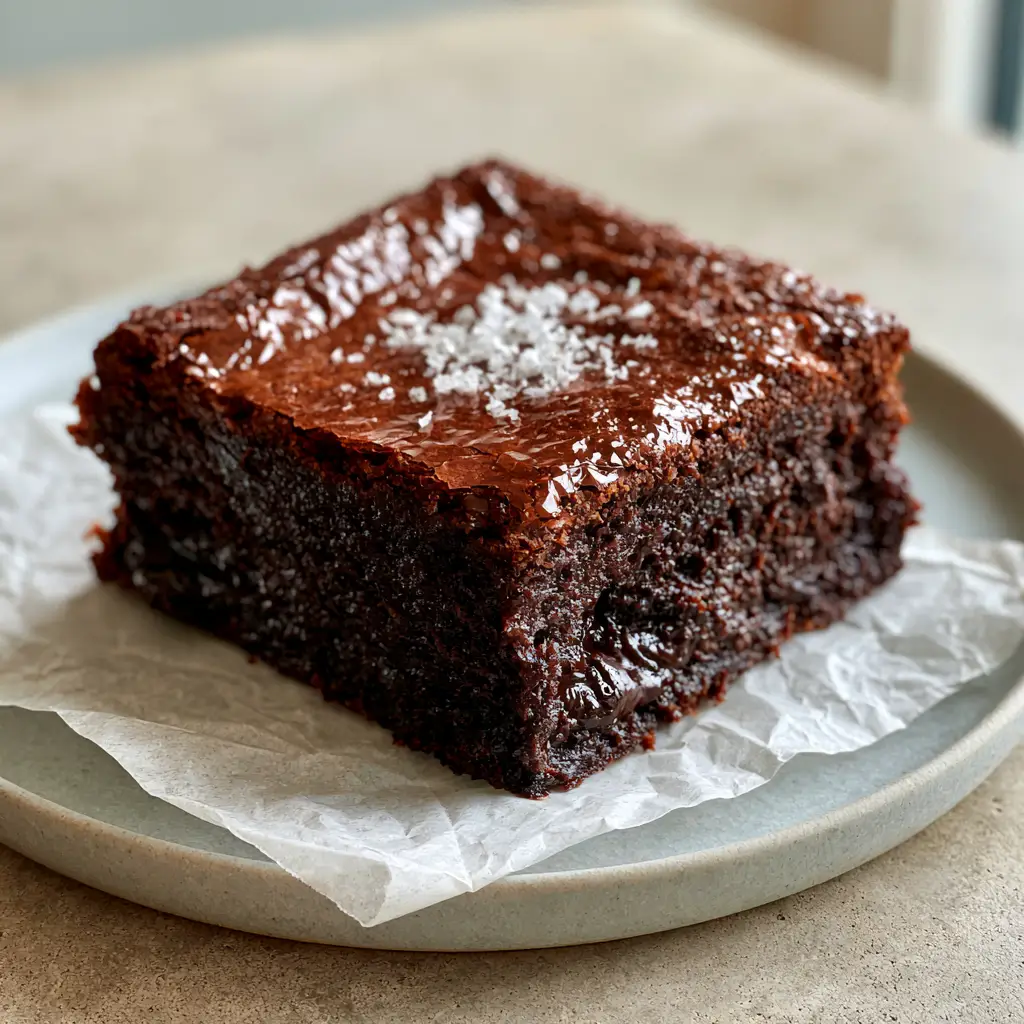
This specific preparation focuses on the science of sugar dissolution and fat ratios to ensure your brownies never turn out cakey or dry. We are aiming for a rich, decadent square that sits proudly on a minimalist light gray ceramic plate, looking every bit as professional as it tastes.
By following this guide, you will master the art of creating melted dark chocolate pockets and achieving that perfect sprinkle of flaky Maldon sea salt. This is more than just a dessert; it is a culinary masterpiece designed for the home baker who demands excellence in every bite.
Why This Fudgy Cocoa Powder Brownie Works Every Time
- The Shattered Meringue Crust: By dissolving the sugar into warm butter and beating the eggs correctly, we create a thin, paper-thin reflective top.
- Deep Mahogany Sheen: The use of premium Dutch-processed cocoa powder provides a dark, sophisticated color that contrasts beautifully with white parchment paper.
- Extreme Fudgy Texture: A precise ratio of fat to flour ensures these brownies remain dense and moist with zero cakey crumbs.
- Melted Chocolate Pockets: Hand-chopped dark chocolate bars create molten pools of cocoa that stay soft even after the brownies have cooled.
- Flavor Balance: The addition of flaky Maldon sea salt crystals cuts through the richness, elevating the chocolate’s natural profile.
Premium Ingredients for a Decadent Brownie Base
Unsalted Butter: 1 cup (225g). Using high-quality butter provides the foundational fat needed for a chewy texture and carries the flavor of the cocoa powder.
Granulated White Sugar: 2 cups (400g). Sugar is not just for sweetness; when properly dissolved, it migrates to the surface to form that iconic shiny crinkled crust.
Dutch-Processed Cocoa Powder: 3/4 cup (75g). This type of cocoa is treated with alkali, giving the brownies a deep mahogany chocolate sheen and a smoother flavor than natural cocoa.
Large Eggs: 4 eggs (room temperature). Eggs provide the protein structure and the “meringue” potential for the top surface of your brownies.
All-Purpose Flour: 1 cup (125g). We use a relatively small amount of flour to keep the density high and prevent the recipe from becoming bread-like.
Dark Chocolate Chunks: 6 oz (170g). Chopping a high-quality dark chocolate bar ensures those signature melted dark chocolate pockets throughout the slice.
Vanilla Extract: 1 tbsp (15ml). A foundational aromatic that bridges the gap between the bitter cocoa and the sweet sugar.
Kosher Salt: 1/2 tsp (3g). Essential for the batter to enhance the cocoa notes from within.
Maldon Sea Salt: 1 tsp (5g). These large, flaky crystals are for the final garnish, providing a delicate crunch and visual contrast on the glossy crust.
If you enjoy these rich chocolate textures, you might also want to try our chewy scotcheroos for another decadent treat.
Foundational Kitchen Tools for Square-Cut Success
To achieve the visual result seen in our photos, you will need a 9×9 inch (23x23cm) square metal baking pan. Metal conducts heat more efficiently than glass, which helps in setting the edges while keeping the center fudgy.
Crumpled white parchment paper is another essential tool; it prevents sticking and provides that rustic, authentic aesthetic when serving. A high-quality whisk and a sturdy silicone spatula are required for incorporating the dry ingredients without over-aerating the batter.
Finally, a sharp chef’s knife is non-negotiable for achieving those clean, square-cut edges. A dull blade will tear the delicate crinkle crust rather than slicing through it.
Step-by-Step Mastery of the Chewy Brownie Recipe
Phase 1: Preparing the Chocolate Foundation
Preheat your oven to 350°F (175°C) and line your square pan with white parchment paper, leaving an overhang on the sides. In a medium microwave-safe bowl or over a double boiler, melt the 1 cup (225g) of unsalted butter.
While the butter is still hot, whisk in the 2 cups (400g) of granulated sugar vigorously for about 2 minutes. The heat from the butter begins to dissolve the sugar, which is the secret step to achieving that highly reflective, shattered crinkle crust.
Phase 2: Building the Meringue Structure
Add the 4 large eggs to the butter-sugar mixture one at a time, whisking well after each addition. You should notice the batter becoming pale and slightly ribbony; this indicates the eggs are emulsifying with the fats.
Stir in the 1 tbsp (15ml) of vanilla extract. At this stage, the batter should look glossy and smooth, resembling a thick chocolate syrup before the dry ingredients even enter the bowl.
Phase 3: Sifting and Folding for Texture
Sift the 3/4 cup (75g) cocoa powder, 1 cup (125g) flour, and 1/2 tsp (3g) salt directly into the wet ingredients. Using a spatula, fold the ingredients together gently until just combined—do not overmix, or you will develop gluten and lose the fudgy density.
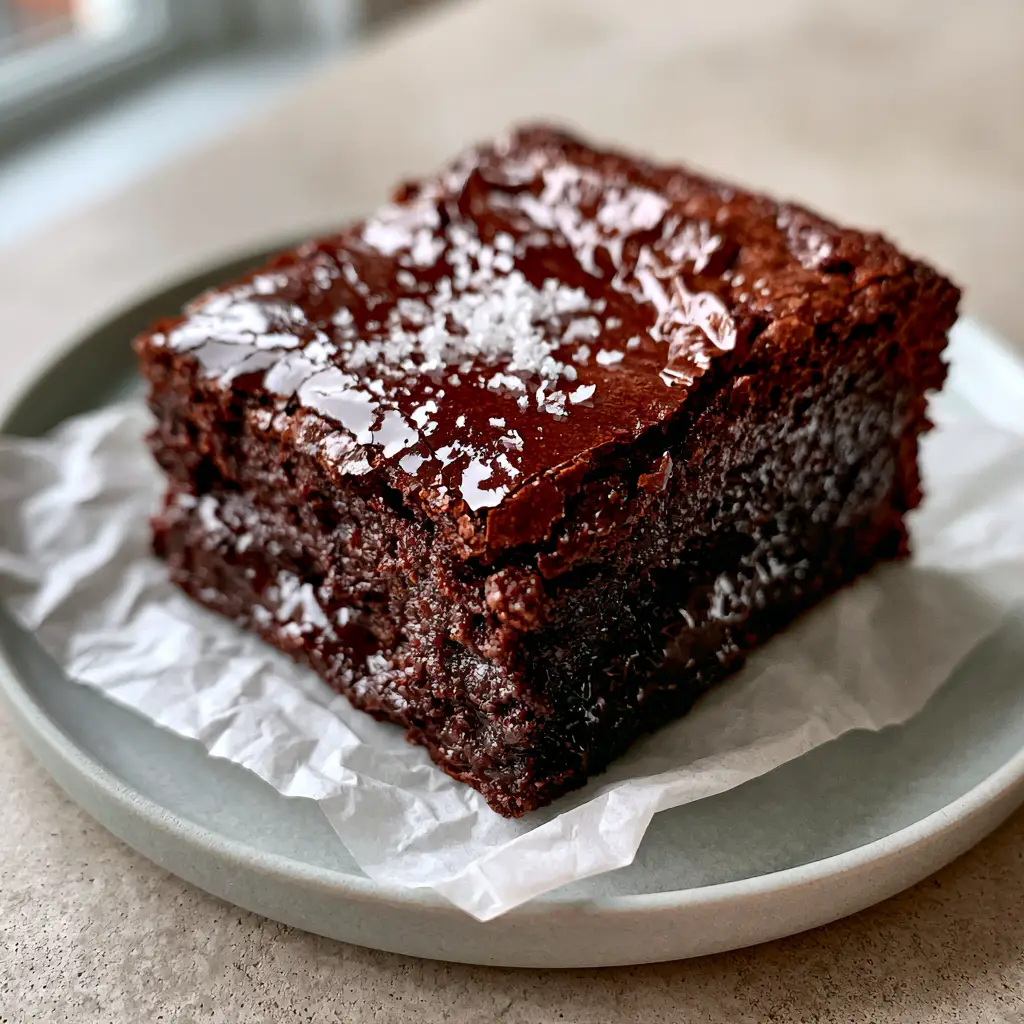
Fold in the 6 oz (170g) of dark chocolate chunks. Ensure they are distributed evenly so every square contains those rich melted dark chocolate pockets described in our visual blueprint.
Phase 4: The Visual Baking Cues
Pour the batter into the prepared pan, smoothing the top with your spatula. Bake for 25-30 minutes. You are looking for a specific sensory cue: the edges should be set, but the center should still have a slight wobble if shaken gently.
The top surface will transform into a paper-thin, highly reflective crust. Remove from the oven and immediately sprinkle the sparse, delicate white flaky sea salt crystals across the glossy mahogany surface.
Expert Tips for a Shattered Crinkle Crust
- Sugar Temperature: Always whisk your sugar into the butter while the butter is hot; this ensures the sugar dissolves enough to create the meringue top.
- Room Temp Eggs: Cold eggs can seize the melted butter, resulting in a lumpy batter and a dull crust.
- The Toothpick Test: For a chewy brownie recipe, a toothpick inserted into the center should come out with a few moist crumbs attached—not clean, and not liquid.
- Avoid Over-Mixing: Once the flour is added, stop mixing as soon as the white streaks disappear to maintain that dense, moist interior.
For a different kind of sweet start to your day, check out our classic homemade pancakes for a weekend treat.
Storage, Reheating, and Texture Preservation
These brownies are best stored at room temperature in an airtight container for up to 4 days. The white parchment paper they were baked on can be used to wrap them, keeping the moisture locked in and the crust intact.
If you prefer a truly molten experience, you can reheat a single square in the microwave for 10-15 seconds. This will reactivate the dark chocolate pockets, making them liquid once more.
For long-term storage, these brownies freeze beautifully. Wrap individual squares in plastic wrap and store in a freezer bag for up to 3 months; thaw at room temperature before serving on your light gray ceramic plate.
What to Serve With These Fudgy Squares
A rich, dark chocolate brownie pairs perfectly with something bright or savory. If you are serving these as part of a larger gathering, consider a refreshing mango boba tea to cleanse the palate between bites.
If you’ve just finished a hearty meal like baked pasta al forno, these brownies provide the perfect decadent conclusion to a family dinner. For a lighter pairing, a cup of peach hibiscus tea offers a floral contrast to the mahogany chocolate notes.
Frequently Asked Questions
You can, but the brownies will be lighter in color and have a sharper, more acidic flavor. Dutch-processed cocoa is essential for that deep mahogany sheen.
The shiny crust is achieved by dissolving the sugar into hot melted butter and whisking the eggs thoroughly. This creates a thin layer of meringue that rises to the surface during baking.
Use the ‘wobble test.’ The edges should be firm, but the center should have a slight jiggle. A toothpick should come out with moist crumbs, not liquid batter.
Allow the brownies to cool completely in the pan. Use a sharp chef’s knife and wipe the blade clean with a warm, damp cloth between every single cut.
Cakey brownies usually result from too much flour or over-beating the eggs, which incorporates too much air. Stick to a low flour-to-fat ratio for a dense, fudgy texture.
The Ultimate Chewy Brownie Recipe Card
Chewy Brownie Recipe: The Ultimate Fudgy Dark Chocolate Brownies
Ingredients
Equipment
Method
- Preheat oven to 350°F (175°C). Line a 9x9 inch pan with crumpled white parchment paper.
- Whisk hot melted butter and sugar together for 2 minutes to ensure the sugar begins to dissolve for the crinkle top.
- Add eggs one at a time, whisking vigorously until the batter is glossy and thick.
- Sift in cocoa powder, flour, and salt. Gently fold with a spatula until no white streaks remain.
- Fold in the dark chocolate chunks evenly throughout the batter.
- Pour into pan and bake for 25-30 minutes until the mahogany crust is shiny and the center is just set.
- Immediately sprinkle with Maldon sea salt while the surface is still hot.
Notes
Do not overbake; the brownies will continue to set as they cool.
Closing & Call to Action
Mastering this chewy brownie recipe is a rite of passage for any serious home cook. The combination of the shattered meringue crust, the deep mahogany chocolate sheen, and those molten chocolate pockets creates a sensory experience that is truly unmatched.
We invite you to share your results with us! Did you achieve that perfect crinkle top? Leave a comment below and let us know your favorite chocolate brand for this recipe. Don’t forget to follow themindfulfeast on Pinterest and save this recipe to your dessert boards for your next baking session!