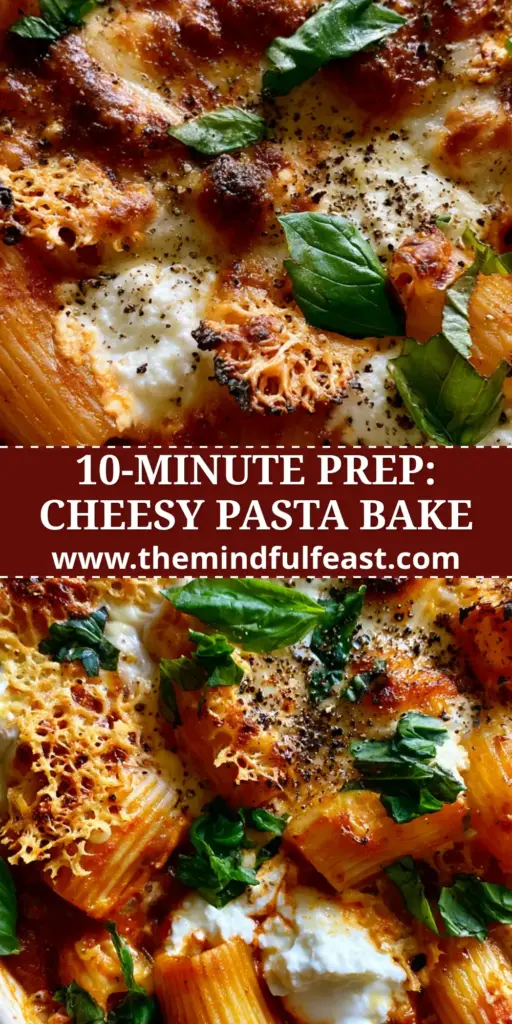
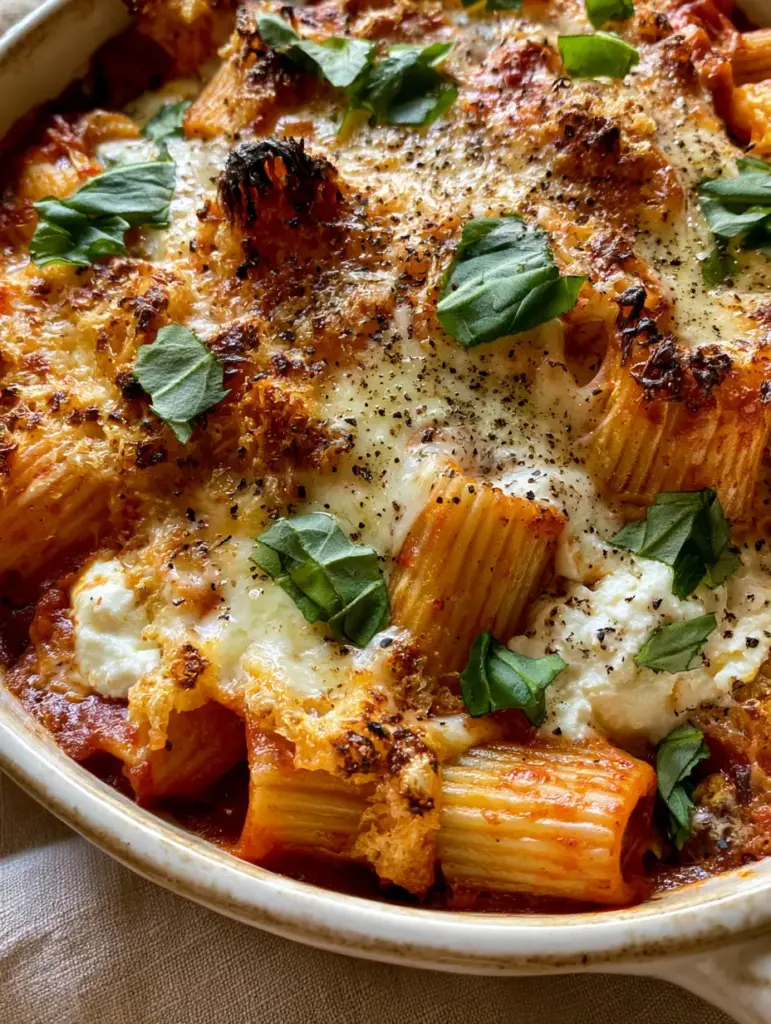
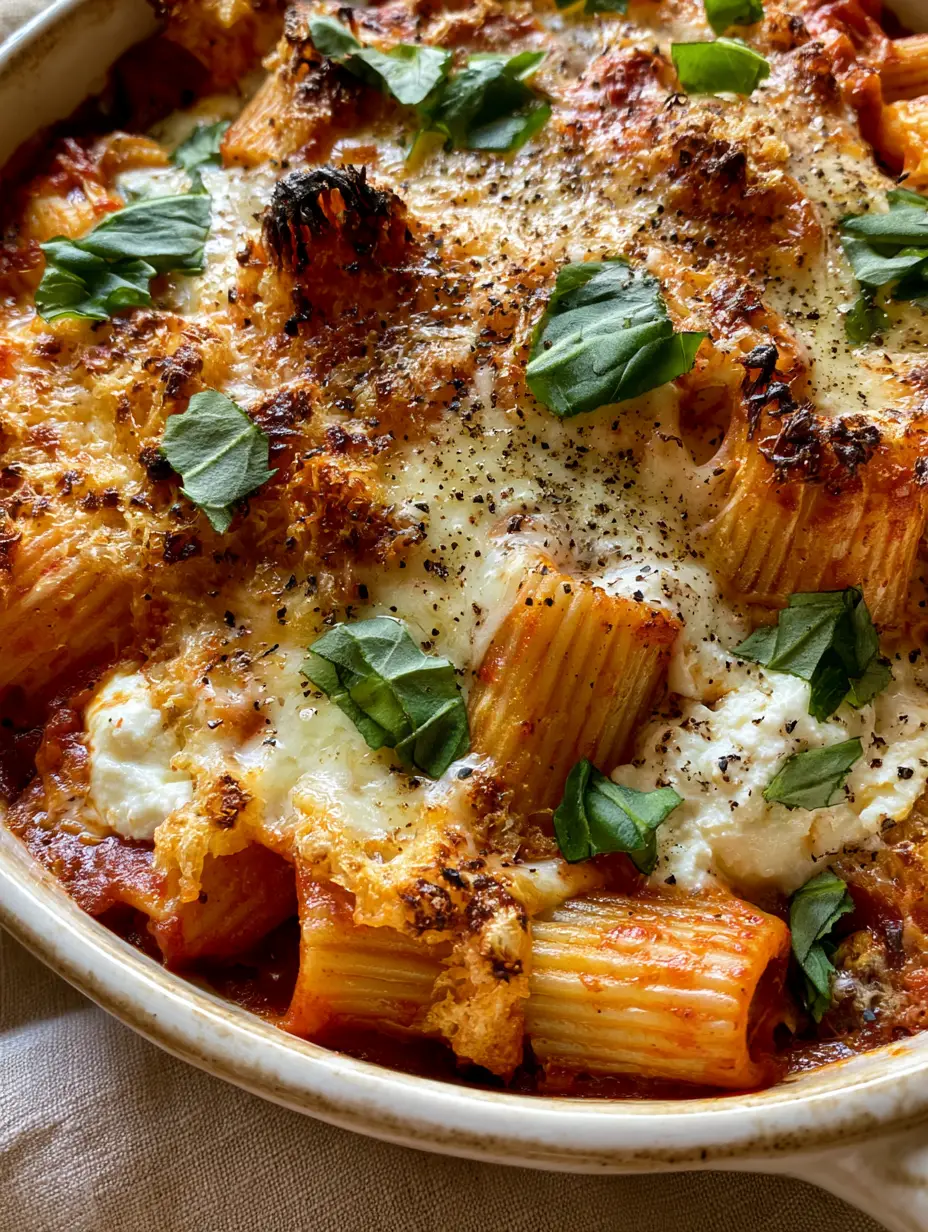
There is nothing quite as comforting as a Pasta al Forno recipe that delivers a perfect harmony of textures, from the snap of al dente rigatoni to the molten stretch of premium mozzarella. Imagine pulling a rustic white ceramic dish from the oven, heavy with the aroma of toasted parmesan and bubbling marinara, as wisps of steam rise to meet the cool kitchen air.
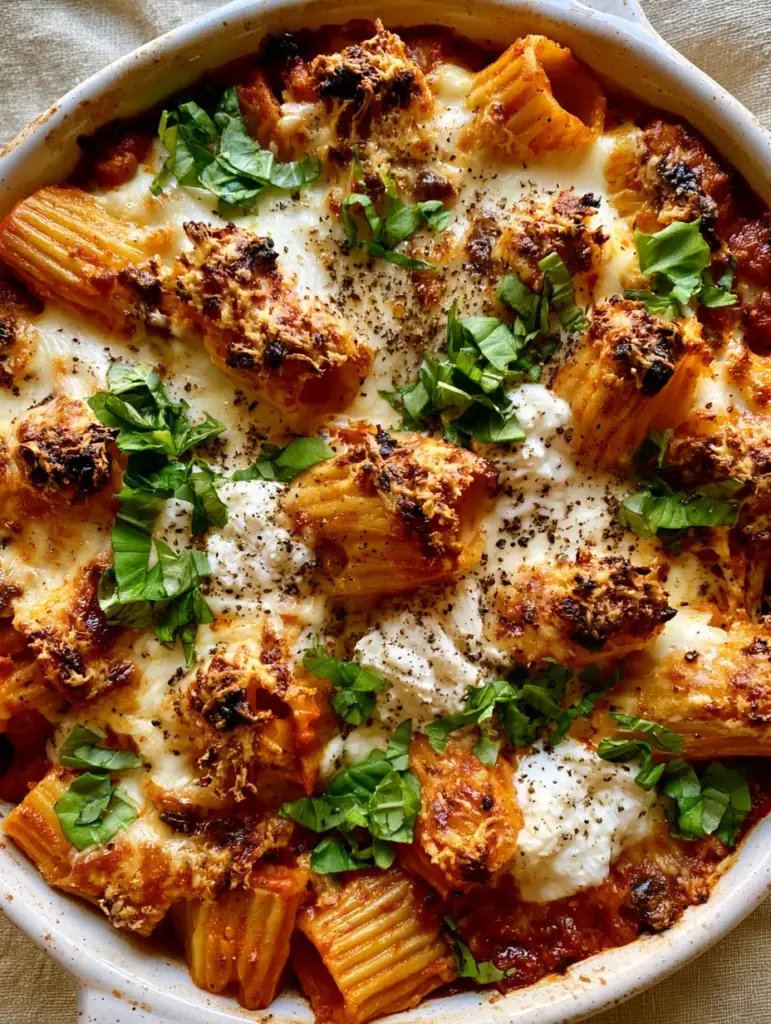
This dish isn’t just a meal; it’s a sensory experience defined by its charred lacey edges and those signature dollops of creamy ricotta that provide a cooling contrast to the rich, glossy red sauce. We are meticulously recreating the classic Italian “pasta al forno”—literally “pasta from the oven”—with a focus on achieving that smartphone-perfect, high-contrast visual appeal.
Whether you are hosting a Sunday family dinner or meal prepping for a busy week, this technique ensures your pasta never turns mushy. By focusing on foundational culinary science, we’ll achieve a restaurant-quality crust that shatters under the fork, revealing a core of saucy, cheesy perfection.
The Essential Architecture of a Perfect Baked Rigatoni
- High-Contrast Textures: The combination of chewy pasta, liquid-gold mozzarella, and a brittle toasted parmesan crust creates a complex mouthfeel.
- Glossy Sauce Consistency: We use specific emulsification techniques to ensure the marinara clings to the ridges of the rigatoni without becoming watery.
- The Ricotta Reveal: Unlike recipes that stir everything together, our method uses distinct dollops to provide pockets of creamy, white sweetness.
- Forensic Visual Cues: Every step is designed to mirror the professional aesthetic of hand-torn basil and heavy cracks of black pepper.
The Flavor Foundation: Ingredients for Success
To execute this Pasta al Forno recipe flawlessly, you need ingredients that stand up to high heat. Low-quality cheeses or thin sauces will result in a flat, greasy dish rather than the structural masterpiece described in our visual blueprint.
1 lb (450g) Rigatoni Pasta: The large ridges and hollow center are scientifically designed to trap maximum sauce. Unlike thinner shapes, rigatoni maintains its “bite” even after a secondary cook in the oven.
3 cups (720ml) Premium Marinara Sauce: Look for a sauce with a deep red hue and visible herb flecks. If you enjoy bolder flavors, you might also like the profile of my creamy tomato ricotta pasta.
8 oz (225g) Whole Milk Mozzarella: Shred your own from a low-moisture block to achieve those iconic molten bubbles. Pre-shredded cheese contains potato starch which prevents the “charred lacey edges” we are looking for.
1 cup (250g) Whole Milk Ricotta: The fat content here is crucial for that “creamy dollop” look. It acts as a palate cleanser against the acidic tomatoes and salty parmesan.
1/2 cup (50g) Finely Grated Parmesan: This is our “crust-maker.” When subjected to high heat, the proteins in parmesan undergo the Maillard reaction, creating that golden-brown, toasted finish.
2 tbsp (30ml) Extra Virgin Olive Oil: We use this to toss the pasta before saucing, which creates a barrier that prevents the rigatoni from absorbing too much liquid and becoming soft.
Fresh Basil and Cracked Black Pepper: These are the “finishers.” Adding them after the bake ensures the basil stays vibrant green and the pepper retains its volatile oils and sharp aroma.
Necessary Tools for a Rustic Presentation
The vessel is as important as the ingredients when following this Pasta al Forno recipe. You will need a 9×13 inch (23x33cm) rustic white ceramic baking dish to achieve the even heat distribution required for the toasted edges.
Additionally, a large heavy-bottomed pot for boiling the rigatoni and a microplane for the parmesan are essential. The microplane creates a snowy texture that melts and toasts much more evenly than a standard box grater.
A Step-by-Step Guide to Mastery
Preparing the Pasta for the Bake
Bring 4 quarts (3.8L) of water to a rolling boil and season heavily with 2 tbsp (35g) of kosher salt. The water should taste like the sea; this is your only chance to season the pasta itself.
Add the rigatoni and cook for exactly 2 minutes less than the “al dente” package instructions. This is a critical culinary maneuver—the pasta will continue to cook inside the oven by absorbing the steam and moisture from the marinara.
Drain the pasta and immediately toss with 1 tbsp (15ml) of olive oil. This prevents the tubes from sticking together while you prepare the layers. If you enjoy hearty pasta dishes, you should also try my beef and pasta in creamy garlic sauce.
Building the Saucy Layers
In a large mixing bowl, combine the par-cooked rigatoni with 2.5 cups (600ml) of the marinara sauce. Stir gently until every ridge of the pasta is coated in a glossy, deep-red sheen.
Pour half of the pasta into your white ceramic baking dish. Spread it into an even layer, ensuring there are plenty of pasta tubes facing upwards to catch the cheese.
The Triple-Cheese Application
Take your ricotta and, using a small spoon, drop 1-inch (2.5cm) dollops across the surface of the first layer. Do not spread them; we want these to remain as distinct “creamy white nests.”
Add the remaining pasta on top, then pour over the final 1/2 cup (120ml) of marinara. This top layer of sauce protects the pasta from drying out under the broiler.
Generously cover the entire surface with the shredded mozzarella. Finally, dust the top with the finely grated parmesan, concentrating a little extra around the edges of the dish to create those charred, lacey textures.
The High-Heat Finish
Preheat your oven to 400°F (200°C). Slide the dish onto the middle rack and bake for 20-25 minutes. Look for the mozzarella to start bubbling vigorously and the parmesan to turn a light golden brown.
For the final 2 minutes, switch the oven to the broiler setting. Watch closely—you are looking for “leopard spotting” on the cheese and distinct charred edges where the cheese meets the ceramic. Once you see the steam rising and the edges are dark gold, remove immediately.
Expert Tips for Success
- Room Temp Ricotta: Let your ricotta sit on the counter for 15 minutes before dolloping. This ensures it stays creamy rather than releasing water during the bake.
- The “Steam” Factor: To capture that perfect photo, let the dish rest for 5 minutes after pulling it from the oven. This allows the sauce to thicken slightly while still emitting beautiful, soft steam.
- Basil Preservation: Never bake the basil. The heat of the oven will turn it black and bitter. Always tear it fresh and scatter it just before serving for that vibrant green contrast.
- Sauce Enrichment: If your marinara feels too acidic, stir in a teaspoon of sugar or a splash of heavy cream before mixing with the pasta. This is a trick often used in my creamy chorizo pasta.
Storage, Reheating, and Freezing
This Pasta al Forno recipe keeps beautifully in the refrigerator for up to 4 days. Store it in an airtight container to prevent the cheese from absorbing fridge odors.
To reheat, add a splash of water or extra sauce to the dish and cover with foil. Bake at 350°F (175°C) until the cheese is molten again. Avoid the microwave if possible, as it can make the rigatoni rubbery.
For freezing, assemble the dish but do not bake it. Wrap tightly in plastic wrap and then foil. It will stay fresh for up to 3 months. Thaw in the refrigerator overnight before baking as directed.
What to Serve With This Cheesy Masterpiece
To balance the richness of the molten mozzarella and toasted parmesan, a crisp green salad with a sharp vinaigrette is the ideal companion. The acidity cuts through the fat and refreshes the palate between bites.
If you are looking for a more protein-heavy side, consider serving this alongside a perfectly seared flat iron steak. The savory juices of the meat complement the tomato-based sauce beautifully.
For a fun, textural contrast, a side of crispy onion ring chips adds a salty crunch that mimics the toasted parmesan crust of the pasta.
Frequently Asked Questions
Yes! You can assemble the dish up to 24 hours in advance. Keep it covered in the refrigerator and add an extra 5-10 minutes to the baking time since you are starting from a cold temperature.
While rigatoni is ideal for its large ridges and ability to hold sauce, you can substitute with penne or ziti. However, rigatoni provides the best structural integrity for the heavy cheese layers.
The secret is using a high-heat bake (400°F) and finishing with a 2-minute broil. Also, ensure you use a finely grated parmesan on top of the mozzarella to create that thin, crispy crust.
For this specific recipe, low-moisture, whole-milk mozzarella is better. Fresh mozzarella (stored in water) releases too much liquid, which can make your sauce watery instead of glossy.
The most common reason is overcooking the pasta before baking. Always boil your rigatoni for 2 minutes less than the al dente instructions, as it will continue to cook in the sauce while in the oven.
The Final Pasta al Forno Recipe
Pasta al Forno Recipe: The Ultimate Cheesy Baked Rigatoni with Ricotta
Ingredients
Equipment
Method
- Boil the rigatoni in salted water for 2 minutes less than the package directions until very al dente. Drain and toss with olive oil.
- Toss the par-cooked rigatoni with 2.5 cups of marinara sauce until every tube is coated and glossy.
- Place half the pasta in the ceramic dish. Add dollops of ricotta across the surface. Top with remaining pasta and sauce.
- Cover with shredded mozzarella and a heavy dusting of parmesan, especially around the edges for a charred effect.
- Bake at 400°F (200°C) for 20 minutes. Finish under the broiler for 2 minutes until the cheese is bubbling with toasted lacey edges.
- Remove from oven, let rest for 5 minutes, then garnish with torn basil and cracked black pepper before serving.
Notes
Ensure the oven is fully preheated to achieve the signature charred lacey edges.
Share Your Culinary Creation!
The beauty of this Pasta al Forno recipe lies in its rustic, unedited charm. We want to see your bubbling cheese, your charred lacey edges, and those vibrant green basil leaves! The contrast of the deep red marinara against the white ceramic dish is a sight to behold.
If you enjoyed this deep-dive into Italian comfort food, please leave a comment below and let us know how your toasted parmesan crust turned out. Don’t forget to follow us on Pinterest and pin this recipe to your “Sunday Dinner” boards!