There is a specific kind of magic found in the Starbucks bakery case, but nothing quite captures the imagination like the iconic Starbucks Cake Pops. These perfectly spherical, pastel-pink treats have become a global phenomenon, beloved for their unique “doughy” texture that defies the logic of traditional cake. If you have ever wondered how a tiny ball of cake can be so incredibly moist and dense while remaining perfectly encased in a glossy, crackable shell, you are in the right place.
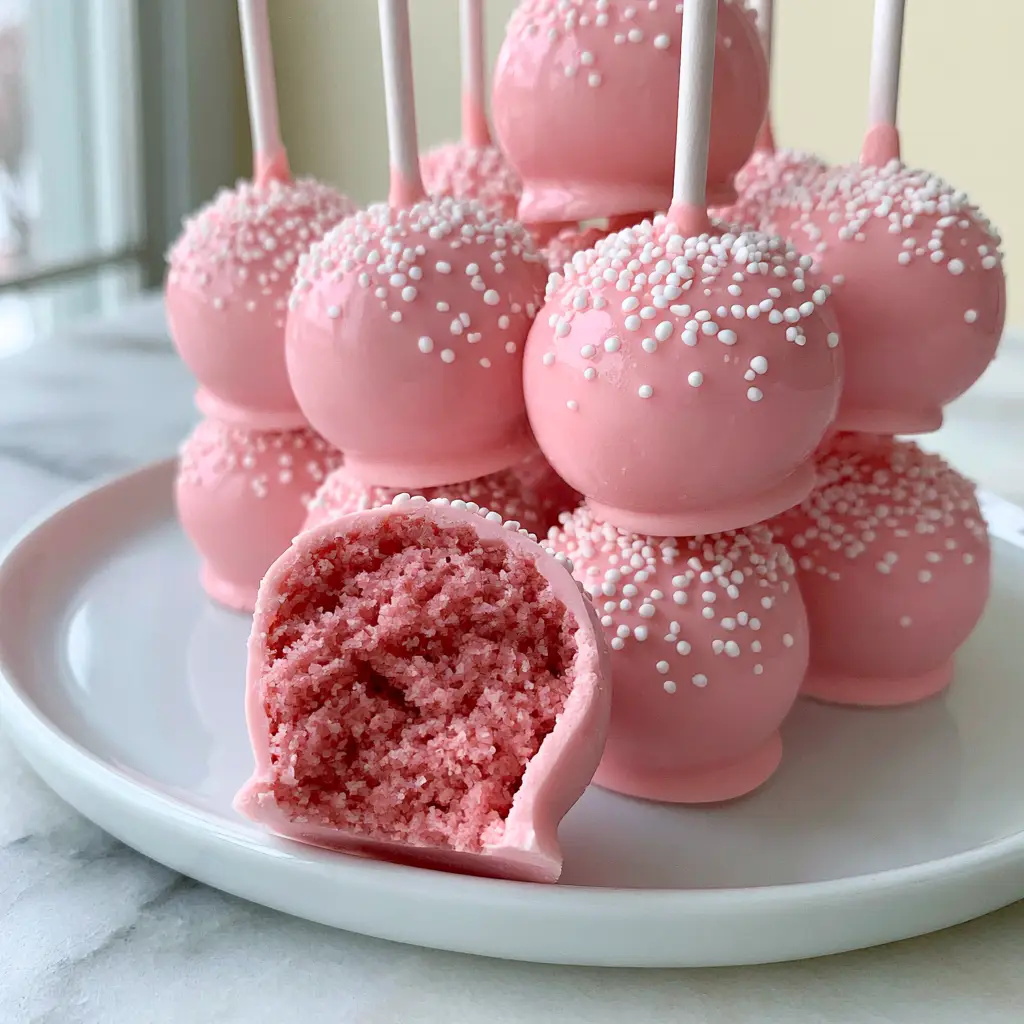
Making Starbucks Cake Pops at home is not just about baking a cake; it is a culinary exercise in texture and precision. We are moving beyond the dry, crumbly texture of standard cupcakes and entering the realm of gourmet confections. By following this professional-grade guide, you will master the art of the pink velvet crumb and the high-gloss candy dip, ensuring your homemade version looks identical to the handheld smartphone photo of a neat stack of gourmet pink cake pops you’d see on a luxury food feed.
Whether you are preparing these for a themed party or simply satisfying a mid-afternoon craving, this recipe delivers the exact sensory experience of the original. From the tiny white sugar nonpareils to the ultra-moist pink center, every detail has been forensically accounted for. Let’s dive into the science of the perfect pop.
The Anatomy of a Perfect Pink Crumb Center
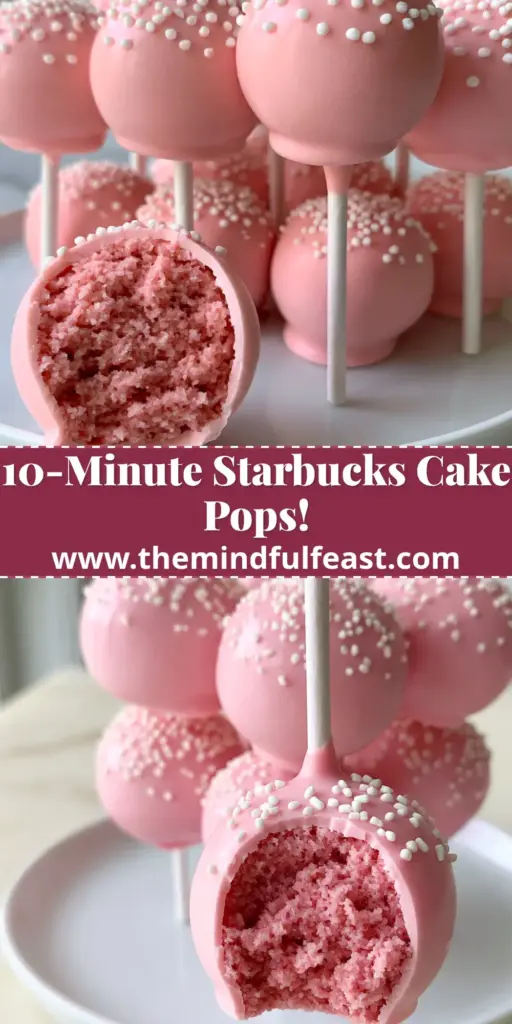
- Signature Doughy Texture: Unlike traditional cake which should be light and airy, these pops feature an ultra-moist, dense, doughy pink cake crumb center that feels like a cross between fudge and velvet.
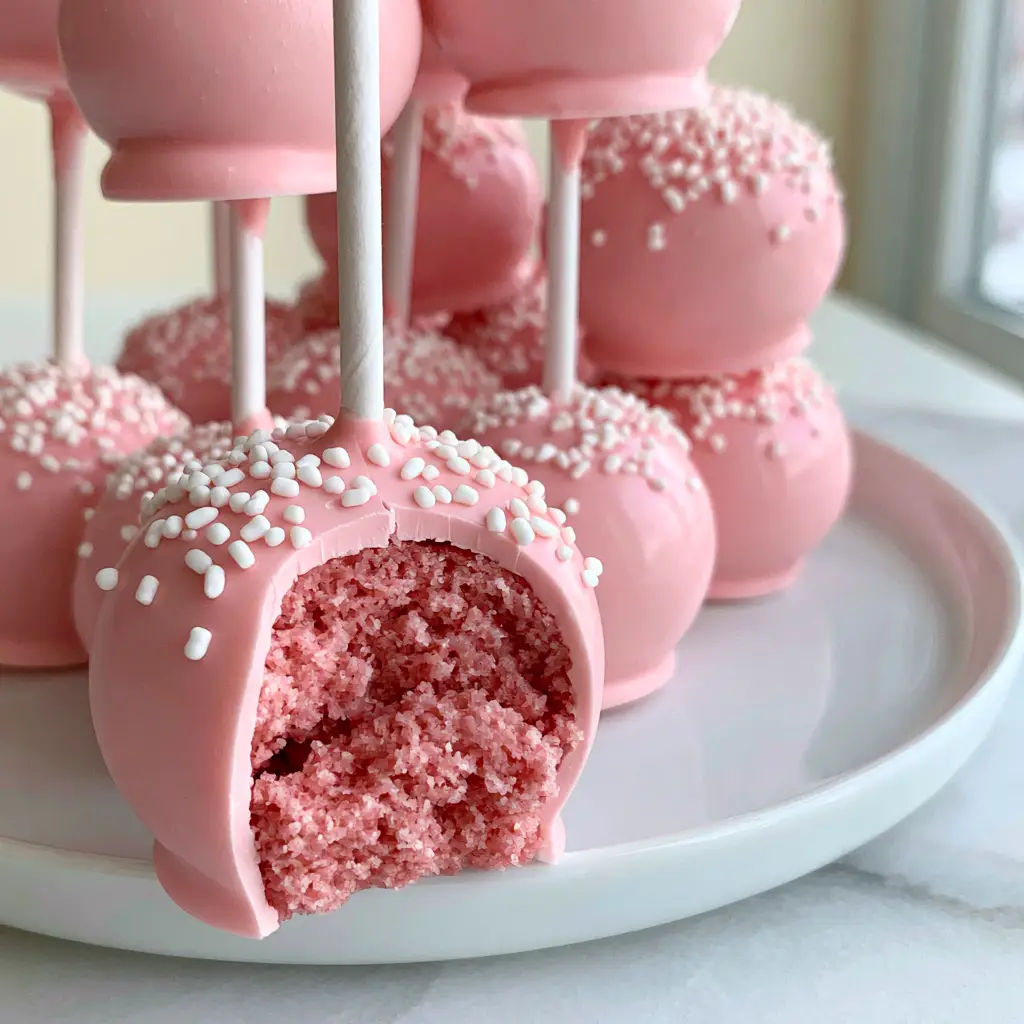
- Glossy Pastel Finish: A perfectly smooth, glossy pastel-pink candy coating that provides a satisfying “snap” when you take a clean bite.
- Forensic Visual Accents: Each pop is adorned with a precise scattering of tiny white sugar nonpareils, mimicking the elegant simplicity of the Starbucks classic.
- Structural Integrity: Using sturdy white paper lollipop sticks ensures the pops stand upright and elegant on a white ceramic plate without wobbling.
Essential Components for Your Pink Velvet Masterpiece
To achieve the specific visual recipe blueprint, we must use high-quality ingredients that perform under the heat of the candy melt and the pressure of the shaping process. Here is what you will need for your Starbucks Cake Pops.
All-Purpose Flour (1.5 cups / 190g): This provides the structural foundation for the cake; we want a moderate protein content to ensure the cake doesn’t become too tough but remains sturdy enough to crumble.
Granulated Sugar (1 cup / 200g): Essential for sweetness and moisture retention, the sugar helps create that tender, tight crumb structure necessary for the dense doughy interior.
Unsalted Butter (0.5 cup / 115g): Softened butter is creamed with sugar to incorporate just enough air to lift the cake while providing a rich, fatty mouthfeel that defines a premium cake pop.
Pink Gel Food Coloring (1-2 drops): Gel is superior to liquid coloring because it provides a vibrant, “moist doughy pink” hue without altering the moisture content or chemical balance of the batter.
Whole Milk (0.5 cup / 120ml): The fat content in whole milk contributes to the richness of the crumb, ensuring the final product isn’t dry or sandy.
Cream Cheese Frosting (0.25 cup / 60g): This is the “glue” that transforms crumbs into a doughy masterpiece; the tang of the cream cheese perfectly balances the sweet candy shell.
Pink Candy Melts (12 oz / 340g): These are specifically formulated to create a smooth, glossy pastel-pink candy coating that sets quickly and maintains a professional shine.
Coconut Oil or Paramount Crystals (1 tsp / 5g): An “invisible” but vital ingredient that thins the candy melts, allowing for a perfectly smooth, drip-free finish.
White Paper Lollipop Sticks: These 6-inch sticks are the standard for achieving the elegant, upright look described in our visual blueprint.
Tiny White Sugar Nonpareils: These small, round sprinkles provide the classic Starbucks aesthetic and a subtle textural contrast to the smooth shell.
Professional Tools for Cake Pop Success
Achieving a result that looks like a gourmet boutique photo requires more than just a bowl and a spoon. You will need a 9×9 inch (23x23cm) baking pan to cook the base cake evenly. A food processor is highly recommended for creating the “ultra-moist” crumbs; it breaks the cake down much more uniformly than hands can, leading to that signature doughy texture.
For the dipping process, a deep, narrow microwave-safe glass or silicone cup is better than a wide bowl. This depth allows you to submerge the entire Starbucks Cake Pops in one clean motion, preventing the uneven “double-dip” look. Finally, a cake pop stand or a block of Styrofoam is essential for letting the pops dry upright so the coating doesn’t flatten on one side.
Crafting the Ultra-Moist Pink Velvet Base
Baking the Foundation
Preheat your oven to 350°F (175°C). Cream the butter and sugar until light and fluffy, then add your egg and a drop of pink gel food coloring. Sift in the dry ingredients and alternate with the milk until a thick, vibrant pink batter forms. Pour this into your prepared pan and bake for 25-30 minutes, or until a toothpick comes out clean.
Allow the cake to cool completely. This is a critical step; if you crumble a warm cake, the steam will turn the interior into a gummy mess rather than a dense, doughy crumb. Once cool, trim off the golden-brown edges of the cake. This ensures that every bite revealed in the “clean bite” visual is a uniform, vibrant pink without any brown streaks.
The Art of the Crumb and Bind
Break the pink cake into large chunks and place them in a food processor. Pulse until you have fine, sandy crumbs. Transfer to a bowl and add the cream cheese frosting one tablespoon at a time. Mix with your hands until the mixture holds together like stiff playdough.
To ensure your Starbucks Cake Pops are uniform, use a small cookie scoop to portion out 1-inch (2.5cm) balls. Roll them between your palms until they are perfectly smooth and spherical. Place them on a parchment-lined tray and chill in the refrigerator for at least one hour. Chilling is non-negotiable; it firms up the fats so the pops don’t fall off the sticks during dipping.
Achieving the Perfect Glossy Candy Shell
Setting the Sticks
Melt a small handful of pink candy melts in the microwave. Dip the tip of each white paper lollipop stick into the melted candy, then insert it about halfway into a chilled cake ball. This act creates a “seal” that locks the stick into the dense crumb. Return the pops to the fridge for another 15 minutes to let this seal harden completely.
The Master Dip Technique
Melt the remaining pink candy melts with the coconut oil, stirring until the mixture flows like warm honey. Hold a cake pop by the stick and plunge it straight down into the glossy pastel-pink coating until the cake is fully submerged and the coating just touches the stick. Pull it straight up—do not stir or swirl.
Gently tap your wrist to encourage excess coating to drip off. While the coating is still wet, lightly scatter the tiny white sugar nonpareils over the top. The “Visual Recipe Blueprint” calls for a neat, elegant arrangement, so don’t over-sprinkle. Place the stick upright in your stand to dry in the soft, diffused natural daylight of your kitchen.
Expert Tips for Bakery-Quality Results
- Avoid the Oil Bleed: If your cake pops start to “sweat” oil, it’s usually because the cake-to-frosting ratio is too high in fat or the pops were too cold when dipped. Aim for a doughy, not greasy, consistency.
- Prevent Cracking: Cracks in the shell happen when there is a massive temperature difference between the cold cake and the hot candy. Let your chilled pops sit at room temperature for 5-10 minutes before dipping.
- The “Thinning” Secret: If your candy coating is too thick, it will pull the cake off the stick. Always use a little coconut oil to achieve that professional, glossy, thin shell.
- Color Matching: For the perfect pastel pink, start with white candy melts and add one or two pink melts at a time until the desired hue is achieved.
Creative Pairings for Your Dessert Spread
These Starbucks Cake Pops are the ultimate showstopper for any dessert table, especially when paired with other vibrant treats. For a cohesive pink theme, consider serving them alongside strawberries and cream cupcakes or even a refreshing strawberry dole whip.
If you are hosting a larger brunch, these pops provide a sweet contrast to savory dishes like huevos rancheros. For a whimsical afternoon tea, they pair beautifully with banana pudding cupcakes, creating a variety of textures from creamy pudding to dense, doughy cake crumbs. If you’ve just finished a hearty meal of cajun chicken rice bowl, these light yet satisfying pops are the perfect way to cleanse the palate.
Storage and Freshness Guide
Because of their dense, doughy interior and sealed candy shell, Starbucks Cake Pops stay fresh much longer than traditional cake. You can store them in an airtight container at room temperature for up to 3 days. For longer storage, keep them in the refrigerator for up to a week.
If you need to transport them, a tall container that allows them to stand upright is best to avoid scuffing the glossy pastel-pink candy coating. If you notice the shell becoming dull, a quick, very gentle buff with a soft microfiber cloth can sometimes restore the shine, though they are best enjoyed fresh.
Common Questions About Homemade Cake Pops
Yes, you can freeze them for up to 6 weeks. Place them in a single layer in a freezer-safe container. Thaw them in the refrigerator to prevent condensation from dulling the glossy finish.
Always dip the stick into melted candy before inserting it into the cake ball. Then, chill the pops thoroughly. This acts as a ‘glue’ that secures the dense cake crumb to the white paper stick.
Add 1 teaspoon (5g) of coconut oil or paramount crystals to your melted candy. This thins the coating, allowing it to flow smoothly and create that glossy, thin pastel-pink shell.
Cracking is caused by extreme temperature changes. If the cake balls are too cold when dipped into warm candy, the internal expansion causes the shell to crack. Let the pops sit at room temperature for 10 minutes before dipping.
The signature doughy texture comes from finely processing the cake into crumbs and mixing it with a high-fat binder like cream cheese frosting. This creates a dense, truffle-like consistency rather than a light sponge.
The Ultimate Starbucks Cake Pops Recipe
Starbucks Cake Pops: The Secret to Achieving That Dense, Doughy Pink Perfection
Ingredients
Equipment
Method
- Cream butter and sugar, add egg, vanilla, and pink coloring. Mix in dry ingredients and milk. Bake at 350°F (175°C) for 25-30 mins.
- Cool cake completely, remove browned edges, and pulse in a food processor until fine crumbs form.
- Mix cake crumbs with cream cheese frosting until a doughy consistency is reached. Roll into 1-inch balls.
- Insert sticks dipped in melted candy into the balls and chill for 1 hour to set.
- Melt candy with coconut oil. Submerge each pop fully, tap off excess, and immediately top with white nonpareils.
- Place upright in a stand until the shell is glossy and firm.
Notes
Use a deep, narrow cup for dipping to get a single, smooth coat.
Closing the Case on the Pink Cake Pop
Mastering the Starbucks Cake Pops recipe at home is a rewarding experience that combines baking skills with confectionery artistry. The contrast between the crackable, glossy pastel-pink candy coating and the ultra-moist, dense pink cake crumb center is a sensory delight that never fails to impress. By paying close attention to the visual cues—the tiny white sugar nonpareils and the sturdy white sticks—you can create a professional-grade treat in your own kitchen.
We would love to see your creations! Share your photos and tag us, or pin this recipe to your favorite dessert boards on Pinterest. Don’t forget to sign up for our newsletter for more deep-dives into the science of your favorite bakery copycats.