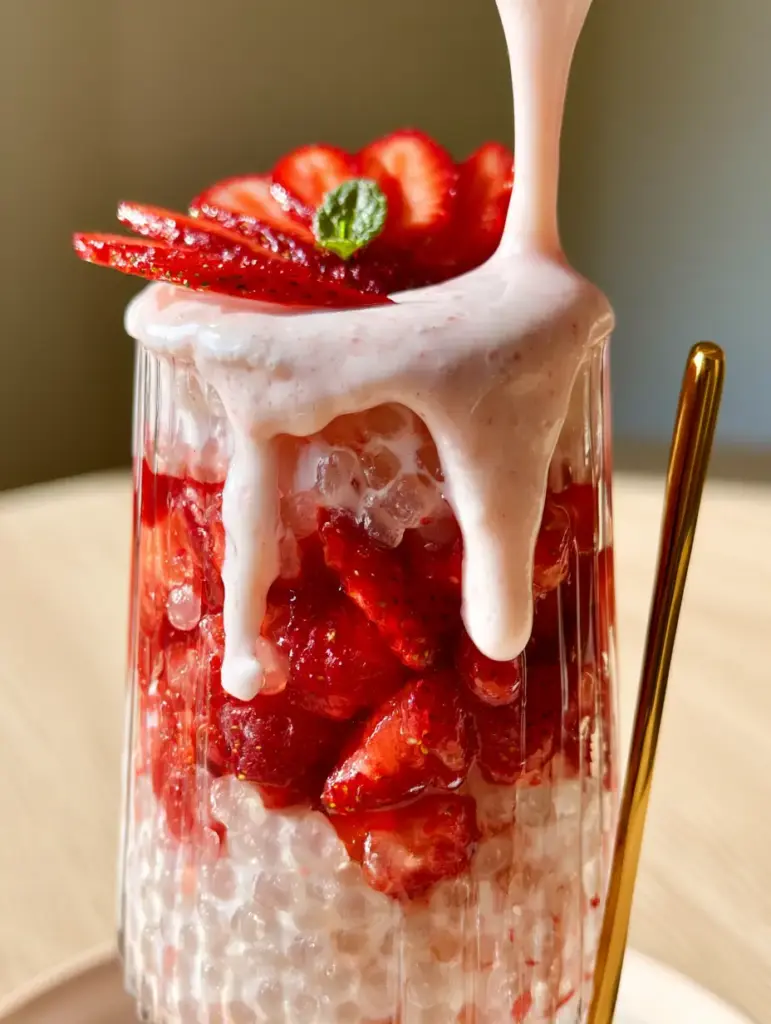
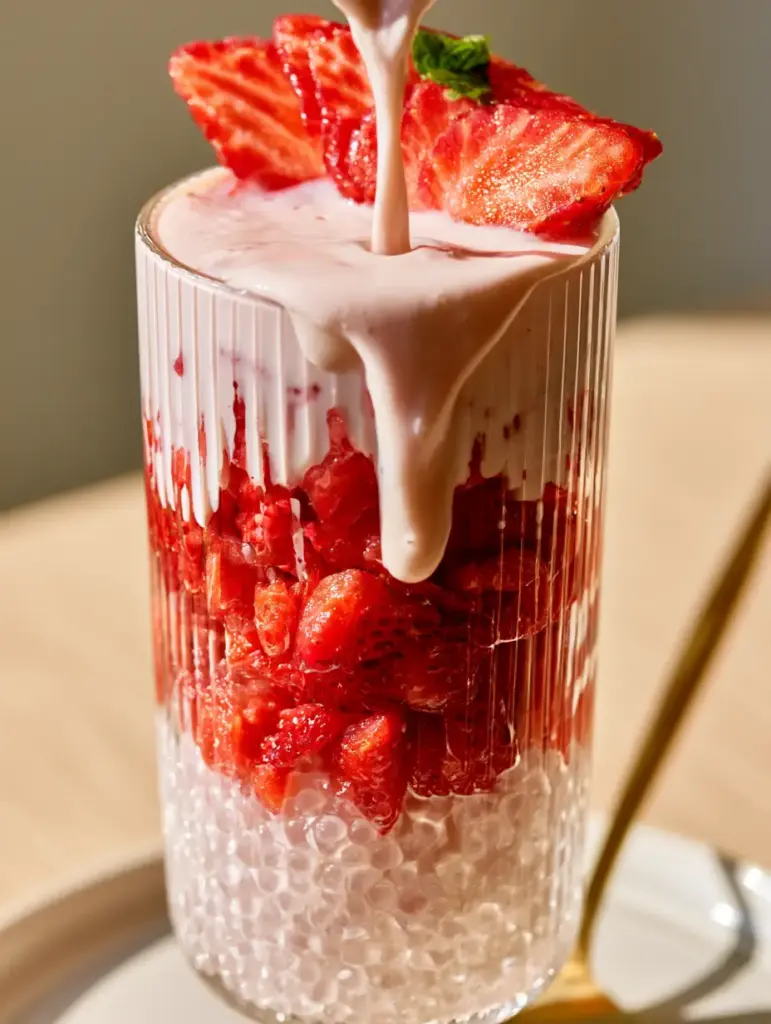
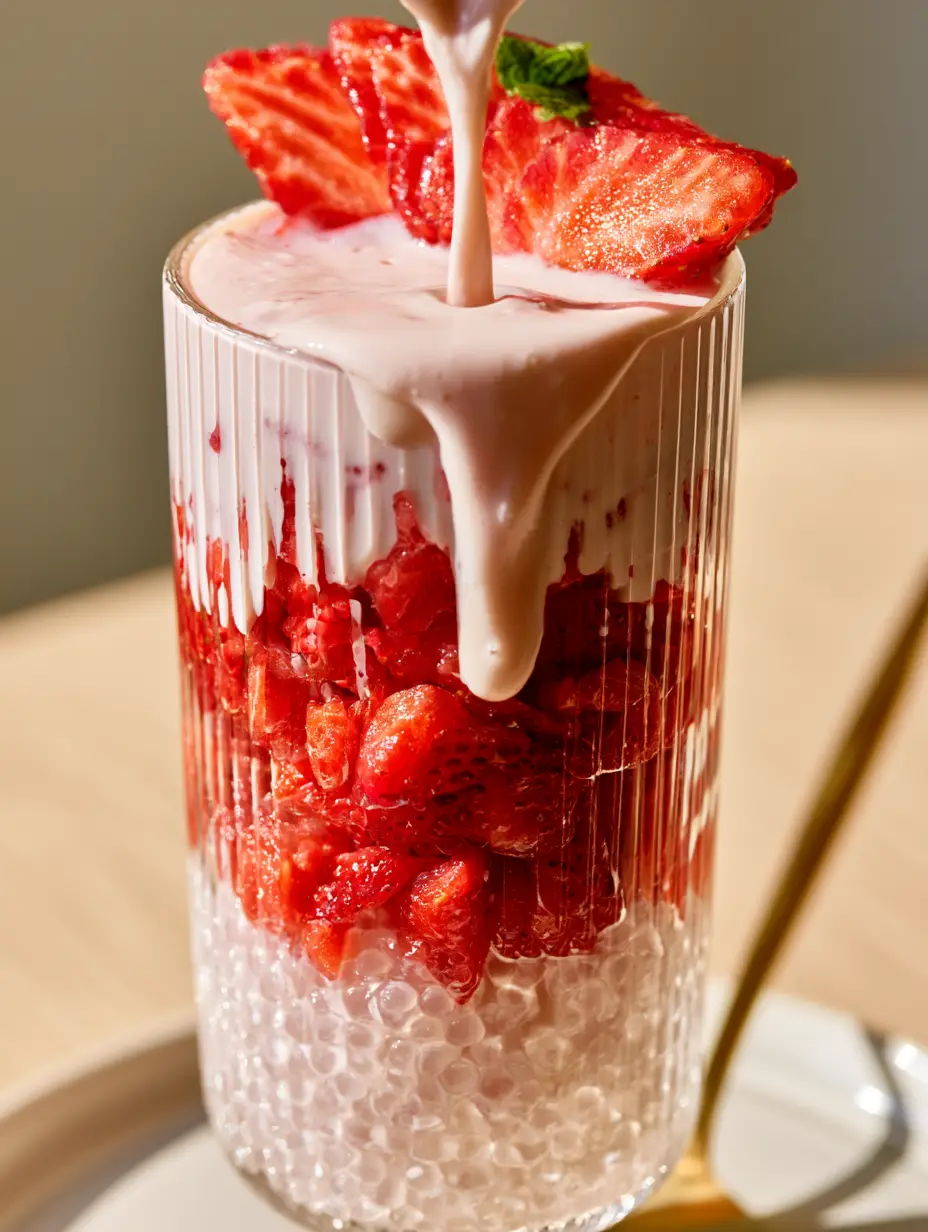
Imagine a tall, elegant ribbed glass catching the soft glow of the afternoon sun. Inside, a beautiful architecture of textures awaits: glistening translucent pearls at the base, a vibrant crimson heart of fresh berries, and a velvety pale pink cream cascading down the sides. This Strawberry Sago is not just a dessert; it is a sensory experience that brings the sophisticated aesthetic of a high-end boutique cafe right into your kitchen.
The Strawberry Sago has taken the culinary world by storm, blending the chewy, satisfying texture of traditional Asian dessert pearls with the bright, nostalgic sweetness of sun-ripened fruit. Whether you are hosting a summer garden party or simply looking for a visually stunning treat to brighten your Tuesday, this recipe delivers professional-grade results with surprisingly simple techniques.
In this comprehensive guide, we will walk you through the forensic details of creating the perfect translucent sago, the science of macerating strawberries for maximum juice extraction, and the secret to achieving that iconic “drip” effect with a condensed milk and heavy cream blend. Every step is designed to ensure your final dish looks exactly like the masterpiece in our visual blueprint.
Why You Will Fall in Love With This Pink Pearl Delight
- Textural Harmony: Experience the contrast between the soft, slippery sago pearls, the juicy crunch of fresh strawberries, and the thick, silk-like consistency of the heavy cream dressing.
- Natural Vibrancy: The deep red hues of the berries against the pale pink cream create a stunning ombre effect that requires no artificial food coloring.
- Customizable Sweetness: By controlling the ratio of condensed milk, you can tailor the richness to your exact preference.
- Cafe-Style Presentation: With the addition of fanned strawberry slices and a fresh mint sprig, this dish is a photographer’s dream.
Before we dive into the method, it is worth noting that while this is a sweet treat, it balances beautifully after a savory meal. If you have just finished a hearty plate of beef with pasta in creamy garlic sauce, the cooling acidity of the strawberries acts as a perfect palate cleanser.
Essential Ingredients for the Perfect Strawberry Sago
To achieve the visual and structural integrity described in our blueprint, every ingredient serves a specific purpose. We are not just making a drink; we are building layers of flavor and texture.
Small Sago Pearls: 1/2 cup (100g). These are the foundation of the dish. When cooked correctly, they become glistening, translucent orbs that provide the signature “chew” characteristic of classic Asian desserts.
Fresh Strawberries: 2 cups (300g), divided. Look for berries that are deep red all the way to the stem. These will be used for the dense middle layer of hand-cut chunks and the delicate fanned garnish on top.
Heavy Whipping Cream: 1 cup (240ml). The heavy cream provides the fat content necessary for a velvety mouthfeel and ensures the dressing is thick enough to create those beautiful drips down the inner glass.
Sweetened Condensed Milk: 1/2 cup (120ml). This acts as both the sweetener and the stabilizer. It creates a dense, syrupy texture that helps the cream layer sit perfectly atop the strawberries without immediately sinking.
Cold Water & Ice: For the “cold shock” process. This is the invisible essential step that prevents the sago pearls from clumping together into a starchy mass.
Fresh Mint: 1 tiny sprig. While small, this provides the essential green contrast against the red and pink palette, as specified in our visual prompt.
Must-Have Kitchen Tools for Layered Perfection
To recreate the exact look of a handheld smartphone photo in natural light, you will need a few specific tools. The right equipment makes the assembly process seamless.
- Tall Ribbed Glassware: The ridges in the glass are crucial for catching the cream drips and creating those gentle highlights in the afternoon sunlight.
- Fine-Mesh Sieve: Essential for rinsing the cooked sago under cold water to remove excess surface starch.
- Precision Paring Knife: Used to create the thin, fanned strawberry slices that sit atop the cream.
- Gold Long-Handled Spoon: As seen in the blueprint, a delicate gold spoon adds a touch of luxury and allows you to reach the sago pearls at the bottom of the tall glass.
If you are planning a full menu, consider starting with a light beet and cucumber salad to keep the meal refreshing and vibrant from start to finish.
Mastering the Sago: A Step-by-Step Culinary Guide
Achieving the “glistening white” and “translucent” look for the sago pearls requires a specific boiling technique. Follow these phases closely to avoid the common pitfall of mushy or stuck-together pearls.
Phase 1: Boiling and Hydrating the Pearls
Bring 6 cups (1.4L) of water to a rolling boil in a large pot. Do not add the sago to cold water, or they will dissolve into the liquid. Once the water is boiling vigorously, slowly pour in the 1/2 cup (100g) of sago pearls.
Stir immediately and constantly for the first 2 minutes to prevent them from sticking to the bottom. Reduce the heat to medium-low and simmer for 10-15 minutes. You are looking for a specific sensory cue: the pearls should be mostly clear with just a tiny white dot in the center.
Turn off the heat, cover the pot, and let them sit for another 5-10 minutes. This “carry-over” cooking time allows the pearls to become fully translucent without falling apart. Immediately drain them through a fine-mesh sieve and rinse under cold running water until the water runs clear and the pearls feel cool to the touch.
Phase 2: Preparing the Vibrant Berry Layer
While the sago cools, take 1.5 cups (225g) of the strawberries and remove the green hulls. Use a sharp knife to hand-cut them into small, juicy chunks. For the best “dense cluster” look mentioned in the prompt, avoid mashing them; you want distinct cubes of fruit.
In a small bowl, toss the chunks with a teaspoon of sugar if the berries are tart. This will draw out a small amount of juice, which helps create the “pale pink” transition when the cream is added later. Set aside a few of the most perfectly shaped berries to slice into fans for the final garnish.
Phase 3: The Velvety Cream Pour
In a medium mixing bowl, whisk together 1 cup (240ml) of heavy cream and 1/2 cup (120ml) of sweetened condensed milk. To achieve the pale pink color described in the visual prompt, take one strawberry, crush it into a paste, and whisk it into the cream until the color is uniform and soft.
The mixture should be thick enough to coat the back of a spoon. If it feels too thin, whisk it vigorously for 30 seconds to incorporate a little air, which will help it “grip” the sides of the ribbed glass during the pour.
Pro Tips for Translucent, Non-Sticky Pearls
- The 10:1 Water Ratio: Always use at least ten times the amount of water as sago. Sago releases a significant amount of starch, and if there isn’t enough water, the liquid will turn into a thick glue.
- Never Rinse Before Cooking: Unlike rice, rinsing raw sago pearls will cause them to disintegrate instantly. They must go straight from the bag into boiling water.
- The Cold Shock: Rinsing with cold water immediately after cooking is the secret to that “glistening” look. It removes the surface starch and stops the cooking process instantly.
- Maceration Time: Let your strawberry chunks sit for at least 10 minutes before assembling. This creates the “juicy” appearance highlighted in the Midjourney prompt.
If you enjoy the balance of creamy and savory, you might also love our teriyaki salmon, which offers a similar contrast of rich textures and bright flavors.
Proper Storage and Freshness Guide
Strawberry Sago is best enjoyed within 2-4 hours of assembly. Over time, the sago pearls will continue to absorb liquid from the cream, eventually losing their translucent appearance and becoming soft.
If you need to make this in advance, store the cooked sago pearls in a container filled with a little bit of sugar water to keep them hydrated and separate. Store the cream mixture and the chopped strawberries in separate airtight containers in the refrigerator. Assemble the layers just before serving to maintain the distinct visual boundaries between the white pearls, red fruit, and pink cream.
Do not freeze this dish. The heavy cream and fresh strawberries will change texture significantly upon thawing, losing the velvety and juicy qualities that make this recipe so special.
What to Serve With Your Creamy Treats
Since this Strawberry Sago is quite rich and sweet, it pairs exceptionally well with savory, salty, or slightly spicy main courses. The creaminess of the condensed milk provides a cooling relief to bolder spices.
Consider serving this as a grand finale after a meal of perfectly seared flat iron steak or a spicy creamy chorizo pasta. The strawberry acidity cuts through the fat of the meat, while the chewy sago provides a playful end to the dining experience. The gold spoon and ribbed glass also elevate the table setting, making the entire meal feel like a curated event.
Your Most Pressing Sago Questions Answered
Yes, small tapioca pearls are a great substitute. They have a very similar texture and appearance, though they may require slightly different boiling times according to the package instructions.
The secret is the condensed milk. It increases the density of the cream, allowing it to sit on the fruit layer. Pouring it slowly over the back of a spoon also helps maintain the layers.
It is traditionally served cold. The refreshing nature of the chilled cream and fresh berries is what makes this dessert so popular for warm weather.
Clumping usually happens if you add pearls to cold water or don’t rinse them immediately after cooking. Always use boiling water and perform a thorough cold-water rinse to remove excess starch.
This means they haven’t cooked long enough. Ensure you let them rest in the hot water, covered, for at least 5-10 minutes after boiling; this carry-over heat is what turns the centers translucent.
The Official Strawberry Sago Recipe Card
Ready to create this masterpiece? Follow the exact measurements below to achieve the cafe-quality look and taste of our visual blueprint. Don’t forget to capture your own smartphone photo in that soft afternoon sunlight!

Strawberry Sago: The Ultimate Creamy Home-Cafe Dessert Recipe
Ingredients
Equipment
Method
- Bring 6 cups (1.4L) of water to a boil. Add sago pearls and simmer for 15 minutes, stirring occasionally, until pearls are mostly translucent.
- Cover and let sit for 5 minutes until fully clear. Drain and rinse under cold water until glistening and separate.
- Hand-cut 1.5 cups of strawberries into juicy chunks. Slice the remaining berries into thin fans.
- Whisk heavy cream and condensed milk together. Add a small amount of strawberry juice to achieve a pale pink hue.
- Place sago pearls at the bottom of a ribbed glass. Add a dense layer of strawberry chunks. Pour the cream over the top, allowing it to drip down.
- Top with fanned strawberry slices and a mint sprig. Serve with a gold spoon.
Notes
Rinse cooked pearls thoroughly in cold water to prevent sticking.
Closing & Call to Action
Creating this Strawberry Sago is an exercise in culinary aesthetics and simple, high-quality ingredients. From the rhythmic boiling of the translucent pearls to the final, delicate placement of the mint leaf, each step contributes to a dessert that is as beautiful to look at as it is delicious to eat. The combination of thick, velvety cream and juicy red berries is a timeless pairing, elevated here by the unique texture of sago.
We would love to see your results! If you make this recipe, please leave a comment below and tell us how your layers turned out. Did you get those perfect cream drips? For more visually stunning recipe inspiration and home-cafe tips, follow us on Pinterest and share your creations with our community. Happy cooking!