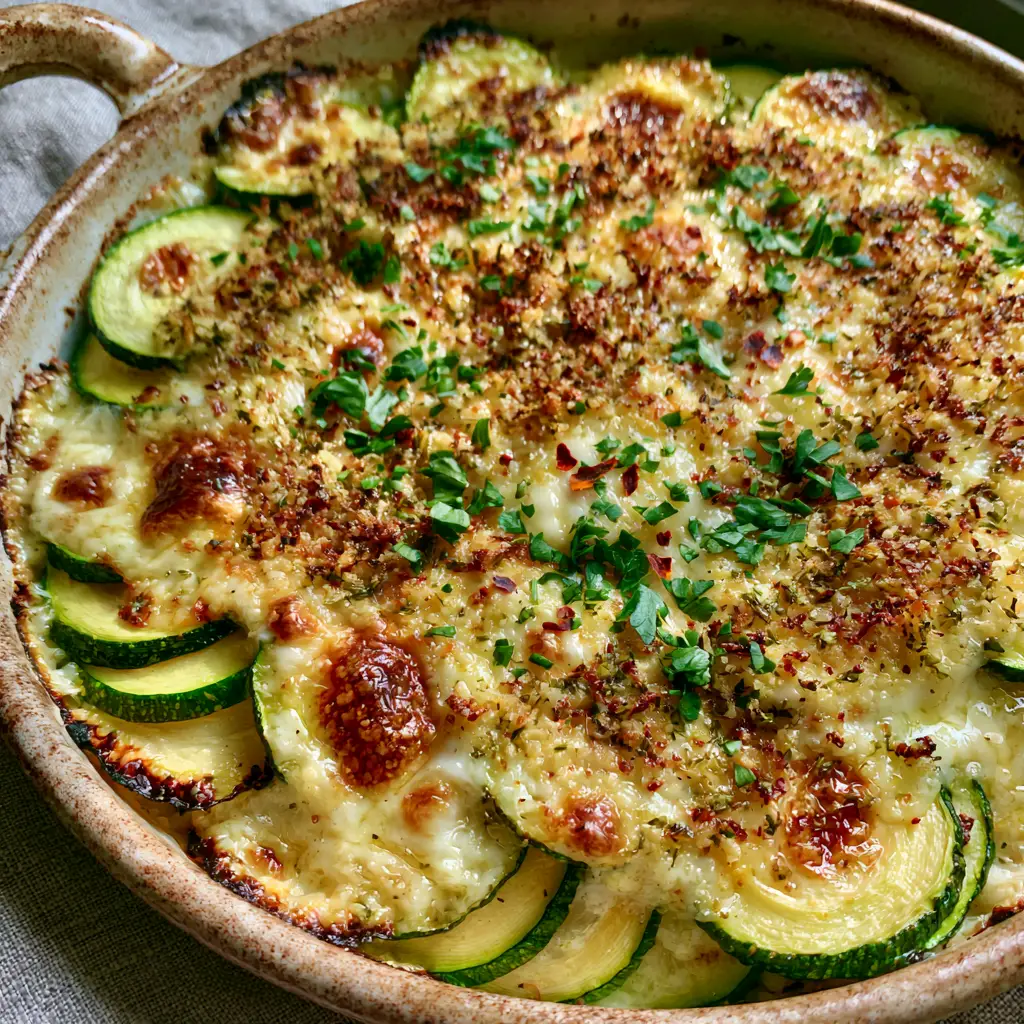
This Baked zucchini and cheese casserole is the ultimate solution for when your garden is overflowing with summer squash and your soul is craving comfort. Imagine tender, thinly sliced rounds of bright green and pale yellow zucchini stacked neatly in a rustic dish, bathed in a bubbly, blistered layer of melted parmesan and mozzarella cheese. This isn’t just another side dish; it is a masterclass in texture and flavor, featuring a heavy sprinkle of toasted herb topping that delivers a satisfying crunch in every single bite.
We have all experienced the disappointment of a watery vegetable bake, but this recipe utilizes professional culinary techniques to ensure a non-soggy result. By focusing on moisture control and high-heat roasting, we achieve those coveted dry seasoned edges and slight charring that elevate the humble zucchini to gourmet status. The addition of red pepper flakes and fresh flat-leaf parsley adds a vibrant finish that makes the golden-brown toasted spots on the cheese truly pop.
Why This Cheesy Summer Squash Bake Will Become Your New Favorite Side
- Perfectly Crispy, Never Soggy: Our method ensures the zucchini rounds retain their structure while the edges develop a beautiful, dry roasted char.
- The Ultimate Cheese Pull: A blend of sharp parmesan and melty mozzarella creates a blistered, golden-brown crust that stretches with every forkful.
- Aromatic Herb Crunch: A specifically engineered panko and herb topping provides a “breaded” feel without the heaviness of a traditional casserole.
- Visually Stunning Presentation: The alternating pattern of green and yellow zucchini makes this a centerpiece-worthy dish for any dinner party.
- Quick and Accessible: Using simple pantry staples, you can transform basic produce into a high-end culinary experience in under an hour.
The Ultimate Cheesy Zucchini Casserole Pantry List
To achieve the specific visual and structural results of this Baked zucchini and cheese casserole, each ingredient has been selected for its moisture-handling properties and flavor profile.
Zucchini Rounds (Green and Yellow): 2 lbs (900g) of firm, medium-sized zucchini. We use both colors for visual contrast; slicing them into uniform rounds ensures they cook evenly and stack beautifully in the ceramic dish.
Coarse Kosher Salt: 1 tbsp (15g). This is a foundational “invisible” ingredient used to “sweat” the zucchini, drawing out excess water before baking to prevent a soggy base.
Extra Virgin Olive Oil: 3 tbsp (45ml). Essential for conducting heat to the edges of the zucchini, allowing for that signature charred effect while providing a rich mouthfeel.
Shredded Mozzarella Cheese: 1.5 cups (170g). This provides the “stretch” and the toasted golden-brown spots described in our visual blueprint.
Grated Parmesan Cheese: 1/2 cup (50g). Parmesan adds a sharp, salty punch and creates the “bubbling” blistered texture on the top layer when exposed to high heat.
Panko Breadcrumbs: 1/2 cup (30g). Chosen for their large surface area, panko creates a crispy golden herb crust that stays crunchy rather than getting wet or mushy.
Dried Oregano and Thyme: 1 tsp (2g) each. These herbs infuse the breadcrumb topping with a rustic, Mediterranean aroma that complements the squash perfectly.
Garlic Powder: 1 tsp (5g). This ensures even garlic flavor distribution across every slice without the risk of burnt fresh garlic bits.
Red Pepper Flakes: 1/2 tsp (1g). Provides a subtle heat and a necessary pop of red color to the final golden presentation.
Fresh Flat-Leaf Parsley: 1/4 cup (15g), finely chopped. Added at the very end to provide a burst of fresh chlorophyll and a professional garnish look.
Essential Tools for the Perfect Gratin Texture
To replicate the 45-degree angle professional photography look, you will need a rustic ceramic baking dish (roughly 9×13 inches or a deep oval). A mandoline slicer is highly recommended to achieve those “distinct, thin-sliced rounds” that stack neatly. You will also need paper towels or a clean kitchen cloth for the crucial moisture-removal step, and a small mixing bowl to incorporate the herb crust ingredients.
A Masterclass in Layering the Perfect Zucchini Bake
Following these steps ensures your Baked zucchini and cheese casserole matches the visual prompt’s description of a golden, non-soggy, and blistered masterpiece.
Step 1: The Critical Moisture Extraction
Slice your green and yellow zucchini into 1/8-inch (3mm) rounds. Place them in a large colander and toss with the kosher salt. Let them sit for at least 20 minutes; you will see water beads forming on the surface. Rinse them quickly under cold water and pat them completely dry—and we mean completely dry—between layers of paper towels. This step is the secret to the charred edges seen in the visual blueprint.
Step 2: Seasoning and Stacking for Visual Impact
Preheat your oven to 400°F (200°C). In a large bowl, toss the dried zucchini rounds with 2 tablespoons (30ml) of olive oil, garlic powder, and half of the red pepper flakes. In your ceramic dish, stack the rounds in a shingled, slightly overlapping pattern, alternating between green and yellow for that “neatly stacked” appearance.
Step 3: Creating the Blistered Cheese Layer
Mix the shredded mozzarella and half of the parmesan. Sprinkle this evenly over the top of the zucchini. The mozzarella will provide the melt, while the parmesan will create the bubbling, blistered spots during the final stages of baking. If you love this cheesy profile, you might also enjoy our creamy three-cheese pasta.
Step 4: The Golden Herb Crust Application
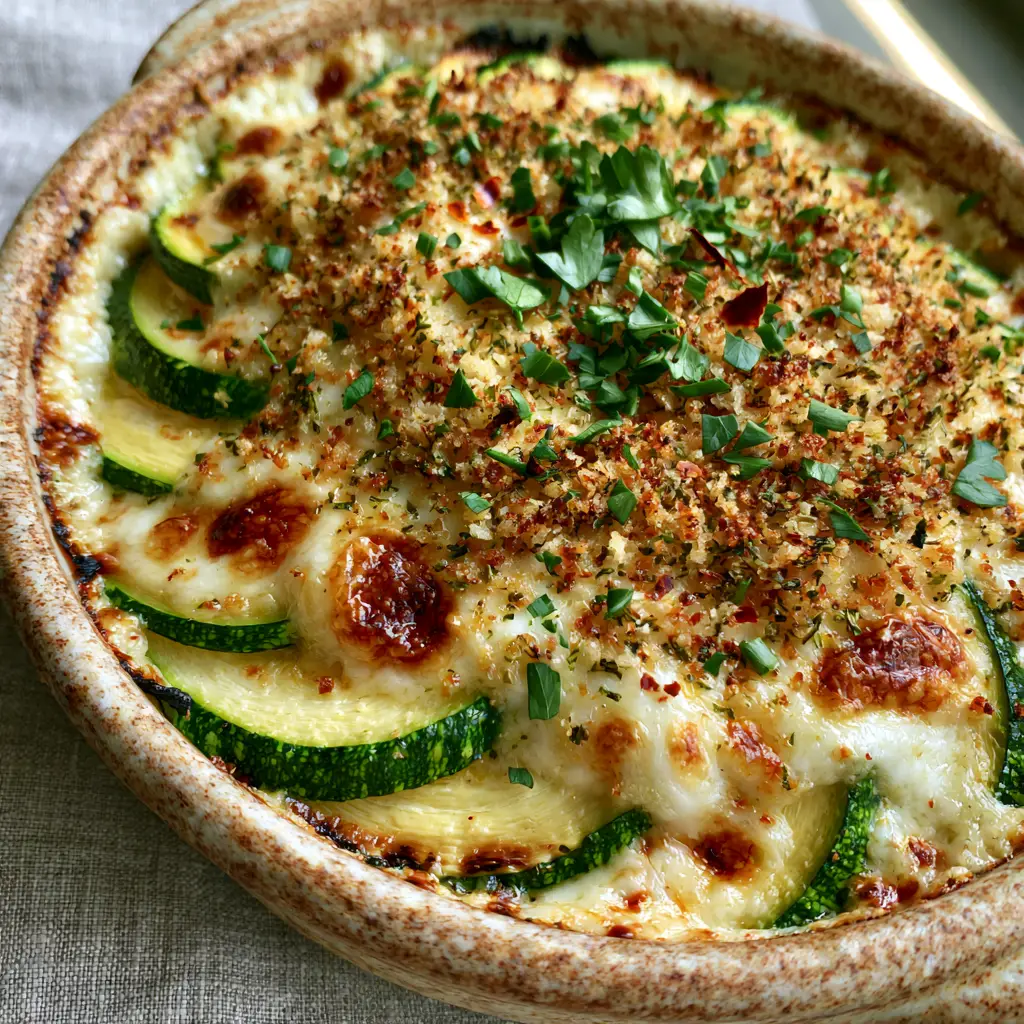
In a small bowl, combine the panko breadcrumbs, the remaining parmesan, dried oregano, thyme, and 1 tablespoon (15ml) of olive oil. Stir until the crumbs are evenly coated with oil. Sprinkle this mixture heavily over the cheese layer. This ensures the topping looks “crunchy, not wet” once it hits the oven’s heat.
Step 5: The High-Heat Roast
Place the dish in the center of the oven and bake for 25-30 minutes. Look for the cheese to be bubbling and the breadcrumbs to turn a deep golden brown. For the final 2-3 minutes, turn on the broiler to achieve those specific “toasted golden-brown spots” and slight charring on the exposed edges of the zucchini. You should hear a faint sizzling sound as the fats from the cheese fry the breadcrumbs.
Step 6: The Finishing Touches
Remove from the oven and let it rest for 5 minutes. This allows the juices to settle so the casserole isn’t runny when served. Garnish with a heavy sprinkle of finely chopped fresh flat-leaf parsley and the remaining red pepper flakes for that hyper-realistic, professional food photography finish.
Pro Tips for a Non-Watery Zucchini Experience
- Don’t Skip the Salt: Zucchini is 95% water. If you don’t salt and drain it, that water will release into your casserole, turning your “crispy crust” into a soggy mess.
- Uniform Slicing: Use a mandoline. If slices vary in thickness, some will be mushy while others stay raw.
- High Heat is Your Friend: Roasting at 400°F (200°C) evaporates moisture quickly. Low temperatures will steam the vegetable instead of roasting it.
- The Oil Barrier: Coating the zucchini in oil before adding the cheese creates a fat barrier that helps prevent the zucchini juices from soaking into the breadcrumbs.
Shelf Life, Reheating, and Storage Secrets
This Baked zucchini and cheese casserole is best enjoyed fresh from the oven to maintain the crunch of the herb topping. However, leftovers can be stored in an airtight container in the refrigerator for up to 3 days. To reheat, avoid the microwave as it will make the zucchini rubbery. Instead, place the casserole in a 350°F (175°C) oven or air fryer for 10 minutes to crisp up the cheese and breadcrumbs again. Freezing is not recommended, as the cellular structure of the zucchini breaks down, leading to a very mushy texture upon thawing.
Perfect Pairings: What to Serve with This Casserole
This versatile dish works as a hearty vegetarian main or a stellar side. For a complete Mediterranean feast, serve it alongside our oven-baked rainbow trout or some sauteed asparagus and mushrooms. If you are looking for more ways to use up your squash harvest, don’t miss our savory stuffed zucchini boats or our famous chocolate chip zucchini bread for dessert.
Frequently Asked Questions about Zucchini Bakes
You can prep the zucchini (salt and dry) and the cheese mix ahead of time, but for the best ‘crispy golden herb crust’ texture, it should be baked just before serving.
Absolutely! Yellow squash and zucchini have similar moisture contents. Using both provides a beautiful visual contrast in the final dish.
The key is to salt the sliced zucchini and let them sit for 20 minutes to draw out moisture, then pat them completely dry before layering and baking at a high temperature.
To make this keto, simply swap the panko breadcrumbs for crushed pork rinds or additional parmesan cheese for the crispy topping.
A combination of mozzarella for the melt and stretch, and parmesan for the salty, golden-brown crust and bubbling effect under the broiler.
The Ultimate Baked Zucchini and Cheese Casserole Recipe
Baked Zucchini and Cheese Casserole with a Crispy Herb Crust
Ingredients
Equipment
Method
- Toss zucchini rounds with salt in a colander for 20 minutes. Rinse and pat very dry with paper towels.
- Toss zucchini with 2 tbsp olive oil and garlic powder. Layer neatly in the ceramic dish, alternating colors.
- Top with mozzarella and half the parmesan. Mix panko with remaining oil and herbs, then sprinkle over the cheese.
- Bake at 400°F (200°C) for 25 minutes. Broil for 2-3 minutes until golden-brown spots appear and edges are charred.
Notes
Use a mix of yellow and green squash for the best visual result.
Bring the Garden to Your Table Tonight
There is nothing quite like the combination of fresh summer produce and indulgent melted cheese. This Baked zucchini and cheese casserole offers a sophisticated yet simple way to enjoy the season’s bounty. Whether you are serving this at a family dinner or a festive holiday gathering, the contrast between the tender zucchini and the “crispy golden herb crust” is guaranteed to impress. If you enjoyed this recipe, please leave a comment below and share your results! Don’t forget to follow us on Pinterest for more culinary inspiration.


