There is a specific culinary magic that happens when a banana pancakes recipe is executed with precision. Imagine standing in a sun-drenched kitchen, the morning light hitting a stack of four ultra-thick pancakes resting on a matte cream stoneware plate. You see the steam rising, the lacy, golden-brown seared edges, and a thick, viscous amber maple syrup slowly making its way down the side of the stack. This isn’t just breakfast; it is a sensory experience designed for those who appreciate the finer details of a perfect sear and an airy, sponge-like interior.
Achieving this level of visual and textural perfection requires more than just mixing batter; it requires an understanding of leavening science and heat management. Our approach focuses on creating a high-domed pancake that maintains its structural integrity under the weight of fresh banana coins and a glistening syrup drip. Every element, from the tiny pinch of coarse sea salt to the aerated fluff of the crumb, has been meticulously calibrated to match the professional standards of elite food photography.
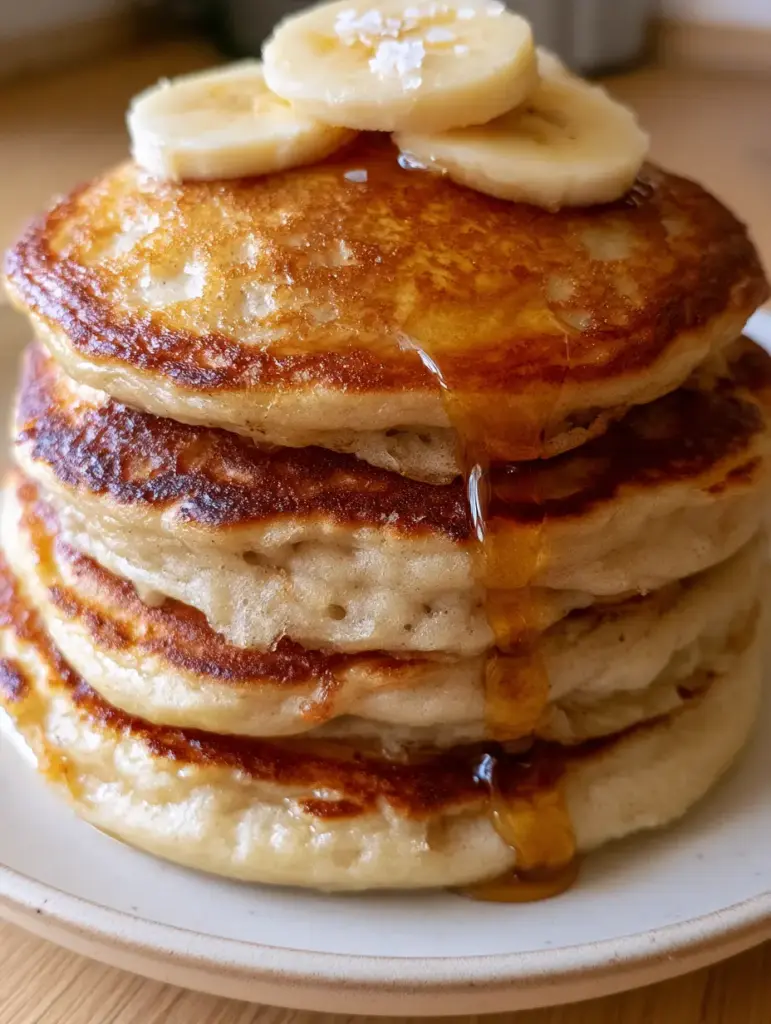
The Architecture of the Perfect Fluffy Banana Stack
- Ultra-Thick Aerated Texture: We utilize a double-leavening system to ensure each pancake rises to nearly an inch in thickness without becoming dense or gummy.
- Lacy Golden-Brown Edges: By controlling the fat-to-heat ratio on the griddle, we achieve a crisp, seared perimeter that provides a necessary textural contrast to the soft interior.
- Scientifically Balanced Sweetness: The natural sugars in the mashed bananas are balanced by a final sprinkle of coarse sea salt, elevating the flavor profile from simple to sophisticated.
- Viscous Syrup Adhesion: We discuss the temperature physics required to keep your maple syrup glistening on the surface rather than immediately soaking into the crumb.
Essential Components for a Gourmet Banana Pancakes Recipe
Overripe Bananas (The Base): You need bananas that are heavily speckled with black spots to provide the necessary moisture and natural sugar for the batter. These bananas are mashed until smooth to ensure even distribution of flavor throughout the sponge-like interior.
Fresh Banana Rounds (The Topping): Unlike the mashed bananas in the batter, the topping requires firm, yellow banana coins. These provide a fresh, clean aesthetic and a firm bite that contrasts with the soft stack.
All-Purpose Flour (300g / 2.5 cups): This provides the protein structure necessary to support the height of an ultra-thick pancake. It acts as the scaffolding for the air bubbles created during the cooking process.
Buttermilk (480ml / 2 cups): The acidity in buttermilk reacts with the leavening agents to create an immediate lift. It also breaks down gluten strands, ensuring the interior remains tender rather than chewy.
Baking Powder (15g / 1 tbsp) and Baking Soda (3g / 0.5 tsp): This dual-action combination ensures the pancakes rise both when the batter is mixed and when it hits the hot matte ceramic plate environment. The soda specifically aids in the Maillard reaction for those seared edges.
Unsalted Butter (60g / 4 tbsp, melted): Fat is essential for a moist crumb and carries the aromatic compounds of the vanilla and banana throughout the palate. We use extra butter on the griddle to achieve the lacy texture.
Coarse Sea Salt (a pinch for finishing): This is the secret weapon of elite chefs. A tiny pinch of coarse salt on top of the fresh banana coins cuts through the richness of the maple syrup.
Pure Maple Syrup (Grade A Amber): A thick, viscous syrup is required for the “perfect drip.” Cooling the syrup slightly before pouring can help achieve that glistening, slow-moving look seen in professional photography.
Tools Required for Professional Results
To achieve the specific “handheld smartphone photo” aesthetic of a tall, steaming stack, you need the right equipment. A heavy-bottomed cast iron griddle or a high-quality non-stick pan is essential for even heat distribution. You will also need a wide stainless steel spatula to flip the thick cakes without collapsing the aerated sides. Finally, a matte ceramic or stoneware plate is preferred over glossy porcelain to allow the glistening syrup to be the visual star of the dish.
The Step-by-Step Guide to Achieving Ultimate Pancake Height
Preparing the Aerated Batter Base
In a large mixing bowl, whisk together your dry ingredients, including the flour, sugar, and leavening agents. In a separate vessel, mash your overripe bananas until they reach a liquid-like consistency with no large chunks. Whisk in the buttermilk, eggs, and melted butter until fully incorporated. Combine the wet and dry ingredients using a folding motion; stop as soon as the flour streaks disappear. Overmixing will deflate the air bubbles you need for that sponge-like texture.
The Secret to Lacy, Seared Edges
Preheat your griddle to medium-low heat (approximately 325°F / 165°C). Add a tablespoon of butter and a drop of neutral oil to the pan. The oil raises the smoke point, allowing the butter to sizzle and create those lacy edges without burning. Drop 1/2 cup (120ml) of batter onto the heat. Do not flatten it; let the thickness of the batter dictate the height of the pancake.
Visual and Sensory Cooking Cues
Watch the surface of the batter. Unlike thin pancakes, these ultra-thick versions will not bubble all the way through. Instead, look for the edges to set and turn an opaque, pale gold. Use your spatula to peek underneath; you are looking for a deep, seared golden-brown crust. Carefully flip the pancake in one decisive motion. The second side will cook faster, so monitor it closely for the same golden-brown finish.
The Art of the Stack and Garnish
Stack four pancakes vertically on your matte cream plate. While they are still steaming, place three neatly overlapping fresh banana coins on the crown. Drizzle the thick maple syrup starting from the center, letting it naturally find a path down the side. Finish with a visible pinch of coarse sea salt sprinkled directly onto the fruit. The salt should remain whole and glistening on the surface.
Expert Tips for the Fluffiest Results
- Rest the Batter: Allow your batter to sit for at least 10 minutes before cooking. This allows the flour to fully hydrate and the leavening agents to begin creating the air pockets seen in the visual prompt.
- Temperature Control: If your pancakes are browning too fast but remain raw inside, your heat is too high. The “lacy edge” comes from the initial contact with fat, but the “sponge-like interior” comes from gentle, consistent heat.
- Freshness Matters: Ensure your baking powder is less than six months old. Old leavening is the primary reason for flat, sad pancakes.
- Wipe the Pan: Between batches, wipe the griddle clean and add fresh butter. Old, burnt butter solids will ruin the golden-brown aesthetic.
Optimal Storage and Reheating Methods
If you have leftover pancakes from your banana pancakes recipe, they can be stored in an airtight container in the refrigerator for up to 3 days. To maintain the seared edges and fluffy interior, avoid the microwave. Instead, reheat them in a dry skillet over low heat or in a toaster oven. For long-term storage, freeze the pancakes in a single layer before transferring them to a freezer bag; they will stay fresh for up to 2 months.
Elevating the Breakfast Table
While these pancakes are a meal in themselves, you can pair them with other homemade delights. For a complete brunch spread, consider serving these alongside crispy vegetable fritters for a savory contrast. If you are looking for more ways to use up ripe fruit, our classic banana bread muffins are a great make-ahead option. For those who enjoy a side of protein, a platter of sautéed breakfast sausage provides a salty balance to the sweet maple syrup and banana rounds.
Frequently Asked Questions
Yes, you can use thawed frozen bananas for the batter, but make sure to drain any excess liquid. For the topping, however, fresh banana coins are required to match the visual appeal and texture of the recipe.
To achieve lacy edges, use a combination of butter and a tiny drop of oil on your griddle. The oil allows the butter to sizzle at a higher temperature without burning, creating a fried, crisp texture at the perimeter.
Place a wire rack over a baking sheet in a 200°F (95°C) oven. The rack allows air to circulate, preventing the bottom pancakes from becoming soggy while they stay steaming hot.
A pinch of coarse sea salt provides a ‘flavor spike’ that balances the intense sweetness of the maple syrup and the richness of the butter, making the overall dish taste more complex.
Gummy pancakes are usually caused by overmixing the batter, which develops too much gluten, or by cooking at a heat that is too high, causing the outside to brown before the inside can set.
The Ultimate Banana Pancakes Recipe Card
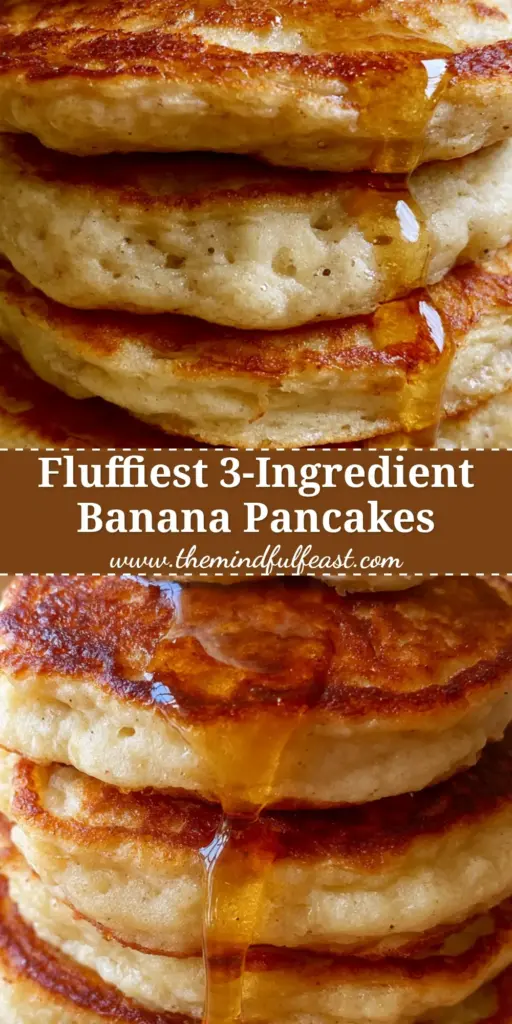
Banana Pancakes Recipe: How to Make Ultra-Thick, Fluffy Cafe-Style Stacks
Ingredients
Equipment
Method
- In a large bowl, whisk together 2.5 cups (300g) flour, 1 tbsp (15g) baking powder, 0.5 tsp (3g) baking soda, and 2 tbsp (25g) sugar.
- In a separate bowl, mash 2 overripe bananas. Whisk in 2 cups (480ml) buttermilk, 2 eggs, 4 tbsp (60g) melted butter, and 1 tsp (5ml) vanilla extract.
- Gently fold the wet ingredients into the dry ingredients. Stop as soon as the flour is incorporated; do not overmix. Let the batter rest for 10 minutes.
- Preheat a griddle to medium-low. Add a small amount of butter and oil to the pan until it sizzles.
- Pour 1/2 cup (120ml) of batter per pancake. Cook until the edges are set and a deep golden-brown, lacy crust forms on the bottom.
- Flip the pancakes and cook for another 1-2 minutes until the interior is airy and cooked through. The stack should be steaming and thick.
- Stack 4 pancakes on a plate. Top with 3 overlapping fresh banana slices, a generous pour of glistening maple syrup, and a tiny pinch of coarse sea salt.
Notes
Use high-quality butter on the griddle to achieve the professional lacy-edge texture.
Join Our Culinary Community
We hope this banana pancakes recipe transforms your morning into a gourmet experience. The combination of the lacy edges and the steaming, fluffy interior is a testament to the beauty of home cooking. If you enjoyed this recipe, please leave a comment below and share your results with us. Don’t forget to follow us on Pinterest for more visually stunning recipe inspiration and kitchen tips!


