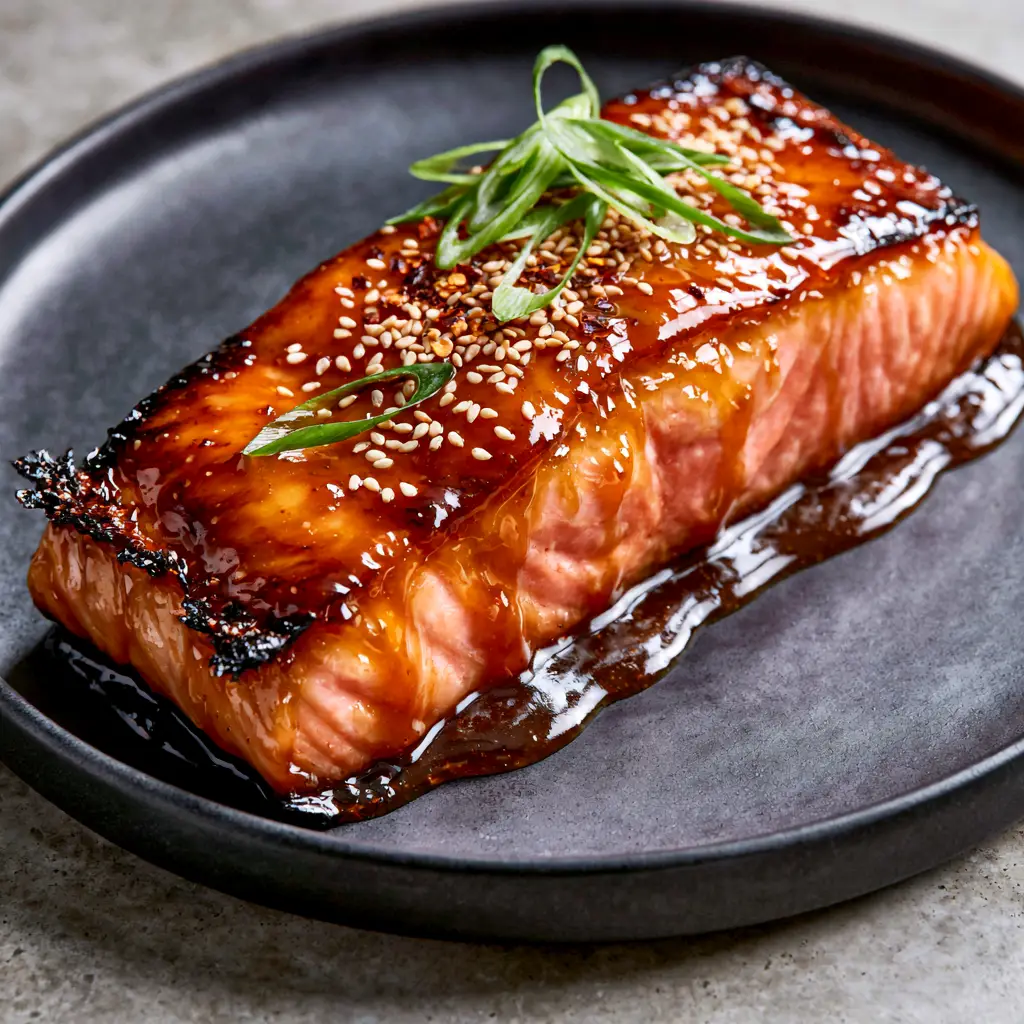
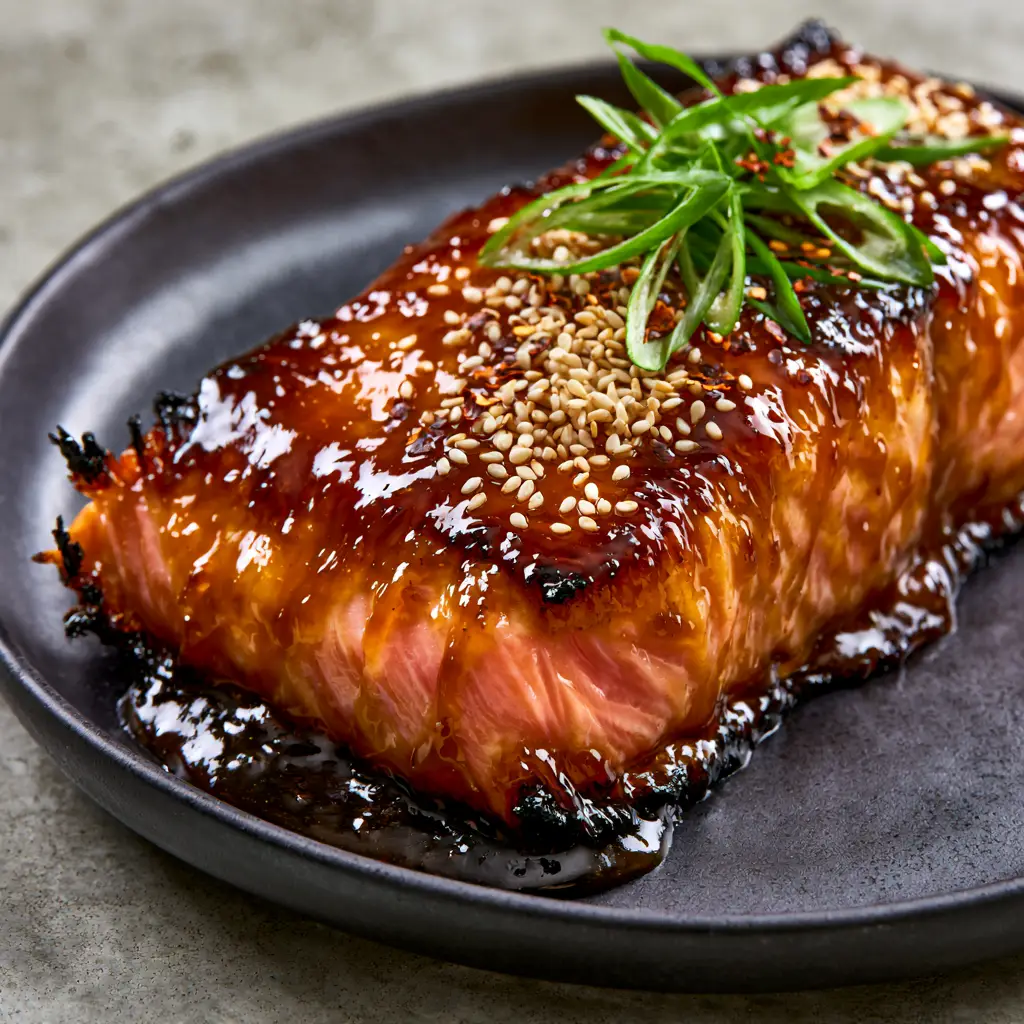
There is a specific kind of culinary magic that happens when high-intensity heat meets a sugar-based lacquer. The Glazed salmon fillet is the pinnacle of this transformation, offering a sensory experience that balances a deeply caramelized, amber-colored crust with a vibrant, flaky pink center that melts on the tongue.
Imagine pulling a tray from your air fryer to find a thick center-cut Atlantic salmon fillet, its surface glistening with a thick, glossy honey garlic glaze. The edges show delicate charred, crispy bits, while the natural crevices of the fish pool with sticky sauce that catches the light beautifully.
This recipe isn’t just about feeding your family; it’s about creating a restaurant-quality centerpiece using modern techniques. By utilizing the air fryer’s convection power, we achieve a level of texture that traditional ovens often struggle to replicate without overcooking the delicate interior.
Why This Air Fried Masterpiece Works
- Textural Contrast: The air fryer creates a “shatter-crisp” exterior while keeping the internal proteins tender and moist.
- Vibrant Presentation: The contrast of bright green scallions and toasted white sesame seeds against a matte black stoneware plate makes the orange tones of the fish pop.
- Balanced Flavor Profile: The sweetness of the honey is cut by the aromatic punch of fresh garlic and the subtle heat of crushed red pepper flakes.
- Speed and Precision: Going from raw fillet to a perfectly glazed masterpiece takes less than 15 minutes, making it ideal for busy weeknights or impressive date nights.
The Essential Components for a Glossy Honey Garlic Glaze
To achieve the visual result described in our blueprint, we need high-quality ingredients that react specifically to heat. Here is what you will need for your Glazed salmon fillet:
Center-Cut Atlantic Salmon Fillets: You want thick fillets, roughly 6 oz (170g) each. Center-cuts provide an even thickness, ensuring the edges char perfectly while the middle stays that signature vibrant pink.
Pure Liquid Honey: 1/4 cup (60ml) of honey acts as the primary glazing agent. Its high sugar content is what creates the deeply caramelized, amber-colored finish we are looking for.
Fresh Grated Garlic: 3 cloves (approx. 15g) of garlic provide the foundational aromatic base. Grating the garlic instead of mincing it allows it to emulsify into the glaze for a smoother, glossy look.
Low-Sodium Soy Sauce: 2 tbsp (30ml) adds the “invisible” salt and depth. It provides the dark pigments necessary for that rich, amber-colored sauce without overpowering the salmon’s natural flavor.
Toasted Sesame Oil: 1 tsp (5ml) adds a layer of fat that helps the glaze “pool” in the crevices of the fish. It also provides a nutty aroma that complements the toasted white sesame seeds.
Foundational Seasonings: 1/2 tsp (3g) of Kosher salt and a pinch of black pepper are essential. These ensure the “flaky pink center” is seasoned from the inside out.
The Garnishes: 1 tbsp (8g) toasted white sesame seeds, 2 thinly sliced scallions (green parts only), and 1/2 tsp (1g) crushed red pepper flakes. These are the visual “finishers” that provide the professional, handheld photography aesthetic.
Culinary Tools for Restaurant-Quality Salmon
Achieving a professional result requires the right environment for your Glazed salmon fillet. An air fryer is non-negotiable here for that specific charred edge texture.
You will also need a small saucepan to reduce the glaze slightly before it hits the fish. This ensures the sauce is thick and glossy, rather than runny. A digital meat thermometer is the “secret weapon” for ensuring that vibrant pink flaky interior without guessing.
Finally, a modern matte black stoneware plate is recommended for serving. The dark, non-reflective surface allows the side-lit highlights of the sticky sauce to truly shine in your final presentation.
Step-by-Step Guide to the Perfect Air Fried Crust
Preparing the Salmon Fillets
Remove your salmon fillets from the refrigerator about 15 minutes before cooking. Pat them extremely dry with paper towels; moisture is the enemy of a caramelized crust.
Season the fillets lightly with salt and pepper on all sides. This foundational seasoning draws out a tiny bit of surface protein, which helps the glaze “grip” the meat during the air frying process.
Simmering the Honey Garlic Glaze
In a small saucepan over medium heat, combine the honey, grated garlic, soy sauce, and toasted sesame oil. Bring to a gentle simmer for 3-4 minutes until the mixture thickens slightly.
The glaze should coat the back of a spoon. If it is too thin, it will slide off the salmon; if it is too thick, it will burn before the fish is cooked. Look for a consistency similar to warm maple syrup.
The First Blast of Heat
Preheat your air fryer to 400°F (200°C). Lightly grease the basket with a high-smoke point oil spray. Place the salmon fillets in the basket, skin-side down (if they have skin).
Air fry for an initial 5 minutes. This sets the protein and starts the rendering of any fats, creating the structural base for our deep caramelization.
Glazing and Finishing
Open the air fryer and generously brush the top and sides of each fillet with the honey garlic glaze. You want to see the sauce pooling slightly in the natural flakes of the fish.
Cook for another 3-5 minutes. Watch for visual cues: the edges should begin to show delicate charred bits, and the glaze should turn a deep amber color. The internal temperature should reach 125°F-130°F (52°C-54°C) for a perfect medium-pink center.
The Final Garnish
Carefully transfer the Glazed salmon fillet to your matte black plate. While the glaze is still hot and sticky, apply your garnishes with precision.
Start with a sprinkle of toasted white sesame seeds, followed by the paper-thin slices of bright green scallions. Finish with a pinch of crushed red pepper flakes for a hint of color and heat.
Pro Secrets for Flawless Caramelization
- The Dry Pat: I cannot overstate this. If the salmon is wet, it will steam rather than sear. A dry surface allows the honey to create that crispy, charred edge.
- Temperature Control: If your air fryer runs hot, drop the temperature to 375°F (190°C) after the glaze is applied to prevent the honey from burning too quickly.
- Carryover Cooking: Remove the salmon when it is slightly under your desired doneness. It will continue to cook for 2-3 minutes as it rests, ensuring the center stays pink and flaky.
- Glaze Reduction: If the glaze seems too thin after cooking, drizzle any remaining sauce from the pan over the fish just before serving for that maximum “glossy” look.
Storing and Reheating Your Glazed Salmon Fillet
While this dish is best served immediately to appreciate the crispy edges, leftovers can be stored in an airtight container in the refrigerator for up to 2 days. The glaze will thicken further when cold.
To reheat, avoid the microwave, as it will make the salmon rubbery and lose the crust. Instead, place the fillet back in the air fryer at 350°F (175°C) for 3-4 minutes until warmed through.
For a different twist on leftovers, you could flake the cold salmon into a creamy salmon pasta or use it as a high-protein topping for a refreshing cucumber crab salad.
Vibrant Side Dishes to Complete Your Meal
To keep the meal balanced, pair your Glazed salmon fillet with sides that offer crunch and acidity. A cucumber edamame salad provides a cool, crisp contrast to the warm, sticky fish.
If you prefer a more fusion-style dinner, serve the salmon alongside some zesty grilled fish tacos components for a “build-your-own” salmon taco night. For those who enjoy a bit of fruit-forward acidity, the flavor profile of this dish actually mirrors the brightness of an orange rosemary glazed salmon, making citrus-based sides an excellent choice.
If you’re looking for a simpler preparation for another night, you might also enjoy our homemade teriyaki salmon recipe.
Frequently Asked Questions
Yes, but you will need to use the broiler setting. Broil for 6-8 minutes, applying the glaze halfway through, and keep a close eye on it to prevent the honey from burning.
Keeping the skin on helps protect the delicate meat from the high heat of the air fryer, ensuring it stays moist. You can easily remove it after cooking if preferred.
The key is a combination of patting the fish bone-dry before cooking and the high-speed air circulation of the air fryer, which caramelizes the sugars in the honey glaze rapidly.
For a vibrant pink, flaky interior, remove the salmon from the heat when it reaches an internal temperature of 125°F to 130°F (52°C-54°C). Carryover cooking will bring it to a perfect 135°F-140°F.
You likely didn’t reduce the glaze enough in the saucepan. Simmering the honey and soy sauce mixture allows water to evaporate, creating that signature ‘sticky’ texture that pools in the crevices.
The Master Recipe: Air Fried Glazed Salmon Fillet
Get ready to experience the perfect marriage of sweet, savory, and charred. This recipe provides all the measurements and timings needed to recreate the stunning visual of a professional food photograph right in your own kitchen.
Glazed salmon fillet with Honey Garlic and Toasted Sesame
Ingredients
Equipment
Method
- Pat salmon fillets extremely dry and season with salt and pepper.
- In a saucepan, simmer honey, garlic, soy sauce, and sesame oil for 3-4 minutes until thick and glossy.
- Place fillets in a preheated air fryer at 400°F (200°C) and cook for 5 minutes.
- Brush salmon generously with glaze. Cook for 3-5 more minutes until edges are charred and interior is 130°F (54°C).
- Plate on matte black stoneware and top with sesame seeds, scallions, and red pepper flakes.
Notes
Use a thermometer to ensure you don't overcook the vibrant pink center.
Final Thoughts on This Gourmet Weeknight Dinner
Mastering the Glazed salmon fillet is a milestone for any home cook. It teaches you the importance of heat management and the beauty of simple garnishes. The result is a dish that is as visually stunning as it is delicious.
If you enjoyed this recipe, please leave a comment below and let us know how your caramelization turned out! Don’t forget to sign up for our newsletter for more elite culinary guides, and share your creations by pinning this recipe to Pinterest.


