There is something undeniably magical about hello kitty cake pops. These iconic treats combine the rich, decadent flavor of moist chocolate cake with a flawless, professional-grade aesthetic that looks like it stepped right out of a high-end Japanese bakery. Whether you are preparing for a themed celebration or simply want to master the art of character desserts, achieving that signature glossy white finish and perfectly sculpted ears is a culinary triumph.
In this comprehensive guide, we are diving deep into the science of the perfect “snap” in your white chocolate coating and the forensic details required to replicate Hello Kitty’s likeness perfectly. We aren’t just making dessert; we are creating edible art that remains structurally sound and visually stunning from the first dip to the final bite.
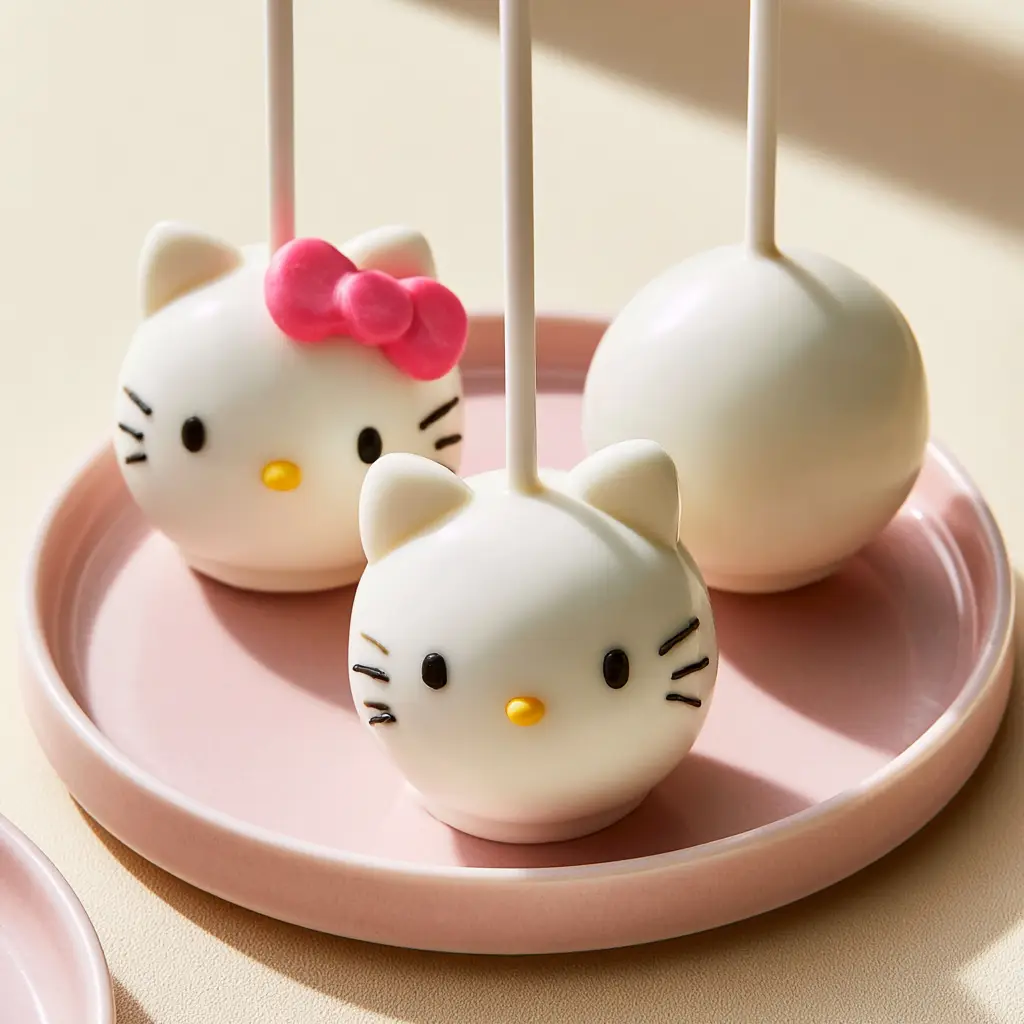
Why These Hello Kitty Cake Pops Are a Baker’s Dream
- Ultra-Smooth Glossy Finish: We use a specific thinning technique to ensure your white chocolate candy coating has zero cracks and a mirror-like shine, just like the professional handheld smartphone photos you see on social media.
- Forensic Character Accuracy: From the hand-sculpted white chocolate ears to the precise placement of the signature pink candy bow, every detail is accounted for.
- Moist Chocolate Core: Unlike dry, crumbly versions, our filling is a scientifically balanced mixture of dark cocoa cake and silky frosting, ensuring a melt-in-your-mouth experience.
- Structural Integrity: These pops are engineered to stay securely mounted on their white paper lollipop sticks without sliding or tilting.
The Essential Components for Character Cake Pop Success
To achieve the specific results described in our visual blueprint, you need high-quality ingredients that perform under the heat of a dipping station. Every item listed here serves a specific structural or aesthetic purpose.
The Moist Chocolate Cake Base
1 ½ cups (190g) All-Purpose Flour: This provides the structural framework for our cake. A medium protein content ensures the cake is sturdy enough to be crumbled and reformed without becoming mushy.
1 cup (200g) Granulated Sugar: Sugar does more than sweeten; it hygroscopically retains moisture, ensuring the center of your hello kitty cake pops stays succulent for days.
½ cup (45g) Unsweetened Cocoa Powder: We recommend a Dutch-processed cocoa for a deep, dark color that contrasts beautifully with the stark white exterior.
1 tsp (5g) Baking Soda & ½ tsp (2.5g) Salt: The baking soda provides the lift, while the salt acts as a flavor enhancer, cutting through the sweetness of the candy coating.
½ cup (120ml) Whole Milk & ¼ cup (60ml) Vegetable Oil: The combination of dairy fats and liquid oil creates a “tender crumb” that is essential for the perfect cake pop texture.
The Sculpting & Coating Materials
2 cups (340g) High-Quality White Candy Melts: These are superior to standard chocolate chips for this recipe because they contain lecithin, which helps achieve that “completely smooth” look described in our visual prompt.
2 tbsp (30ml) Coconut Oil or Paramount Crystals: This is our secret weapon for thinning the coating to a dipping consistency that prevents cracking as it sets.
Small Pink Candy Bows & Yellow Candy Beads: These represent the iconic Hello Kitty accessories. The yellow bead nose must be tiny to maintain the minimalist aesthetic.
Black Edible Food Paint or Ink: Used for the eyes and whiskers to provide a sharp, clean contrast against the white coating.
Must-Have Tools for Professional Results
Achieving a macro-focus-worthy finish requires more than just a bowl and spoon. You will need a white paper lollipop stick set for the classic look, and a cake pop stand (or a block of styrofoam) to allow the coating to dry without flat spots. A small, food-safe paintbrush is also required for the black edible ink details. For those planning a larger event, these pops are the perfect addition to a themed character dessert table.
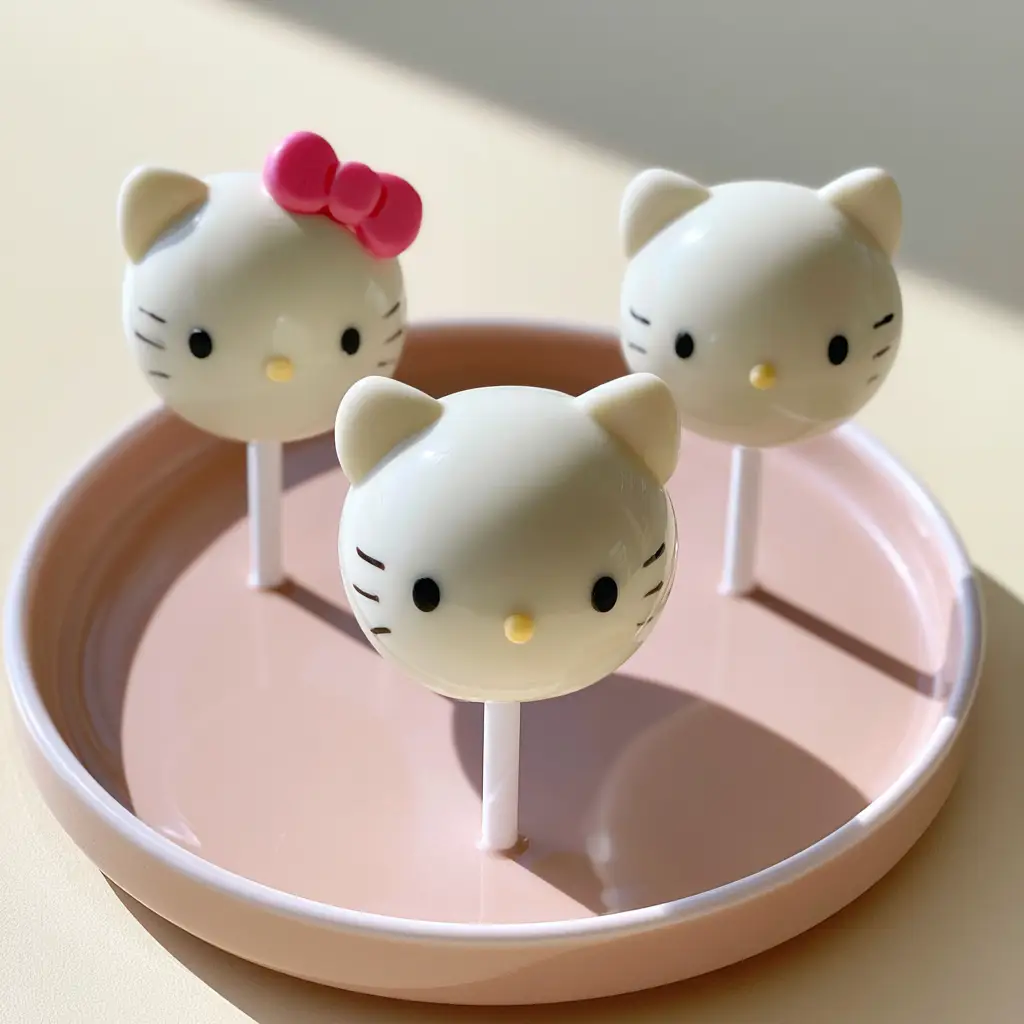
Mastering the Foundation: Baking the Chocolate Base
Creating the Batter
Preheat your oven to 350°F (175°C). In a large bowl, whisk together your flour, sugar, cocoa, baking soda, and salt. In a separate measuring jug, combine the milk, oil, one large egg, and a teaspoon of vanilla extract. Pour the wet ingredients into the dry and whisk until just combined. Do not overmix, as this develops gluten and makes the cake too tough to crumble properly.
The Bake and Cool Phase
Pour the batter into a greased 9-inch (23cm) square pan. Bake for 25–30 minutes, or until a toothpick inserted into the center comes out clean. It is vital to let the cake cool completely to room temperature before moving to the next stage. If the cake is even slightly warm, it will melt the frosting and result in a greasy, unstable filling.
The Art of the Character Sculpt
Crumbling and Binding
Once cooled, remove the brown edges of the cake (the “crust”) to ensure your filling is a uniform, dark chocolate color. Crumble the remaining cake into fine, sandy grains. Add 3–4 tablespoons (45-60g) of chocolate frosting. Mix with your hands until the dough holds together like chilled playdough. If it cracks when you roll it, add a tiny bit more frosting.
Forming the Hello Kitty Silhouette
Scoop approximately 1 tablespoon (30g) of dough and roll it into a perfect sphere. To create the “hand-sculpted ears” mentioned in the visual blueprint, take two tiny pinches of cake dough and form them into small triangles. Press them firmly onto the top of the sphere. Use your thumb to smooth the seam where the ear meets the head. Chill these shaped heads in the freezer for 15 minutes to firm up before dipping.
Dipping for a Flawless, Crack-Free Coating
The Temperature Controlled Dip
Melt your white candy melts with the coconut oil in 30-second bursts in the microwave, stirring vigorously between each. The coating should be thin enough to run off a spoon like warm honey. Dip the tip of a white paper lollipop stick into the coating, then insert it halfway into the chilled cake ball. This acts as “glue.”
The Final Submerge
Submerge the entire cake pop vertically into the coating until it reaches the stick. Do not stir the pop in the liquid. Pull it straight out and gently tap your wrist to let the excess drip off. The goal is a “flawless, glossy, completely smooth” surface. While the coating is still wet, carefully place the pink candy bow on the left ear and the yellow candy bead nose in the center. If you’re looking for something lighter after these rich treats, consider a refreshing chilled salad.
Forensic Detailing with Edible Ink
Wait for the white coating to harden completely (about 20 minutes at room temperature). Using a fine-tipped brush or an edible ink marker, draw two oval eyes. They should be level with the yellow nose but spaced wider apart. This specific placement is the key to the Hello Kitty “look.” If you make a mistake, a tiny drop of high-proof alcohol (like vodka) on a Q-tip can erase the ink without dissolving the white chocolate.
Expert Tips for Success
- Avoid Temperature Shocks: Never dip a frozen cake pop into very hot candy melts. The rapid expansion and contraction are what cause the coating to crack. Aim for “room temperature” cake balls and “warm” coating.
- The “Tap” Technique: When removing excess coating, tap your wrist, not the stick. Tapping the stick too hard can vibrate the cake ball right off into the chocolate.
- Consistent Sizing: Use a small cookie scoop to ensure every one of your hello kitty cake pops is the exact same size for a professional trio presentation.
- Thin is In: If your coating feels thick or gloppy, add more coconut oil half a teaspoon at a time. A thick coating will pull on the cake and cause it to fall off the stick.
Storage and Preservation
These hello kitty cake pops are surprisingly resilient. They can be stored in an airtight container at room temperature for up to 3 days. For longer storage, keep them in the refrigerator for up to a week. If you choose to refrigerate, be aware that condensation may form on the glossy surface when you bring them back to room temperature, which can dull the shine. For those who love prepping ahead, these are great late-night treats to have on hand.
What to Serve with Character Treats
Since these cake pops are quite sweet and rich, they pair beautifully with savory or tart items to balance the palate. If you are hosting a lunch, follow up a spicy chicken salad with these pops for a cooling finish. Alternatively, for a cozy evening, a savory meat pie provides the perfect salty contrast to the decadent chocolate and white chocolate exterior of the pops.
Frequently Asked Questions
You can, but real white chocolate must be tempered to set firmly and stay glossy. Candy melts are easier for beginners because they are designed to melt and re-harden without the complex tempering process.
Shape the ears from the cake dough itself before dipping. By creating a single structural unit, the candy coating will ‘shrink-wrap’ around the ears and the head, holding them securely in place.
The secret is thinning the candy melts with coconut oil or paramount crystals. This reduces the viscosity, allowing the excess coating to flow off the pop easily, leaving a thin, glossy, and professional-looking layer.
Cracking usually happens due to temperature shock. If the cake balls are too cold (from the freezer) and the candy coating is too warm, the rapid change causes expansion and cracking. Keep your cake balls at room temperature for 5 minutes before dipping.
The Official Hello Kitty Cake Pop Recipe
Hello Kitty Cake Pops: The Ultimate Guide to Perfect Sanrio Sweets
Ingredients
Equipment
Method
- Whisk dry and wet ingredients separately, combine, and bake in a 9-inch pan at 350°F (175°C) for 25-30 minutes.
- Once completely cool, crumble the chocolate cake into a bowl and mix with frosting until a dough-like consistency forms.
- Roll 1-tablespoon portions into spheres. Hand-sculpt two small triangles for ears and attach to the top of each sphere.
- Melt white chocolate with coconut oil. Dip the sticks into the coating, then into the cake balls. Submerge the entire head for a glossy finish.
- While wet, add the pink bow and yellow nose. Once dry, use black edible ink to paint the eyes and whiskers.
Notes
Ensure the cake pops are at room temperature, not frozen, when dipping to avoid temperature shock.
Conclusion: Bring the Sanrio Magic Home
Mastering hello kitty cake pops is a rite of passage for any creative home baker. By focusing on the forensic details—the glossy finish, the specific ear shape, and the precise placement of the bow—you transform a simple chocolate cake into a piece of iconic pop culture. The contrast between the dark, moist interior and the crisp, white chocolate shell is a sensory delight that appeals to all ages.
We would love to see your creations! Share your photos and tag us, or head over to our Pinterest for more character-inspired baking tutorials. Don’t forget to leave a comment below if you have any questions about the dipping process!


