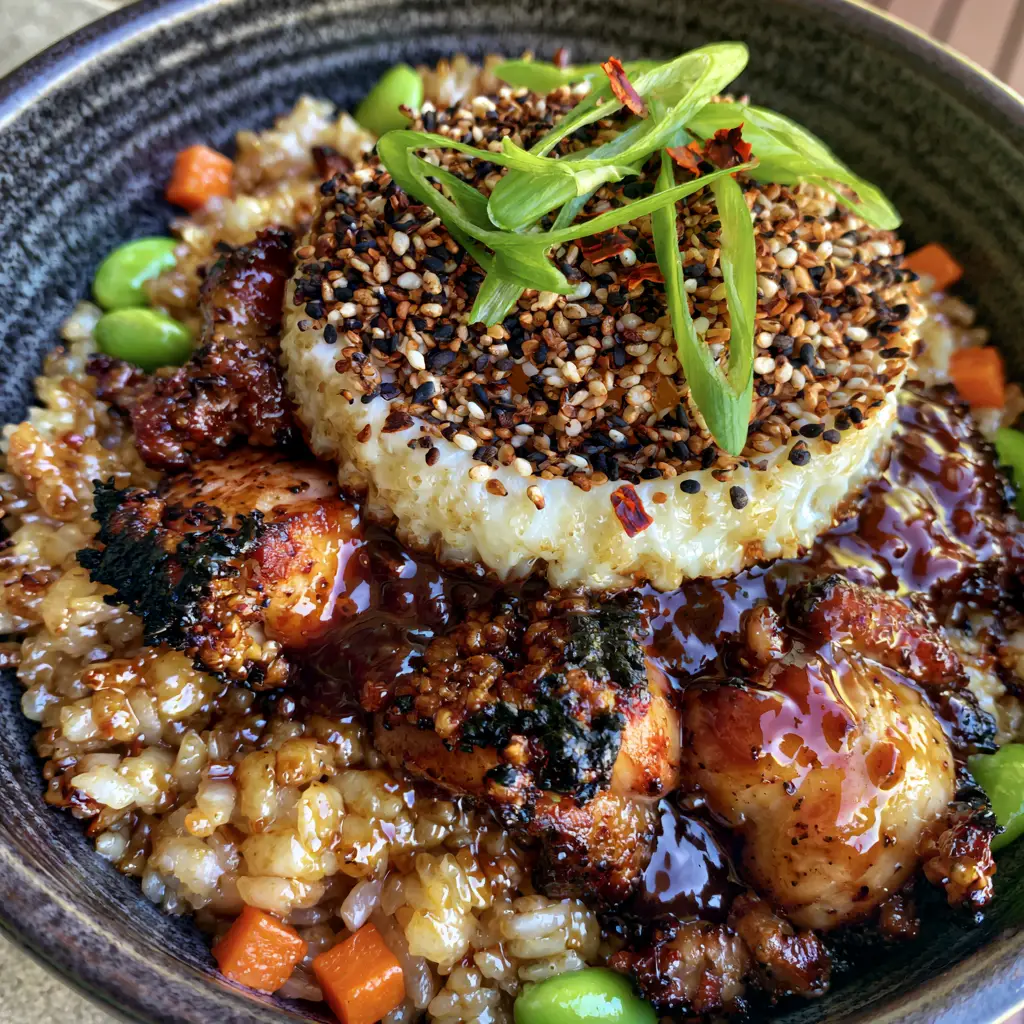
There is a specific, soul-satisfying magic that happens when high-heat wok cooking meets the deep, complex sweetness of a traditional Japanese glaze. This Japanese BBQ chicken fried rice isn’t just another weeknight meal; it is a visual and sensory masterpiece designed to mimic the high-end experience of a Tokyo teppanyaki grill right in your own kitchen. We are talking about individual, fluffy grains of rice dancing with golden egg and large, succulent chunks of chicken thigh that boast a glistening, dark mahogany finish.
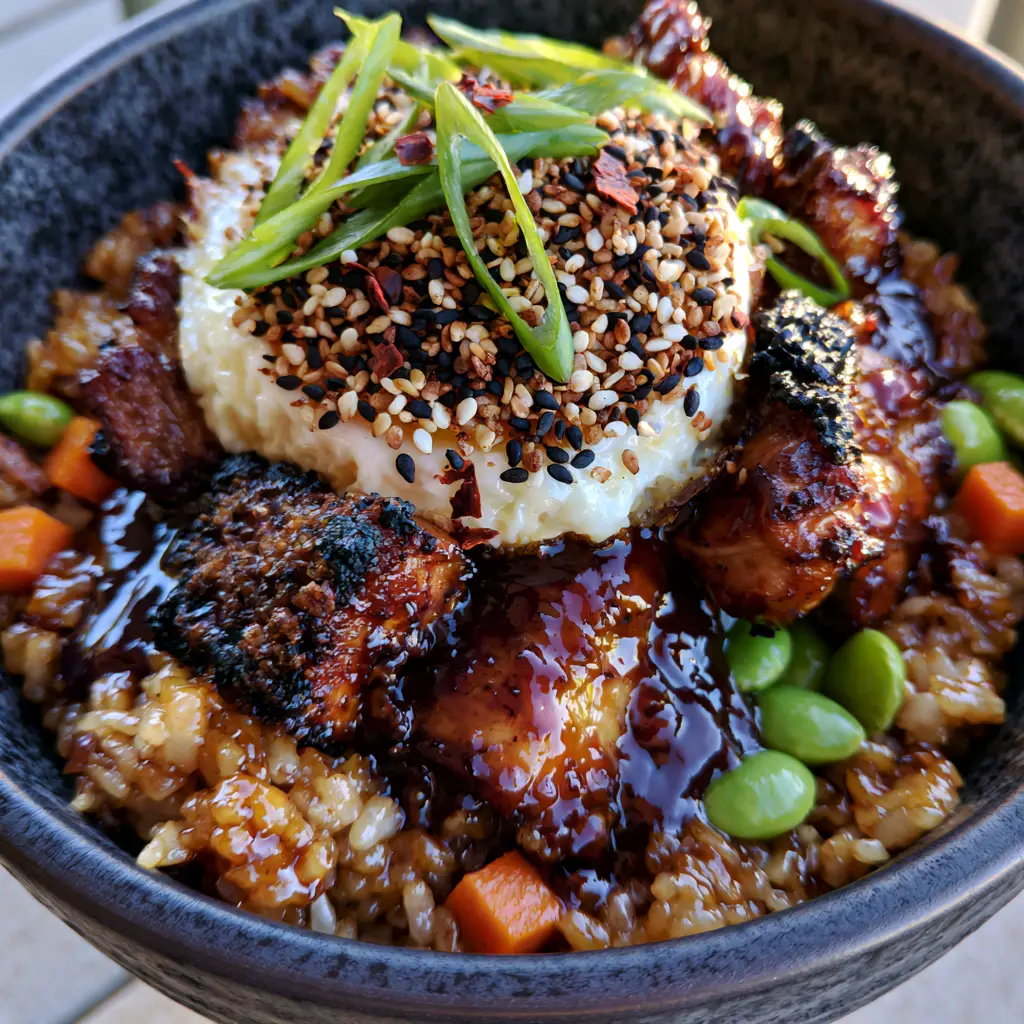
The secret lies in the contrast of textures and colors. Imagine a rustic black ceramic bowl filled with mahogany-glazed chicken, vibrant green bias-cut scallions, and a heavy dusting of toasted white sesame seeds. Every bite offers a symphony of charred edges, tender meat, and the aromatic punch of fresh ginger and micro-cilantro. Whether you are a fan of easy fried rice recipes or looking to elevate your dinner game, this recipe delivers on every professional culinary promise.
Why This Japanese BBQ Chicken Fried Rice Works Every Time
- The Mahogany Glaze: A specialized blend of soy, ginger, and sugars that reduces into a thick, light-catching syrup, providing that signature charred edge.
- Short-Grain Precision: Unlike long-grain varieties, short-grain rice offers a unique “plump” chewiness that remains fluffy and distinct when fried correctly.
- High-Contrast Garnishing: The combination of micro-cilantro and heavy sesame seeds creates a professional, restaurant-quality visual appeal that pops against the black ceramic serving vessel.
- Texture Layering: We combine the soft, golden scrambled egg bits with the crunch of charred onion pieces to ensure no two bites are the same.
The Essential Components for a Glistening Umami Masterpiece
To achieve the visual and structural integrity seen in the most premium Japanese eateries, we must select our ingredients with forensic precision. Each component serves a scientific purpose, from the fat content in the chicken to the starch structure of the rice.
The Protein Foundation
1.5 lbs (680g) Boneless Skinless Chicken Thighs: We use thighs because the higher fat content allows for high-heat searing without drying out. This is essential for achieving those “deeply caramelized, charred edges” described in our visual blueprint. If you love working with this cut, you might also enjoy our BBQ chicken thighs recipe.
The Umami Glaze Architecture
1/2 cup (120ml) Japanese BBQ Sauce (or Dark Soy Sauce base): This provides the mahogany pigment and the base umami profile. We look for a sauce with enough sugar content to facilitate the Maillard reaction under high heat.
2 tbsp (30ml) Mirin: This Japanese rice wine adds a subtle sweetness and a beautiful luster to the finished glaze, making the chicken “glisten” as it catches the light.
1 tbsp (15g) Freshly Grated Ginger: The enzymes in fresh ginger help slightly tenderize the chicken while providing a sharp, aromatic counterpoint to the heavy soy notes.
The Rice and Textural Elements
4 cups (600g) Cooked Short-Grain Rice (Day-Old): Using chilled, day-old rice is non-negotiable. Fresh rice contains too much moisture, which leads to a mushy texture rather than the “individual, fluffy, non-mushy grains” we require.
3 Large Eggs: Whisked and fried separately to ensure “golden scrambled egg bits” that remain distinct from the rice grains.
1 Small Yellow Onion, Finely Diced: These will be cooked until they reach a “tiny charred” state, adding depth and sweetness to the rice foundation.
Foundational Invisible Ingredients
2 tbsp (30ml) Neutral Oil (Grapeseed or Vegetable): A high smoke point oil is required for the initial sear of the chicken and the high-heat toss of the rice.
1/2 tsp (3g) Kosher Salt: To be used in stages to ensure the internal seasoning of the chicken and eggs is balanced before the glaze is added.
Professional Equipment for the Ultimate Sear
To replicate the “handheld smartphone photo” quality of this dish, you need tools that can handle intense heat and provide even distribution. A well-seasoned carbon steel wok is the gold standard, as its thin walls allow for rapid temperature changes, essential for “charring” without overcooking.
If a wok isn’t available, a heavy-bottomed cast-iron skillet is the next best choice. The thermal mass of cast iron ensures that when you add the cold rice, the temperature doesn’t drop, preventing the rice from steaming instead of frying. You will also need a sharp chef’s knife to achieve those “vibrant, bias-cut bright green scallions” that serve as our primary visual garnish.
Step-by-Step Evolution of the Perfect Fried Rice
Phase 1: Searing the Chicken for Maximum Char
Start by cutting your chicken thighs into large, uniform 1-inch (2.5cm) chunks. Pat them bone-dry with paper towels; moisture is the enemy of the sear. Heat 1 tablespoon (15ml) of oil in your wok until it just begins to smoke.
Add the chicken in a single layer. Do not crowd the pan. Let the chicken sit undisturbed for 3-4 minutes. You are looking for a deep, golden-brown crust to form—this is the foundation of your charred edges. Flip and cook for another 2 minutes until nearly cooked through.
Phase 2: Developing the Mahogany Glaze
Lower the heat slightly and pour in your Japanese BBQ sauce, mirin, and grated ginger. As the liquid hits the hot pan, it will bubble vigorously. Toss the chicken constantly as the sauce reduces. You will see the sauce transform from a thin liquid into a “thick, glistening dark mahogany soy-ginger glaze” that coats every piece of meat. Remove the chicken from the pan and set aside.
Phase 3: The Fluffy Rice and Charred Onion Base
Wipe the wok clean and add another tablespoon of oil. Add the diced onions and cook over medium-high heat until the edges are dark and slightly burnt—these are your “tiny charred onion pieces.” Push them to the side and pour in your whisked eggs. Scramble them quickly until you have “golden scrambled egg bits,” then break them apart with your spatula.
Increase the heat to high and add the chilled rice. Use the back of your spatula to break up any clumps. Toss vigorously for 3-5 minutes. You should hear the rice “crackling” in the pan—this is the sound of the exterior of the grains dehydrating and crisping up, ensuring they stay individual and fluffy.
Phase 4: The Final Integration
Return the glazed chicken and any residual sauce to the wok. Toss everything together for 60 seconds to ensure the rice is lightly seasoned by the glaze. The rice should not be swimming in sauce; it should be just barely kissed by the mahogany color, keeping the grains distinct.
Expert Tips for Success
- The Temperature Rule: Always ensure your rice is cold. If you must use fresh rice, spread it out on a baking sheet and place it in front of a fan or in the freezer for 15 minutes to surface-dry the grains.
- Don’t Over-Garnish: While we want a “dense layer” of scallions, ensure they are bias-cut (at a 45-degree angle). This increases the surface area of the green, making the color appear more “vibrant” against the dark chicken.
- The Sesame Toast: If your sesame seeds aren’t pre-toasted, toss them in a dry pan for 30 seconds until they smell nutty. This adds a crucial olfactory layer to the “mouth-watering shine” of the dish.
- Controlled Heat: If the glaze starts to smell like it’s burning rather than caramelizing, add a teaspoon of water to emulsify the sugars back into a sauce.
What to Serve With This Elevated Fried Rice
This Japanese BBQ chicken fried rice is a complete meal on its own, but it pairs beautifully with light, acidic sides to cut through the richness of the umami glaze. A simple cucumber sunomono salad or steamed bok choy provides the perfect balance.
If you’re looking for other rice-based inspirations, you might enjoy our Persian jeweled rice for a different flavor profile, or perhaps our chicken paella for another one-pan masterpiece. For those who prefer a creamier finish, our broccoli chicken and rice casserole offers a comforting alternative.
Storage, Reheating, and Freezing Advice
Leftovers can be stored in an airtight container in the refrigerator for up to 3 days. To reheat, avoid the microwave if possible, as it can make the rice gummy. Instead, add a teaspoon of oil to a skillet and fry the rice for 2-3 minutes until heated through. This restores the “charred” texture of the chicken edges.
This dish does not freeze particularly well once fully assembled, as the micro-cilantro and scallions will wilt and lose their vibrant green color. However, you can freeze the glazed chicken separately for up to 2 months.
Frequently Asked Questions
While you can, short-grain rice is preferred for this recipe to achieve the specific ‘plump’ and chewy texture typical of Japanese cuisine. Long-grain rice will be less cohesive and won’t match the visual blueprint as effectively.
Bias-cut means slicing the scallions at a 45-degree angle. This creates long, oval-shaped pieces that provide more visual ‘green’ surface area and a more professional aesthetic than simple circular rings.
You can create a quick substitute by mixing 1/4 cup soy sauce, 2 tablespoons brown sugar, 1 tablespoon mirin, and a dash of toasted sesame oil. This will provide the necessary sugar content for caramelization.
The mahogany color comes from the reduction of sugars in the Japanese BBQ sauce and mirin. By searing the chicken first and then adding the glaze over high heat, the sauce thickens and caramelizes into a dark, glistening coat.
Freshly cooked rice is full of moisture. When fried, this moisture turns to steam, making the rice mushy. Day-old rice has dehydrated slightly, allowing the grains to stay individual and become crispy in the wok.
The Ultimate Japanese BBQ Chicken Fried Rice Recipe
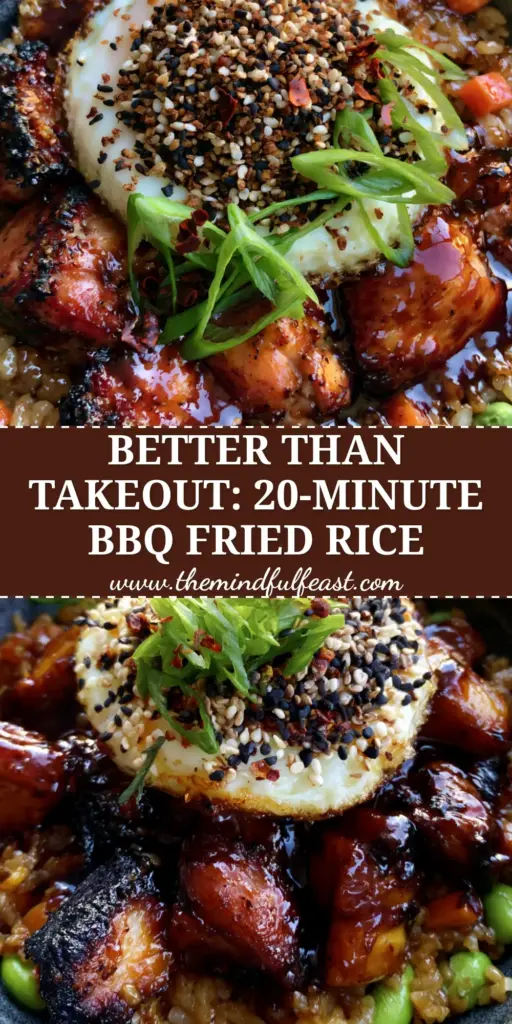
Japanese BBQ Chicken Fried Rice with a Dark Umami Glaze
Ingredients
Equipment
Method
- Heat oil in a wok over high heat. Add chicken chunks in a single layer. Sear for 3-4 minutes until deep charred edges form.
- Add Japanese BBQ sauce, mirin, and ginger. Toss until the liquid reduces into a thick, glistening dark mahogany glaze. Remove and set aside.
- Wipe wok, add oil, and fry onions until tiny charred pieces form. Scramble eggs into golden bits.
- Add chilled short-grain rice. Toss on high heat for 3-5 minutes until grains are fluffy and individual.
- Fold chicken back into the rice. Garnish heavily with bias-cut scallions, toasted sesame seeds, and micro-cilantro.
Notes
Ensure the wok is smoking hot before adding chicken for the best char.
Closing & Call to Action
Mastering the art of the Japanese BBQ chicken fried rice is all about respecting the balance between high heat and delicate glazes. By following these forensic steps—from the charred onion bits to the glistening mahogany chicken—you’ve created a dish that is as much a visual triumph as it is a culinary one. We would love to see your recreations! Please leave a comment below with your results and don’t forget to share this recipe with your fellow home cooks on Pinterest.