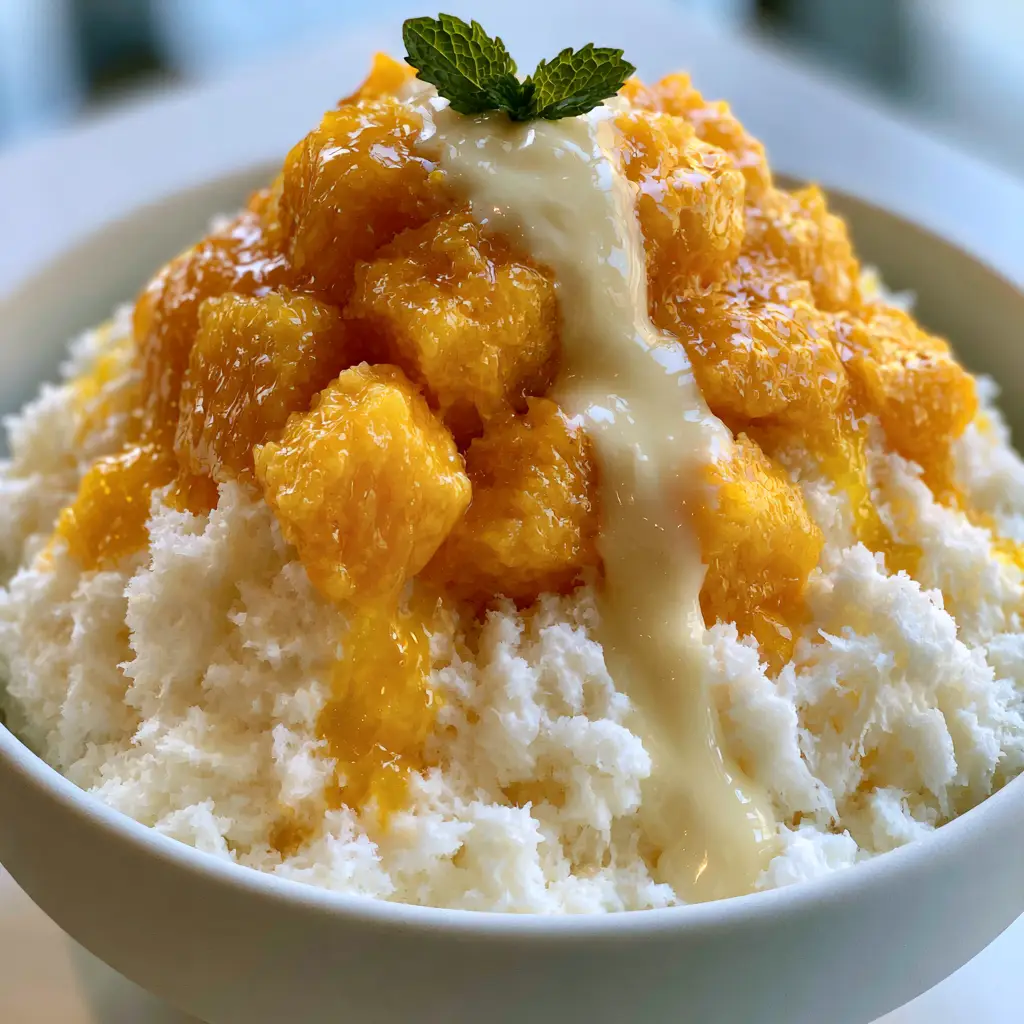
There is nothing quite like the first spoonful of a perfectly crafted mango bingsu. Imagine a mountain of ultra-fluffy, crystalline snowy white milk ice flakes that melt the micro-second they hit your tongue. It is a sensory experience that defines summer in South Korea, and now, you can recreate this masterpiece in your own kitchen.
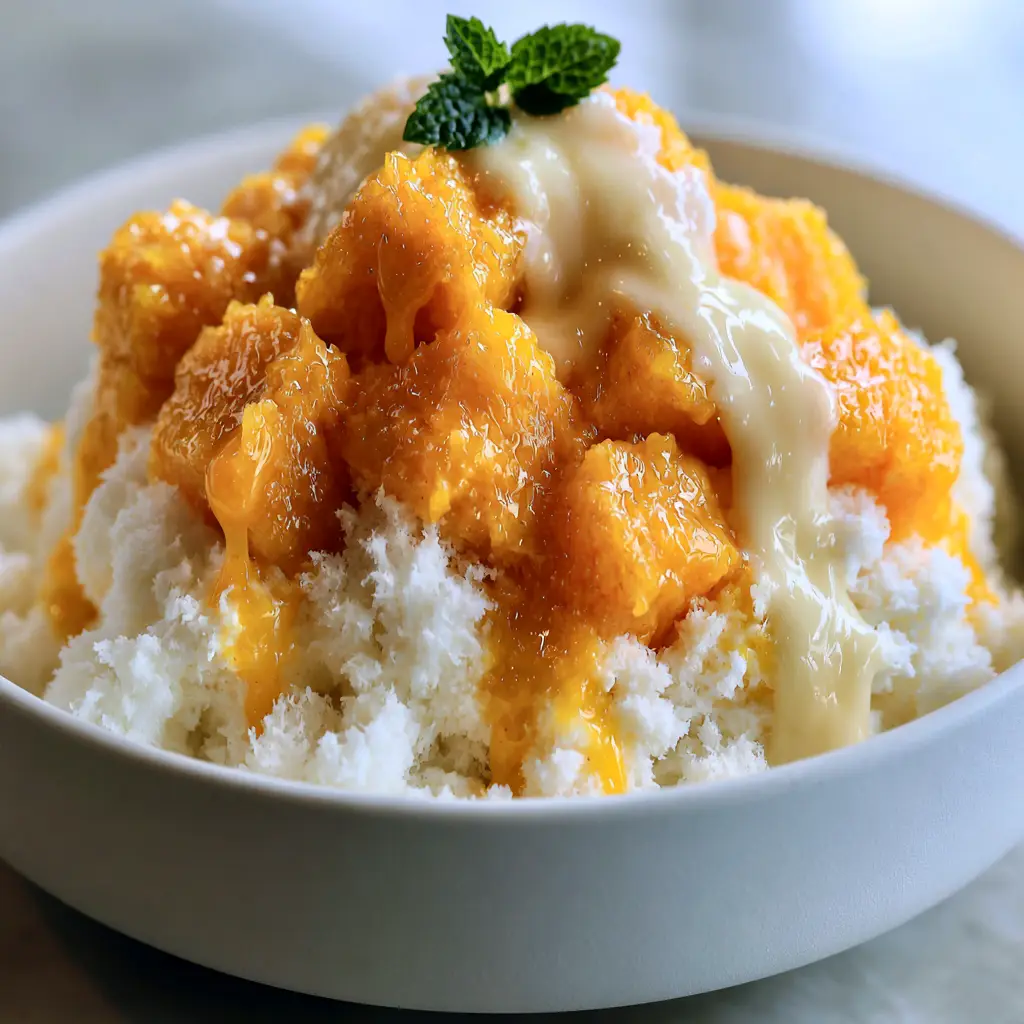
Our mango bingsu stays true to the aesthetic of a high-end Seoul cafe. We are focusing on that extreme close-up quality: vibrant orange-yellow honey mango chunks that look juicy and glistening, topped with a thick, viscous stream of ivory sweetened condensed milk. Every ribbon of sweetness and every tiny bright green mint sprig is designed to create a dessert that is as visually stunning as it is delicious.
Whether you are serving this on a light wood tabletop for the perfect handheld smartphone photo or enjoying it as a refreshing reward after a spicy Korean beef bowl, this recipe delivers. Let’s dive into the science of “snow ice” and the art of the perfect mango cube.
Why This Mango Bingsu is the Ultimate Summer Showstopper
- Cloud-Like Texture: By using a specific ratio of whole milk and heavy cream, we create ice that shaves into delicate, snowy flakes rather than hard granules.
- Honey Mango Superiority: We specifically use honey mangoes (Ataulfo) for their buttery, non-fibrous texture and intense natural sweetness.
- The “Glossy Ribbon” Drizzle: Our technique for layering sweetened condensed milk ensures every bite of ice is seasoned, not just the top.
- Visual Precision: From the silver dessert spoon submerged in the snow to the single mint peak, this recipe follows a professional visual blueprint for food photography.
The Anatomy of a Perfect Mango Bingsu: Ingredients and Substitutions
To achieve the result seen in high-end dessert boutiques, we must look beyond just “ice and fruit.” The ingredients below are selected for their chemical properties during the freezing and shaving process.
Whole Milk (500ml / 2 cups): This is the foundation of your snow. The fat content in whole milk prevents the ice from becoming a solid, unbreakable block, allowing for those crystalline flakes.
Heavy Cream (120ml / 0.5 cup): Adding cream increases the silkiness of the melt. It provides the “ivory” color to the ice base, making it look richer than water-based shaved ice.
Granulated Sugar (2 tbsp / 25g): Sugar acts as a natural antifreeze. By lowering the freezing point slightly, it ensures the milk ice stays soft enough to shave into “ultra-fluffy” snow.
Fresh Honey Mangoes (2 large): Also known as Ataulfo mangoes, these are the “vibrant orange-yellow” stars of the show. They lack the stringy fibers found in Tommy Atkins varieties, ensuring a “juicy and glistening” mouthfeel.
Sweetened Condensed Milk (60ml / 4 tbsp): This provides the viscous, thick drizzle. It acts as the primary sweetener and creates those beautiful glossy ribbons over the mango cubes.
Fresh Mint Sprigs: Used sparingly as a garnish to provide a pop of “bright green” color. It adds a subtle aromatic lift that cuts through the creamy milk base.
Fine Sea Salt (a pinch): A tiny amount of salt is an “invisible” ingredient. It enhances the mango’s natural sugars and makes the dairy taste more complex.
Professional Equipment for Shaved Ice Excellence
While a professional Bingsu machine is a luxury, you can achieve remarkable results with common kitchen tools. The goal is to create “crystalline snowy white milk ice flakes” without them clumping into a slush.
A high-speed blender can work if you pulse the frozen milk cubes rapidly. However, for the most authentic texture, a manual or electric rotary ice shaver is recommended. If you have neither, a granite-ware pan and a sturdy fork can be used to create “granita-style” flakes, though they will be slightly coarser than the “snow” described in our visual prompt.
Don’t forget the serving vessel! A minimalist white ceramic bowl is essential for highlighting the vibrant mango. The ceramic also holds the cold better than glass, preventing your mountain of snow from collapsing too quickly while you take your photos.
The Secret to Crafting Snowy White Milk Flakes
Phase 1: Preparing the Milk Base
In a large measuring pitcher, whisk together the 500ml (2 cups) of whole milk, 120ml (0.5 cup) of heavy cream, and 2 tbsp (25g) of sugar. Stir until the sugar is completely dissolved and no grit remains at the bottom.
Pour the mixture into silicone ice cube trays. Using silicone makes it much easier to pop the cubes out later without melting the edges with warm water, which would ruin the flake texture.
Freeze the cubes for at least 6 hours, or ideally overnight. The cubes should be rock-hard and opaque white before they are ready to be transformed into snow.
Phase 2: Master the Mango Cube Technique
While the milk base freezes, prepare your “perfectly cubed” honey mangoes. Slice the mango cheeks off the pit, then use a sharp paring knife to score a grid pattern into the flesh, being careful not to cut through the skin.
Invert the mango half so the cubes pop outward. Use a spoon to gently scoop the cubes into a bowl. The cubes should be roughly 1.5cm (0.5 inch) for that “juicy and glistening” look. Chill the mango cubes in the refrigerator until the very moment of assembly.
Phase 3: Shaving the Snow Mountain
Place your white ceramic bowl in the freezer for 10 minutes before shaving. This is a crucial “pro tip” that prevents the first layer of snow from melting into a puddle.
Pop the milk cubes out of the tray. If using a blender, pulse in short bursts until the ice looks like fluffy snow. If using a shaver, work quickly to pile the flakes into a high mountain in the chilled bowl.
Look for the visual cue: the ice should look like fresh winter powder, not translucent or wet. It should be a “mountain of ultra-fluffy” flakes that stands tall without support.
Phase 4: The Art of the Drizzle and Garnish
Gently place the chilled honey mango chunks around the base of the ice mountain and a few at the peak. Do not press them in, or you will deflate the air in the snow.
Take your sweetened condensed milk and, using a steady hand, create a “thick, viscous stream” starting from the peak. Let it flow down the sides in “glossy ribbons” over the mango. If you love mango-themed treats, this drizzle also pairs beautifully with our mango cupcakes.
Finish by placing a single tiny bright green mint sprig at the very peak. Insert a silver dessert spoon partially into the side, lifting a spoonful of the snowy ice and mango to recreate that iconic handheld smartphone photo look.
Expert Tips for Bingsu Success
- Fat is Flavor: Never use skim or 1% milk. The lack of fat will result in hard, crunchy ice crystals rather than the “crystalline snowy white” texture we desire.
- Keep it Cold: Work in a cool kitchen if possible. Bingsu is extremely temperature-sensitive. If the snow starts to look wet, put the bowl back in the freezer for 5 minutes.
- Mango Ripeness: Choose honey mangoes that give slightly to pressure and have a strong, sweet aroma at the stem. If they aren’t ripe enough, the cubes won’t look “juicy and glistening.”
- The Layering Trick: For a professional touch, put a layer of condensed milk and mango in the *middle* of the ice mountain as you build it, then more on top. This ensures no “dry” bites of ice.
Storage and Make-Ahead Advice
Mango bingsu is a “live” dessert—it must be eaten immediately after assembly. You cannot store a fully assembled bingsu in the freezer, as the fluffy snow will freeze into a solid, icy block and the mangoes will lose their texture.
However, you can make the milk cubes up to 2 weeks in advance and keep them in a sealed freezer bag. You can also cube the mangoes 3-4 hours ahead of time, provided they are kept in an airtight container in the fridge to keep them glistening.
Creative Pairings and Menu Ideas
This dessert is the perfect palate cleanser. Because it is light and refreshing, it follows heavier meals beautifully. Consider serving it after a tray of taco casserole or a hearty Philly cheesesteak wrap.
If you are hosting a summer garden party, mango bingsu serves as a great alternative to traditional ice cream. It is one of those 3-ingredient snacks (if you count the base, fruit, and drizzle) that looks like it took hours of effort.
Frequently Asked Questions About Mango Bingsu
Yes! You can freeze the milk mixture in silicone trays and pulse the cubes in a high-speed blender until they reach a snowy consistency, or use a fork to scrape a frozen block for a coarser flake.
Always pre-chill your serving bowl in the freezer for at least 10 minutes. Working in a cool environment and using a milk base with a higher fat content also helps maintain the snow’s structure.
Yes, it is the traditional sweetener. It provides a thick, viscous drizzle that binds the ice and fruit together. You can substitute with coconut condensed milk for a dairy-free topping.
Traditional shaved ice uses water-based ice, while Bingsu uses a frozen milk and cream base. This results in a much creamier, snow-like texture that melts more smoothly on the tongue.
Honey mangoes (Ataulfo) have a very small pit and lack the tough, stringy fibers found in other varieties. Their flesh is buttery and exceptionally sweet, which is essential for the texture of Bingsu.
The Ultimate Mango Bingsu Recipe
Mango Bingsu Recipe: Ultra-Fluffy Korean Shaved Milk Ice with Honey Mango
Ingredients
Equipment
Method
- Whisk whole milk, heavy cream, sugar, and salt until dissolved. Pour into silicone trays and freeze for 6+ hours.
- Score and cube the honey mangoes into uniform pieces. Keep chilled until the moment of assembly.
- Use an ice shaver or blender to process the milk cubes into ultra-fluffy, crystalline snow flakes.
- Pile the snow into a chilled ceramic bowl. Top with mango cubes and a thick drizzle of condensed milk in glossy ribbons.
- Garnish with a single mint sprig at the peak and serve with a silver dessert spoon.
Notes
Ensure your bowl is pre-chilled in the freezer to prevent the snow from melting instantly.

Closing & Call to Action
Crafting the perfect mango bingsu is about more than just satisfying a sweet tooth; it’s about the joy of texture and the beauty of fresh, seasonal fruit. Once you master the art of the milk-snow base, the possibilities are endless. We hope this guide helps you create a dessert that looks just as incredible as it tastes!
Did you manage to get that perfect “glossy ribbon” drizzle? We want to see! Leave a comment below or share your creations with us. For more visual recipe inspiration, follow us on Pinterest and save this recipe to your summer dessert boards!