Black velvet cupcakes are the ultimate expression of sophisticated indulgence, offering a dramatic visual contrast that stops the scroll every single time. Unlike traditional red velvet, which relies on a chemical reaction between acid and natural cocoa, these cupcakes achieve their striking midnight hue through the use of premium black cocoa powder.
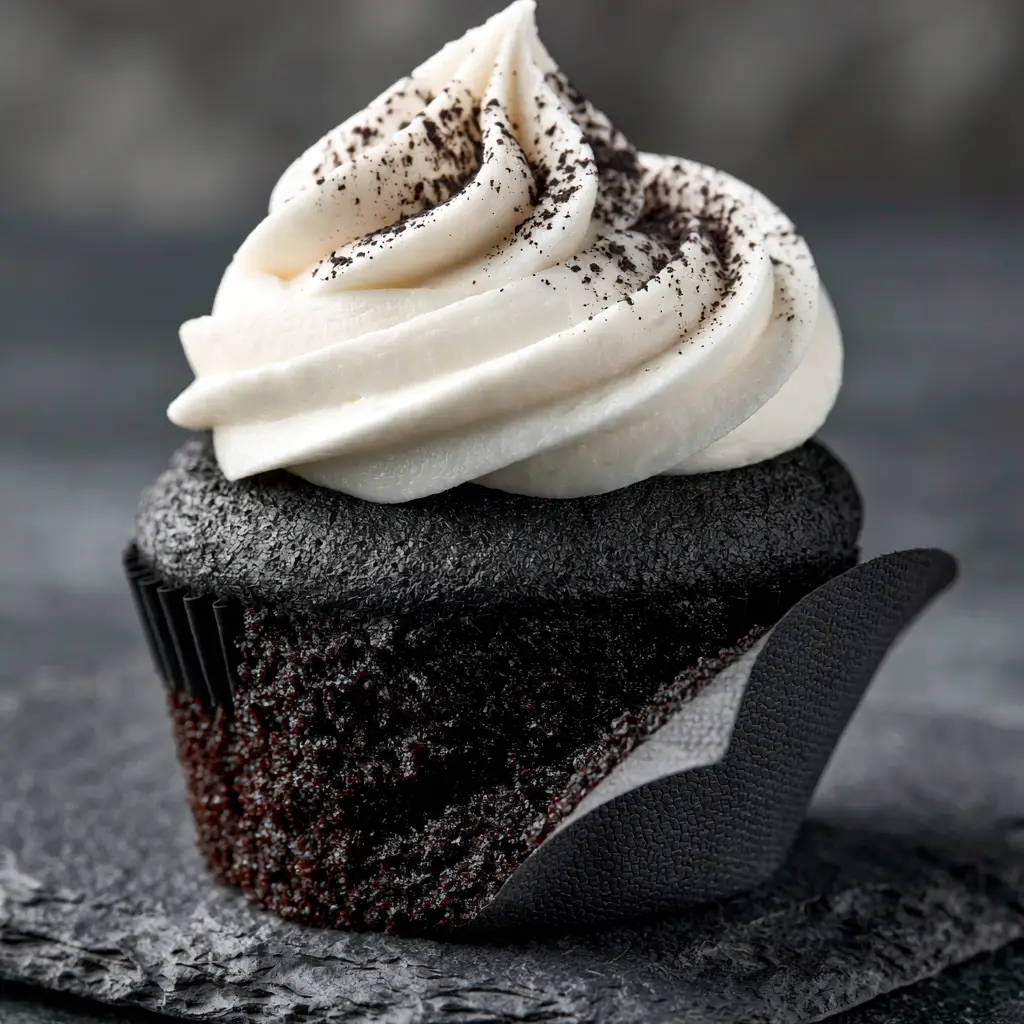
Imagine a deep charcoal-black base so moist and tender it practically melts on the tongue, paired with a stark-white, voluminous cream cheese frosting swirl. This isn’t just a dessert; it is a culinary statement that balances the intense, earthy notes of dark chocolate with the tangy sweetness of high-quality dairy.
In this guide, we will explore the science of alkalized cocoa, the architecture of a stable cream cheese swirl, and the specific techniques required to achieve that professional “handheld smartphone photo” aesthetic. Whether you are preparing these for a themed event or simply craving a sophisticated treat, these black velvet cupcakes deliver unparalleled texture and flavor.
Why This Black Velvet Recipe Defines Sophistication
- Intense Visual Contrast: The juxtaposition of the deep charcoal crumb against the stark-white ridges of the frosting creates a high-fashion aesthetic.
- Ultra-Moist Texture: By utilizing a specific ratio of oil and buttermilk, we ensure a velvety, fine-crumb structure that stays fresh for days.
- Premium Flavor Profile: The use of black cocoa provides a smooth, non-bitter chocolate flavor reminiscent of a high-end dark cookie.
- Pro-Level Piping: We focus on a thick, structured cream cheese swirl that holds its shape without the need for excessive sugar.
- Forensic Accuracy: Every element, from the matte-black paper liner to the fine cocoa dusting, is designed for maximum visual impact.
The Essential Pantry for Midnight-Black Cakes
To achieve the specific charcoal-black color seen in our blueprint, you must use Black Cocoa Powder. This is a heavily Dutch-processed (alkalized) cocoa that has a neutral pH and a flavor profile similar to an Oreo cookie; 1/2 cup (45g) is the standard for this recipe.
All-Purpose Flour: 1 & 1/2 cups (190g) provides the structural foundation without making the cupcakes heavy or bready. It allows the moisture from the fats to create that signature velvet feel.
Granulated Sugar: 1 cup (200g) sweetens the batter while helping to tenderize the crumb by interfering with gluten development. It also helps the cupcakes retain moisture as they sit.
Buttermilk: 3/4 cup (180ml) is non-negotiable for “velvet” textures; the acidity breaks down the gluten, resulting in a tender, fine-crumb structure. If you are out of buttermilk, you might find yourself looking for other midnight snacks, but it is worth the trip to the store for the real thing.
Vegetable Oil: 1/2 cup (120ml) of a neutral oil ensures the cupcake remains moist even when refrigerated. Unlike butter-based cakes, oil cakes stay soft at colder temperatures.
Large Egg: 1 room-temperature egg (approx. 50g) binds the ingredients together and provides just enough lift and richness to the charcoal base.
Hot Coffee: 1/2 cup (120ml) of freshly brewed hot coffee “blooms” the black cocoa powder. This process releases the trapped flavor oils in the cocoa, intensifying the chocolate profile without adding a discernible coffee taste.
Leavening Agents: 1 tsp (5g) baking powder and 1/2 tsp (3g) baking soda work together to provide a clean, even rise. The soda specifically reacts with the buttermilk to create tiny air bubbles.
Fine Sea Salt: 1/2 tsp (3g) is the “invisible” ingredient that balances the bitterness of the dark cocoa and enhances the sweetness of the frosting.
The Secrets to Stark-White Cream Cheese Frosting
The visual blueprint requires a thick, voluminous, perfectly structured swirl of stark-white frosting. To achieve this, use 8 oz (225g) of full-fat, brick-style cream cheese and 1/2 cup (115g) of unsalted butter, both slightly softened but still cool to the touch.
To keep the frosting stark-white, avoid using dark vanilla extract; instead, opt for clear vanilla flavoring or simply omit it. Beat the butter and cream cheese for at least 5 minutes before adding sugar to aerate the fats, which naturally lightens their color.
You will also need 3-4 cups (375-500g) of sifted powdered sugar. Adding the sugar in stages allows you to control the thickness, ensuring the ridges of your piping tip stay clean and defined rather than melting into a blob.
Technical Tools for Bakery-Style Results
To replicate the hand-held smartphone photo style of our visual prompt, you need the right tools. A standard 12-cup muffin tin is essential, but the real secret lies in the matte-black paper liners. These liners blend into the cupcake base, creating a seamless, dark silhouette.
For the frosting, a large open-star piping tip (like an 1M or 2D) is required to create those deep, defined ridges. A fine-mesh sieve is also necessary for the final dusting of black cocoa, ensuring a light, atmospheric finish rather than clumps.
A digital kitchen scale is highly recommended for measuring your ingredients in grams. Accuracy is the difference between an ultra-moist cupcake and one that is dry or crumbly. If you enjoy precision baking, you might also love the technical challenge of our chocolate chip cookie dough cheesecakes.
Step-by-Step Architecture of the Black Velvet Crumb
Preparing the Charcoal Base
Begin by preheating your oven to 350°F (175°C). Line your muffin tin with the matte-black paper liners mentioned in our blueprint. In a large bowl, sift together the flour, sugar, black cocoa, baking powder, baking soda, and salt. Sifting is crucial here to prevent clumps of cocoa from marring the velvety crumb.
Emulsifying the Liquid Ingredients
In a separate vessel, whisk together the egg, buttermilk, oil, and vanilla. Slowly pour the wet ingredients into the dry, whisking by hand until just combined. The batter will be thick and incredibly dark at this stage, looking like liquid obsidian.
Blooming the Cocoa
Gently stir in the hot coffee. The heat will thin the batter and activate the cocoa. Do not overmix; stop as soon as the batter is smooth. Overmixing develops gluten, which would ruin the “velvety” texture we are aiming for. The final batter should be thin enough to pour easily.
The Precision Bake
Divide the batter evenly among the 12 liners, filling them about 2/3 full. Bake for 18-22 minutes. You are looking for a specific visual cue: the tops should be springy to the touch, and a toothpick inserted into the center should come out with just a few moist crumbs attached. The cupcakes should not be domed excessively; a flatter top provides a better stage for the frosting swirl.
Engineering the Perfect Stark-White Swirl
Creaming for Volume
While the cupcakes cool completely on a wire rack, prepare the frosting. Beat the cool butter and cream cheese on medium-high speed for 5-7 minutes. You will see the color shift from a pale yellow to a bright, stark white as air is incorporated into the fats.
Stabilizing the Ridges
Lower the mixer speed and gradually add the powdered sugar. Once incorporated, whip on high for another 2 minutes. The frosting should be stiff enough to hold a peak. If it feels too soft, chill it in the refrigerator for 15 minutes before piping to ensure those “clean, defined ridges” from the visual prompt.
The Piping Technique
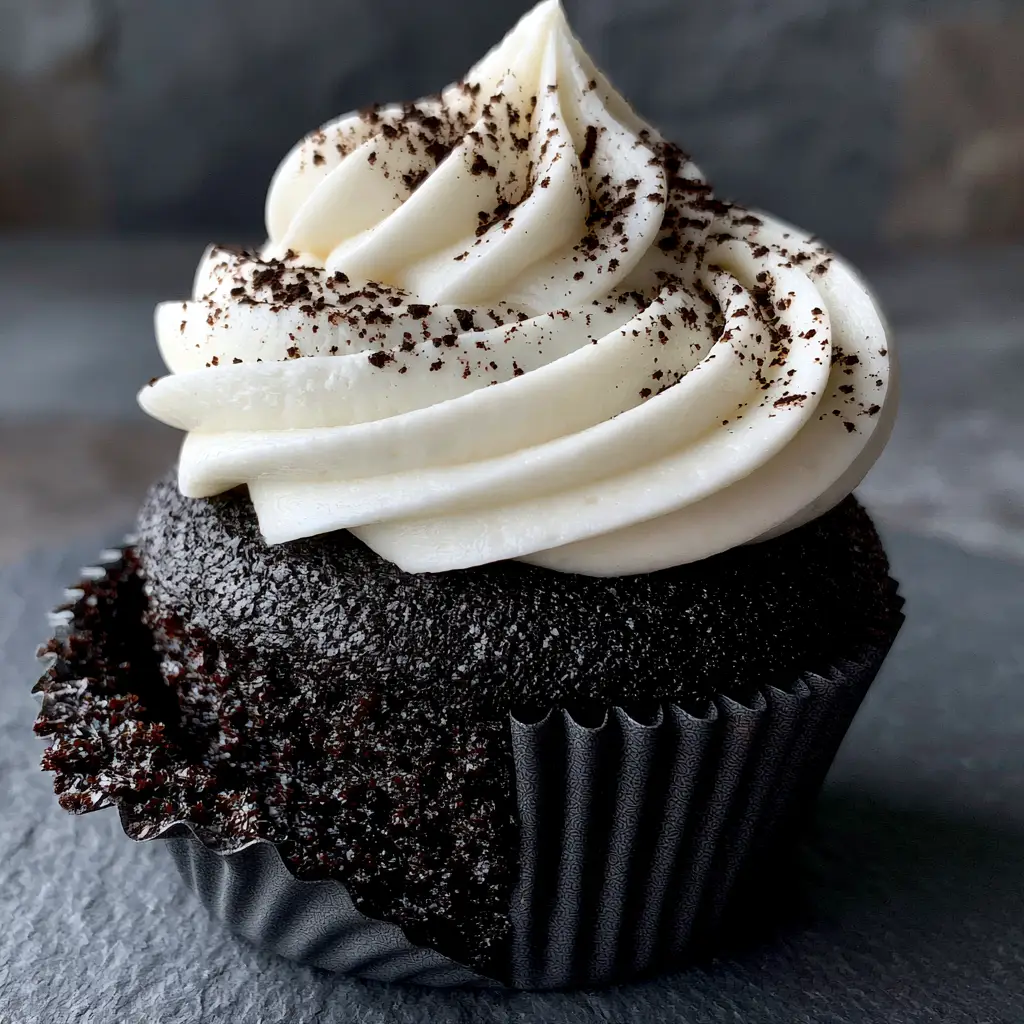
Fit a piping bag with your star tip and fill with the cream cheese frosting. Starting at the outer edge of the cooled cupcake, pipe in a circular motion, moving toward the center and upward to create a tall, voluminous swirl. The matte-black liner should still be visible at the base.
Expert Tips for Success
- Temperature Control: Ensure your egg and buttermilk are at room temperature to prevent the batter from curdling, which preserves the velvety crumb.
- The Cocoa Dusting: Wait until the very last second to dust the cupcakes with the extra black cocoa powder. If done too early, the moisture in the frosting may absorb the powder, losing that delicate, fine-textured look.
- Liner Selection: If you cannot find matte-black liners, use double-layered standard liners to prevent the dark oils of the cake from making the paper look greasy.
- Crumb Check: When you peel back the liner, the cake should show a “fine crumb.” If the cake is sticking to the paper, it may be slightly underbaked or was peeled while still warm.
Storage and Preservation Tactics
Because these black velvet cupcakes contain a high-moisture cream cheese frosting, they must be stored in the refrigerator. Place them in an airtight container to prevent the frosting from absorbing fridge odors. They will remain moist and delicious for up to 4 days.
For the best flavor experience, remove the cupcakes from the fridge 20-30 minutes before serving. This allows the butter in the frosting and the oil in the cake to soften, returning the cupcake to its intended velvety state. These are just as indulgent as our decadent banana brownies when served at the right temperature.
What to Serve With These Dramatic Treats
These cupcakes are rich and chocolate-forward, making them the perfect centerpiece for a dessert spread. If you are hosting a larger gathering, like a themed birthday party, these can serve as the sophisticated “adult” option alongside more whimsical treats.
To balance the sweetness, consider serving them alongside a tart fruit dish, such as a fresh peach galette. The acidity of the fruit cuts through the richness of the cream cheese, cleansing the palate between bites of the dark charcoal cake.
Frequently Asked Questions
Yes, you can use boiling water, but coffee is recommended as it ‘blooms’ the cocoa powder, intensifying the chocolate flavor without making the cupcake taste like coffee.
No food coloring is required. The deep charcoal-black color comes entirely from the premium black cocoa powder, which is heavily Dutch-processed.
Beat the butter and cream cheese for at least 5 minutes to aerate them, which lightens their natural yellow tint. Additionally, use clear vanilla extract instead of dark brown extract.
Black velvet cupcakes use alkalized black cocoa powder, which has a neutral pH and a darker color than standard cocoa. They also include buttermilk for a ‘velvet’ crumb texture, whereas standard chocolate cakes may use milk or water.
This usually happens if the butter or cream cheese was too warm, or if you used ‘spreadable’ cream cheese from a tub. Use brick-style cream cheese and chill the frosting for 15 minutes before piping.
The Ultimate Black Velvet Cupcakes Recipe
Black Velvet Cupcakes: A Masterclass in Dark Cocoa and Creamy Contrast
Ingredients
Equipment
Method
- Preheat oven to 350°F (175°C) and line a muffin tin with matte-black liners. Sift flour, sugar, black cocoa, baking powder, baking soda, and salt into a bowl.
- Whisk egg, buttermilk, and oil together. Add to dry ingredients. Stir in hot coffee until a smooth, thin obsidian-colored batter forms.
- Fill liners 2/3 full and bake for 18-22 minutes until springy. Cool completely on a wire rack.
- Beat butter and cream cheese for 5 minutes until stark white. Add powdered sugar gradually until stiff ridges form.
- Pipe a voluminous swirl on each cupcake. Gently peel down the liner slightly for the visual effect, then dust with fine black cocoa powder through a sieve.
Notes
Ensure the cream cheese is brick-style, not spreadable, for a stable swirl.
Closing & Call to Action
These black velvet cupcakes are more than just a treat; they are a masterclass in texture and visual design. The combination of the moisture-rich charcoal base and the architectural cream cheese swirl creates a dessert that is as beautiful to look at as it is to eat. The delicate dusting of black cocoa powder adds that final touch of professional elegance that makes this recipe stand out.
We invite you to try this recipe and experience the velvety crumb for yourself. If you enjoyed this guide, please leave a comment below and share your results! Don’t forget to follow us and save this recipe to your boards on Pinterest for your next special occasion.


