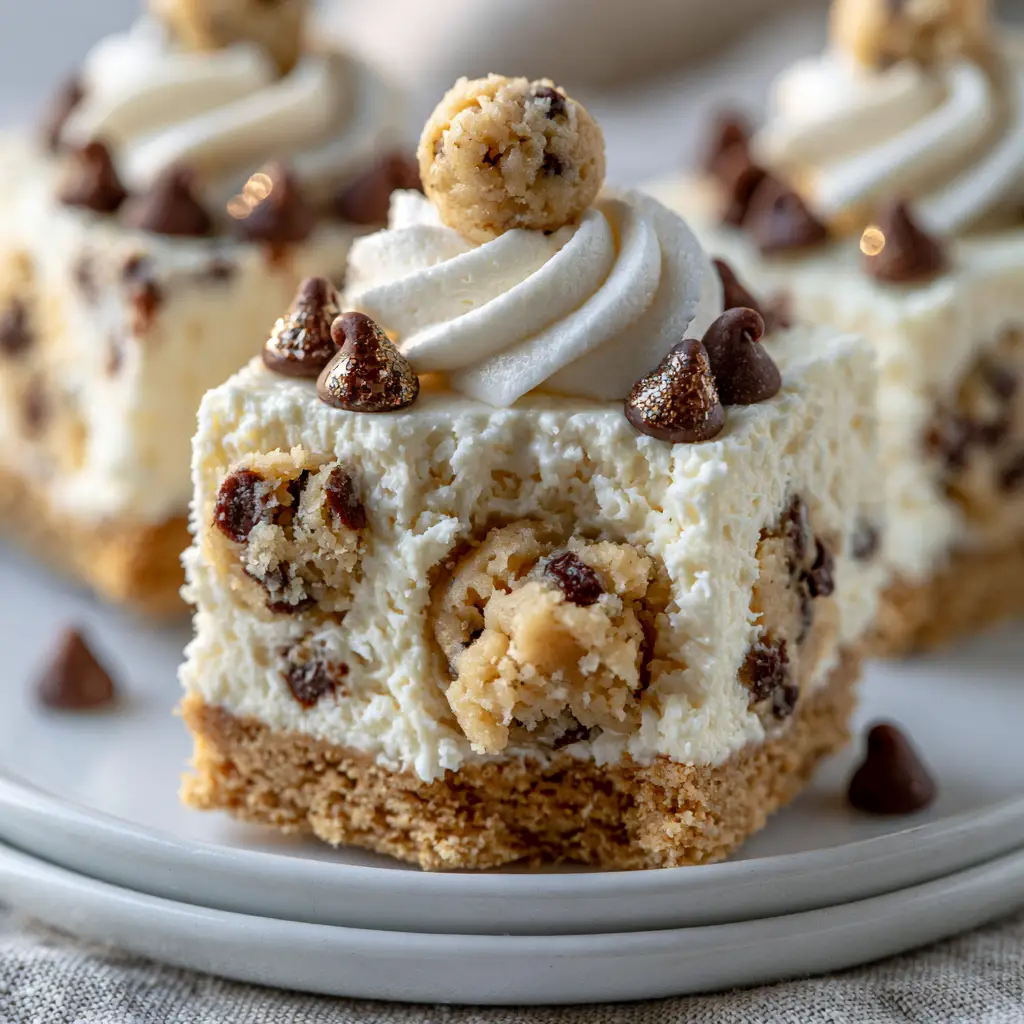
There is something undeniably nostalgic about the combination of buttery graham crackers, velvety cream cheese, and the forbidden allure of raw cookie dough. These chocolate chip cookie dough cheesecakes take that nostalgia and elevate it into a sophisticated, bite-sized indulgence that looks as stunning as it tastes. Imagine a dense, white cheesecake center packed with nuggets of edible dough, all sitting atop a golden, compressed crust.
When you take that first bite, you will experience a symphony of textures: the crunch of the base, the silkiness of the filling, and the soft, gooey yielding of the cookie dough chunks. This recipe is designed to replicate the high-end aesthetic of professional patisserie while remaining approachable for any enthusiastic home cook. Whether you are hosting a refined gathering or looking for the ultimate treat, these squares are the answer.
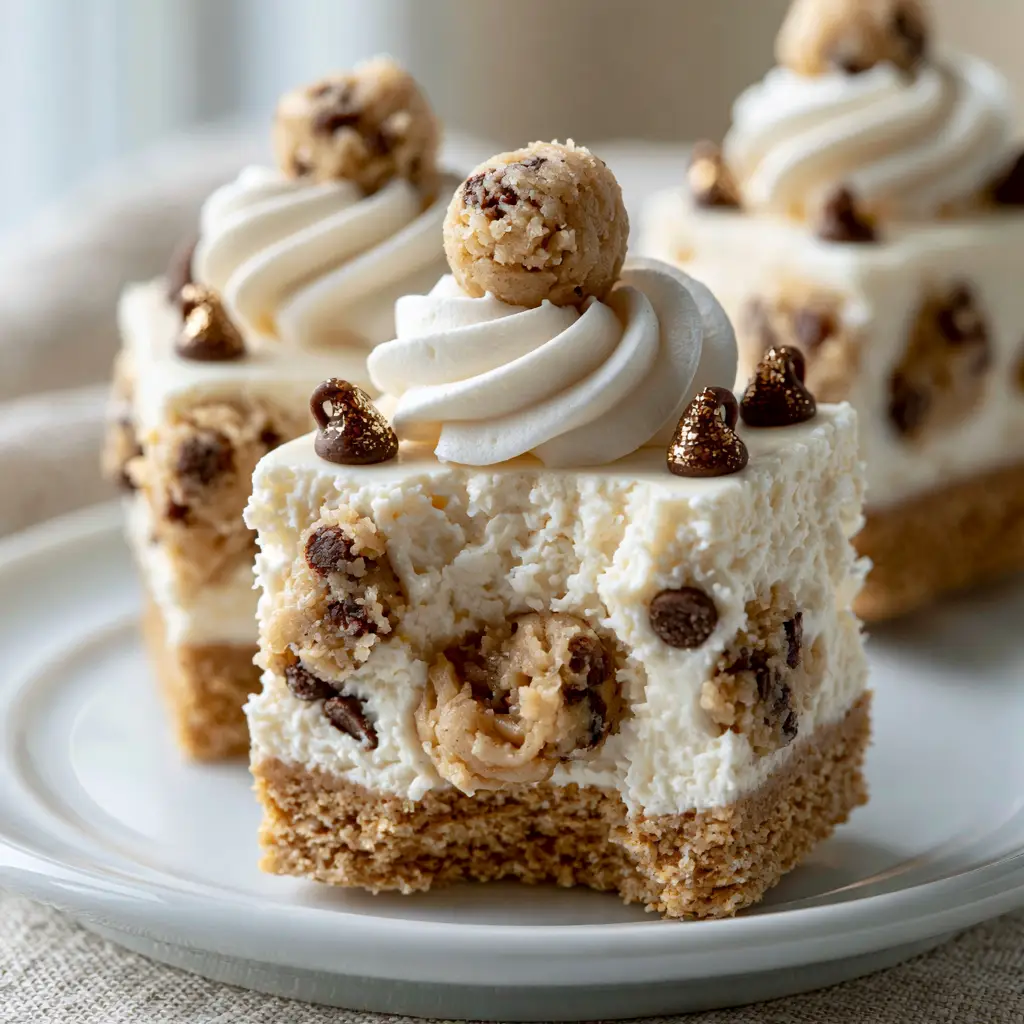
The visual appeal is paramount here, featuring glistening mini semi-sweet chocolate chips that catch the light and a delicate swirl of whipped cream on top. Each square is a masterpiece of culinary architecture, balanced perfectly to ensure every forkful contains a bit of every layer. If you have enjoyed my no-bake s'mores cookie dough bites, you will find this cheesecake version to be the logical, decadent next step in your dessert repertoire.
What Makes These Mini Cheesecake Squares Irresistible
- Textural Contrast: A thick, buttery graham cracker crust provides a sturdy, crunchy foundation for the velvety filling.
- Safe Indulgence: We use heat-treated flour and an egg-less base to create 100% safe, edible cookie dough chunks that stay soft even when chilled.
- Velvety Mouthfeel: The cream cheese filling is whipped to a dense, professional consistency that mimics the look of a baked cheesecake without the fuss.
- Glistening Finishes: Mini semi-sweet chocolate chips provide a sophisticated visual pop and a balanced hit of dark cocoa.
- Professional Garnish: Each bite is finished with a stabilized whipped cream dollop and a miniature sphere of raw cookie dough for a true “bakery case” look.
Essential Components for the Perfect Cookie Dough Bite
Full-Fat Cream Cheese: Use 16 oz (450g) of brick-style cream cheese at room temperature. This is the structural backbone of your filling; low-fat or tub versions will not yield the dense, velvety texture seen in the visual prompt.
Heat-Treated All-Purpose Flour: For the cookie dough, you will need 1.25 cups (155g) of flour. Heating the flour to 160°F (71°C) ensures it is safe to consume raw by eliminating potential bacteria.
Unsalted European-Style Butter: You will use 0.5 cups (115g) for the crust and another 0.5 cups (115g) for the dough. Higher fat content in European butter leads to a richer flavor and a more “glistening” appearance in the final dough spheres.
Graham Cracker Crumbs: 1.5 cups (150g) of finely ground crumbs create that thick, golden base. Ensure they are pressed firmly to prevent crumbling when you cut the squares.
Mini Semi-Sweet Chocolate Chips: 1 cup (170g) total is divided between the filling and the garnish. Mini chips are essential for the “bite-sized” scale of these cheesecakes, ensuring they don’t overwhelm the texture.
Heavy Whipping Cream: 0.5 cups (120ml) is folded into the filling to lighten the density just enough to make it melt-on-the-tongue soft while maintaining its square shape.
Light Brown Sugar and Granulated Sugar: A mix of both provides the classic molasses depth required for authentic cookie dough flavor. You will need 0.5 cups (100g) of brown sugar and 0.25 cups (50g) of white sugar for the dough.
Tools Required for Professional Results
To achieve the clean, sharp edges seen in the visual blueprint, you will need an 8×8 inch (20x20cm) square baking pan. Lining this pan with parchment paper with an overhang—often called “slings”—is the only way to lift the chilled slab out for perfect slicing.
A hand mixer or stand mixer is vital for aerating the cream cheese. Without it, you won’t achieve that “velvety white” appearance. Lastly, a sharp chef’s knife dipped in hot water and wiped clean between every single cut is the secret to those glistening, smooth sides shown in the close-up photos.
Mastering the Edible Cookie Dough Chunks
Step 1: The Safety First Flour Prep
Preheat your oven to 350°F (175°C) and spread your 1.25 cups (155g) of flour on a baking sheet. Bake for 5-7 minutes until the internal temperature reaches 160°F (71°C). This process removes the “raw” grain taste and makes these chocolate chip cookie dough cheesecakes safe for everyone.
Step 2: Creaming the Dough Base
In a medium bowl, cream together 0.5 cups (115g) of softened butter with the brown and white sugars. Add 2 tbsp (30ml) of milk and 1 tsp (5ml) of vanilla extract. Mix until smooth and pale—this is the sensory cue that your sugar has begun to dissolve into the fat.
Step 3: Folding and Chilling
Gently fold in the heat-treated flour and 0.5 cups (85g) of mini chocolate chips. The dough should be soft but hold its shape. Roll about 1/4 of the dough into tiny spheres for the garnish; the rest will be crumbled into chunks for the cheesecake interior. Chill these while you prep the crust.
Constructing the Buttery Graham Cracker Foundation
Combine your 1.5 cups (150g) of graham cracker crumbs with 0.5 cups (115g) of melted butter and 2 tbsp (25g) of sugar. The mixture should feel like wet sand. Press it firmly into the bottom of your lined 8×8 pan.
Use the bottom of a flat measuring cup to compress the crust. This high-pressure “pressing” ensures the crust stays intact even when a bite is taken out. For an extra crisp finish, you can bake this base for 8 minutes at 325°F (165°C), though a chilled version works perfectly for a no-bake approach.
Creating the Velvety Cream Cheese Filling
Step 1: The Smooth Base
Beat the room-temperature cream cheese with 0.5 cups (100g) of powdered sugar until completely smooth. Look for a glossy finish with no visible lumps. If the cream cheese is too cold, the filling will be grainy, ruining the “velvety” visual we are aiming for.
Step 2: Aeration and Inclusion
In a separate bowl, whip 0.5 cups (120ml) of heavy cream to stiff peaks, then gently fold it into the cream cheese. Now, gently fold in the cookie dough chunks and another 1/4 cup (40g) of mini chocolate chips. The goal is to see the “visible chunks” suspended in the white filling without streaking the dough into the cream.
Step 3: The Long Chill
Spread the filling over the crust and smooth the top with an offset spatula. Chill for at least 6 hours, preferably overnight. This long rest is what creates the “dense” structure that allows the squares to be stacked without collapsing.
Expert Tips for Bakery-Quality Success
- Temperature Control: Ensure your cream cheese is truly room temperature (leave it out for 2 hours). This is the only way to get that professional, smooth-as-silk texture.
- Clean Slicing: Wipe your knife with a warm, damp cloth after every cut. This prevents the cream cheese filling from smearing onto the golden crust layer.
- The Flour Sift: After heat-treating your flour, it may clump. Sift it before adding it to the butter and sugar to ensure your cookie dough chunks aren’t gritty.
- Garnish Timing: Add the whipped cream dollop and the cookie dough sphere just before serving. This prevents the moisture in the cream from softening the garnish dough ball too much.
Optimal Storage and Freezing Instructions
These mini cheesecakes are best stored in an airtight container in the refrigerator for up to 5 days. Because they contain dairy and heat-treated flour, they must remain chilled to maintain their structural integrity.
If you want to make these ahead of time, they freeze beautifully. Flash-freeze the individual squares on a tray for 1 hour before transferring them to a freezer-safe bag. They will stay fresh for up to 3 months. Thaw in the refrigerator for 2 hours before serving to regain that “gooey cookie dough center” texture.
Perfect Pairings for Your Dessert Spread
If you are serving these at a party, they pair exceptionally well with other finger foods. For a balanced dessert table, try adding some fudgy banana brownies for a different texture profile. If you’re hosting a themed event like a SpongeBob squarepants birthday party, these square-shaped bites fit the theme perfectly!
For a late-night treat, these are the ultimate midnight snacks. You might even serve them alongside thick chocolate milkshakes for a true cocoa-overload experience that kids and adults alike will adore.
Frequently Asked Questions
I don’t recommend it, as store-bought dough contains raw eggs and untreated flour. Our recipe provides a safe, edible alternative that tastes even better.
Chill the cheesecake for at least 6 hours, then use a sharp chef’s knife dipped in hot water and wiped clean between every single cut.
They will stay fresh and delicious for up to 5 days when stored in an airtight container in the refrigerator.
Yes! We use heat-treated flour and omit eggs in the cookie dough chunks, making it 100% safe to consume without baking.
This usually happens if the cream cheese wasn’t full-fat or if the heavy cream wasn’t whipped to stiff peaks before folding it in.
The Complete Chocolate Chip Cookie Dough Cheesecake Recipe
Chocolate Chip Cookie Dough Cheesecakes: The Ultimate Mini Square Bites
Ingredients
Equipment
Method
- Bake flour at 350°F (175°C) for 5-7 minutes until it reaches 160°F (71°C). Let cool completely.
- Cream butter and sugars. Add milk and vanilla, then stir in the heat-treated flour and mini chocolate chips. Roll 16 small balls for garnish; crumble the rest.
- Combine graham crumbs, butter, and sugar. Press firmly into an 8x8 pan and chill.
- Beat cream cheese and powdered sugar. Fold in whipped heavy cream, then the cookie dough crumbles and mini chips.
- Spread filling over crust. Chill for 6 hours. Lift from pan using parchment handles and cut into 16 squares.
Notes
Dip your knife in hot water between cuts for professional square edges.
Closing & Call to Action
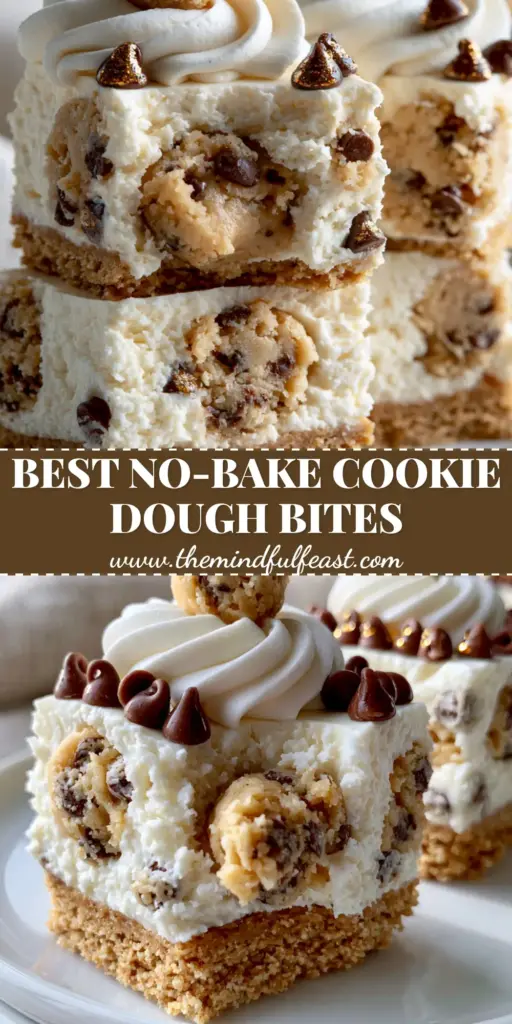
These chocolate chip cookie dough cheesecakes represent the pinnacle of home-kitchen dessert craftsmanship. With their distinct layers, safe-to-eat dough, and professional presentation, they are guaranteed to be the star of any plate. The contrast between the salty-sweet crust and the rich, chocolate-studded filling is a flavor profile that never goes out of style.
If you enjoyed making (and eating!) these mini bites, please leave a comment below and let me know how they turned out. Don’t forget to share your photos and pin this recipe to your favorite dessert boards on Pinterest!


