There is a specific, transcendental joy found in a stack of chocolate chip pancakes that defy the laws of gravity. We aren’t talking about thin, flimsy crepes or standard diner fare; we are crafting three-story architectural marvels of breakfast engineering.
Imagine cutting your fork into a stack so tall it requires a structural butter square to anchor it. These chocolate chip pancakes boast a two-inch vertical rise, a vibrant golden-brown toasted exterior, and a porous, cloud-like interior that mirrors the texture of a high-end sponge cake.
By marrying traditional buttermilk science with precise heat management, you can achieve that elusive side-profile shot: large, gooey dark chocolate chunks melting into a soft, white crumb, all glistening under a slow-motion cascade of amber maple syrup. This is the ultimate breakfast experience designed for those who take their morning meal seriously.
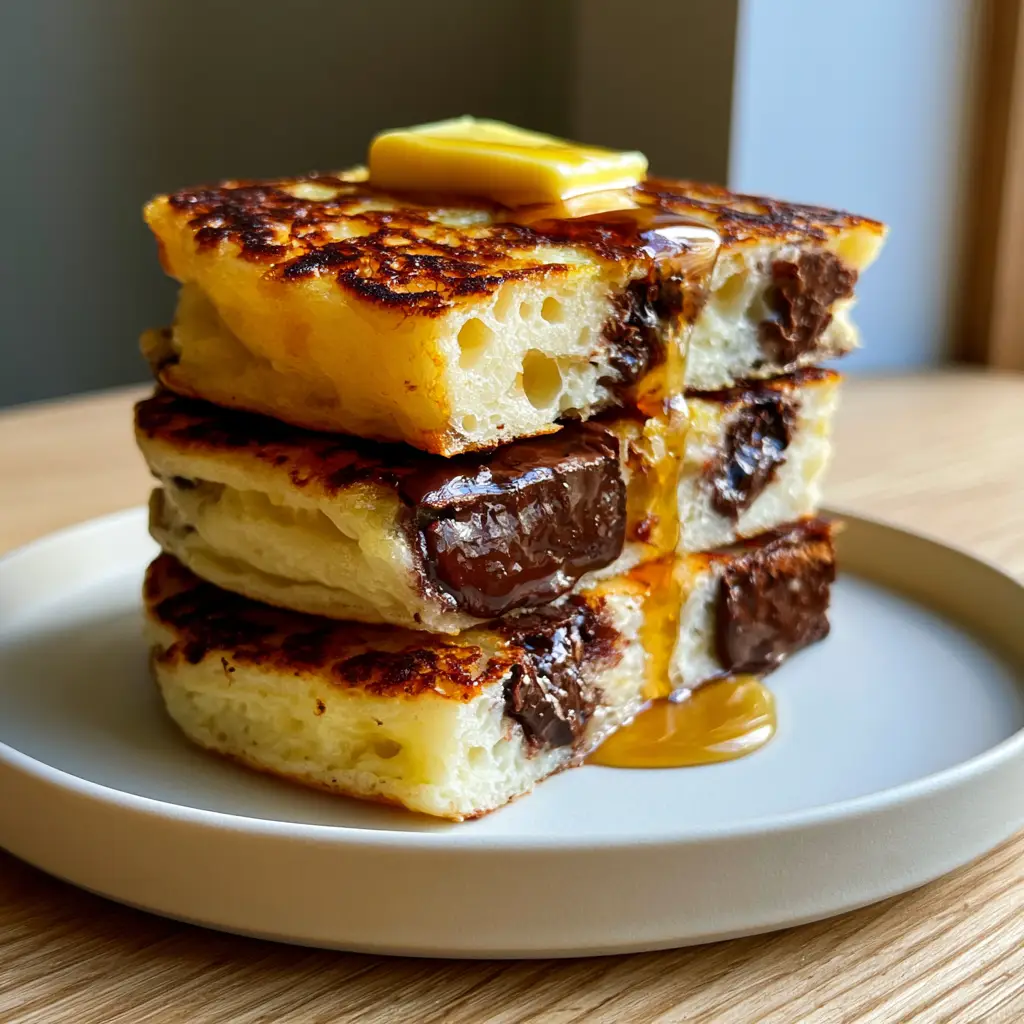
The Anatomy of an Ultra-Thick Breakfast Masterpiece
Achieving a 2-inch height per pancake isn’t luck; it’s culinary forensics. The visual blueprint of this dish relies on a specific ratio of leavening agents to liquid, ensuring the batter holds its shape the moment it hits the heat.
- Vertical Architecture: Three distinct 2-inch (5cm) thick layers that maintain their structural integrity without collapsing.
- Textural Duality: A griddle-toasted, golden-brown crust that provides a slight crunch, contrasting against the aerated, “white-cake” interior.
- Molten Inclusions: Hand-cut semi-sweet chocolate chunks that create pockets of liquid gold rather than the uniform sweetness of standard chips.
- Glossy Finishing: The interplay between the melting salted butter square and the translucent, mid-drip maple syrup coating the edges.
Essential Ingredients for the Ultimate Fluffy Batter
To recreate the chocolate chip pancakes seen in our visual blueprint, you need high-quality foundational ingredients. Each component serves a scientific purpose in achieving that massive rise and soft crumb.
All-Purpose Flour: 2 ½ cups (312g). This provides the necessary gluten structure to support the weight of the chocolate chunks and the height of the rise. Avoid cake flour, which lacks the strength for this specific 2-inch thickness.
Buttermilk: 2 cups (480ml). The acidity in buttermilk reacts with the leavening agents to produce carbon dioxide, creating the “porous air bubbles” visible in the cross-section. It also tenderizes the gluten for a cake-like finish.
Baking Powder & Baking Soda: 1 tbsp (12g) and ½ tsp (3g) respectively. This double-leavening approach ensures an immediate lift when the batter hits the griddle and a secondary rise as it cooks.
Granulated Sugar: 3 tbsp (38g). Beyond sweetness, sugar aids in the Maillard reaction, resulting in that vibrant golden-brown, toasted surface described in our visual prompt.
Salted Butter (Melted & For Topping): 4 tbsp (56g) for the batter, plus a large square for the garnish. The salt in the butter balances the intense sweetness of the chocolate and syrup.
Large Eggs: 2 units. Eggs act as the binder, ensuring the 2-inch stack doesn’t crumble when sliced. They contribute to the rich, “soft white” color of the interior sponge.
Semi-Sweet or Dark Chocolate Chunks: 1 cup (170g). Using chunks instead of chips ensures those “large, gooey, half-melted” visual cues. Hand-chopping a high-quality bar yields the best results.
Maple Syrup: For the final “glossy stream” drizzle. Use Grade A Amber for that classic, translucent mid-drip look on the matte white ceramic plate.
Must-Have Tools for Precision Griddling
Achieving a 2-inch height requires more than just a good recipe; you need the right environment to control the heat. If you’ve recently mastered a chocolate oreo cake, you’ll appreciate the importance of even heat distribution.
A heavy-bottomed non-stick griddle or a well-seasoned cast-iron skillet is essential. These tools provide the thermal mass necessary to sear the exterior to a golden brown while the interior gently steams and rises. You will also need a wide offset spatula to flip these massive stacks without losing their shape.
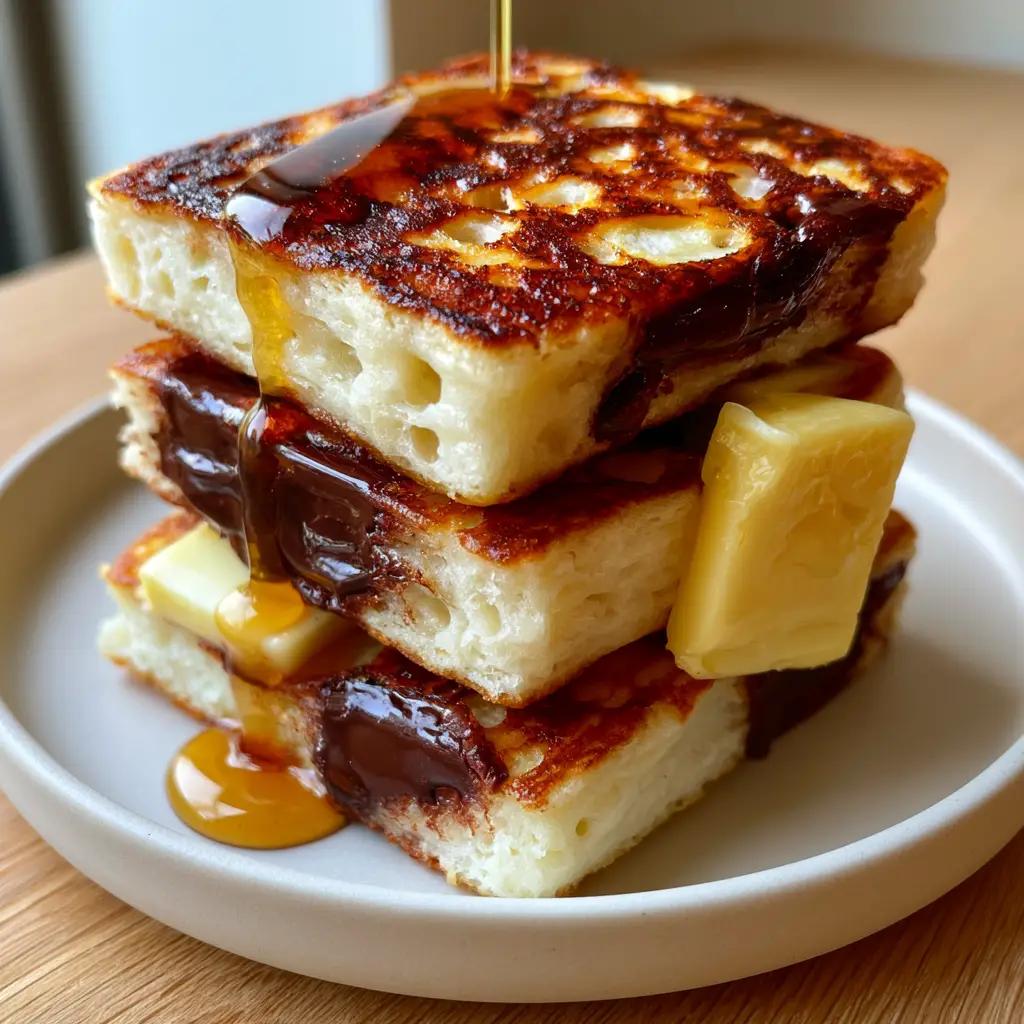
Step-by-Step Guide to the 2-Inch Rise
Building the Aerated Batter
In a large bowl, whisk together your dry ingredients. In a separate jug, combine the buttermilk, eggs, and cooled melted butter. The secret to the “porous air bubbles” is not overmixing. Fold the wet into the dry until just combined; lumps are your friends here, as they keep the gluten relaxed.
The “Low and Slow” Cooking Method
Preheat your griddle to a consistent medium-low heat. Because these chocolate chip pancakes are so thick, high heat will burn the outside before the center is set. Ladle approximately ¾ cup of batter for each pancake. Immediately press your large chocolate chunks into the raw surface rather than mixing them into the bowl; this ensures even distribution and visible gooeyness.
The Sensory Cues for Flipping
Wait for the visual signals. You will see bubbles forming on the edges and the center beginning to look matte rather than shiny. When you peek underneath, the surface should be a vibrant, toasted golden-brown. Flip with one confident motion. The second side only needs about 2-3 minutes to finish the “cake-like” interior.
Expert Tips for Bakery-Style Results
- Rest the Batter: Allow the batter to sit for 10 minutes before cooking. This allows the flour to fully hydrate and the leavening agents to begin their work, leading to a loftier 2-inch height.
- Temperature Control: If your pancakes are browning too fast but remaining raw inside, drop your heat. The “extreme close-up” profile depends on a perfectly cooked, white sponge interior.
- The Butter Square: Place your salted butter square on the stack while the pancakes are piping hot. This creates the “glistening and sliding” effect seen in professional food photography.
- Syrup Strategy: For the perfect “mid-drip” photo, warm your syrup slightly. This reduces viscosity and creates that glossy, translucent coating on the edges of the stack.
Perfect Pairings for a Breakfast Feast
These decadent chocolate chip pancakes are a meal on their own, but they pair beautifully with a variety of textures. For a refreshing beverage pairing, try our honey lemon butterfly fizz to cut through the richness of the dark chocolate.
If you are serving a crowd and need a savory balance, a light arabic salad or a fresh mediterranean salad offers a bright, acidic contrast to the buttery buttermilk sponge. For those planning a full day of cooking, these pancakes are a great start before moving on to chicken dinner recipes later in the evening.
Storage, Reheating, and Freezing
While these are best served immediately on a matte white ceramic plate, you can store leftovers. Place them in an airtight container in the refrigerator for up to 3 days. To maintain the “griddle-toasted” exterior, reheat them in a toaster oven or on a dry skillet rather than the microwave, which can make them rubbery.
To freeze, lay the pancakes in a single layer on a baking sheet until frozen solid, then transfer to a freezer bag. They will keep their structural integrity for up to 2 months. Simply toast from frozen for a quick weekday indulgence.
Frequently Asked Questions
Yes, but chunks provide larger, gooier pockets of melted chocolate that are more visible and decadent, fitting the visual blueprint of a gourmet stack.
Absolutely. Buttermilk provides the acidity needed for a massive rise and breaks down gluten for a soft, cake-like interior texture that regular milk cannot replicate.
The secret to 2-inch thick pancakes is a high flour-to-liquid ratio, resting the batter for 10 minutes, and using both baking powder and baking soda to react with the acidic buttermilk.
Ensure your batter has enough sugar and that you use a small amount of butter or oil on a preheated griddle to trigger the Maillard reaction for that perfectly toasted surface.
This happens when the griddle is too hot. For ultra-thick pancakes, use medium-low heat to allow the interior to steam and rise while the exterior slowly develops a golden-brown crust.
The Ultimate Chocolate Chip Pancake Recipe
Chocolate Chip Pancakes: The Secret to Ultra-Thick 2-Inch Buttermilk Stacks
Ingredients
Equipment
Method
- Whisk flour, baking powder, baking soda, and sugar in a large bowl.
- In a separate jug, whisk buttermilk, eggs, and melted butter.
- Fold wet ingredients into dry until just combined; do not overmix. Rest batter for 10 minutes.
- Heat griddle to medium-low. Lightly grease with butter or oil.
- Ladle 3/4 cup of batter per pancake. Top with chocolate chunks.
- Cook until bubbles form and bottom is golden-brown. Flip and cook for 2-3 more minutes.
- Stack three pancakes, top with a butter square and a generous drizzle of maple syrup.
Notes
Use medium-low heat to cook the 2-inch stacks all the way through without burning the exterior.
Master the Art of the Morning Stack
Creating these ultra-thick chocolate chip pancakes is a rewarding culinary challenge that transforms a simple breakfast into an event. The combination of the vibrant golden-brown exterior and the gooey dark chocolate chunks makes every bite a masterpiece of texture and flavor.
We invite you to share your towering creations with us! If you enjoyed this recipe, please leave a comment below and share your photos on Pinterest. Happy griddling!


