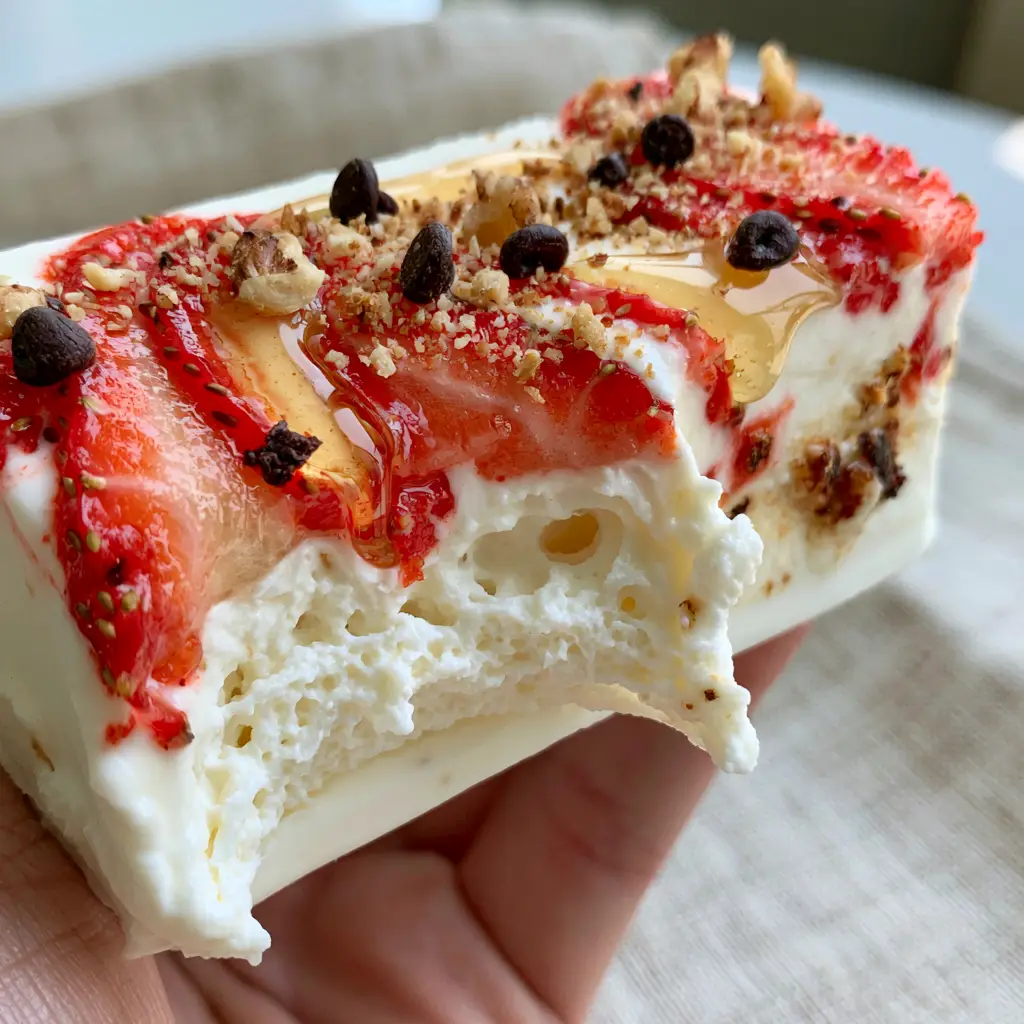
There is nothing quite like the sensation of biting into one of these frozen yogurt bars on a warm afternoon. Imagine a thick, rectangular bar that feels substantial in your hand, offering a dense yet aerated base of whipped Greek yogurt. The first bite reveals a smooth, velvety interior, free from the jagged ice crystals that plague lesser frozen snacks.
This recipe isn’t just about freezing yogurt; it’s about a culinary transformation. By using specific whipping techniques and high-quality ingredients like vibrant red strawberries and golden organic honey, we create a handheld dessert that rivals any high-end gelateria. The contrast between the soft yogurt and the crunch of toasted walnuts and mini dark chocolate chips makes every mouthful a textured adventure.
Whether you are looking for a healthy post-workout snack or a sophisticated dessert to serve at your next gathering, these frozen yogurt bars deliver. They are bright, naturally sweet, and visually stunning with their embedded fruit and honey swirls. Let’s dive into the science and art of making the perfect frozen treat.
Why These Whipped Berry Treats Are a Game Changer
- Ultra-Creamy Texture: Unlike standard yogurt bark, these bars are whipped to incorporate air, ensuring a velvety, soft-bite interior straight from the freezer.
- Forensic Visual Appeal: Every bar features vibrant, thinly sliced red strawberries and a distinct swirl of golden honey for a professional, social-media-ready look.
- Satisfying Crunch: The combination of crushed toasted walnuts and mini dark chocolate chips provides a necessary structural contrast to the creamy foundation.
- Naturally Sweetened: We rely on organic honey and fresh fruit, minimizing refined sugars while maximizing depth of flavor.
The Secret Science of Non-Icy Frozen Yogurt Bars
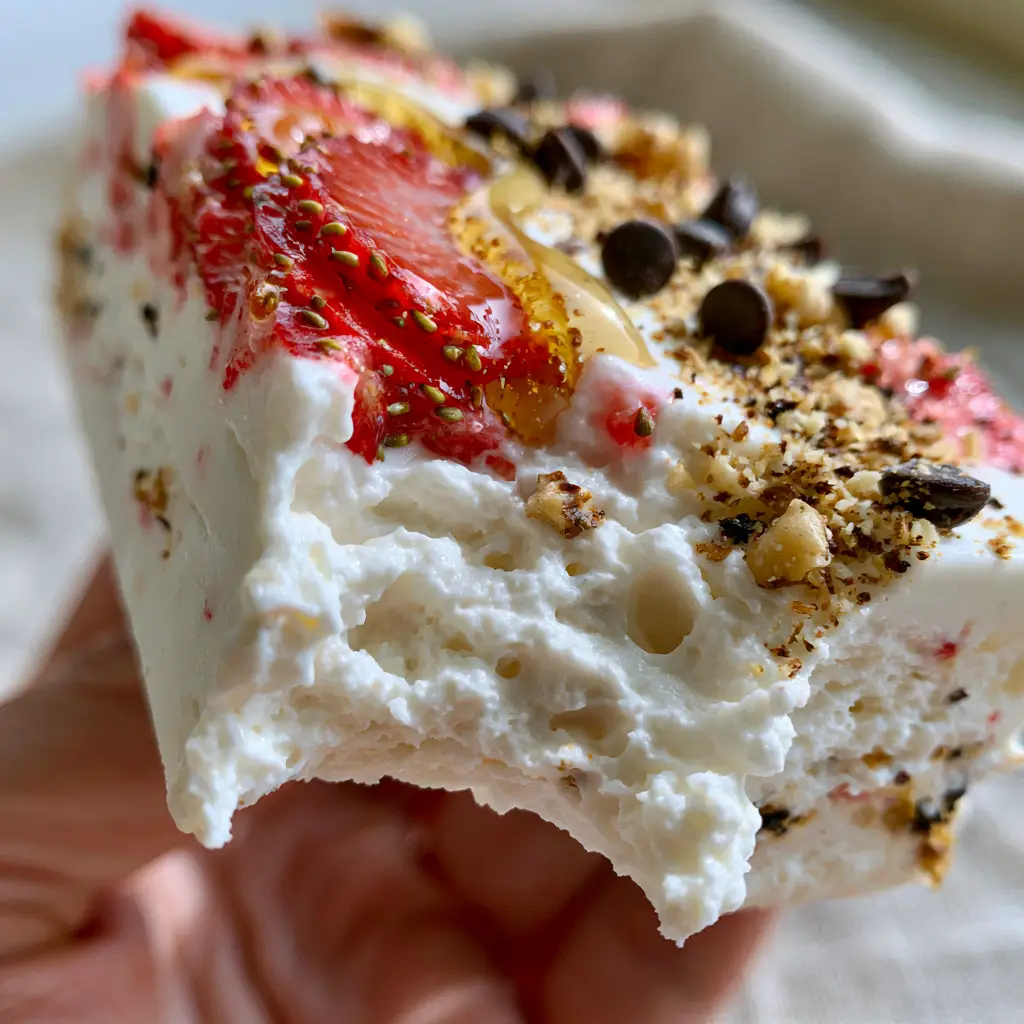
To achieve the “zero visible ice crystals” look described in our visual blueprint, we must understand the role of fat and air. Using full-fat Greek yogurt is non-negotiable here. The fat molecules coat the tongue and prevent large ice crystals from forming, while the whipping process introduces tiny air bubbles that keep the bar soft.
If you enjoy experimenting with different flavor profiles in your frozen snacks, you might also want to check out our creamy peanut butter bars for a nuttier alternative. However, the strawberry-honey combination remains a classic for its brightness and refreshing acidity.
Foundational Ingredients for the Perfect Velvet Interior
Full-Fat Greek Yogurt: You will need 3 cups (720ml) of the thickest Greek yogurt you can find. The high protein and fat content are what provide the structural integrity and the “velvet” mouthfeel.
Heavy Whipping Cream: Adding 1/2 cup (120ml) of heavy cream allows us to aerate the base. This is the “invisible” ingredient that transforms a block of ice into a soft, biteable bar.
Organic Honey: 1/3 cup (80ml) of honey acts as our primary sweetener. Because honey has a lower freezing point than granulated sugar, it keeps the bars from becoming rock hard.
Fresh Red Strawberries: You’ll need about 1 cup (150g) of vibrant, ripe strawberries. Slicing them thinly ensures they integrate into the yogurt without creating large, icy chunks.
Mini Dark Chocolate Chips: 1/4 cup (45g) of mini chips provides a localized burst of cocoa. The “mini” size is crucial so they don’t overpower the delicate strawberry slices.
Toasted Walnuts: 1/3 cup (40g) of walnuts, crushed finely. Toasting them is essential to release their oils and provide a smoky, savory counterpoint to the sweet honey.
Pure Vanilla Extract & Sea Salt: A teaspoon (5ml) of vanilla and a pinch of salt (2g) are the culinary anchors. They enhance the dairy notes and make the strawberry flavor pop.
Essential Equipment for Professional Results
To achieve the handheld, rectangular shape shown in our photography, you need the right tools. A standard 9×9 inch (23x23cm) baking pan lined with parchment paper is the best canvas. The parchment paper is vital; it allows you to lift the entire slab out once frozen without cracking the delicate whipped structure.
You will also need a hand mixer or a stand mixer fitted with a whisk attachment. Manual whisking won’t achieve the level of aeration needed for that “velvety, aerated interior texture.” A sharp mandoline or a very steady hand with a chef’s knife is required for the thinly sliced strawberries.
Mastering the Whipped Foundation: Step-by-Step
Step 1: The Toasting and Prep
Begin by placing your walnuts in a dry skillet over medium heat. Toast them for 3-5 minutes, shaking the pan frequently, until they smell nutty and appear golden brown. Once cooled, crush them into a fine dust with occasional small pieces for texture.
Step 2: Slicing the Strawberries
Wash and hull your strawberries. Using a sharp knife, slice them into rounds no thicker than 1/8 inch (3mm). This ensures they remain tender when frozen. If they are too thick, they will feel like ice cubes inside your creamy bar.
Step 3: Creating the Aerated Yogurt Base
In a large chilled bowl, combine the Greek yogurt, heavy cream, half of the honey, vanilla, and salt. Use your mixer to beat the mixture on medium-high speed for about 3-4 minutes. You are looking for a visual change: the mixture should look glossy, thick, and slightly increased in volume.
Step 4: The Layering Process
Spread the whipped yogurt mixture into your parchment-lined pan. Use an offset spatula to smooth the top until it is perfectly level. This creates the “dense, whipped, ultra-creamy white foundation” that serves as the base of our bars.
Step 5: Embedding and Swirling
Gently press the strawberry slices into the surface of the yogurt. Drizzle the remaining honey in a zig-zag pattern across the top. Use a toothpick to swirl the honey into the yogurt, creating those beautiful golden ribbons. Finish by scattering the mini dark chocolate chips and the toasted walnuts evenly across the surface.
Step 6: The Solid Frozen State
Place the pan in the freezer for at least 6 hours, though overnight is best. You are looking for a “solid frozen state” that still yields slightly when pressed. Once frozen, lift the parchment paper out and use a warm knife to cut the slab into 8-10 uniform rectangular bars.
Expert Tips for Culinary Success
- Avoid Non-Fat Yogurt: Water content is the enemy of creaminess. Non-fat yogurt will result in a brittle, icy bar that lacks the velvet interior we are aiming for.
- The Warm Knife Trick: When slicing the bars, dip your knife in hot water and wipe it dry between each cut. This ensures clean edges and prevents the bars from shattering.
- Honey Temperature: If your honey is too thick, warm it for 10 seconds in the microwave so it drizzles easily, allowing for a more delicate swirl.
- Storage Matters: Once cut, wrap each bar individually in parchment paper and store in an airtight container to prevent freezer burn and odor absorption.
What to Serve With Your Frozen Yogurt Bars
These bars are a fantastic standalone snack, but they also fit beautifully into a larger brunch or dessert spread. If you are serving these for a healthy breakfast, pair them with tiramisu overnight oats for a caffeine-infused start to your day.
For a refreshing afternoon refreshment, these bars pair perfectly with a refreshing butterfly fizz. The citrus notes in the drink complement the honey and strawberry beautifully. If you’re looking for something warm to balance the cold, a slice of warm cinnamon roll cake provides a cozy contrast in temperatures.
Practical Storage and Shelf Life Advice
Because these bars contain fresh fruit and whipped dairy, they are best consumed within two weeks of freezing. Over time, the strawberries may begin to develop small ice crystals due to the moisture migrating. Keep them tucked away in the coldest part of your freezer, away from the door, to maintain that consistent velvety texture.
When you’re ready to eat, let the bar sit at room temperature for about 60 seconds. This brief tempering period allows the whipped fats to soften just enough to achieve that “soft velvet interior” mentioned in our visual prompt.
Frequently Asked Questions
Yes, maple syrup works as a 1:1 substitute, though it will slightly alter the flavor profile. Both syrups help lower the freezing point, keeping the bars biteable.
While you can use frozen strawberries, they tend to release more moisture, which can lead to ice crystals. For the best visual and textural result, thinly sliced fresh strawberries are recommended.
The secret is using full-fat Greek yogurt and incorporating air by whipping it with a hand mixer. The fat and air bubbles prevent large ice crystals from forming, resulting in a velvety texture.
These bars are best consumed within 2 weeks. For longer storage, wrap them individually in parchment paper and place them in a heavy-duty freezer bag to prevent freezer burn.
Dip a sharp chef’s knife into hot water, wipe it completely dry, and then make a firm, swift cut. The heat from the blade helps glide through the fats without shattering the bar.
The Official Strawberry Honey Frozen Yogurt Bars Recipe
Frozen Yogurt Bars: The Ultimate Creamy Strawberry and Honey Treat
Ingredients
Equipment
Method
- Toast walnuts in a dry skillet over medium heat for 3-5 minutes until fragrant, then crush finely.
- Slice fresh strawberries into thin rounds, approximately 1/8 inch (3mm) thick.
- In a large bowl, combine yogurt, cream, half the honey, vanilla, and salt. Beat with a hand mixer on medium-high for 3-4 minutes until aerated and glossy.
- Spread mixture into a lined pan. Press strawberries into the surface, drizzle and swirl remaining honey, and top with chocolate chips and walnuts.
- Freeze for 6+ hours. Lift from pan using parchment and cut into rectangular bars using a warm, sharp knife.
Notes
Temper the bars for 60 seconds before eating for the best texture.
Join the Frozen Yogurt Revolution
These frozen yogurt bars are a testament to how simple ingredients, when treated with professional technique, can become something extraordinary. The combination of whipped dairy, fresh fruit, and the crunch of walnuts creates a sensory experience that is far superior to store-bought alternatives. We encourage you to try this recipe and share your results!
If you enjoyed this recipe, please leave a comment below and let us know how your honey swirls turned out. Don’t forget to save this to your favorite boards on Pinterest so you can make them all summer long!


