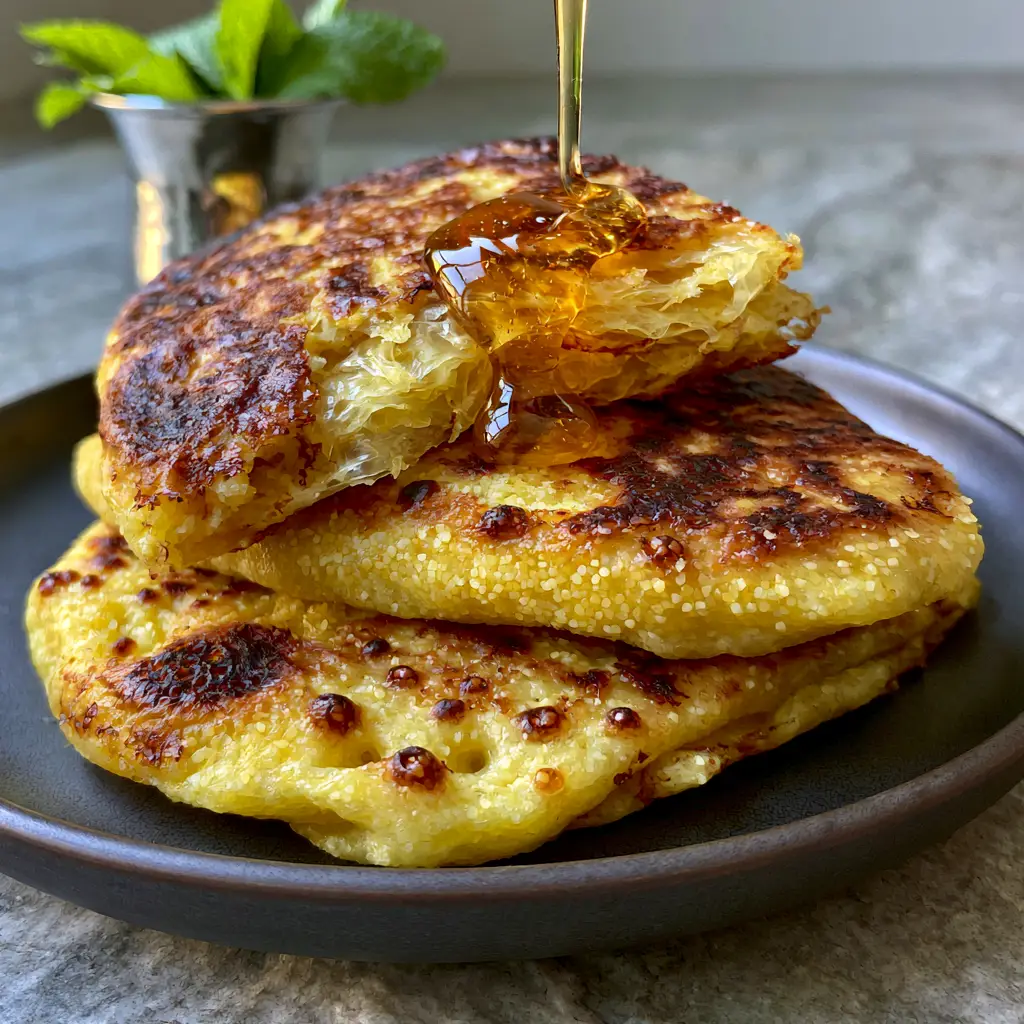
Mastering a traditional Moroccan Msemen recipe is like learning a delicious form of culinary origami. This iconic square flatbread, also known as Rghifa, is a staple of North African hospitality, prized for its unique combination of a crisp, shattered exterior and soft, translucent internal layers.
Imagine standing in a sun-drenched kitchen in Marrakech, the air thick with the aroma of sizzling clarified butter. You pull apart a warm, golden-yellow square, revealing a cross-section of fifty delicate, lacy layers that practically melt on your tongue.
Whether you are serving this for a festive breakfast or a cozy afternoon snack, this Moroccan Msemen recipe delivers a sensory experience that is unmatched by any other flatbread. With a drizzle of amber orange-blossom honey and a steaming glass of mint tea, you are transporting your senses directly to the Maghreb.
Why This Laminated Semolina Flatbread Is a Breakfast Masterpiece
- Structural Perfection: The specific folding technique creates dozens of paper-thin layers that mimic the complexity of a croissant but with a hearty semolina bite.
- Textural Contrast: You get a vibrant golden-yellow crust with deep bronze toasted spots and tiny air bubbles that provide a satisfying crunch.
- Visual Appeal: Topped with a fine semolina dusting and a glistening pour of viscous honey, it is as beautiful to look at as it is to eat.
- Authentic Flavor: The use of melted clarified butter (smneh) provides a deep, nutty richness that regular butter simply cannot achieve.
Essential Components for the Perfect Moroccan Msemen Recipe
To achieve the specific lacy interior and golden-brown toasted exterior shown in our blueprint, you need a balance of high-quality ingredients. Each component serves a functional purpose in the lamination process.
Fine Durum Semolina: 2 cups (320g). This is the backbone of the dough, providing the signature yellow hue and the strength needed to stretch the layers until they are translucent.
All-Purpose Flour: 1 cup (125g). Adding a portion of white flour softens the protein structure, making the dough more extensible and easier to fold without tearing.
Warm Water: 1 1/4 cups (300ml). The water must be blood-warm to relax the gluten instantly, allowing for that paper-thin stretching phase.
Granulated Sugar: 1 tsp (4g). While it adds a hint of sweetness, its primary job is to encourage those beautiful deep bronze toasted spots during pan-frying.
Fine Sea Salt: 1 tsp (6g). Salt is non-negotiable for flavor, balancing the richness of the butter and the sweetness of the honey drizzle.
Active Dry Yeast: 1/4 tsp (1g). We use a very tiny amount—not for a massive rise, but to provide just enough “lift” to create tiny air bubbles between the layers.
Melted Clarified Butter: 1/2 cup (115g). Clarified butter has a higher smoke point and a concentrated flavor, essential for creating the “shatter-effect” of the exterior.
Vegetable Oil: 1/2 cup (120ml). Mixing oil with the butter helps in the stretching process, preventing the dough from snapping back as you pull it thin.
Extra Semolina (for dusting): 1/4 cup (40g). A fine dusting between layers prevents them from fusing together, ensuring you see those fifty distinct folds when torn open.
Must-Have Tools for Lamination Success
Achieving a professional-grade Moroccan Msemen recipe requires more than just your hands. You need a large, clean, neutral stone or laminate surface to stretch the dough until it is thin enough to see through.
A heavy-bottomed cast iron skillet or a traditional Moroccan farrah (clay or iron griddle) is vital for even heat distribution. You will also want a small pastry brush for applying the clarified butter and a sharp bench scraper to portion the dough evenly.
The Step-by-Step Guide to Translucent, Lacy Layers
Phase 1: Kneading the High-Elasticity Dough
In a large bowl, whisk together your fine semolina, all-purpose flour, sugar, salt, and yeast. Gradually add the warm water, mixing by hand until a shaggy dough forms.
Turn the dough onto a clean surface and knead for at least 10 minutes. You are looking for a smooth, supple texture that is slightly tacky but doesn’t stick to your hands; it should feel like a soft earlobe.
Phase 2: The Resting Ritual
Divide the dough into smooth, golf-ball-sized rounds. Coat each ball lightly in vegetable oil to prevent a skin from forming, and let them rest under plastic wrap for 30-45 minutes.
This rest period is crucial; it allows the gluten to relax completely. If you skip this, your Moroccan Msemen recipe will result in tough, rubbery bread rather than the delicate lace we are aiming for.
Phase 3: The “Rghifa” Stretching and Folding Technique
Oil your work surface generously. Place one dough ball in the center and flatten it with your palm. Using oiled hands, gently pull the edges outward until the dough is a massive, paper-thin circle—you should be able to see the countertop through it.
Drizzle the surface with melted clarified butter and sprinkle a pinch of fine semolina. Fold one side into the center, then the other, to form a long rectangle. Drizzle more butter, sprinkle semolina, and fold again to form a perfect square. Repeat this with all dough balls.
Phase 4: Searing to Golden-Brown Perfection
Heat your skillet over medium-high heat. Take a folded square and gently pat it out to flatten it slightly. Place it in the dry or lightly oiled pan.
Cook for 2-3 minutes per side. Watch for the visual cues: the bread should puff up with tiny air bubbles, and the exterior should transform into a vibrant golden-yellow with scattered bronze toasted spots.
Expert Tips for the Fluffiest Moroccan Msemen
- The Windowpane Test: When stretching, the dough should be thin enough that it is almost translucent. If it tears easily, let the dough balls rest for another 15 minutes.
- Don’t Scrimp on Butter: The fat is what separates the layers. Without enough butter and semolina dusting between folds, the dough will simply fuse into one thick piece.
- Heat Management: If the pan is too hot, the outside will burn before the internal layers cook. If it’s too low, the bread will become dry and hard. Look for a steady sizzle.
- Keep it Covered: As you stack the finished Msemen, keep them covered with a clean kitchen towel to trap the steam, which keeps them soft and pliable.
Flavor Pairings and Serving Suggestions
A Moroccan Msemen recipe is traditionally served with a small bowl of melted butter and honey for dipping. To mimic our visual blueprint, drizzle a thick stream of orange-blossom honey over a stack of three, allowing it to glisten in the light.
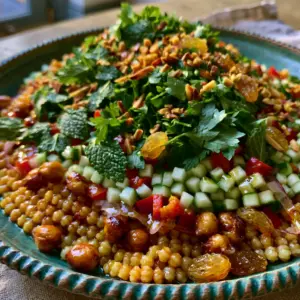
For a complete North African feast, serve these alongside a hearty vegan Moroccan stew or as a side to a fragrant Moroccan couscous salad. If you prefer a savory application, they make an incredible fresh flatbread wrap (coming soon) for grilled meats.
Don’t forget the drink! A silver Moroccan tea glass filled with hot tea and fresh bright green mint leaves is the essential companion to cut through the buttery richness of the bread.
Managing Leftovers: Storage and Reheating
Msemen is best enjoyed fresh from the griddle, but it stores remarkably well. You can keep them in an airtight bag at room temperature for 2 days, or in the refrigerator for up to 5 days.
To reheat, avoid the microwave, which can make the semolina dough chewy. Instead, toss them back onto a hot, dry skillet for 60 seconds per side until they regain their signature crisp exterior and the internal layers soften.
You can also freeze these flatbreads! Place sheets of parchment paper between each square, wrap them tightly in foil, and freeze for up to 3 months. Reheat directly from frozen on a low-heat griddle.
Common Questions About This Moroccan Msemen Recipe
While possible, you will lose the signature yellow color and the slightly gritty, hearty texture that fine durum semolina provides. A mix is best for the perfect balance of strength and softness.
You can, but clarified butter (or smneh) is preferred because it has a higher smoke point and lower water content, which helps create crisper, more distinct internal layers.
Yes! You can fold the Msemen and keep them in the fridge overnight before frying, or cook them fully and reheat them on a griddle the next day for a fresh-baked taste.
Tearing usually means the gluten hasn’t rested enough. Let your dough balls sit for an additional 15-20 minutes to relax before attempting to stretch them paper-thin.
The Ultimate Moroccan Msemen Recipe Card
Moroccan Msemen Recipe: The Secret to 50 Paper-Thin Buttery Layers
Ingredients
Equipment
Method
- Whisk semolina, flour, sugar, salt, and yeast in a large bowl. Gradually add warm water until a shaggy dough forms.
- Knead the dough for 10 minutes by hand or 7 minutes in a stand mixer until smooth and elastic.
- Divide into 8 balls, coat with oil, and let rest covered for 45 minutes.
- Stretch one ball into a paper-thin translucent circle. Apply butter and a dusting of semolina. Fold into a square using the Rghifa method.
- Flatten the square slightly and cook on a medium-high skillet for 2-3 minutes per side until golden with bronze toasted spots.
- Stack, drizzle with honey, and serve with mint tea.
Notes
Ensure the dough rests fully to prevent tearing during stretching.

Bring the Flavors of Morocco to Your Kitchen
There is nothing quite like the satisfaction of tearing into a stack of homemade Msemen and seeing those fifty translucent layers you created from scratch. This Moroccan Msemen recipe is more than just a meal; it is a celebration of texture and tradition.
If you enjoyed this journey into Moroccan baking, you might also love exploring our authentic manakeesh recipe or trying your hand at a traditional savory mansaf. Both offer unique insights into the world of Middle Eastern and North African flatbreads.
Did you achieve those perfect bronze spots? Tag us in your photos and share this recipe on Pinterest! Don’t forget to leave a comment below telling us how your first batch turned out.