Mastering Nespresso coffee recipes at home transforms your morning routine from a simple caffeine fix into a high-end cafe experience. This specific iced caramel macchiato is designed for the modern aesthetic, featuring distinct layers that look just as good as they taste. By leveraging the precision of Nespresso’s extraction, we can create a beverage that rivals any specialty coffee shop.
The visual appeal of this drink is rooted in its structural integrity, starting with a base of dense caramel and ending with a pillowy microfoam. We aren’t just making coffee; we are constructing a sensory experience that balances the bitterness of roasted beans with the silky sweetness of dairy and caramel. Whether you are a seasoned barista or a Nespresso novice, this guide provides the forensic detail needed for perfection.
In this article, we will explore the science behind the perfect pour, the importance of ice clarity, and how to achieve that elusive “cascading” effect seen in professional food photography. Prepare to elevate your home barista skills with the most visually stunning of all Nespresso coffee recipes.
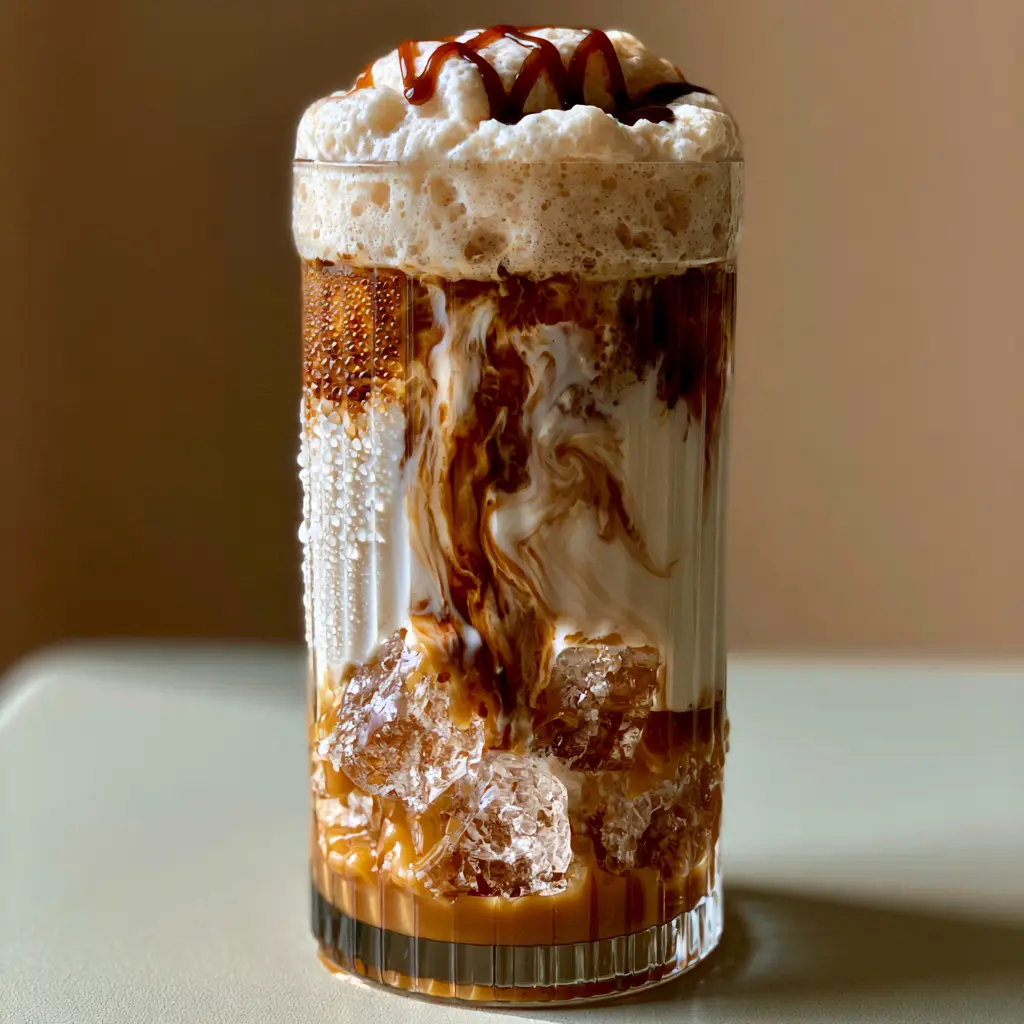
Why This Layered Caramel Masterpiece Works
- Textural Contrast: The combination of velvety whole milk and thick, stable cold foam creates a multi-dimensional mouthfeel that changes with every sip.
- Visual Precision: Utilizing a tall ribbed glass allows the cascading espresso to be seen in high definition, mimicking the professional aesthetic of modern social media trends.
- Flavor Balance: The double shot of Nespresso espresso provides a robust backbone that isn’t overshadowed by the golden caramel sauce.
- Temperature Control: By using large crystal-clear ice cubes, we minimize dilution, ensuring the coffee remains potent until the very last drop.
The Anatomy of a Perfect Nespresso Coffee Recipes Build
To achieve the result shown in our visual blueprint, you need specific ingredients that interact correctly based on density. The heaviest element—the caramel—must sit at the bottom, while the lightest—the cold foam—floats on top. This is the fundamental physics of layered coffee drinks.
Nespresso Espresso Capsules: You will need 2 capsules (approx. 80ml total) of a high-intensity roast. Look for pods with notes of cocoa or toasted cereal to complement the caramel sauce. A darker roast ensures the coffee flavor cuts through the fat of the whole milk.
Golden Caramel Sauce: Use 2 tbsp (30ml) of a high-quality, viscous caramel sauce. A thin syrup will simply mix into the milk immediately; you need a “sauce” consistency to anchor the base of the ribbed glass. This provides the “dense golden” look required for the blueprint.
Cold Whole Milk: 3/4 cup (180ml) of full-fat whole milk is essential for the “rich, velvety” texture described. Lower fat milks lack the protein and fat structure to create the beautiful swirling effect when the hot espresso hits the cold liquid.
Heavy Cream and Skim Milk for Foam: For the “thick, pillowy layer of microfoam,” a 50/50 blend of 2 tbsp (30ml) heavy cream and 2 tbsp (30ml) skim milk works best. The skim milk provides the structure (protein), while the heavy cream provides the stability and shine.
Crystal-Clear Ice: You will need 4-5 large clear ice cubes. These are made by directional freezing, which removes trapped air bubbles. Standard cloudy ice will melt faster and ruin the aesthetic “handheld smartphone photo” look we are targeting.
Dark Caramel Drizzle: A finishing touch of 1 tsp (5ml) dark caramel syrup. This should be slightly darker than the base sauce to create visual depth in the zigzag pattern atop the foam.
Essential Barista Tools for Your Kitchen
Achieving this level of Nespresso coffee recipes requires more than just the machine itself. You need a tall ribbed glass to emphasize the verticality of the layers and the condensation droplets. A milk frother (like the Aeroccino or a handheld wand) is vital for achieving the microfoam consistency.
You will also need a long-handled bar spoon. This allows you to guide the espresso pour down the side of the glass or over the back of the spoon, which slows the liquid and prevents the layers from mixing prematurely. A small pitcher for your espresso extraction is also helpful for precise pouring.
Constructing the Layered Aesthetic: Step-by-Step
Phase 1: Preparing the Foundation
Start by cleaning your tall ribbed glass to ensure no smudges interfere with the light. Squeeze 2 tbsp (30ml) of the dense golden caramel sauce directly into the bottom of the glass. Use a circular motion to ensure the sauce coats the base evenly, creating that solid golden anchor.
Carefully add your crystal-clear ice cubes one by one. Do not drop them, as the weight can splash the caramel sauce up the sides of the glass prematurely. The ice should reach about 3/4 of the way up the glass, providing the internal structure for the milk to cascade through.
Phase 2: The Milk and Espresso Cascade
Slowly pour 3/4 cup (180ml) of cold whole milk over the ice. As the milk hits the caramel and ice, it should begin to settle, but stay distinct from the caramel base. If you’re looking for more breakfast inspiration to go with your coffee, check out this fluffy pancake recipe for a perfect pairing.
Extract your double shot of Nespresso espresso into a separate small pitcher. While the espresso is still hot and has its natural crema, slowly pour it directly into the center of the milk. Watch for the sensory cue of “cascading swirls”—the dark coffee will bloom outward through the white milk, creating a marbled effect that is the hallmark of professional Nespresso coffee recipes.
Phase 3: The Microfoam Topping
In a separate frother or small jar, combine your heavy cream and skim milk. Froth on the “cold” setting until the mixture doubles in volume and looks like wet paint or melted ice cream. This is your pillowy microfoam.
Gently spoon the foam over the top of the coffee until it reaches the brim of the glass. It should sit proudly above the espresso-milk layer. Finally, take your dark caramel syrup and create a light zigzag drizzle across the foam. The weight of the drizzle should be light enough to sit on top of the foam without sinking immediately.
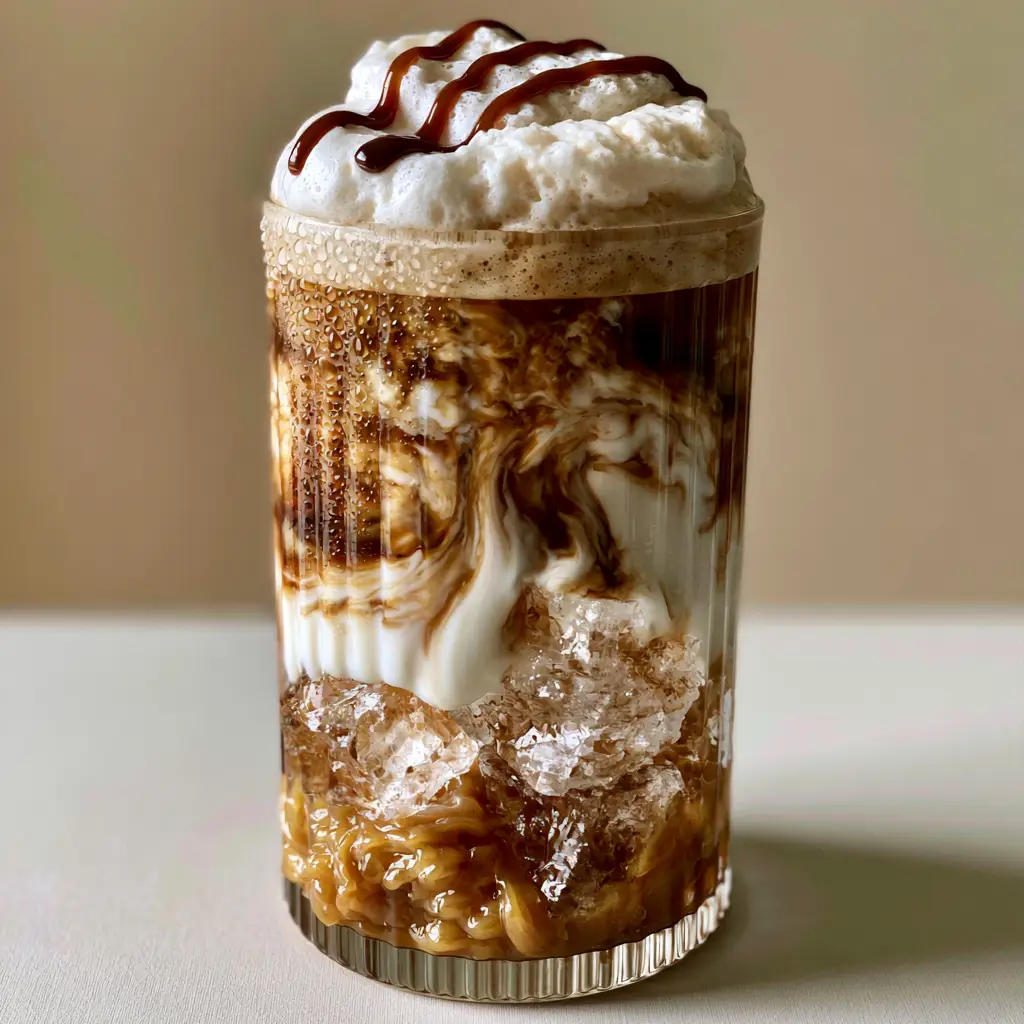
Expert Tips for Success with Nespresso
- Chill Your Glass: Place your ribbed glass in the freezer for 5 minutes before building the drink. This encourages the formation of those beautiful “condensation droplets” described in the prompt.
- The “Slow Pour” Technique: To keep the layers sharp, pour the espresso over the back of a spoon held just above the milk line. This breaks the fall of the hot liquid.
- Water Quality: Use filtered water in your Nespresso machine. Impurities in tap water can alter the acidity of the espresso, clashing with the sweetness of the caramel.
- Freshness Matters: Froth your cold foam last. If it sits too long, the air bubbles will enlarge, and you will lose that “pillowy microfoam” texture.
The Science of Cold Foam Stability
Why do some Nespresso coffee recipes have foam that disappears in seconds while others stay thick? It comes down to protein denaturation. When you froth milk, you are incorporating air and stretching protein molecules. Using cold milk is essential because the fats are solid, which helps support the air bubbles. This is why a mix of heavy cream (high fat) and skim milk (high protein) creates the most stable foam for an iced beverage.
If you enjoy experimenting with textures in the morning, you might also find success with overnight oats recipes, which rely on similar hydration and setting principles to achieve a creamy consistency.
Storage and Make-Ahead Advice
This drink is designed for immediate consumption to enjoy the temperature contrast between the hot espresso and cold milk. However, you can prep the caramel and ice in the glass and keep it in the freezer for up to 20 minutes. We do not recommend storing the fully assembled drink, as the ice will eventually melt and the layers will bleed together.
For those who love sweet treats but need something more shelf-stable, exploring easy dessert recipes like cookies or brownies is a better path for long-term storage.
What to Serve With This Aesthetic Iced Coffee
This rich, caramel-forward drink pairs beautifully with savory or slightly salty snacks to balance the palate. Consider serving it alongside a stack of pancakes or even a unique zucchini onion pie for a sophisticated brunch. The saltiness of the onions and the earthiness of the zucchini provide a fantastic counterpoint to the dark caramel drizzle.
If you are hosting a larger gathering, these Nespresso coffee recipes act as a great “welcome drink” followed by a variety of cake pop recipes for a dessert-focused celebration.
Frequently Asked Questions
You can, but the visual result will change. Caramel sauce is denser and stays at the bottom of the glass, creating a layered look. Caramel syrup is thinner and will likely mix into the milk immediately, resulting in a more uniform brown color.
Crystal-clear ice is achieved through directional freezing. You can use a small insulated cooler inside your freezer with the lid off; the water freezes from the top down, pushing air and impurities to the bottom, leaving the top layer clear.
For a Macchiato-style drink, the milk and ice go in first, followed by the espresso. This allows the hot coffee to sit on top of the cold milk and slowly ‘bleed’ downward, creating the beautiful aesthetic swirls.
Pods with high intensity (level 8+) and notes of caramel, cocoa, or oak work best. For Vertuo, the ‘Double Espresso Scuro’ or ‘Ice Leggero’ are ideal, while for Original, ‘Arpeggio’ or ‘Kazaar’ provide the necessary strength to stand up to milk and ice.
Cold foam requires cold proteins and fats. If your milk is room temperature, the bubbles will be large and unstable. Using a blend of skim milk (for structure) and heavy cream (for thickness) ensures a dense, microfoam texture.
The Ultimate Nespresso Iced Caramel Macchiato
Nespresso Coffee Recipes: The Ultimate Layered Iced Caramel Macchiato
Ingredients
Equipment
Method
- Pour the golden caramel sauce into the bottom of the tall ribbed glass, ensuring an even layer.
- Carefully place the crystal-clear ice cubes on top of the caramel base.
- Slowly pour the cold whole milk over the ice, allowing it to settle above the caramel.
- Extract two Nespresso pods and pour the hot espresso into the center of the milk to create a swirling cascade effect.
- Whisk heavy cream and skim milk on a cold setting until thick and pillowy; spoon onto the coffee.
- Apply a light zigzag drizzle of dark caramel syrup over the microfoam.
Notes
Ensure milk is very cold for the most stable microfoam.

Closing & Call to Action
Elevating your morning with these Nespresso coffee recipes is a simple luxury that yields professional results. The key is in the layering—respecting the density of each ingredient to create that perfect visual cascade. If you enjoyed this recipe, please leave a comment below and let us know which Nespresso pod you chose for your brew!
Don’t forget to share your aesthetic coffee photos with us on Pinterest and tag @purelyhomecooked so we can see your beautiful ribbed glass creations!


