There is a specific culinary magic that happens when high-heat roasting meets the sharp, salty profile of aged cheese. This Parmesan zucchini recipe isn’t just another side dish; it is a masterclass in texture management and flavor extraction. By transforming humble summer squash into vibrant deep green rounds topped with a bubbly, golden-brown crown, we bridge the gap between healthy vegetable prep and indulgent comfort food.
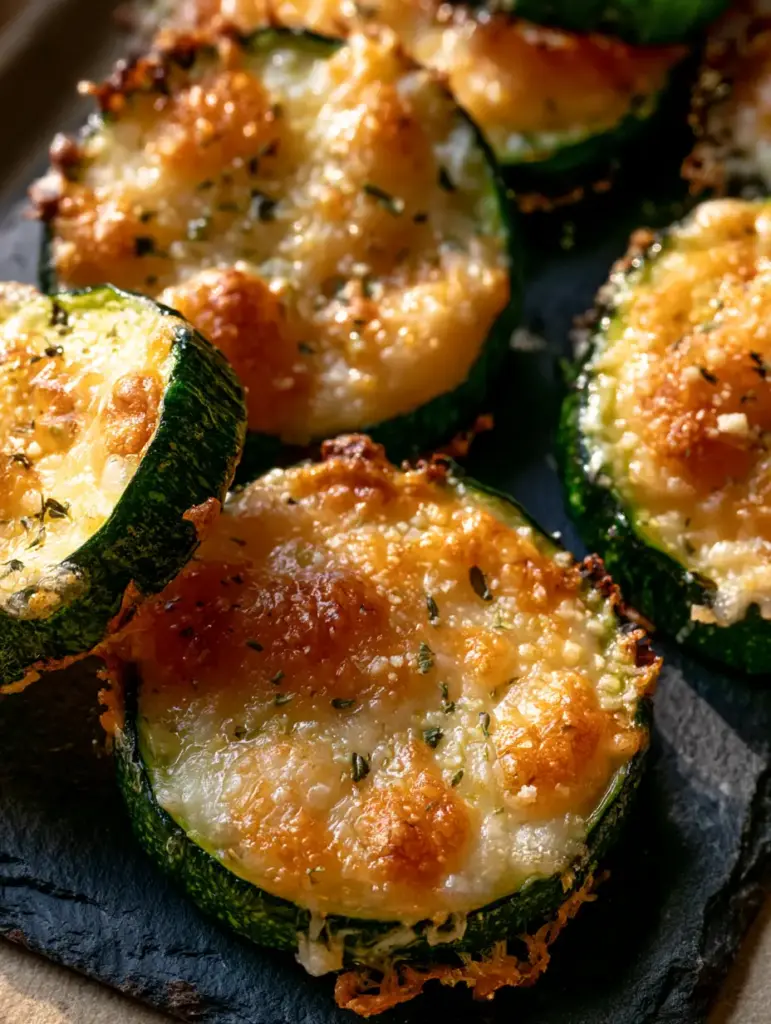
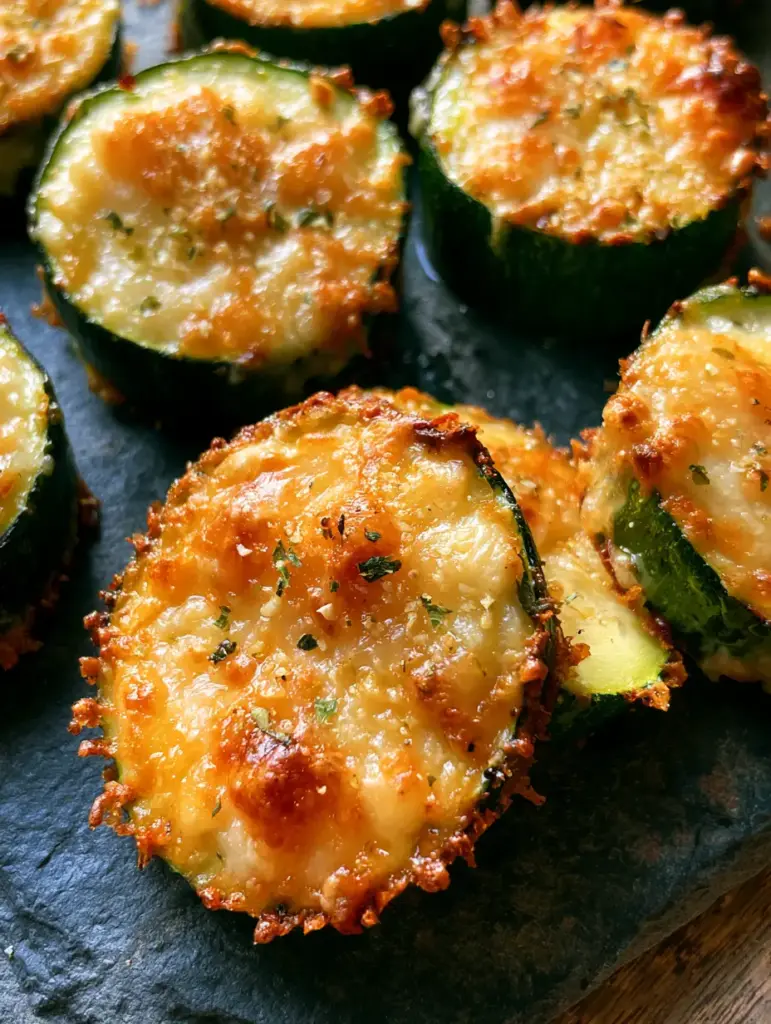
Imagine pulling a tray from the oven where each slice is rimmed with delicate, crispy cheese lace edges that shatter upon the first bite. The visual contrast of the deep green zucchini skin against the toasted garlic powder and tiny green specks of dried Italian herbs makes this a centerpiece-worthy addition to any meal. Whether you are looking for a low-carb snack or a sophisticated side for a dark slate board presentation, this method delivers professional results every time.
Achieving that glistening olive oil sheen without making the zucchini soggy requires a deep understanding of moisture control. In this guide, we will explore the science of roasting, the importance of cheese density, and how to capture that perfect handheld smartphone photo aesthetic for your own culinary portfolio. Let’s dive into the ultimate way to prepare this seasonal staple.
Why This Crispy Roasted Squash Will Change Your Side Dish Game
- The Ultimate Texture Contrast: You get a soft, succulent zucchini interior paired with a shatteringly crisp, bubbly parmesan crust.
- Visual Gourmet Appeal: The combination of vibrant green skins and golden-brown “lace” edges ensures every plate looks like a high-end restaurant feature.
- Rapid Maillard Reaction: We utilize toasted garlic powder and high-heat roasting to develop deep savory notes in under 20 minutes.
- Scientifically Sound Prep: Our method prevents the dreaded “mushy zucchini” syndrome by focusing on surface area and heat distribution.
The Essential Components for a Perfect Savory Crust
Medium Zucchini (approx. 500g): Choose firm, straight zucchini with smooth skin to ensure uniform “thick-cut” rounds that hold their shape during roasting. The vibrant green color is essential for that fresh, macro-shot aesthetic.
Finely Grated Parmesan Cheese (90g / 1 cup): Use high-quality, aged Parmesan for the best melt and “lace” formation. Finely grated cheese creates a more consistent, bubbly crust than thick shreds.
Extra Virgin Olive Oil (30ml / 2 tbsp): This provides the necessary fat for heat conduction and creates the glistening sheen seen in professional food photography. It also helps the herbs adhere to the cheese.
Toasted Garlic Powder (3g / 1 tsp): Unlike fresh garlic which can burn at high temperatures, garlic powder integrates into the cheese crust for a uniform, toasted flavor profile. It adds the fine grains visible on the surface of the finished dish.
Dried Italian Seasoning (2g / 1 tsp): A blend of oregano, basil, and thyme provides those tiny green specks that break up the golden color of the cheese. It adds an aromatic herbal layer that complements the squash.
Fine Sea Salt and Cracked Black Pepper: These foundational seasonings enhance the natural sweetness of the zucchini while balancing the saltiness of the Parmesan cheese.
Must-Have Kitchen Tools for Culinary Precision
To achieve the “bubbly and golden-brown” look described in our visual blueprint, you need the right conductivity. A heavy-duty rimmed baking sheet is non-negotiable for even heat distribution across the zucchini bottoms.
I highly recommend using parchment paper or a high-quality silicone baking mat. This is the secret to developing those “crispy cheese lace edges” without the rounds sticking to the pan and tearing when you try to lift them.
A sharp chef’s knife or a mandoline slicer is vital for ensuring every round is exactly 1/2-inch (1.25cm) thick. Uniformity in cutting leads to uniformity in cooking, ensuring no slice is overdone while others remain raw.
The Step-by-Step Blueprint for Golden Parmesan Zucchini
Phase 1: Precision Slicing and Surface Preparation
Start by preheating your oven to 425°F (220°C). This high temperature is critical for evaporating surface moisture quickly, allowing the cheese to fry against the vegetable surface rather than steam.
Wash and dry your zucchini thoroughly. Slice them into thick-cut rounds, aiming for a consistent 1/2-inch (1.25cm) thickness. Place the rounds in a large mixing bowl and toss gently with the olive oil, sea salt, and black pepper until each slice has a light sheen.
Phase 2: The Cheese Crusting Technique
In a small bowl, whisk together the finely grated Parmesan, toasted garlic powder, and dried Italian herbs. This ensures the aromatics are evenly distributed within the cheese matrix before it hits the heat.
Arrange the zucchini rounds on your prepared baking sheet with at least an inch of space between them. Use a spoon to mound a generous tablespoon of the cheese mixture onto each round, pressing down slightly so it stays in place. You want the cheese to slightly overlap the edges of the zucchini; this is what creates that iconic lacy border as it melts.
Phase 3: The High-Heat Roast and Sensory Cues
Slide the tray into the center rack of the oven. Roast for 12-15 minutes. Around the 10-minute mark, begin watching for sensory cues: you should hear a gentle sizzling sound and smell the nutty aroma of toasted cheese.
The zucchini is ready when the cheese is bubbly and has turned a deep golden-brown. If you want an even crispier top, you can switch to the broiler for the final 60 seconds, but watch closely to prevent the Italian herbs from charring.
Phase 4: The Resting Period and Presentation
Remove the pan from the oven and let it sit for 2-3 minutes. This resting phase allows the melted cheese to firm up slightly, ensuring the “lace” edges stay attached to the zucchini when moved. For a rustic, professional look, serve these on a dark slate board, tilting one slice to show off the browned, crisp bottom.
Expert Tips for the Elite Home Cook
- Moisture Management: If your zucchini feels particularly watery, sprinkle the raw slices with a pinch of salt and let them sit for 10 minutes, then pat dry before oiling. This leads to a firmer “bite.”
- Cheese Quality Matters: Avoid the “green shaker can” cheese. Real Parmigiano-Reggiano has a higher fat-to-protein ratio that results in better bubbling and a more complex flavor profile.
- The Crowding Trap: Never overlap the rounds on the pan. If they are too close, they will release steam and soften the cheese crust rather than crisping it.
- Oil Spray Finish: For that extra glistening macro-shot look, give the rounds a very light mist of olive oil spray immediately after they come out of the oven.
Mastering the Art of Storage and Reheating
While these are best served immediately to enjoy the shatter-crisp edges, you can store leftovers in an airtight container for up to 3 days. The zucchini will soften significantly in the fridge due to its high water content.
To revive the texture, avoid the microwave at all costs—it will turn the dish into a soggy mess. Instead, reheat the rounds in an air fryer at 350°F (175°C) for 3-4 minutes or back in a hot oven until the cheese begins to sizzle again.
Freezing is not recommended for this specific recipe. The cellular structure of the zucchini breaks down when frozen, and the delicate cheese lace will lose its structural integrity upon thawing.
Flavor Pairings and Internal Culinary Explorations
This Parmesan zucchini is a versatile powerhouse. For a complete Italian-inspired dinner, serve these alongside a hearty Cajun chicken and sausage pasta for a spicy kick, or keep it light with a fresh chickpea tuna salad.
If you enjoy the flavor profile of this dish but want a different format, you might try these parmesan zucchini muffins for a grab-and-go snack. For those who prefer a more traditional roasted vegetable medley, our guide on garlic parmesan roasted zucchini offers a similar flavor profile with different cutting techniques.
For a high-protein breakfast, these rounds make an excellent side to a classic Italian frittata, providing a salty crunch that cuts through the richness of the eggs.
Common Questions About Crispy Zucchini Rounds
Yes! Cook the rounds at 400°F (200°C) for 8-10 minutes. Ensure they are in a single layer and use a piece of parchment paper to catch the melting cheese lace.
For the specific bubbly, golden-brown crust and crispy lace edges shown, it is best to use freshly and finely grated aged Parmesan. Canned versions often contain anti-clumping agents that prevent proper melting.
The secret lies in high heat (425°F) and avoiding overcrowding on the pan. Additionally, ensuring the zucchini is sliced at least 1/2-inch thick allows the outside to crisp before the inside turns to mush.
Absolutely. This recipe is naturally low-carb and high in healthy fats and protein, making it an ideal side dish for those following a ketogenic or low-glycemic lifestyle.
This usually happens if the zucchini was too oily or if the rounds weren’t allowed to rest for 2-3 minutes after leaving the oven. The resting period allows the cheese to ‘bond’ to the vegetable surface.
The Ultimate Parmesan Zucchini Recipe
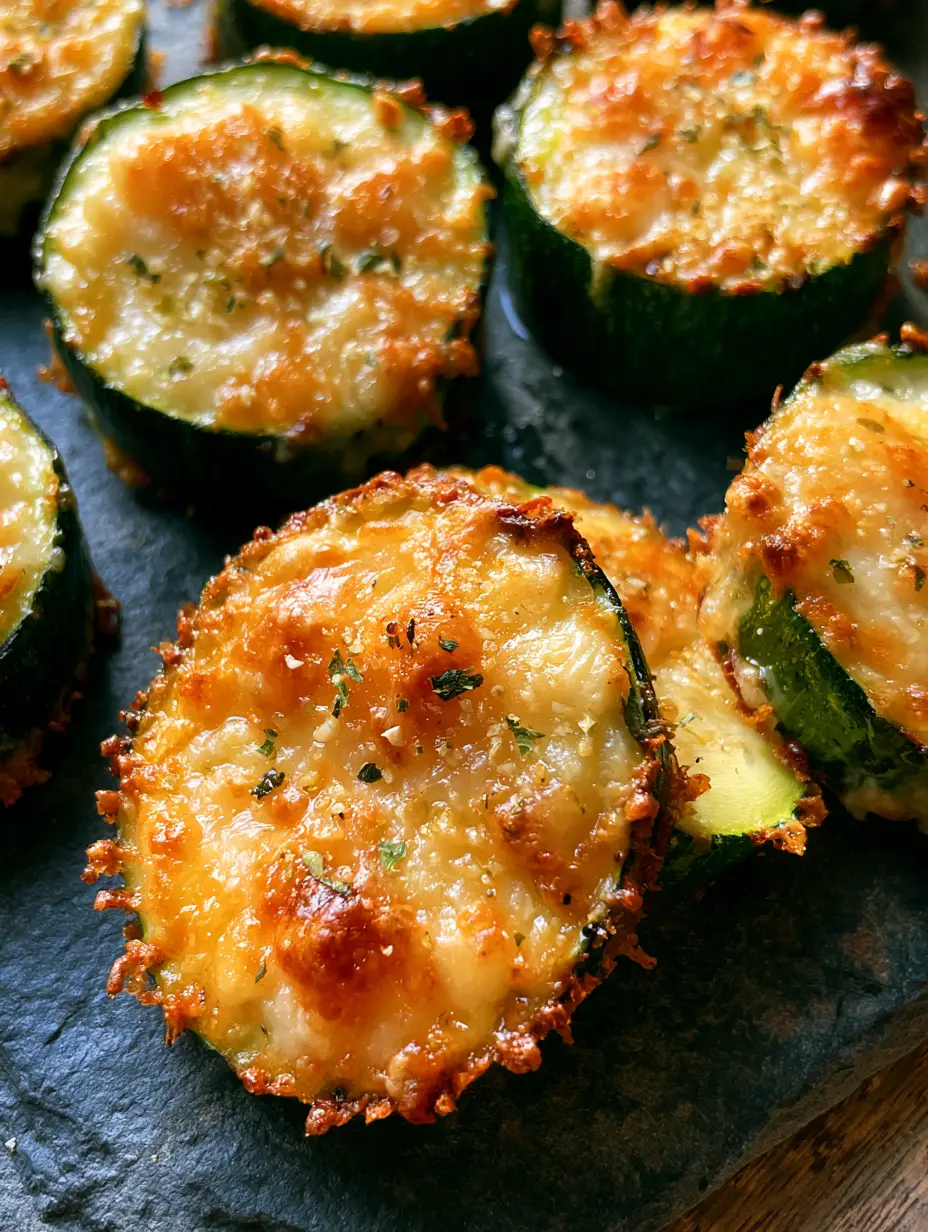
Parmesan Zucchini Rounds with a Crispy Golden Garlic Crust
Ingredients
Equipment
Method
- Preheat oven to 425°F (220°C) and line a baking sheet with parchment paper.
- Slice zucchini into 1/2-inch rounds. Toss in a bowl with olive oil, salt, and pepper until glistening.
- Mix parmesan, garlic powder, and Italian herbs. Place zucchini on the sheet and top each with a generous tablespoon of the cheese mixture, pressing lightly.
- Bake for 12-15 minutes until the cheese is bubbly and deep golden-brown with visible crispy lace edges.
- Let rest for 3 minutes to allow the cheese lace to set before serving on a slate board.
Notes
Use finely grated cheese rather than shredded for the best bubbly crust texture.
Join the Authentic Flavor Community
We hope this Parmesan zucchini recipe brings a burst of flavor and a professional touch to your kitchen table. The combination of simple ingredients and precise technique is what elevates a meal from ordinary to extraordinary. If you enjoyed this recipe, please leave a comment below and let us know how your cheese crust turned out!
Don’t forget to share your culinary creations with us! Follow and tag authenticflavorfinds on Pinterest for more visual recipe inspiration and gourmet tips. Pinning this recipe helps other home cooks find the secret to the perfect crispy vegetable side dish.