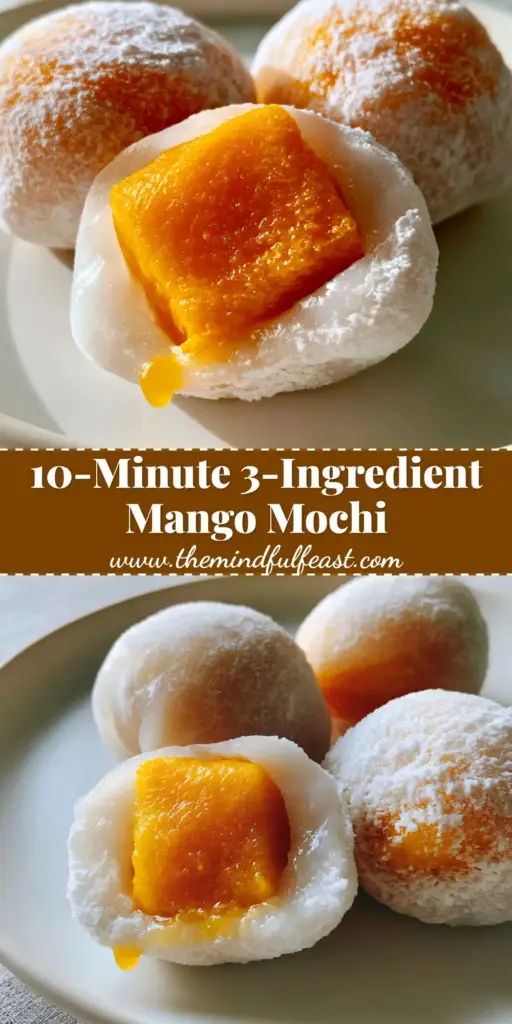
Mango mochi is the pinnacle of refreshing, chewy indulgence, combining the ancient art of Japanese rice cakes with the vibrant, tropical soul of sun-ripened fruit. This isn’t just a snack; it is a sensory journey that begins with a delicate, translucent skin and ends with a burst of chilled mango juice.
When you hold a piece of this mango mochi, you immediately notice the “Q-texture”—a specific culinary term for that perfect, bouncy resistance that gives way to a soft, supple interior. It is the gold standard of Asian confectionery.
Whether you are a seasoned wagashi enthusiast or a curious home cook, mastering the mango mochi requires a blend of precision and intuition. In this guide, we will break down the science of glutinous rice flour to ensure your results match the stunning, professional-grade visuals of a high-end Tokyo boutique.
The Irresistible Allure of the Perfect Mango Mochi
What makes this specific mango mochi recipe stand out in a sea of desserts? It is the commitment to the “fresh-is-best” philosophy, ensuring every bite captures the essence of summer.
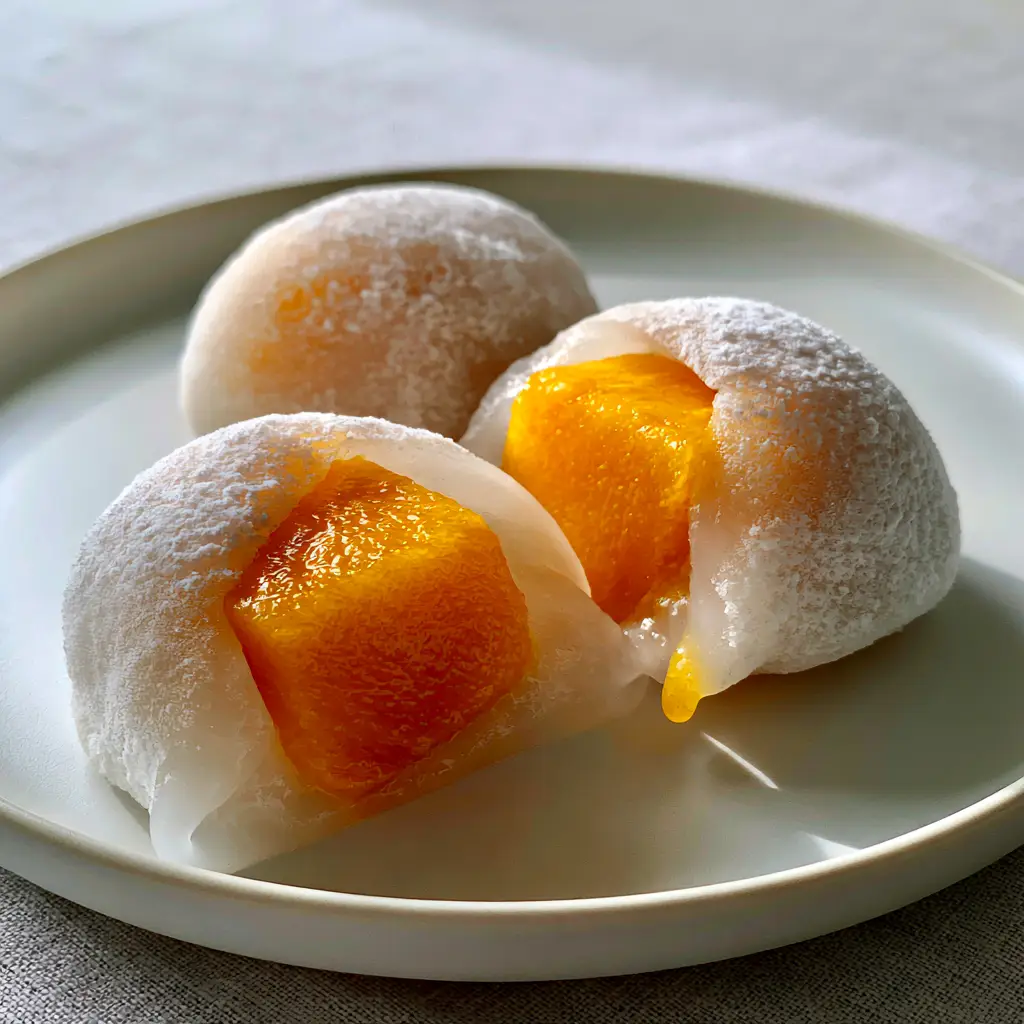
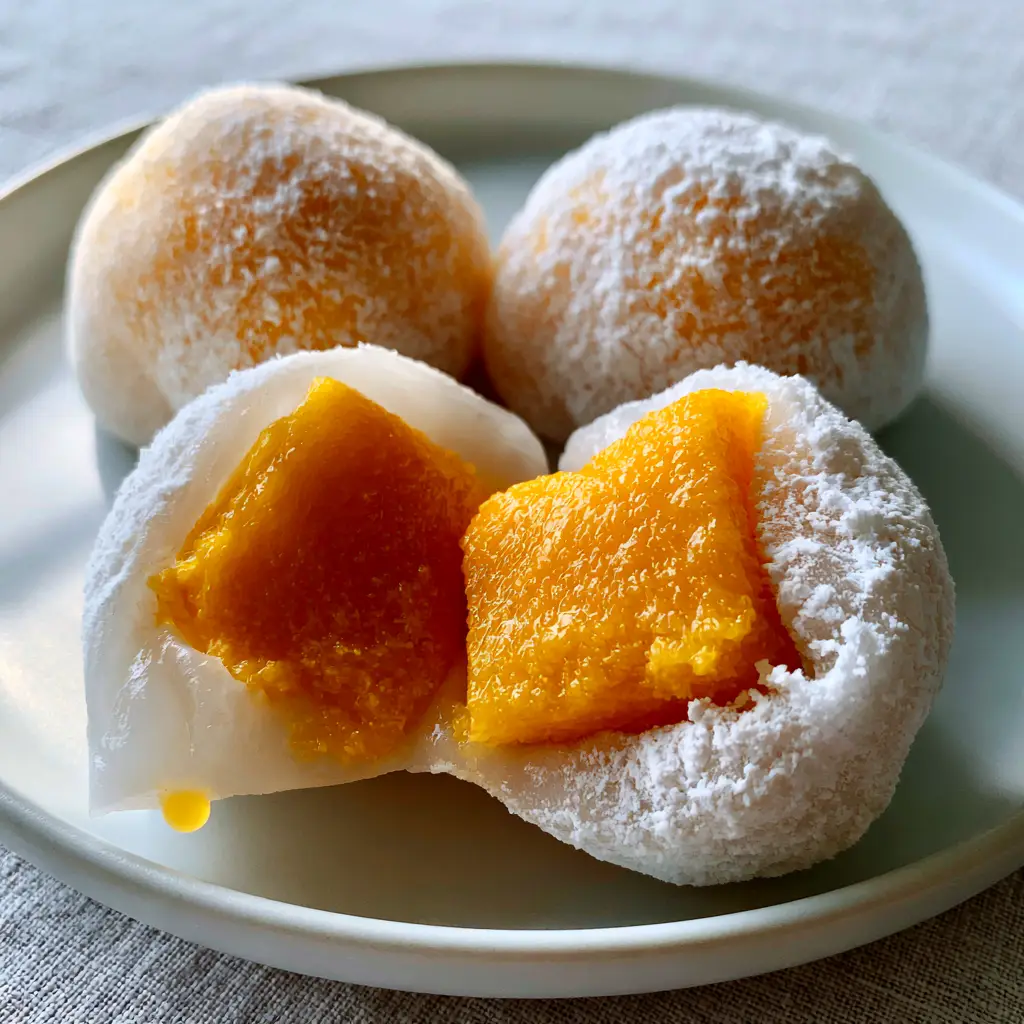
- Vibrant Visual Contrast: The milky-white, translucent dough provides a stunning backdrop for the neon-orange mango cube hidden inside.
- Perfectly Balanced Sweetness: By relying on the natural sugars of the fruit, we avoid the cloying sweetness often found in store-bought versions.
- The Iconic “Q” Texture: We use a specific ratio of liquid to flour to achieve a dough that is visibly soft and stretchy, yet holds its round, plump shape.
- Silky Finish: A fine dusting of white cornstarch creates a velvet-like exterior that prevents sticking while adding a professional, matte aesthetic.
Premium Essentials for Translucent Mango Mochi Skin
To achieve the look of those three plump, round balls resting on a minimalist ceramic plate, you need the right building blocks. Every ingredient here serves a structural and visual purpose.
Glutinous Rice Flour (Mochiko or Shiratamako): 1 1/2 cups (200g). This is the foundation of the dough; its high amylopectin content creates the signature stretch and translucency essential for mango mochi.
Powdered Sugar: 1/3 cup (40g). We use powdered sugar because it dissolves instantly into the dough, ensuring a smooth, grit-free texture that glows under natural morning light.
Full-Fat Coconut Milk or Water: 1 cup (240ml). Using a milky liquid ensures the dough remains an opaque, milky-white rather than turning completely clear, providing that beautiful “supple” look.
Sun-Ripened Mango Cubes: 2 large mangoes (preferably Ataulfo or Kent). You need large, juicy cubes of vibrant neon-orange fresh mango that are firm enough to hold their shape but soft enough to yield to a bite.
Cornstarch or Potato Starch: 1/2 cup (60g), for dusting. This provides the delicate, fine dusting of white silk-textured starch that prevents the mochi from sticking to your hands or the plate.
Neutral Oil: 1 tsp (5ml). A tiny amount of oil added to the dough helps maintain its elasticity and prevents it from drying out as it chills.
Essential Tools for Hand-Crafted Fruit Daifuku
While mango mochi is a rustic-looking treat, achieving that “extreme macro” perfection requires a few specific tools to handle the sticky dough with grace.
A microwave-safe glass bowl is vital for even heat distribution during the “steaming” process. You will also need a silicone spatula, which is naturally non-stick and allows you to fold the dough effectively to develop the gluten-like structure.
A sharp paring knife is necessary to slice the mochi in half, revealing that perfectly centered mango cube. To get the clean cut seen in professional photography, wipe the blade with a damp cloth between every single slice.
Step-by-Step Mastery: How to Shape the Perfect Mango Mochi
Preparing the Tropical Heart
Begin by peeling your mangoes. Use a sharp knife to cut large, 1-inch (2.5cm) cubes from the cheeks of the fruit. Ensure they are uniform; a perfectly centered cube is the hallmark of a master-crafted mango mochi.
Place the cubes on a paper towel-lined plate and chill them in the refrigerator. Cold mango is easier to wrap and ensures that a single tiny droplet of juice glistens on the cut edge when you finally serve the dish.
Creating the Milky-White Dough
In your glass bowl, whisk together the glutinous rice flour and powdered sugar. Slowly pour in the coconut milk (or water) and the teaspoon of oil. Whisk until the mixture is completely smooth and resembles thick pancake batter.
Cover the bowl with plastic wrap, leaving a small vent. Microwave on high for 1 minute. Remove and stir with your silicone spatula. The dough will look patchy—this is normal. Microwave for another 45 seconds until the dough is translucent and matte.
The Art of Stretching and Kneading
Dust a clean work surface generously with cornstarch. Turn the hot dough out onto the starch. Be careful; it will be very hot! Use a bench scraper or your starch-covered hands to fold the dough over itself several times.
This “kneading” process develops the elasticity. You are looking for a surface that shows a subtle bounce. Once the dough is smooth and supple, roll it into a log and cut it into 8 equal pieces.
Wrapping the Sun-Ripened Mango
Flatten one piece of dough into a 3-inch (7.5cm) circle. Place a chilled mango cube in the center. Gently pull the edges of the dough up and over the mango, pinching the bottom to seal it tightly.
Roll the ball between your palms to create a perfectly round, plump shape. The outer mochi skin should be visibly soft and stretchy, clinging tightly to the fruit. Repeat with the remaining pieces.
Expert Tips for Success and “Q-Texture” Consistency
- Temperature Control: Always wrap the mango while the dough is still warm but handleable. If the dough cools completely, it loses its “stretch,” making it difficult to seal the bottom.
- Avoid Over-Dusting: While cornstarch is necessary, too much will mask the translucent beauty of the skin. Use a soft pastry brush to remove excess starch before serving.
- The “Centered” Secret: To ensure the mango is perfectly centered, make sure your dough circle is of even thickness before placing the fruit.
- Steam Method: If you don’t have a microwave, you can steam the dough in a parchment-lined basket for 15-18 minutes until it becomes translucent and bouncy.
Preserving Freshness: Storage and Serving Advice
Mango mochi is best enjoyed within a few hours of assembly. At this stage, the skin is at its most supple and the mango juice hasn’t yet begun to soften the dough from the inside out.
If you must store them, place them in an airtight container at room temperature for up to 24 hours. Do not refrigerate them for long periods, as the cold temperature causes the starches in the rice flour to “retrograde,” turning the soft skin hard and chalky.
For the best experience, serve these chilled mango treats on a minimalist matte white ceramic plate against a neutral grey background to let the vibrant orange color pop.
Creative Pairings for Your Mango Dessert
This mango mochi is a star on its own, but it fits beautifully into a larger spread of Asian-inspired treats. If you enjoyed the process of working with glutinous rice, you might want to try making a strawberry mochi for a tart, berry-filled variation.
For those who love the refreshing nature of fruit-based sweets, this watermelon mochi offers a unique twist on summer snacking. If you have leftover mango, consider incorporating it into a broader mango dessert recipe collection, like a mango sticky rice or pudding.
If you are serving these as part of a luncheon, they provide a sweet, cooling contrast to savory dishes like a street corn chicken salad or even a light cucumber salad.
Frequently Asked Questions
Fresh mango is highly recommended for the best texture and juice. Frozen mango can become mushy when thawed, which may affect the structural integrity of the mochi skin.
Using a mixture of glutinous rice flour and coconut milk provides that signature translucent yet milky-white appearance. Microwaving until the dough looks matte and slightly clear is the key visual cue.
It is best consumed within 4-6 hours. If stored longer, the mango juice begins to dissolve the dough, and the skin can become tough if refrigerated.
You must use glutinous rice flour, such as Mochiko or Shiratamako. Regular rice flour will not produce the stretchy, bouncy Q-texture required for mochi.
Mochi dough is naturally very sticky. Ensure you use plenty of cornstarch on your hands and work surface, and handle the dough while it is still warm but not piping hot.
The Ultimate Fresh Mango Mochi Recipe
Mango Mochi: The Ultimate Guide to Soft, Stretchy, Fresh Fruit Daifuku
Ingredients
Equipment
Method
- Peel the mangoes and cut the cheeks into large, 1-inch (2.5cm) cubes. Ensure they are uniform for a centered look.
- Place mango cubes on a paper towel-lined plate and refrigerate until needed. Cold fruit prevents the dough from becoming soggy.
- In a microwave-safe glass bowl, whisk together glutinous rice flour, powdered sugar, coconut milk, and oil until smooth.
- Cover with vented plastic wrap and microwave on high for 1 minute. Stir with a silicone spatula.
- Microwave for another 45-60 seconds until the dough is translucent and has a matte, milky-white appearance.
- Transfer the hot dough to a cornstarch-dusted surface. Fold and knead until smooth and supple with a subtle bounce.
- Divide dough into 8 pieces. Flatten into circles, place a chilled mango cube in the center, and pinch the edges to seal.
- Roll into plump balls and lightly brush off excess starch. Slice in half with a damp knife to reveal the juicy center.
Notes
Keep leftovers in an airtight container at room temperature; do not refrigerate for more than 2 hours or the skin will harden.
Share Your Mango Mochi Creations!
There is nothing quite as satisfying as the first bite of a homemade mango mochi, where the stretchy dough meets the cold, juicy fruit. We hope this guide helps you achieve that professional “Q-texture” and aesthetic in your own kitchen.
Did you manage to capture that glistening droplet of juice on the cut edge? We’d love to see your results! Leave a comment below with your tips, or share your photos and tag us. Don’t forget to save this recipe to your dessert boards on Pinterest so you can find it whenever the mango cravings hit!