Imagine the nostalgic, buttery flavor of a classic birthday cake merged with the dense, decadent texture of a professional-grade cheesecake. This Birthday Cake Cheesecake is a showstopper, designed to capture the joy of a celebration in every single bite. Unlike traditional baked versions that can be finicky, this no-bake masterpiece delivers a velvety smoothness that rests atop a thick, golden-brown crust.
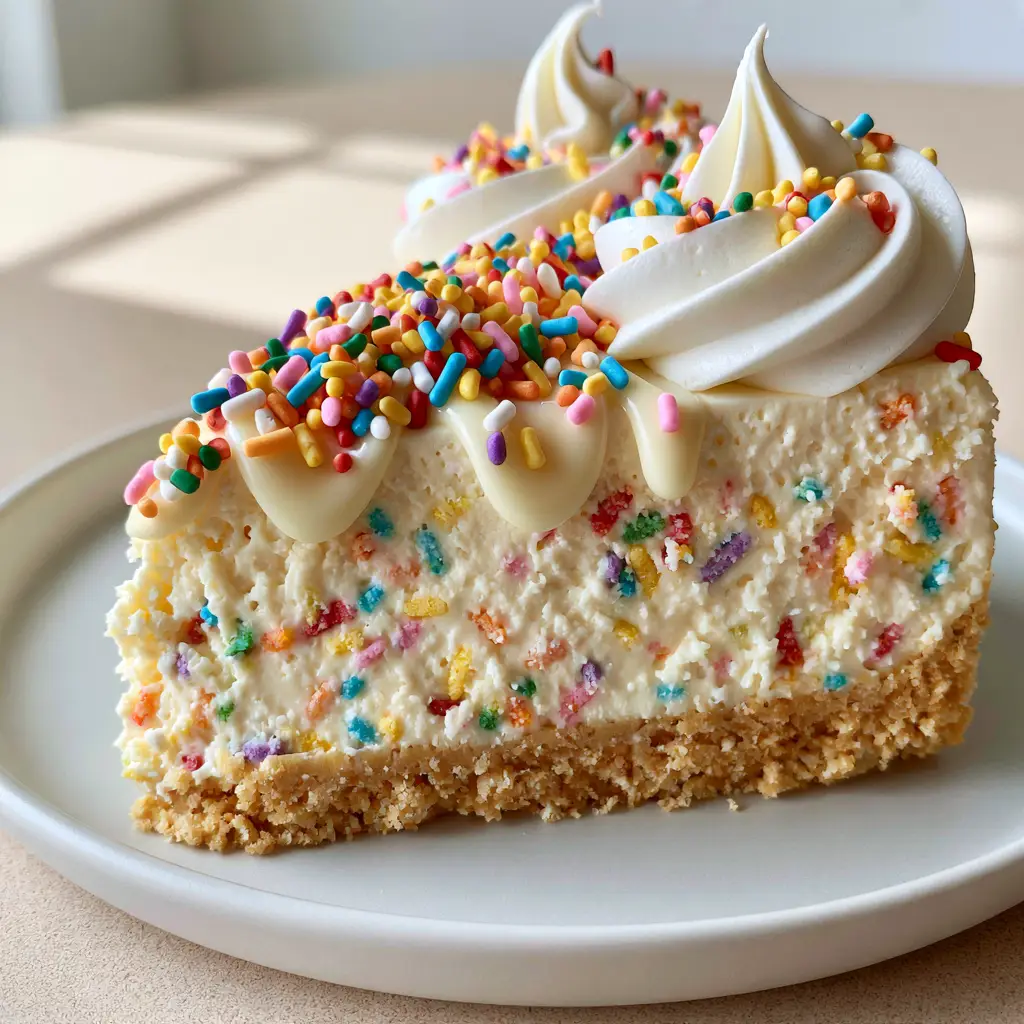
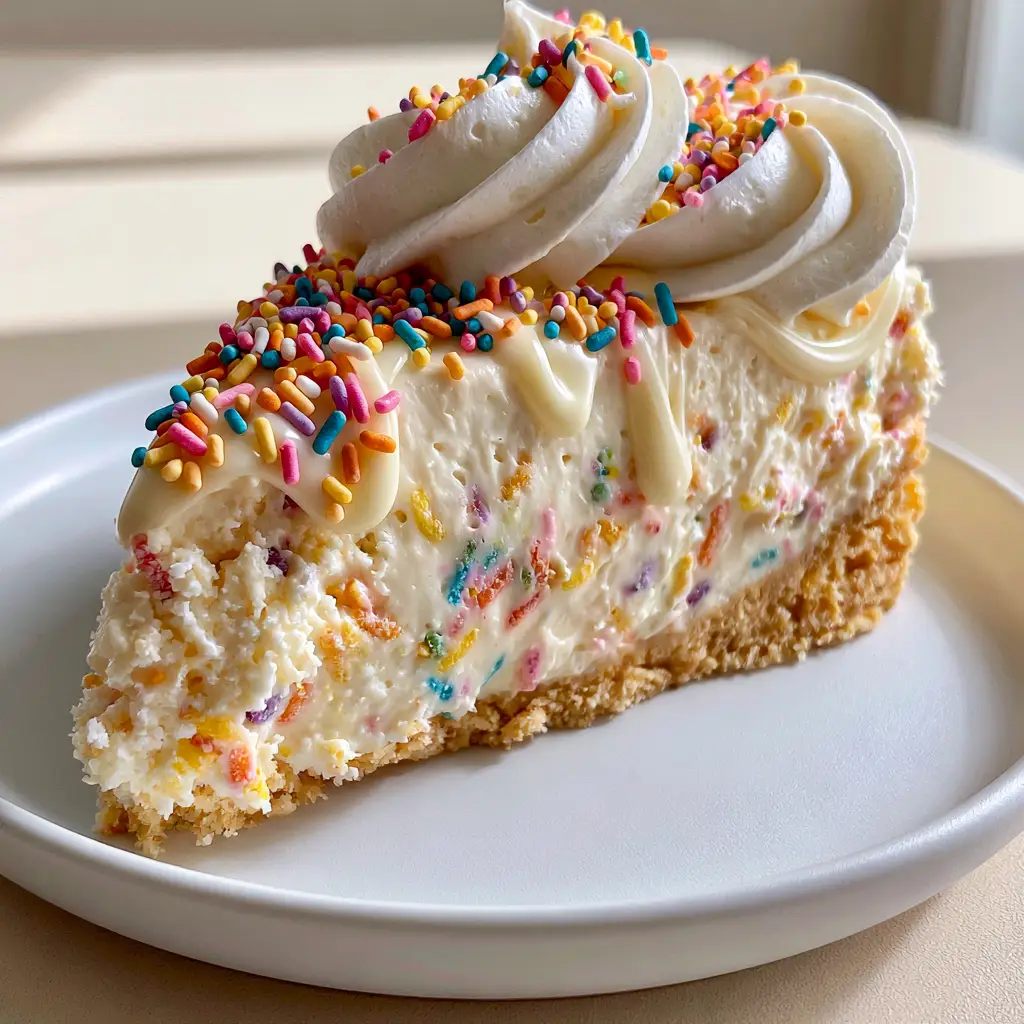
The visual appeal of this dessert is undeniable, featuring a pale cream-colored filling packed with suspended, colorful rainbow sprinkles that pop against a matte white ceramic plate. Topped with elegant swirls of piped whipped cream and a glossy white chocolate drizzle, it looks like it came straight from a high-end boutique bakery. Whether you are hosting a party or just craving a festive treat, this recipe is your ticket to a perfect dessert every time.
If you love the flavor profile of celebratory treats, you might also enjoy making homemade birthday cake pops or a classic funfetti loaf cake for your next gathering. This cheesecake, however, stands in a league of its own thanks to the unique crunch of its Golden Oreo base and its sophisticated presentation.
Why This No-Bake Birthday Cake Cheesecake Works
- Textural Contrast: The combination of a crunchy, buttery Golden Oreo crust and a dense, velvety filling provides a professional-level mouthfeel.
- Visual Forensics: We use specific “jimmies” style sprinkles to ensure the colors stay vibrant and don’t bleed into the pale cream filling.
- Glossy Finish: The white chocolate drizzle adds a luxurious sheen and a hit of extra sweetness that balances the tang of the cream cheese.
- No-Bake Ease: Skip the water baths and the fear of cracks; this recipe relies on proper aeration and chilling for a foolproof set.
Essential Ingredients for a Velvety Finish
Golden Oreo Cookies: You will need 36 cookies (approximately 14.3 oz / 405g). These provide the signature “cake batter” flavor for the base, offering a much more thematic taste than standard graham crackers.
Unsalted Butter: 1/2 cup (115g) of melted butter acts as the glue for your crust. It ensures the base is thick and stable enough to support the dense filling.
Full-Fat Cream Cheese: Use 24 oz (680g) of brick-style cream cheese. It must be softened to room temperature to achieve that “velvety” texture described in our visual blueprint.
Powdered Sugar: 1.5 cups (180g) provides sweetness without the graininess of granulated sugar. It dissolves instantly into the fats for a smooth finish.
Heavy Whipping Cream: 1.5 cups (360ml) of chilled cream is beaten to stiff peaks and folded in. This is the “invisible” ingredient that provides structure and lift without baking.
Rainbow Sprinkles (Jimmies): 1/2 cup (80g) plus extra for topping. Use the rod-shaped jimmies rather than nonpareils to prevent the colors from running into the batter.
White Chocolate Chips: 1/2 cup (90g) melted with a teaspoon of oil creates the glossy white chocolate drizzle seen in our professional visual prompt.
The Tools You Will Need
To achieve the elegant swirls of piped white whipped cream, you will need a piping bag fitted with a large star tip (like a 1M or 2D). A 9-inch (23cm) springform pan is essential for removing the cheesecake cleanly to show off that thick, golden-brown crust. A high-speed hand mixer or stand mixer is required to aerate the heavy cream sufficiently to ensure the cheesecake sets firmly enough to be sliced on a modern matte plate.
Step-by-Step Instructions for the Perfect Slice
Constructing the Golden Oreo Crust
Begin by pulsing the Golden Oreos in a food processor until they reach the consistency of fine sand. Pour in the 1/2 cup (115g) of melted butter and pulse until the mixture looks like wet gold. Press this firmly into the bottom of your springform pan, using the bottom of a flat glass to ensure an even, thick layer. Chill this in the freezer for 15 minutes while you prepare the filling.
Whipping the Velvety Filling
In a large bowl, beat the room-temperature cream cheese and powdered sugar together until completely smooth and free of lumps. In a separate chilled bowl, whip the heavy cream until stiff peaks form—look for the cream to hold its shape firmly when the whisk is lifted. Gently fold the whipped cream into the cream cheese mixture using a silicone spatula. This folding technique is what creates the “dense yet velvety” body seen in the visual blueprint.
The Sprinkle Suspension Technique
Once the filling is smooth, gently fold in the rainbow sprinkles. Do not overmix, or the friction may cause the colors to bleed. Pour the mixture over the chilled crust and smooth the top with an offset spatula. Tap the pan firmly on the counter to remove air bubbles. Refrigerate for at least 6 hours, or ideally overnight, until the cheesecake is firm to the touch.
Finishing with Piped Cream and Glossy Drizzle
Before serving, melt the white chocolate chips in 20-second intervals until smooth. Use a spoon to create a thin, glossy drizzle across the top. Pipe elegant swirls of extra whipped cream around the perimeter and scatter a festive handful of jimmies over the top. The result should match the handheld smartphone photo style: realistic, vibrant, and incredibly tempting.
Expert Tips for Success
- Temperature Matters: Ensure your cream cheese is truly at room temperature. If it is cold, you will end up with tiny white lumps that ruin the velvety visual appeal.
- Don’t Scrimp on the Chill: Since this is a no-bake recipe, the “set” comes from the fat solidifying in the fridge. Cutting it too early will result in a messy slice rather than the clean edges seen on a modern matte plate.
- Clean Slices: For the perfect “handheld photo” look, dip your knife in hot water and wipe it dry between every single cut. This ensures the rainbow sprinkles remain suspended and visible in the cross-section.
- White Chocolate Tempering: If your drizzle is too thick, add 1/2 teaspoon of coconut oil to the melted white chocolate to achieve that professional, glossy sheen.
Planning a Party Menu?
This Birthday Cake Cheesecake is a rich dessert, so it pairs beautifully with lighter, savory options for a balanced party spread. Consider serving it after a fresh traditional Greek salad or a light crispy cucumber salad to cleanse the palate. For a more substantial meal, these easy chicken enchiladas provide a savory contrast that makes the sweet cheesecake taste even better.
Frequently Asked Questions
Yes, you can freeze it for up to one month. Thaw it in the refrigerator for 4 hours before serving to maintain the velvety consistency.
Yes, but using Golden Oreos provides the specific ‘birthday cake’ flavor profile. Regular Oreos will work but will change the visual appearance to a dark chocolate base.
Adding a tiny amount of coconut oil or vegetable oil to the melted white chocolate prevents it from seizing and gives it a professional, high-shine finish.
For clean, professional slices, it needs at least 6 hours in the refrigerator. Overnight is best to ensure the fats fully solidify for a dense texture.
This usually happens if you use nonpareils (tiny balls) or if the filling is overmixed. Use ‘jimmies’ (rod-shaped sprinkles) and fold them in gently at the very end.
Birthday Cake Cheesecake Recipe Card
Birthday Cake Cheesecake: The Ultimate No-Bake Celebration Dessert
Ingredients
Equipment
Method
- Pulse Golden Oreos in a food processor until fine, then mix with melted butter until it resembles wet sand.
- Press the mixture into a 9-inch springform pan and freeze for 15 minutes to set the thick golden-brown crust.
- Beat softened cream cheese and powdered sugar until velvety and smooth.
- Whip heavy cream to stiff peaks in a separate bowl, then gently fold into the cream cheese mixture with rainbow sprinkles.
- Pour filling onto the crust and refrigerate for at least 6 hours or overnight.
- Drizzle with glossy melted white chocolate, pipe whipped cream swirls, and top with extra jimmies before serving.
Notes
Use rod-shaped sprinkles (jimmies) to prevent color bleeding.
Bring the Celebration Home
This Birthday Cake Cheesecake is more than just a dessert; it is a center-piece that brings joy to any table. With its buttery Golden Oreo crust and velvety, sprinkle-filled center, it captures the essence of a party in every slice. The elegant whipped cream swirls and glossy white chocolate drizzle ensure that it looks just as good as it tastes.
If you enjoyed this recipe, please leave a comment below and let us know how your celebration turned out! Don’t forget to sign up for our newsletter for more elite recipes and follow us on Pinterest to save this to your favorite dessert boards.


