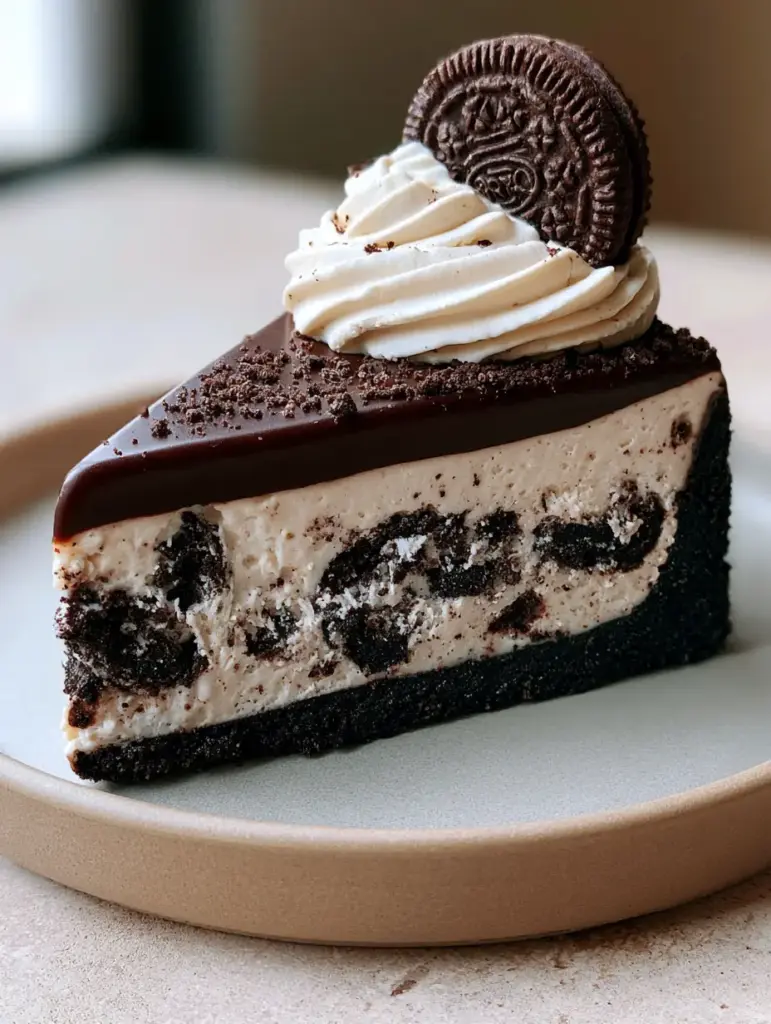
The chocolate Oreo cake is the undisputed champion of the dessert world, a towering testament to the timeless pairing of dark cocoa and sweet cream. This specific rendition isn’t just a simple dessert; it is a multi-textured architectural marvel designed for the most discerning palates. Imagine a thick, compressed dark Oreo cookie crust base that provides a satisfying snap, leading into a velvety cookies-and-cream cream cheese mousse filling packed with chunky cookie bits.
Every bite of this decadent treat is punctuated by a smooth, glossy dark chocolate ganache glaze that cascades over the edges like liquid silk. The visual appeal is completed with a precise whipped cream swirl, a whole mini Oreo, and a light dusting of fine cookie crumbs. Whether you are hosting a formal dinner or a casual weekend gathering, this cake delivers professional bakery results right from your home kitchen.
This recipe was developed to bridge the gap between high-end pastry arts and home-cooked accessibility. By focusing on sensory cues—the sound of the cookies crumbling, the sight of the chocolate emulsifying, and the smell of high-quality vanilla—you will master the art of the chocolate Oreo cake with confidence and ease.
Why This No-Bake Oreo Masterpiece Works
- Unrivaled Texture Contrast: The combination of a gritty, butter-bound crust and a cloud-like mousse creates a sensory experience that keeps you coming back for more.
- Glossy Ganache Finish: We use a specific ratio of heavy cream to dark chocolate to ensure a mirror-like shine that remains soft enough to slice.
- Chunky Cookie Integration: Unlike commercial versions, we fold in large fragments of Oreos into the filling to ensure “cookies and cream” is more than just a flavor—it’s a physical presence.
- Professional Aesthetics: The garnishes of mini Oreos and fine crumbs provide a visual hierarchy that looks stunning on a minimalist matte ceramic plate.
- No-Bake Simplicity: Achieve gourmet results without ever preheating your oven, making this the perfect summer or high-stress holiday dessert.
The Essential Elements of a Rich Chocolate Oreo Cake
To achieve the specific visual and structural results seen in our professional photography, you must select high-quality ingredients. Each component serves a scientific purpose in the stability and flavor profile of the final slice.
Whole Oreo Cookies: You will need 36 standard Oreos for the crust and filling. These provide the characteristic dark cocoa flavor and the essential cream filling that acts as a secondary binder.
Unsalted Butter (Melted): 1/2 cup (115g) of high-fat European butter. This acts as the mortar for your compressed crust, ensuring it holds its shape when sliced onto a pale concrete tabletop.
Full-Fat Cream Cheese: 16 oz (450g) at room temperature. The fat content is non-negotiable here; it provides the structural integrity required for a clean, upright slice of chocolate Oreo cake.
Powdered Sugar: 1 cup (120g) to sweeten the mousse without adding the graininess associated with granulated sugar. It dissolves instantly into the cream cheese for a velvety mouthfeel.
Heavy Whipping Cream: 1.5 cups (360ml) chilled. This is whipped to stiff peaks and folded in to aerate the dense cream cheese, creating the “mousse” texture described in our visual blueprint.
High-Quality Dark Chocolate: 4 oz (115g) of 60% cacao or higher. Chopped finely, this ensures a rapid melt when combined with hot cream for the glossy ganache glaze.
Foundational Salt: 1/4 tsp (1.5g) of fine sea salt. Salt is the invisible hero that cuts through the sugar and amplifies the deep notes of the dark chocolate ganache.
Mini Oreos and Extra Crumbs: These are the final flourishes that transition the dish from “homemade” to “artisanal.” The mini Oreo provides a sense of scale and whimsy to the garnish.
Professional Tools for a Perfect Slice
Achieving a handheld smartphone photo-worthy result requires the right equipment. You don’t need a professional bakery, but these items are essential for the clean layers shown in our blueprint.
A 9-inch (23cm) springform pan is mandatory for this chocolate Oreo cake. The removable sides allow you to reveal the distinct layers of crust, mousse, and ganache without damaging the edges.
An offset spatula is your best friend for smoothing the cookies-and-cream filling. A flat, level surface is required so the dark chocolate ganache can sit perfectly flat without pooling in the center.
A high-speed food processor is the most efficient way to achieve the “fine cookie crumbs” used for the dusting. If you prefer chunky bits in the filling, a simple zip-top bag and a rolling pin will allow for more textural control.
Constructing the Compressed Oreo Cookie Crust
The foundation of any great chocolate Oreo cake is a crust that stays together. Many no-bake recipes suffer from a crumbly base, but our compression technique ensures a solid foundation.
Start by pulsing 24 Oreo cookies in your food processor until they reach the consistency of wet sand. Slowly drizzle in the 1/2 cup (115g) of melted butter while the motor is running. The mixture should look dark, damp, and smell intensely of cocoa.
Transfer the crumbs into your springform pan. Use the flat bottom of a heavy measuring cup to press the crumbs down firmly. You want to see the butter slightly glistening on the surface—this is a visual cue that the crust is sufficiently compressed.
Place the pan in the freezer for 20 minutes. This “shock” sets the butter immediately, creating a rigid barrier that prevents the cream cheese filling from seeping into the crust and making it soggy.
Engineering the Cookies-and-Cream Mousse Filling
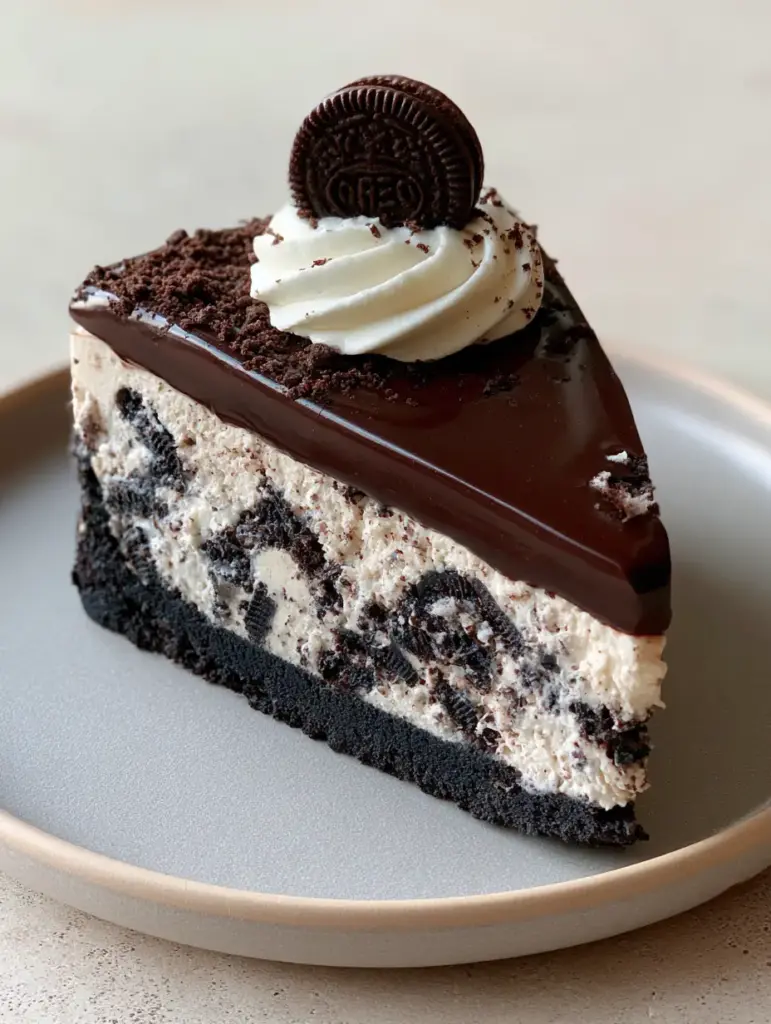
The heart of the chocolate Oreo cake is the velvety cookies-and-cream cream cheese mousse filling. The goal is a texture that is light yet stable enough to support the weight of the ganache.
In a large bowl, beat the room-temperature cream cheese with the powdered sugar and vanilla extract. Beat until no lumps remain. You are looking for a “silky ribbon” stage where the mixture falls off the beaters in a smooth, continuous stream.
In a separate chilled bowl, whip your heavy cream until stiff peaks form. When you lift the whisk, the cream should stand straight up without drooping. This is the structural framework for your mousse.
Gently fold the whipped cream into the cream cheese mixture using a large rubber spatula. Be careful not to deflate the air you’ve just beaten in. Once combined, fold in 12 crushed Oreo cookies. These should be “chunky bits” rather than dust, providing the visual contrast seen in the midjourney prompt.
Pour the filling over your chilled crust. Use your offset spatula to create a perfectly level top. Tap the pan on the counter three times to release any trapped air bubbles that could ruin the visual of your slice.
The Secret to a Glossy Dark Chocolate Ganache
The crowning glory of this chocolate Oreo cake is the smooth, glossy dark chocolate ganache glaze. The secret to that professional shine is a touch of light corn syrup or honey, which prevents the chocolate from dulling as it sets.
Heat 1/2 cup (120ml) of heavy cream in a small saucepan until it just begins to simmer. You will see small bubbles forming around the edges and steam rising. Do not let it reach a rolling boil, as this can scorch the chocolate.
Place your finely chopped dark chocolate in a heat-proof bowl and pour the hot cream over it. Let it sit undisturbed for 5 minutes. This allows the heat to penetrate the cocoa solids evenly without creating oily separation.
Starting from the center, whisk in small circular motions. Watch as the pale cream and dark chocolate emulsify into a rich, mahogany-colored glaze. Add a teaspoon of corn syrup at the very end for that “mirror” finish. Pour it over the chilled cake and tilt the pan to let it coat the surface naturally.
Expert Tips for Visual Perfection
- The Clean Cut: To get the perfect slice shown on the matte ceramic plate, dip a sharp knife in hot water and wipe it dry between every single cut. This prevents the mousse from sticking to the blade.
- Temperature Control: Ensure your cream cheese is truly at room temperature. If it’s even slightly cold, you will end up with tiny white lumps that ruin the “velvety” appearance of the filling.
- Chilling is Key: A chocolate Oreo cake requires a minimum of 6 hours in the fridge, but overnight is better. This allows the fats to crystallize, ensuring the cake holds its “thick, velvety” structure when the springform ring is removed.
- Garnish Timing: Add the whipped cream swirls and mini Oreos just before serving. If you add them too early, the cookie may lose its crunch due to the moisture in the cream.
Flavor Pairings and Serving Suggestions
While the chocolate Oreo cake is a star on its own, it pairs beautifully with other dessert table staples. If you are looking for a complementary profile, consider serving it alongside a lighter vanilla cherry cake to balance the deep cocoa notes.
For those who love a variety of textures, these cake pop recipes offer a bite-sized alternative that guests can enjoy while mingling. If you prefer a warm contrast, a slice of this cinnamon roll cake provides a spicy, yeasty counterpoint to the cold, creamy Oreo filling.
If you’re making this for a celebration, you can even pair it with a whimsical funfetti loaf cake for a colorful spread. And if you happen to have leftover Oreos, they make a fantastic topping for chocolate chip pancakes the next morning!
Frequently Asked Questions
Absolutely. Wrap the cake tightly in plastic wrap and foil. It will stay fresh in the freezer for up to 3 months. Thaw in the refrigerator overnight before serving for the best texture.
It is best to use standard Oreos for the crust. The extra cream in Double Stuf can make the compressed crust too greasy and soft, preventing it from holding that sharp, clean edge.
Yes, because of the cream cheese and whipped cream mousse, this cake must be kept refrigerated. It can sit at room temperature for about 30-45 minutes before it begins to soften.
The secret is adding a teaspoon of light corn syrup or honey to the chocolate and cream mixture. This prevents the chocolate from dulling as it cools and creates a professional mirror-like gloss.
This usually happens if the whipped cream wasn’t beaten to stiff peaks or if the cream cheese was over-beaten and became too warm. Ensure your heavy cream is ice-cold before whipping.
The Ultimate Chocolate Oreo Cake Recipe
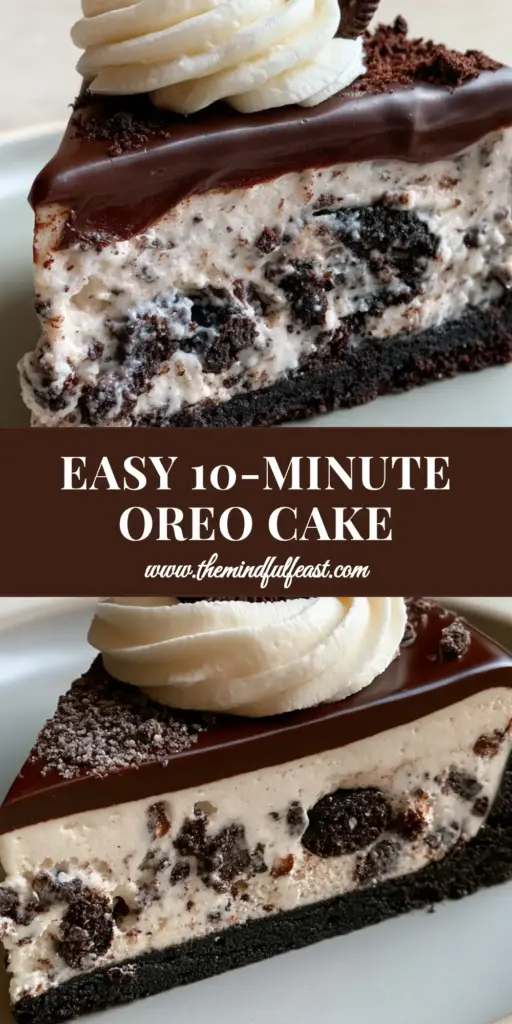
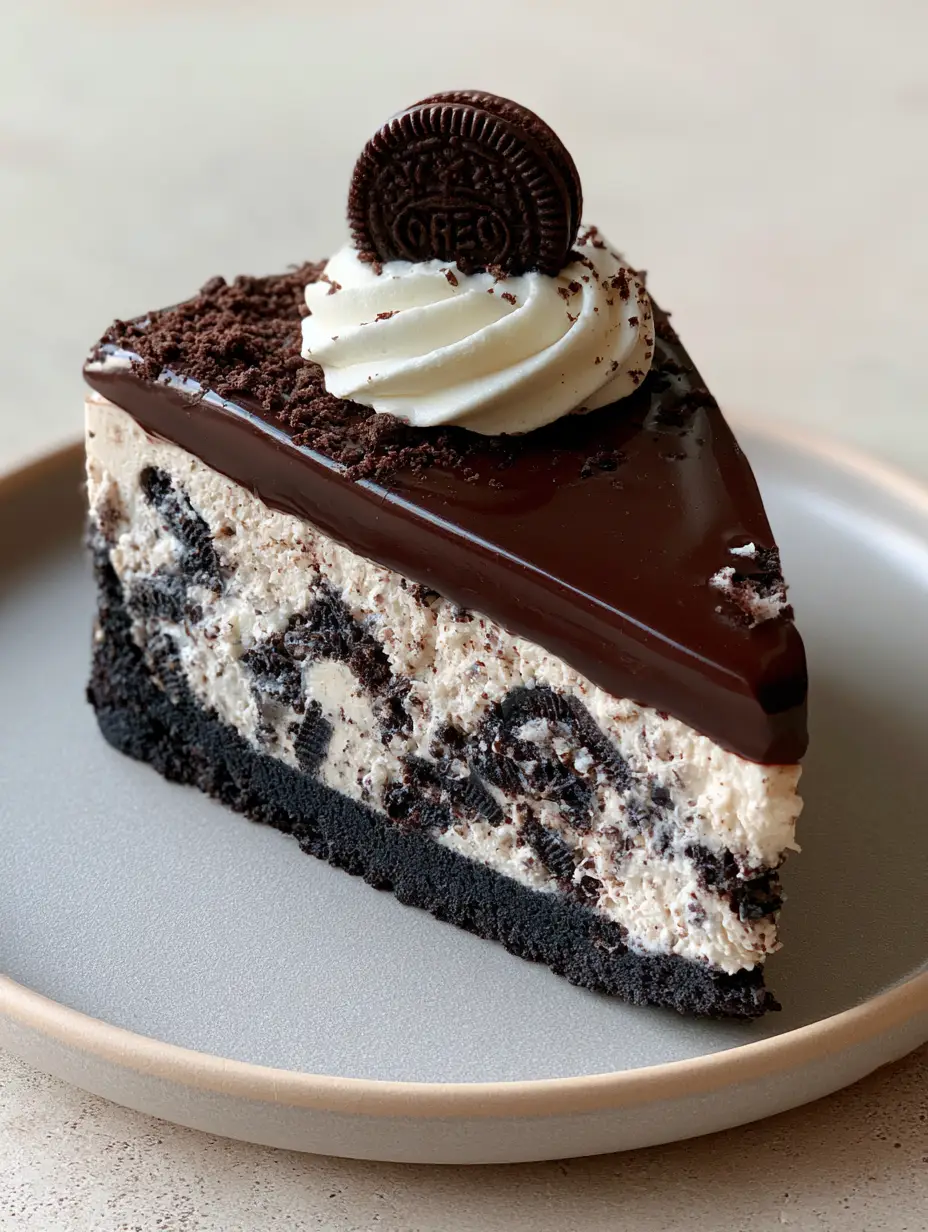
Chocolate Oreo Cake: The Ultimate No-Bake Cookies and Cream Delight
Ingredients
Equipment
Method
- Pulse 24 Oreos in a food processor until fine. Mix with melted butter until the mixture resembles wet sand.
- Press firmly into the bottom of a 9-inch springform pan. Freeze for 20 minutes to set.
- Cream together room-temperature cream cheese, powdered sugar, and vanilla until silky smooth.
- Whip heavy cream to stiff peaks in a separate bowl. Gently fold the whipped cream and chunky Oreo bits into the cream cheese mixture.
- Spread the filling over the crust and smooth with an offset spatula. Chill for at least 4 hours.
- Pour simmering cream over chopped chocolate. Let sit for 5 minutes, then whisk with corn syrup until glossy. Pour over the chilled cake.
- Once ganache is set, pipe whipped cream swirls. Top each swirl with a mini Oreo and dust with fine cookie crumbs.
Notes
Ensure cream cheese is at room temperature to avoid lumps in the mousse.
Sharing Your Culinary Creation
We hope this chocolate Oreo cake brings a touch of bakery-level luxury to your home table. The combination of the thick crust, chunky mousse, and glossy ganache is a guaranteed crowd-pleaser that looks as good as it tastes. The soft, bright natural side-daylight of your dining room will perfectly highlight the textures of this dessert.
If you enjoyed this recipe, please leave a comment below and let us know how your ganache turned out! Don’t forget to snap a photo of your perfect slice on a minimalist plate and share it with us on Pinterest. Your feedback helps our community of home cooks thrive.